| Oracle® Retail Integration Bus Cloud Service Hospital Administration Guide Release 19.0.000 F22946-02 |
|
 Previous |
 Next |
| Oracle® Retail Integration Bus Cloud Service Hospital Administration Guide Release 19.0.000 F22946-02 |
|
 Previous |
 Next |
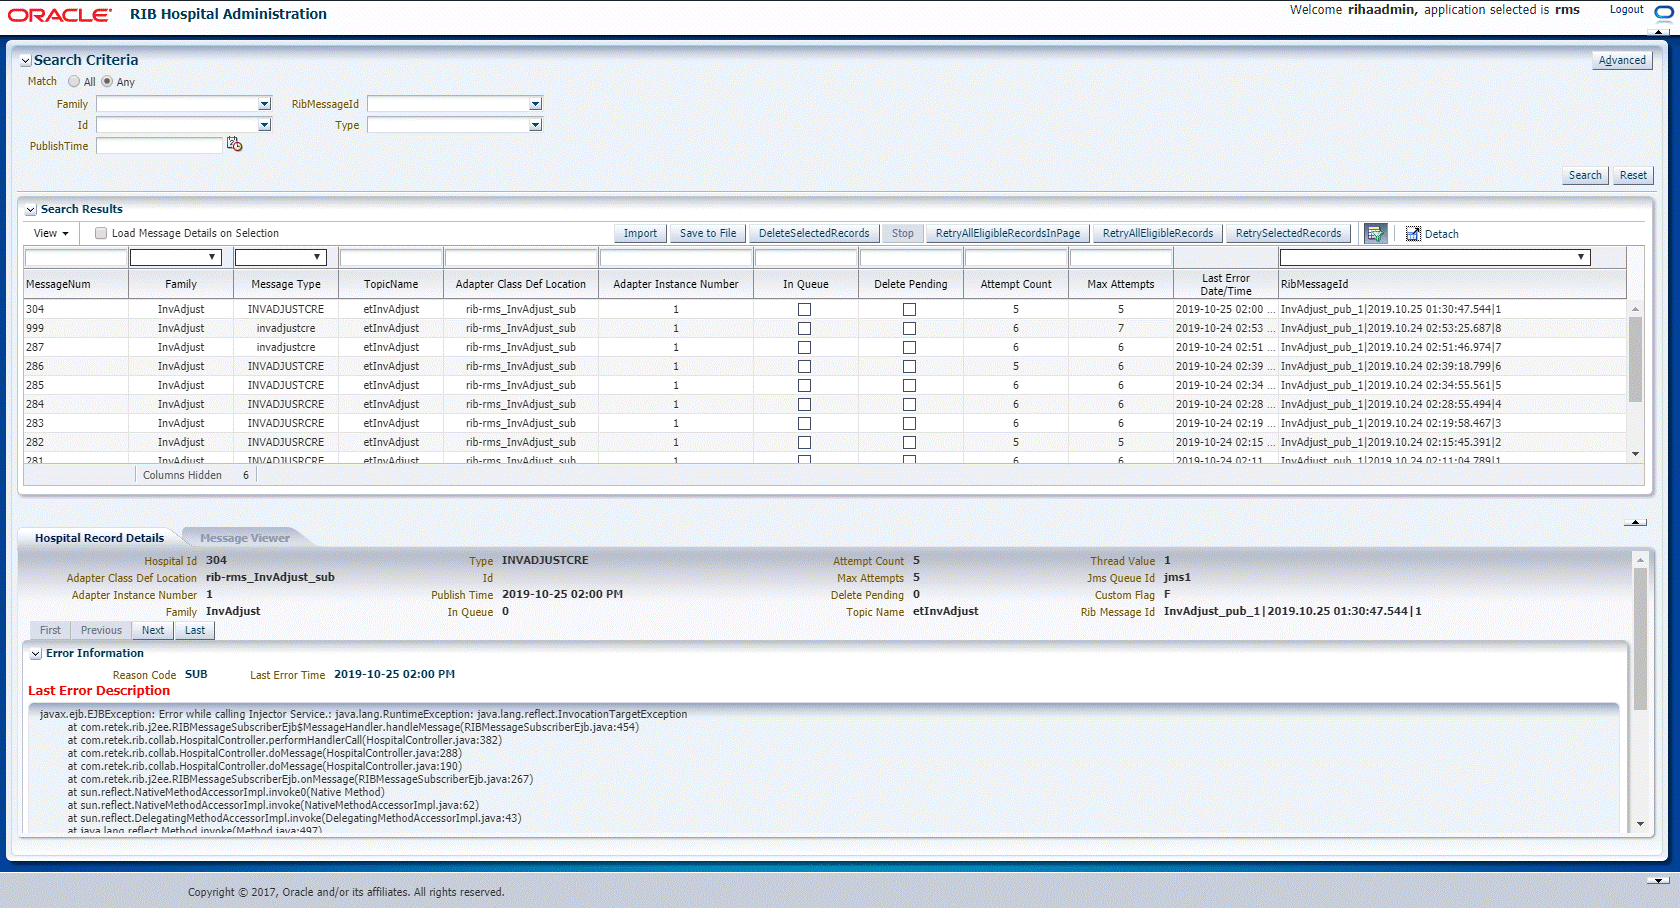
This chapter describes the navigation steps in the Oracle Retail Integration Bus Hospital Administration or RIB Hospital Administration (RIHA) application.
This procedure explains how to log in to the application.
Enter the application URL http://<host>:<port>/riha-web in the address bar of the browser.
|
Note: Using Mozilla Firefox Web browser is recommended. |

In the User Name field, enter the user name configured at the time of installation of the application.
In the Password field, enter the password.
Select the application name from the drop down to go the error hospital details of a particular application.
Click Login. The application home page appears.

This procedure explains how to search for a hospital record in RIHA.
By default, the basic search option is enabled. Basic search is done using the Equal to operator against the given search values.
Click Reset to clear the data from search fields.
To perform a Basic Search:
Log in to the application.

In the Search Criteria section, enter or select the criteria to limit your search in one or more of the following fields:
Family
ID
Publish Time
RIB Message ID
Message Type
|
Note: Select All to match all fields in the search. Select Any to match any field in the search criteria. |
Click Search. The hospital records that match the search criteria are populated in the search results table.

By default, the basic search option is selected in the application. In the search panel, click Advanced to switch to advanced search option. Advanced search allows you to add more search fields to the search criteria. Click Add Fields to add more fields.In the advanced search, the operators of each search field can be changed to other available options.Click Basic to switch back to the basic search option.Click Reset to clear the data from search fields.
To perform an Advanced Search:
Log in to the application.
Click Advanced in the search panel.

Click Add Fields. Additional fields are listed. Select the required fields to add to the search criteria.
Click the red cross mark icon besides the field to remove the field from the search criteria.
Enter values in the respective fields and click Search. The hospital records that match the search criteria are populated in the search results table.
This procedure explains how to mark a message for deletion from the RIB Hospital.
Log in to the application.
Search for hospital records.
Select a row that represents a hospital record.
Click Delete. A confirmation dialog box appears.

The message is deleted when the hospital retry adapters and/or process checks for messages to be deleted from the RIB Hospital.
|
Note: A message that is in queue (as indicated when the check box in the In Queue column is selected) cannot be deleted. |
This procedure explains how to stop a retry adapter and/or a process from attempting to retry a message.
Log in to the application.
Search for a message.
Select a row that represents a hospital record.
Click Stop. The retry adapter and/or a process does not attempt to reprocess the message until you select the message for Retry.
|
Note: A message that is in queue (as indicated when the check box in the In Queue column is selected) cannot be stopped. |
This procedure explains how to retry a message after you have stopped the retry adapter and/or process from re-processing it.
Log in to the application.
Search for a message.
Select a row that represents a hospital record.
Click one of the following buttons:
RetryAllEligibleRecordsInPage - This option will retry all the eligible records in current page which is being displayed. (See note below for delete criteria)
RetryAllEligibleRecords - This option will retry all the eligible records in all of the pages.
RetrySelectedRecords - This will retry records that are selected using the multi-select option.
|
Note: A message that is in queue (as indicated by the check box in the In Queue column is selected) or pending deletion (as indicated by the check box in the Delete Pending column is selected) cannot be retried. |
This procedure explains how to view a message.
Log in to the application.
Search for hospital records.
Click the Load Message Details on Selection check box located in the search results table.
Select a row to view the payload of hospital records.
Click the Message Viewer tab. The message viewer displays the payload in text mode.

You can edit the message shown and click Save to save the message.
This procedure explains how to save a message locally.
Search for a message and select a row.
Click Save To File. The message is saved to a RibMessage.xml, a text file named by default.
This procedure explains how to retrieve a message from a local location.
Click Import.
Search for a message and select a row.
A popup browser opens with an option to browse for a hospital entry to be loaded.
The message must be in the following specified format.
<HospitalEntry>
<AdapterClassLocation>AdapterClassLocation</AdapterClassLocation>
<Family>Family</Family>
<Type>Type</Type>
<TopicName>TopicName</TopicName>
<CustomFlag>F</CustomFlag>
<CustomData> <![CDATA[ CustomData ]]> </CustomData>
<ReasonCode>ReasonCode</ReasonCode>
<RibMessagePayloadView>
<RibMessagePayload>
<MessageData> <![CDATA[ <Message Xml> ]]> </MessageData>
</RibMessagePayload>
</RibMessagePayloadView>
<RibMessageRoutingInfoView>
<RibMessageRoutingInfo>
<SeqNumber>0</SeqNumber>
<Name>Name</Name>
<Value>Value</Value>
<Detail1Name>DetailName</Detail1Name>
<Detail1Value>DetailValue</Detail1Value>
</RibMessageRoutingInfo>
</RibMessageRoutingInfoView>
</HospitalEntry>
This procedure explains how to update an existing hospital record location.
Search for a message and select a row (see View and Edit a Message).
Save the hospital entry locally (See Save a Message Locally).
Edit the hospital entry file.
Do not edit or remove any of the <MessageNum> attributes.
Click Import.
A popup browser window opens with an option to browse for the edited hospital entry to be loaded.

The message must be in the same format in which it was saved.
Format the hospital entry to be updated.
<HospitalEntry>
   <MessageNum>12345</MessageNum>
   <AdapterClassLocation>AdapterClassLocation</AdapterClassLocation>
   <Family>Family</Family>
   <Type>Type</Type>
   <RibMessageId>RibMessageId</RibMessageId>
   <Id>Id</Id>
   <PublishTime>YYYY-MM-DD HH:MM:SS</PublishTime>
   <TopicName>TopicName</TopicName>
   <ThreadValue>Threadvalue</ThreadValue>
   <JmsQueueId>jmsId</JmsQueueId>
   <CustomFlag>F</CustomFlag>
   <CustomData>    <![CDATA[  CustomData   ]]>   </CustomData>
   <ReasonCode>ReasonCode</ReasonCode>
   <RibMessagePayloadView>
      <RibMessagePayload>
         <MessageNum>12345</MessageNum>
         <MessageData> <![CDATA[ <Message Xml> ]]>  </MessageData>
      </RibMessagePayload>
   </RibMessagePayloadView>
   <RibMessageRoutingInfoView>
      <RibMessageRoutingInfo>
         <SeqNumber>0</SeqNumber>
         <Name>Name</Name>
         <Value>Value</Value>
         <Detail1Name>DetailName</Detail1Name>
         <Detail1Value>DetailValue</Detail1Value>
      </RibMessageRoutingInfo>
   </RibMessageRoutingInfoView>
</HospitalEntry>
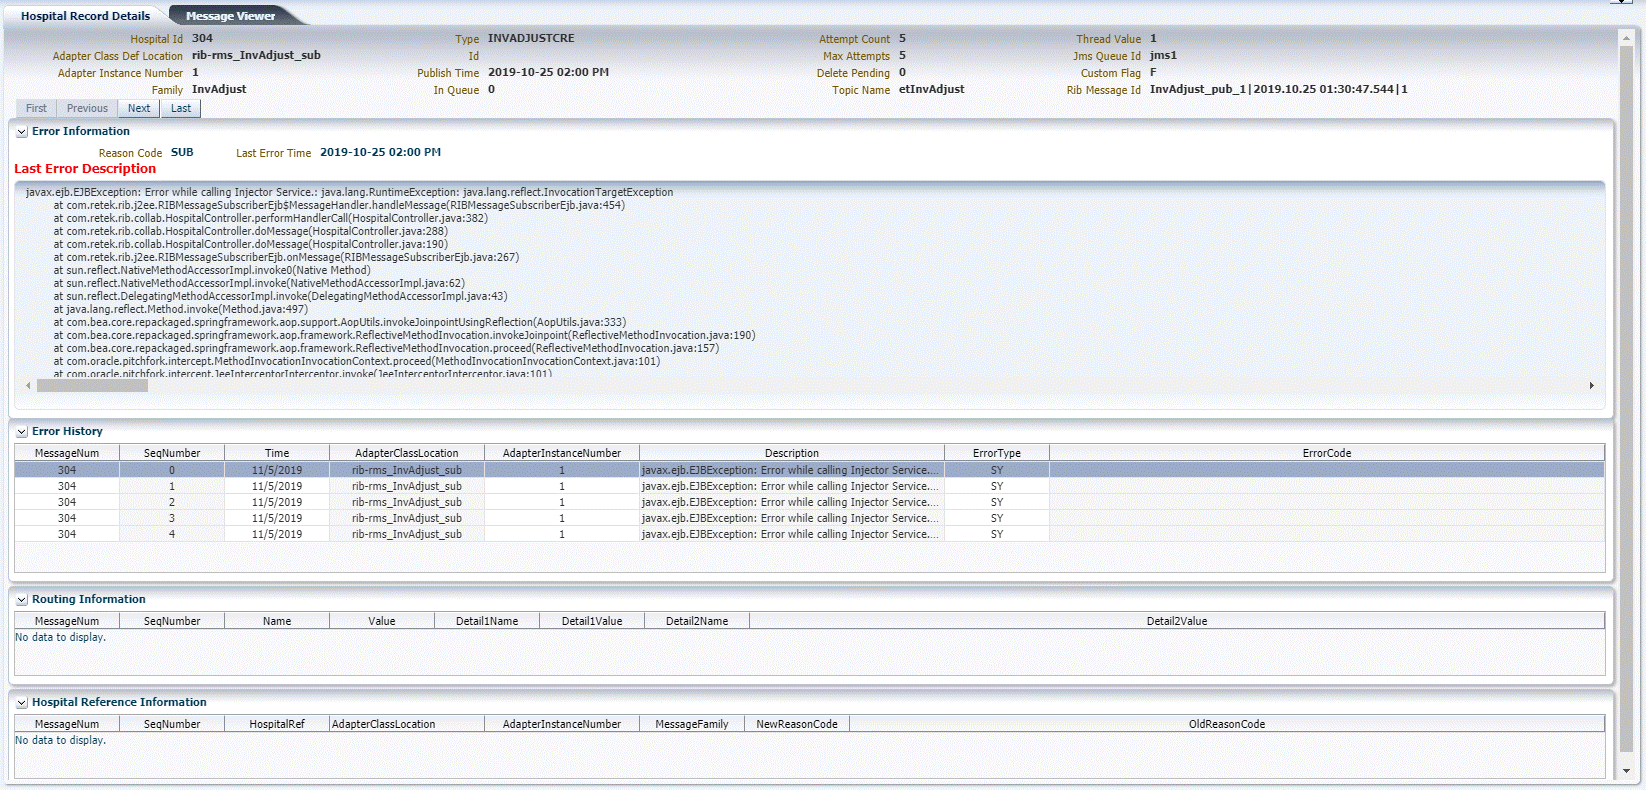
This procedure explains how to see detailed information about a hospital record.

Search for a message (see "View and Edit a Message").
Select a row that represents a hospital record.
By default, the Hospital Records Detail tab is active and displays the selected row's hospital record details.
The size of the pane can be adjusted by using the arrow mark located in the right side of the pane.
This procedure explains how to view a message's error history.

Search for a message (see "View and Edit a Message").
Select a row that represents a hospital record.
By default the Hospital Records Details tab is active and displays hospital record details for the selected row.
Click on the arrow located near the error history. This will expand the pane and display errors associated with each of the possible retry attempts.
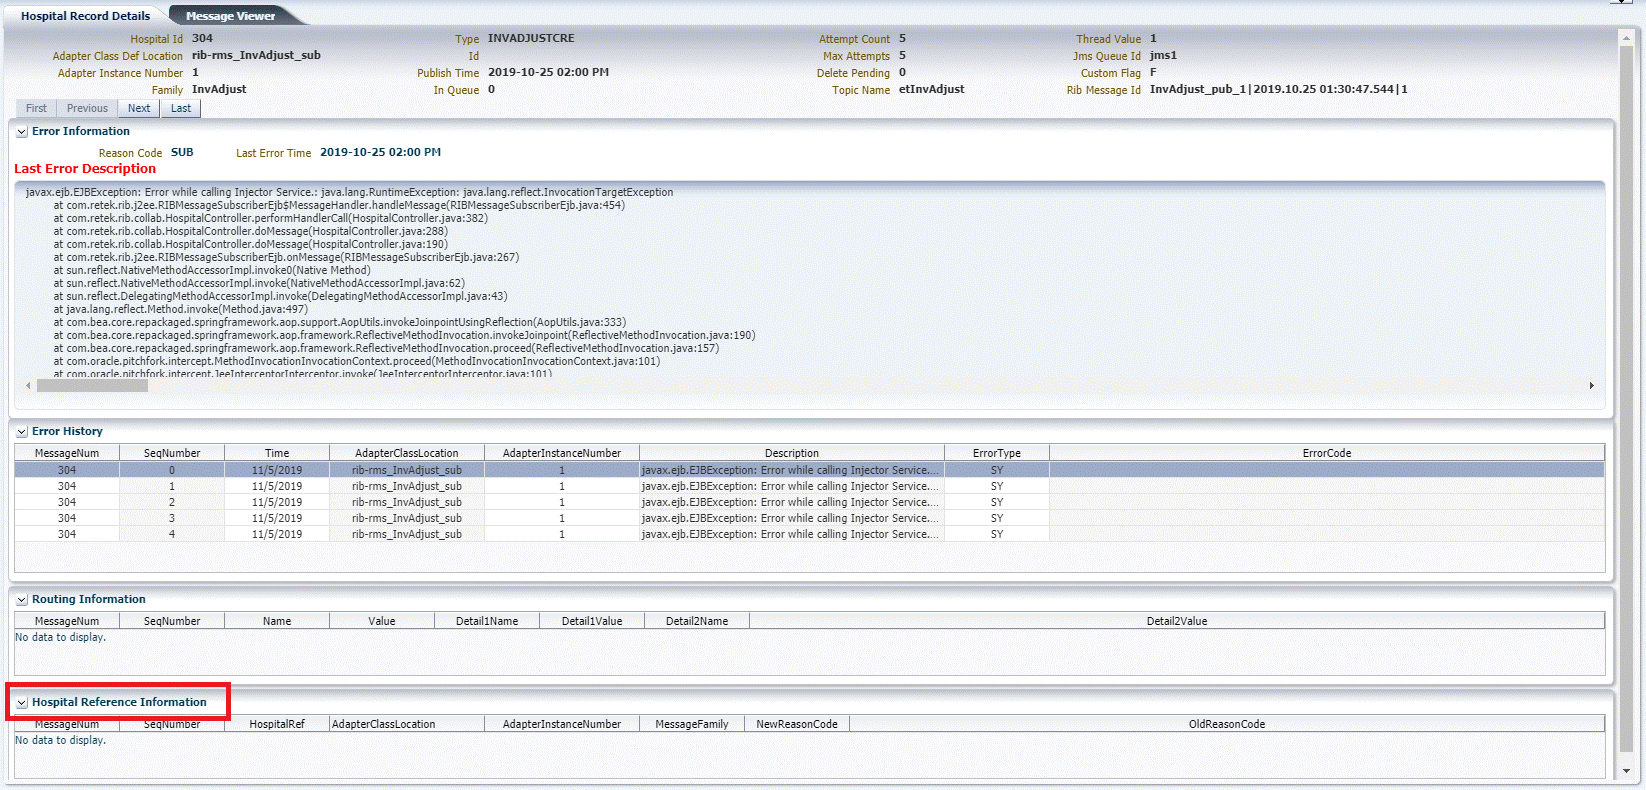
This procedure explains how to view a message's hospital reference information.
|
Note: This pane contains data that applies only to retailers who have access to the custom code. |
This pane displays records that are already in the RIB_MESSAGE table but are prevented from being retried until another record has been successfully retried. Once the other record has been successfully retried, the Reason Code in the RIB_MESSAGE table for the record being referenced in the Hospital Reference column is set to the new Reason Code to make it available for retry. View the hospital record details for a message (see View Hospital Record Details).

Search for a message (see View and Edit a Message).
Select a row that represents a hospital record.
By default the Hospital Records Details tab is active and displays hospital record details of the selected row.
Click on the arrow located near the hospital reference information. This will expand the pane and display associated reference information.

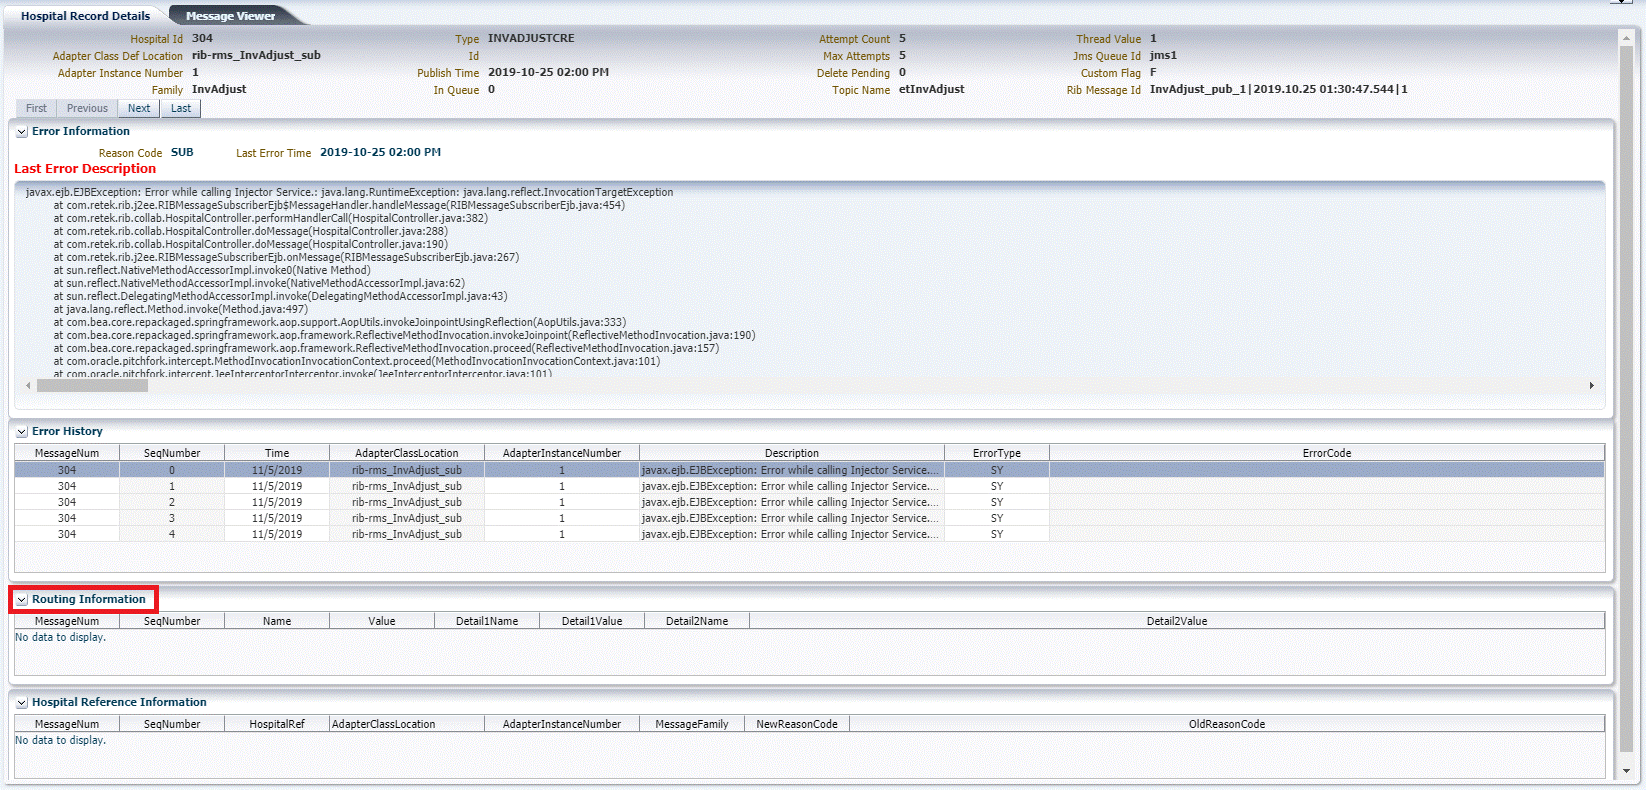
This procedure explains how to view a message's routing information.
Search for a message (see View and Edit a Message).
Select a row that represents a hospital record.
By default the Hospital Records Details tab is active and displays hospital record details of the selected row.
Click on the arrow located near the routing information. This will expand the pane and display associated reference information.