| Oracle® Retail Service Backbone Cloud Service Developers Guide 19.0.000 F25618-01 |
|

 Previous |
 Next |
| Oracle® Retail Service Backbone Cloud Service Developers Guide 19.0.000 F25618-01 |
|
Previous |
Next |
Oracle Retail application landscape of the customer has a variety of applications servicing different business functions. There is a legitimate need to integrate these applications. Customers may have one or more of these applications from vendors other than Oracle. Both Oracle and non-Oracle applications should be able to integrate as long as the interface requirements are met.
In this document we are describing the process and instructions to integrate a third-party application to an Oracle Retail application using RSB. We will be providing instructions and example to show how to integrate using RSB. For this purpose, we are assuming Order Management System (OMS) as the third-party application. OMS is only a representational application that implements retail order management functionality. Actual applications that will be used instead can be any third-party applications like Yantra, and so on.
Any third-party applications that can consume or provide SOAP based web-services can be integrated with Oracle Retail application through RSB. While there can be complex integration scenarios, this document describes only those where the services can be integrated by adapting the interfaces of the consumer and provider. This adaptation is done by modifying message in OSB layer.
The web services you want to integrate to RSB is likely to be different from what the corresponding provided decorators expect. These differences can be broadly classified into two categories:
Payload is different
Service and operation names are different
In order to integrate with third-party application services, first step is to import the WSDL file of third-party application service into the decorator project. Following are the steps:
Right-click WSDL >BusinessService. 
Select Service Bus Resources and click OK. 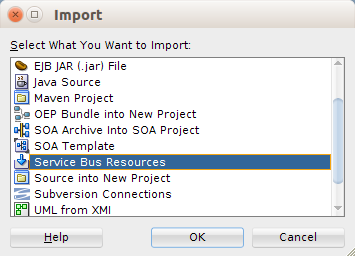
Select Resources from URL and click Next. 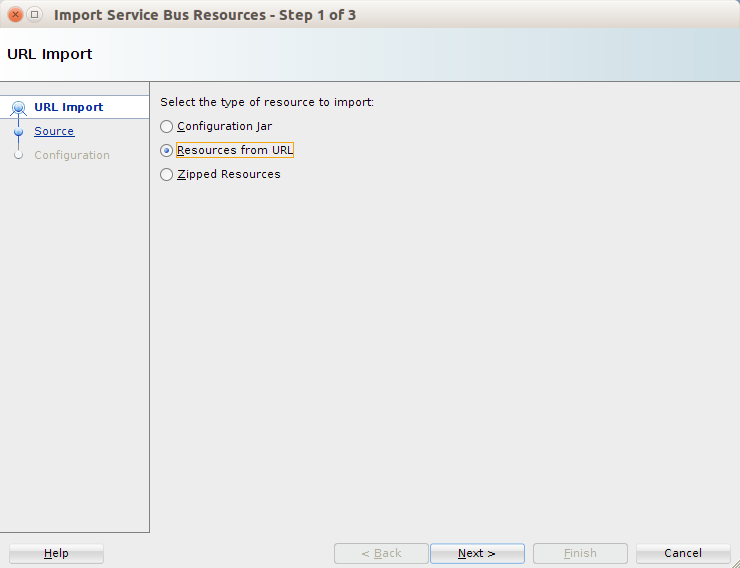
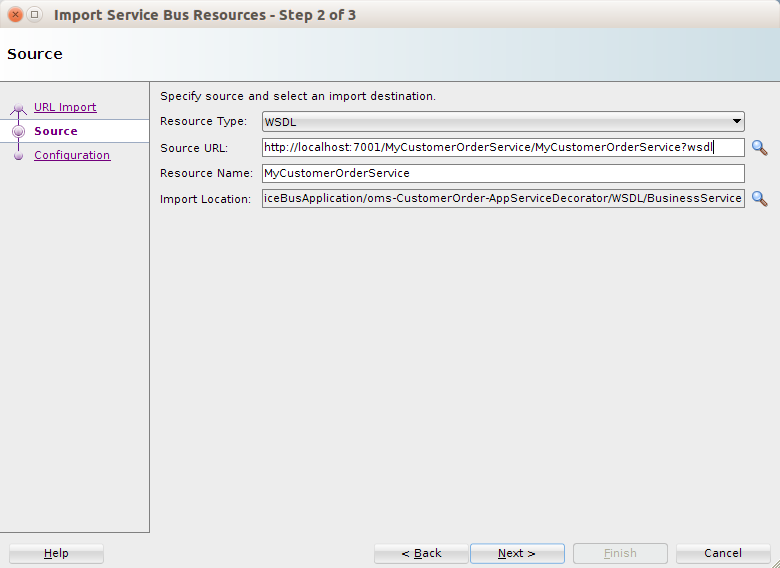
Select Resource Type as WSDL. Also provide the URL of the WSDL. Alternatively, if you have the WSDL downloaded to your local machine, you can browse to that location and select the WSDL file. Here open the WSDL and verify the WSDL can be successfully accessed.
Click Next. 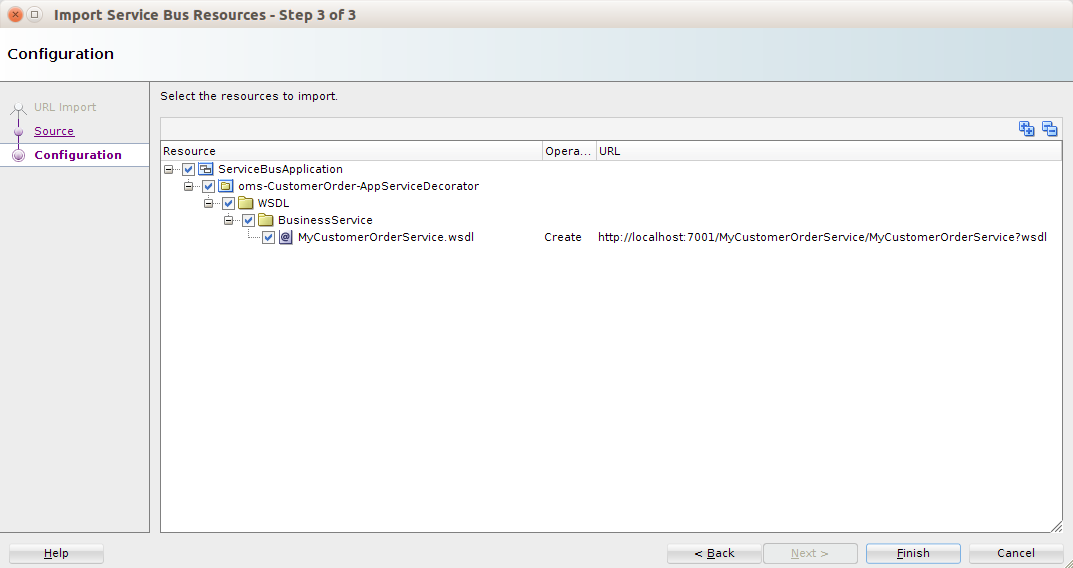
Click Finish. The new WSDL file is added to the project. 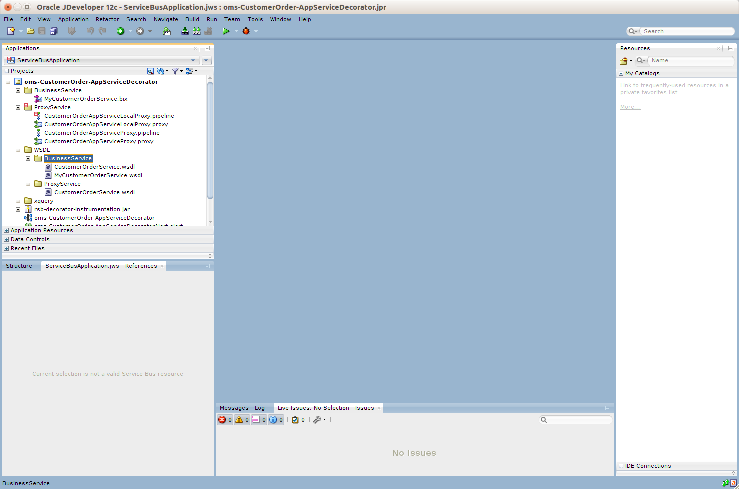
Select new WSDL, right click and select Service Bus> Generate Business Service to modify the business service.
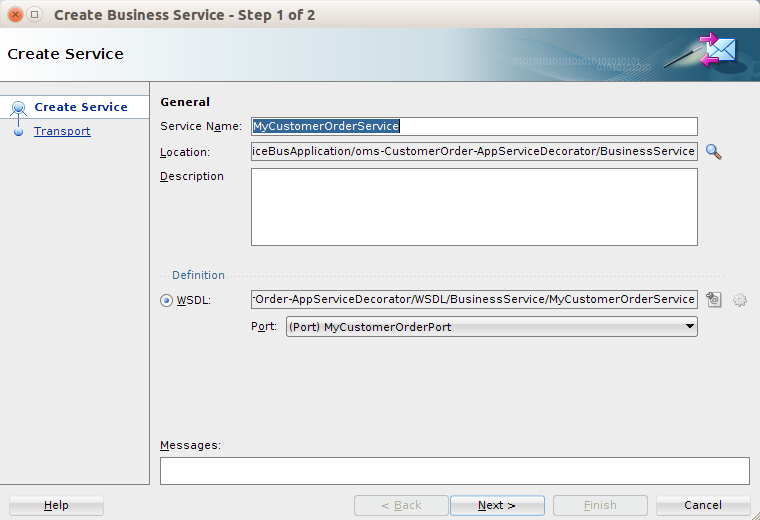
Change the location to the Business Service folder and click Next. 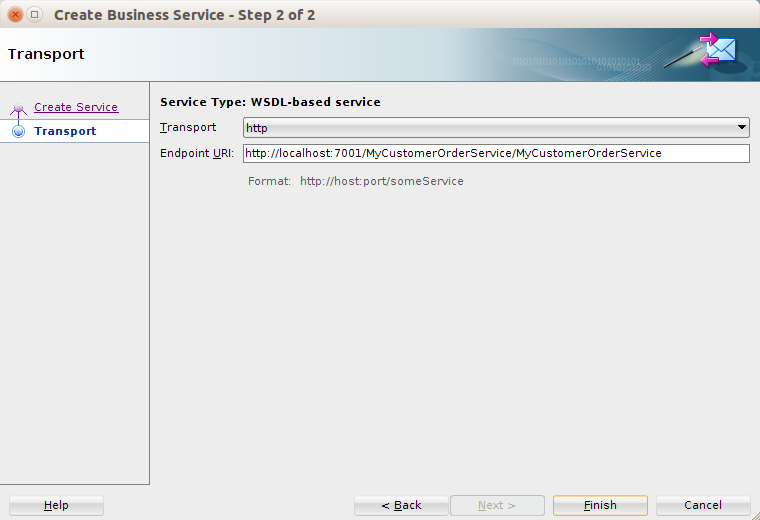
Click Finish to generate business service from new WSDL. 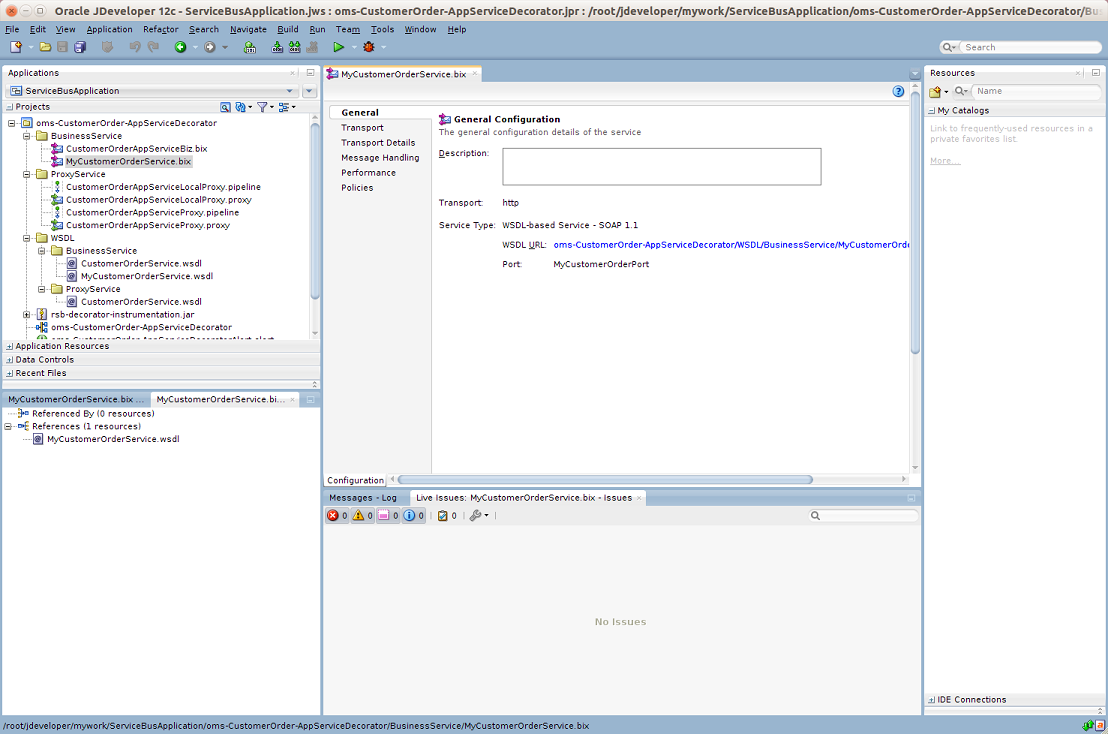
Select previous business service "CustomerOrderAppService.bix", right click and select Delete. 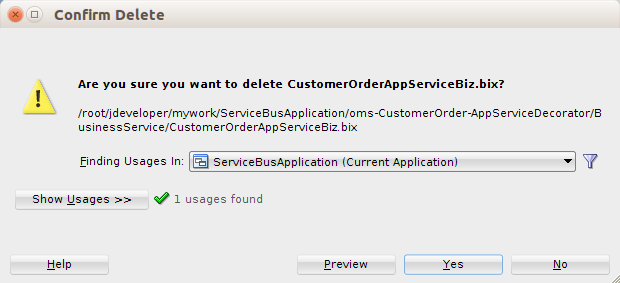
Click Yes to delete the previous business service.
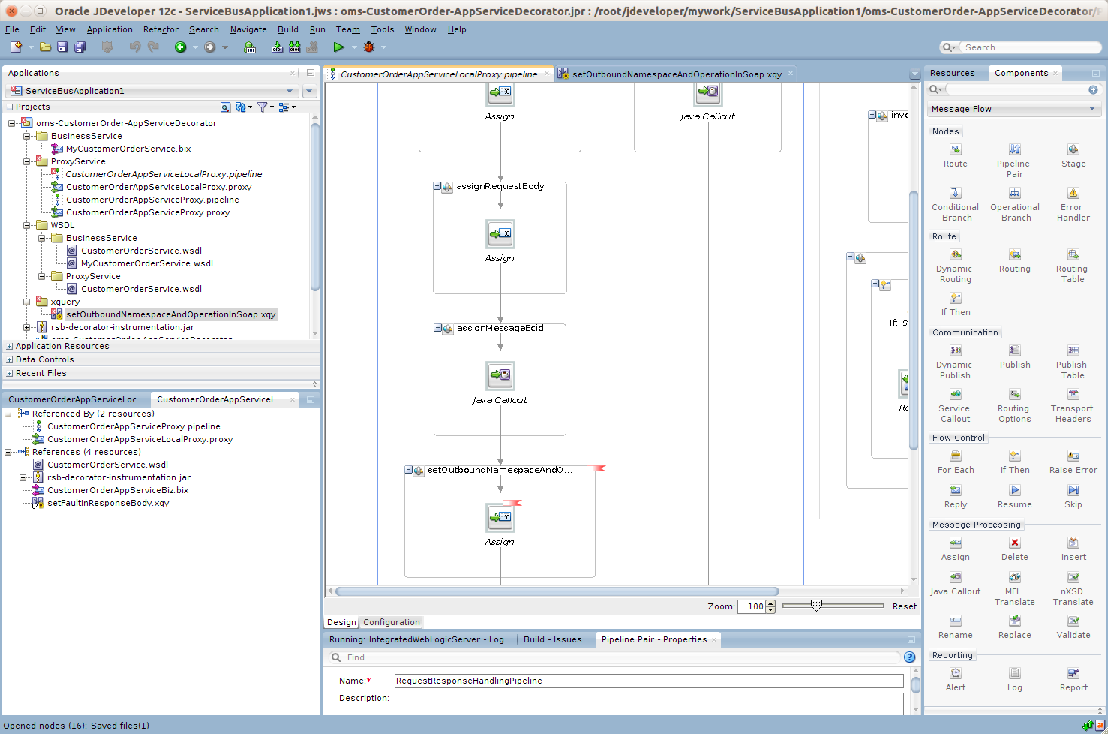
When the business service is changed to use a new WSDL, then the SOAP request of proxy service will not work as-is with the new business service because the business service WSDL may have different namespaces and names for operations and services. So now the proxy service message flow will need to be modified to transform the incoming message to the expected format of business service. In order to do these transformations XQuery files can be used. A sample for making these changes in proxy service message flow is shown below.
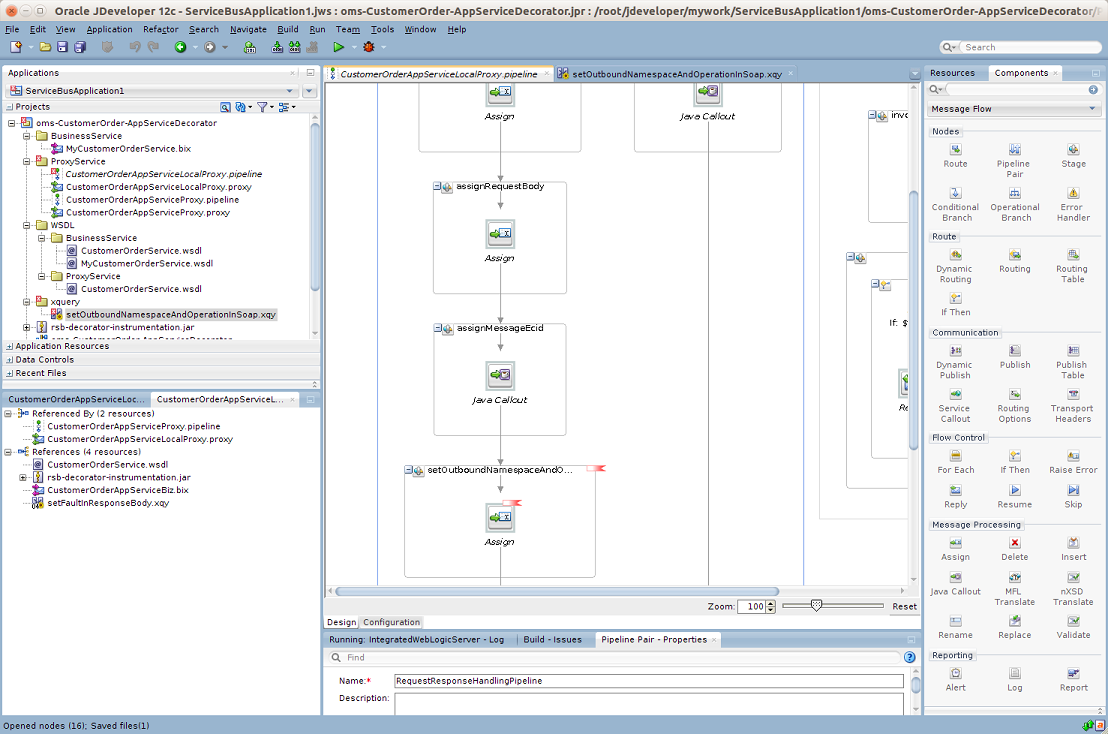
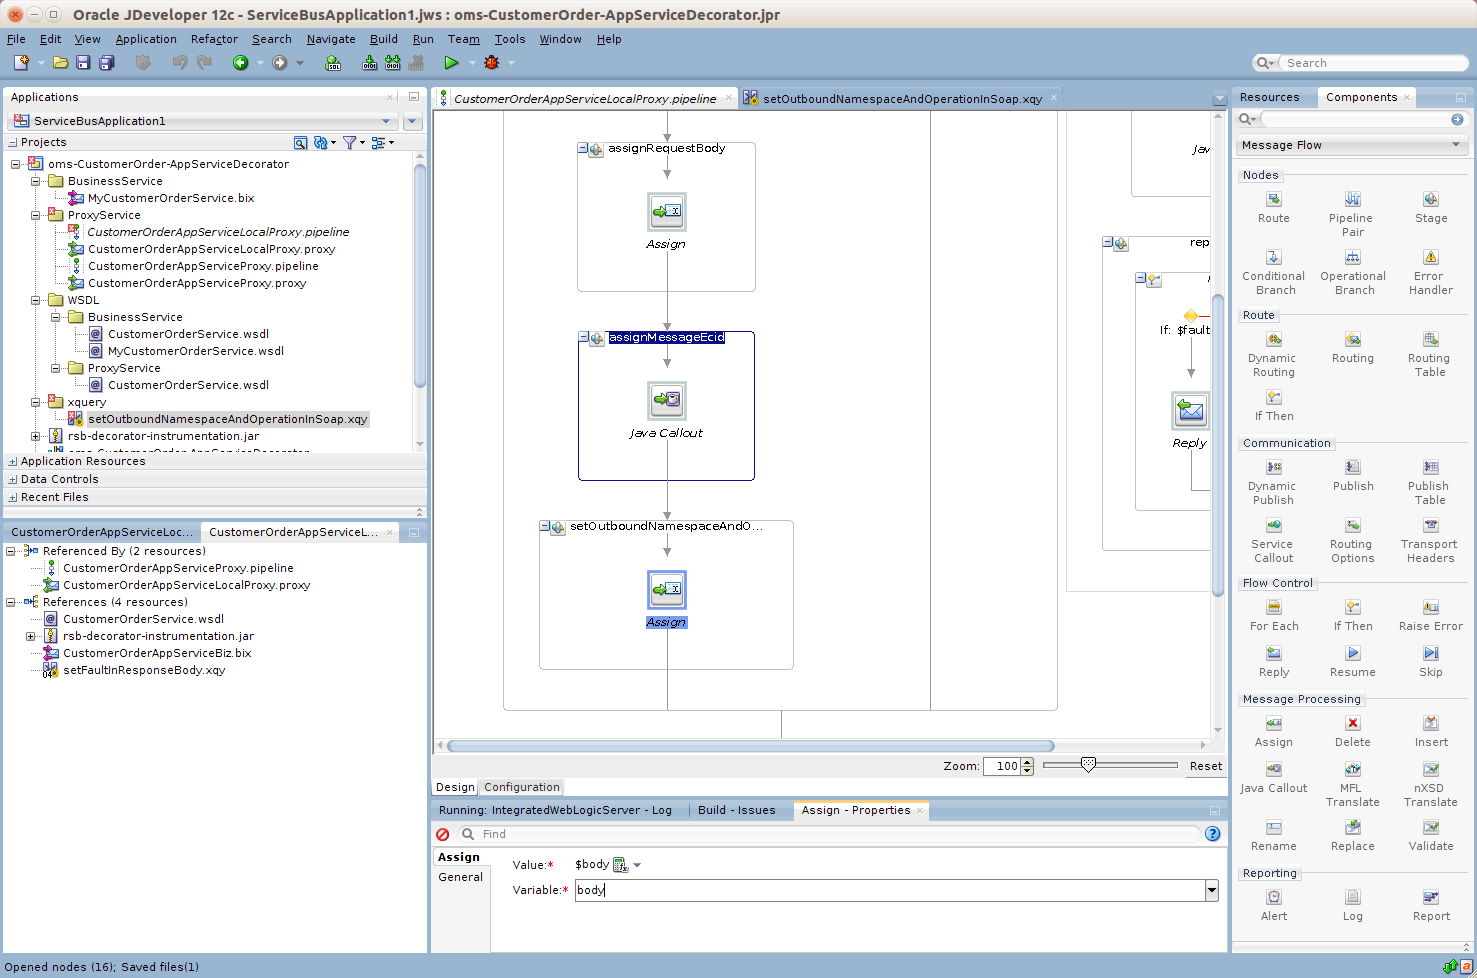
The first step is to add a new stage in request pipeline of local proxy service message flow. To add a new stage, drag Stage component from Components window below assignMessageEcid stage. Enter the name of the stage as "setOutboundNamespaceAndOperation".
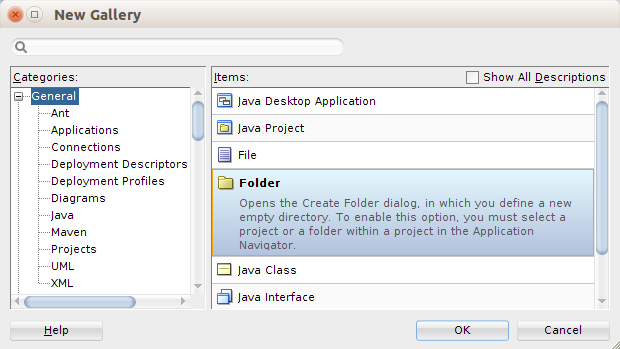
To create a new xquery file, you need to create a folder "xquery" where all the xquery files will be saved. To create the folder, right click the project name and select New > From Gallery > Folder. For Enter or select the parent folder, verify the AppServiceDecorator folder is selected (for example, omsc-CustomerOrder-AppServiceDecorator). Enter xquery as the folder name.
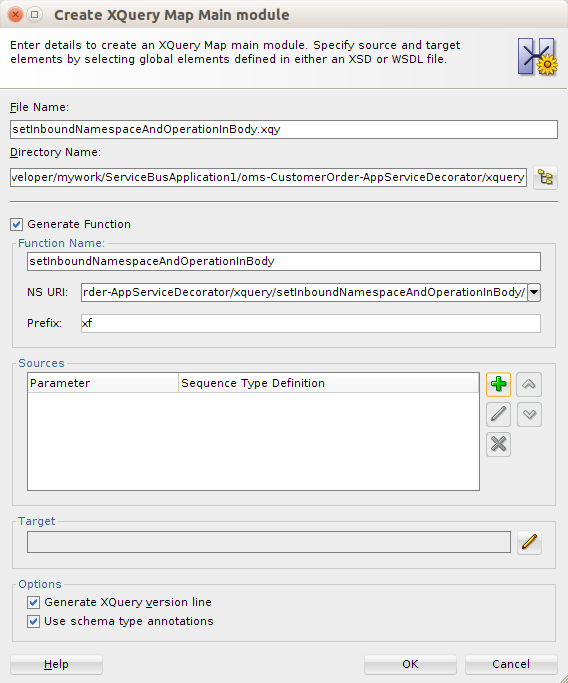
Right click the xquery folder and select New > Xquery File ver 1.0. Enter the name "setOutboundNamespaceAndOperationInBody".
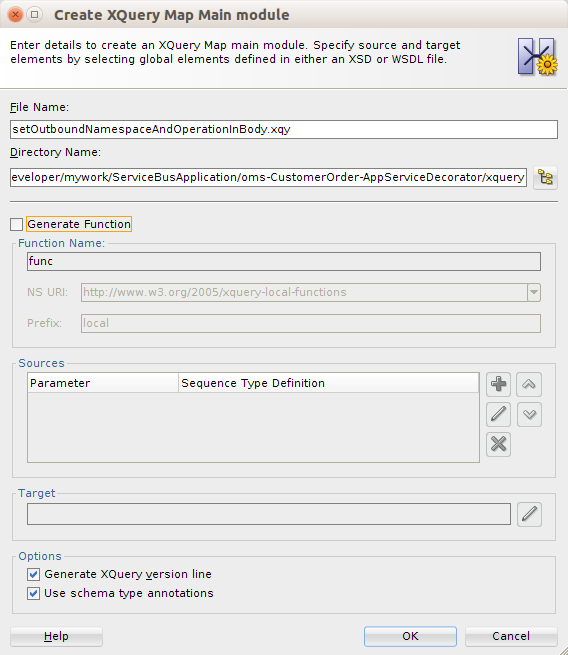
Select Generate Function check box, and provide Function Name "setOutboundNamespaceAndOperationInSoap". Proivide NS URI (for example, http://tempuri.org/oms-CustomerOrder-AppServiceDecorator/xquery/setOutboundNamespaceAndOperationInSoap/) and Prefix as xf. Click add in the Sources section.

Enter Name as "soapBody" and click edit in Sequence Type section.

Select Untyped tab, select Element and click OK.
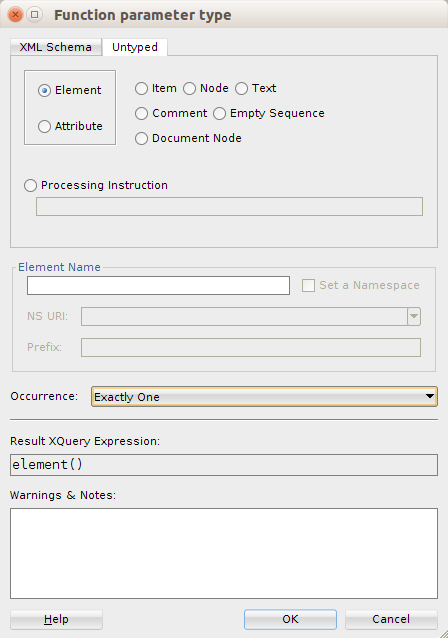
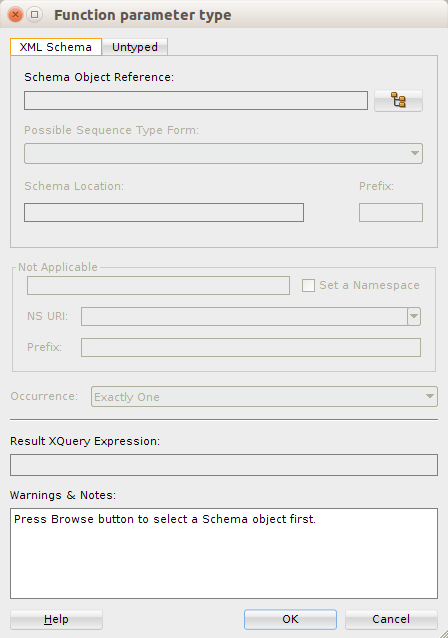
In the Function parameter type window, click OK. 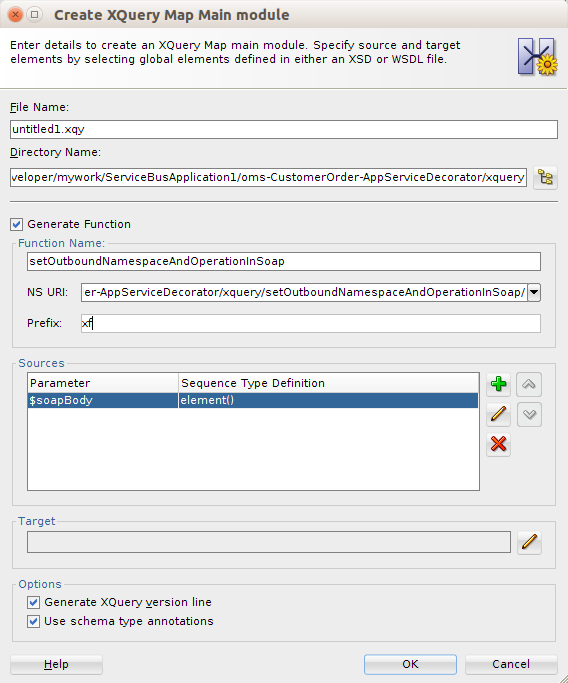
In the Create Xquery Map Main module window, edit the target by clicking edit.
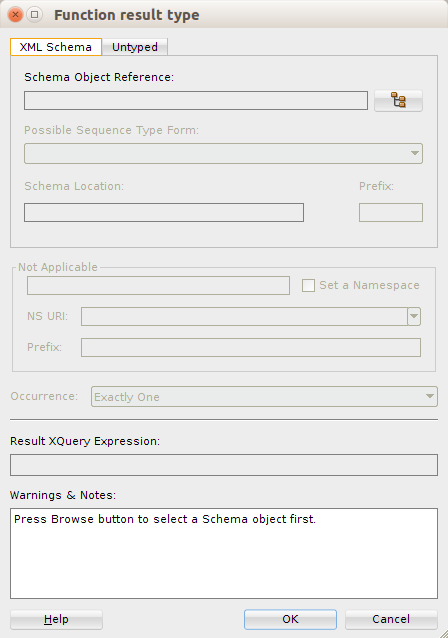
In the Untyped tab, select the Element option and click OK. 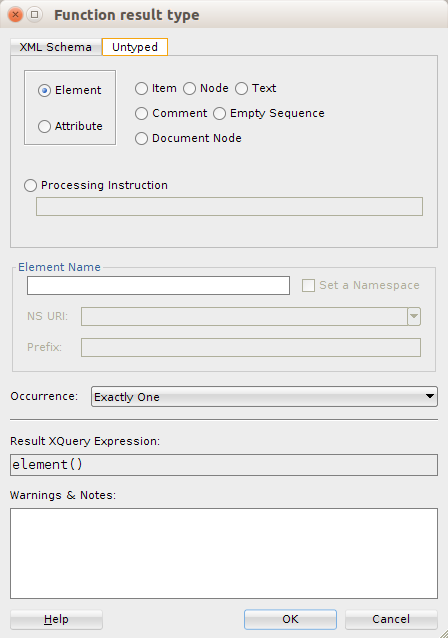
Click OK on the Create XQuery Map module window. 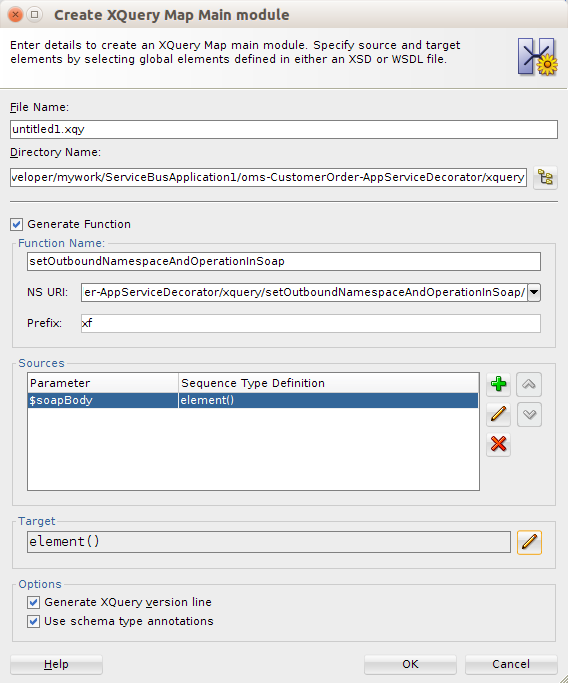
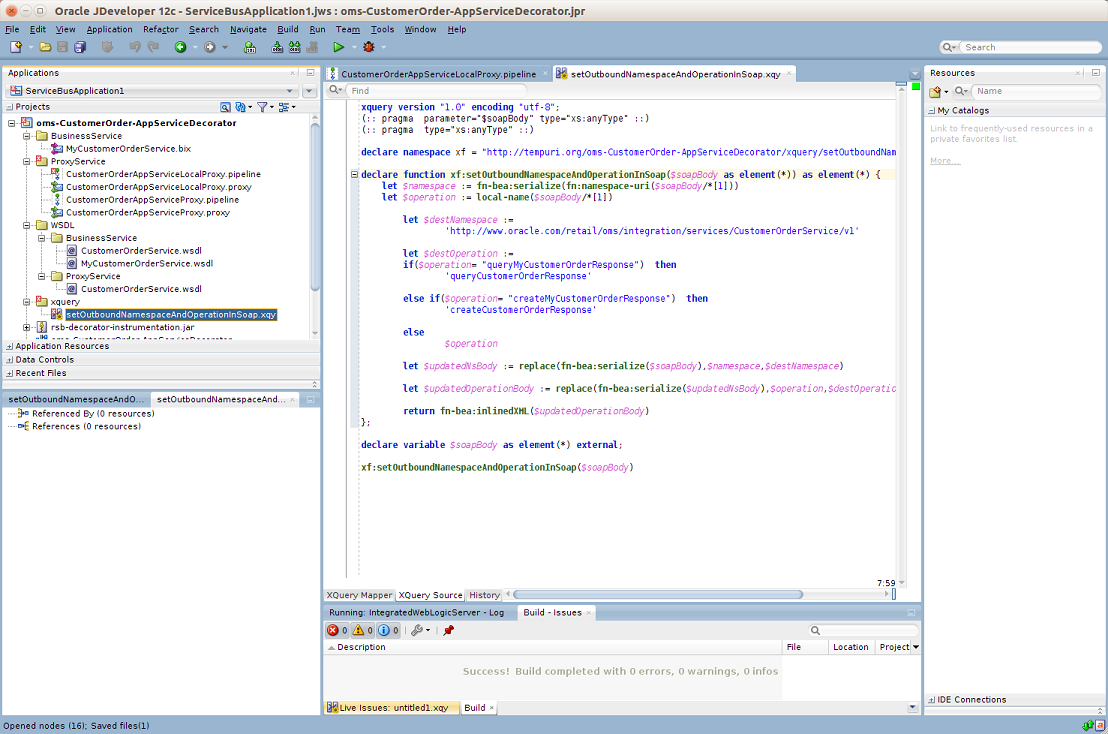
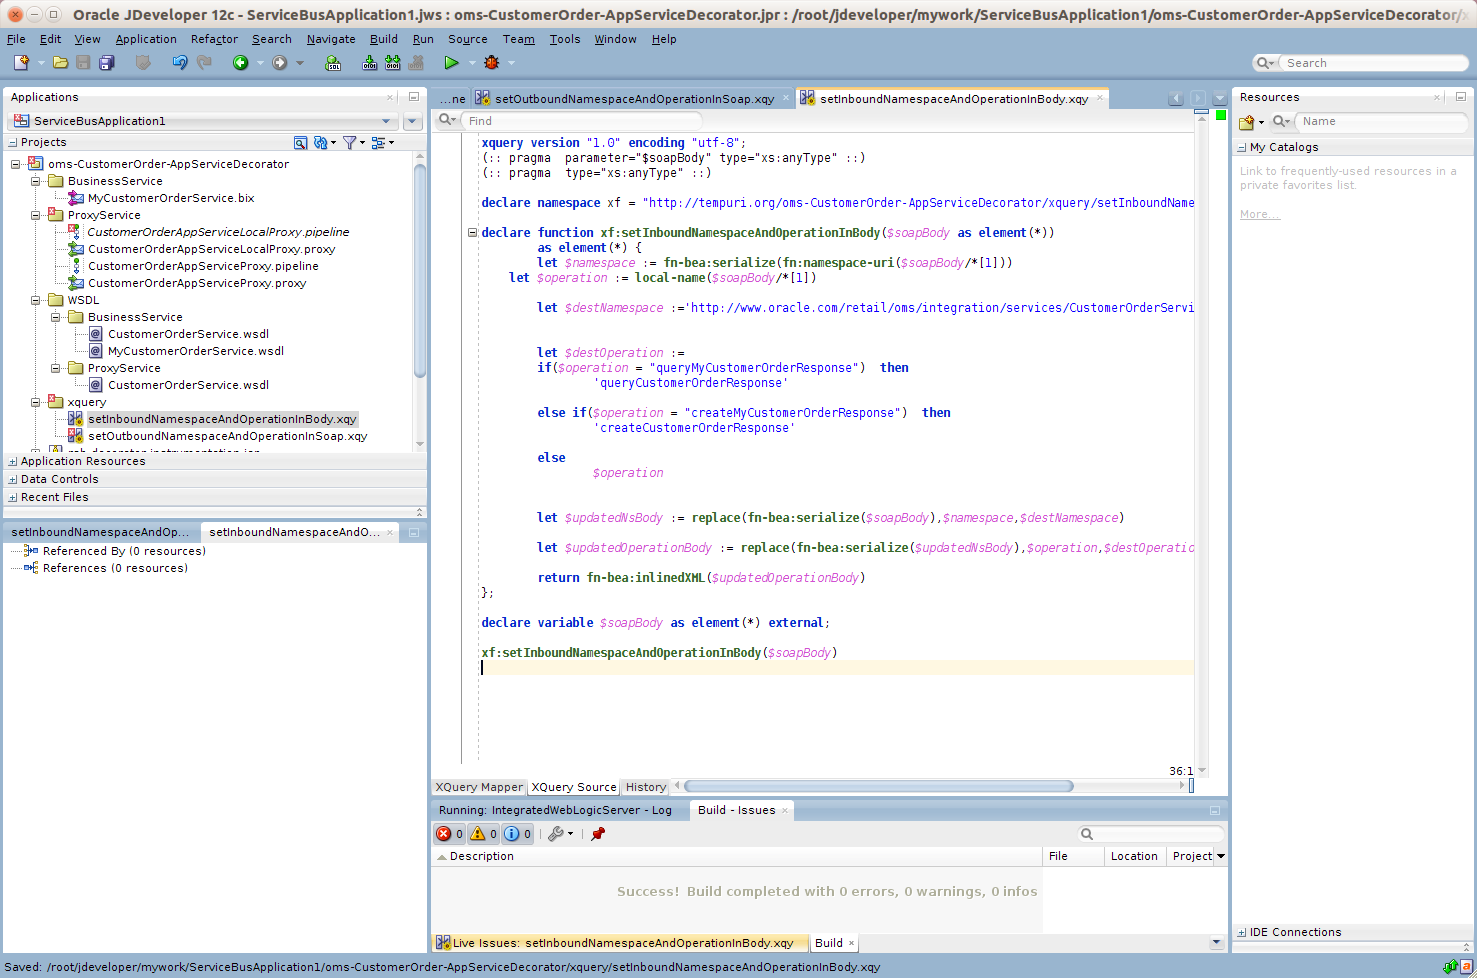
Click OK. In the source view of the file, enter the code as shown in the screenshot below. In this code, the variable $namespace contains the namespace of the incoming request xml and $operation contains the operation name in the incoming request. Further, we check for each incoming operation name and assign the corresponding outbound operation name in $destOperation variable.
For example, when the incoming operation name is queryCustomerOrder, the outbound operation name needs to be queryMyCustomerOrder. The namespace is at service level, so we find the service namespace from the new business service WSDL and assign it to $destNamespace variable. The sample xquery shown in the screenshot is listed in Appendix A. You can copy the code and make changes appropriate to your requirements.
Return to the stage in message flow and add an Assign action. Steps to add Assign action are:
Drag assign component from Message Processing section of Components window into "setOutboundNamespaceAndOperation" stage
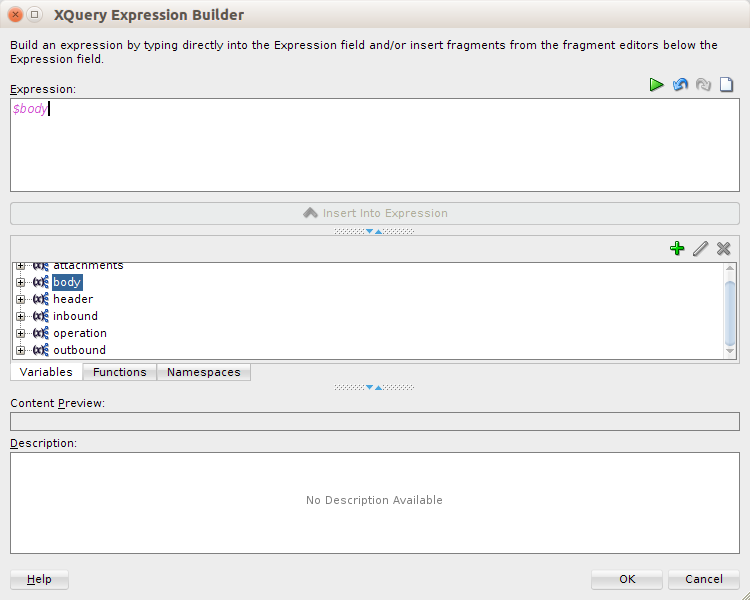
In the Expression field of Assign action, click the <Expression> link and go to XQuery Expression Builder window:
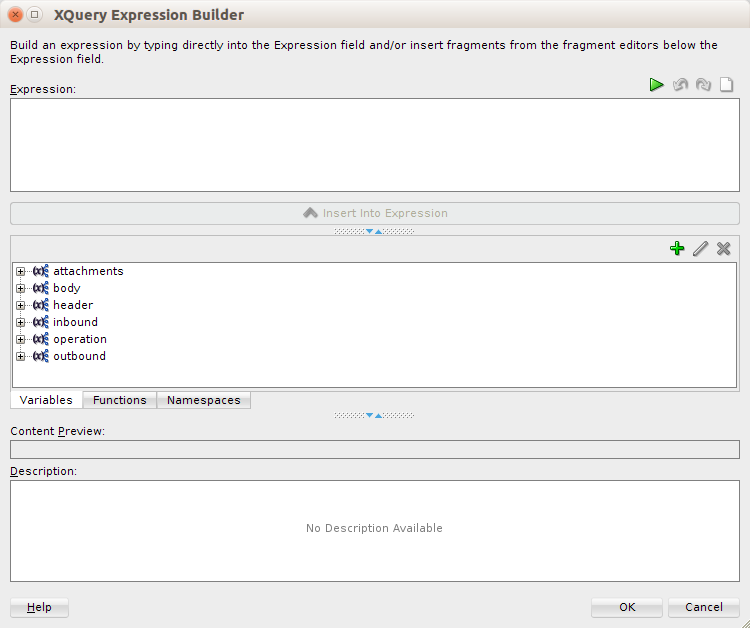
Enter $body in the Expression field and click OK.
In the Variable field of Assign action, enter the value as body.
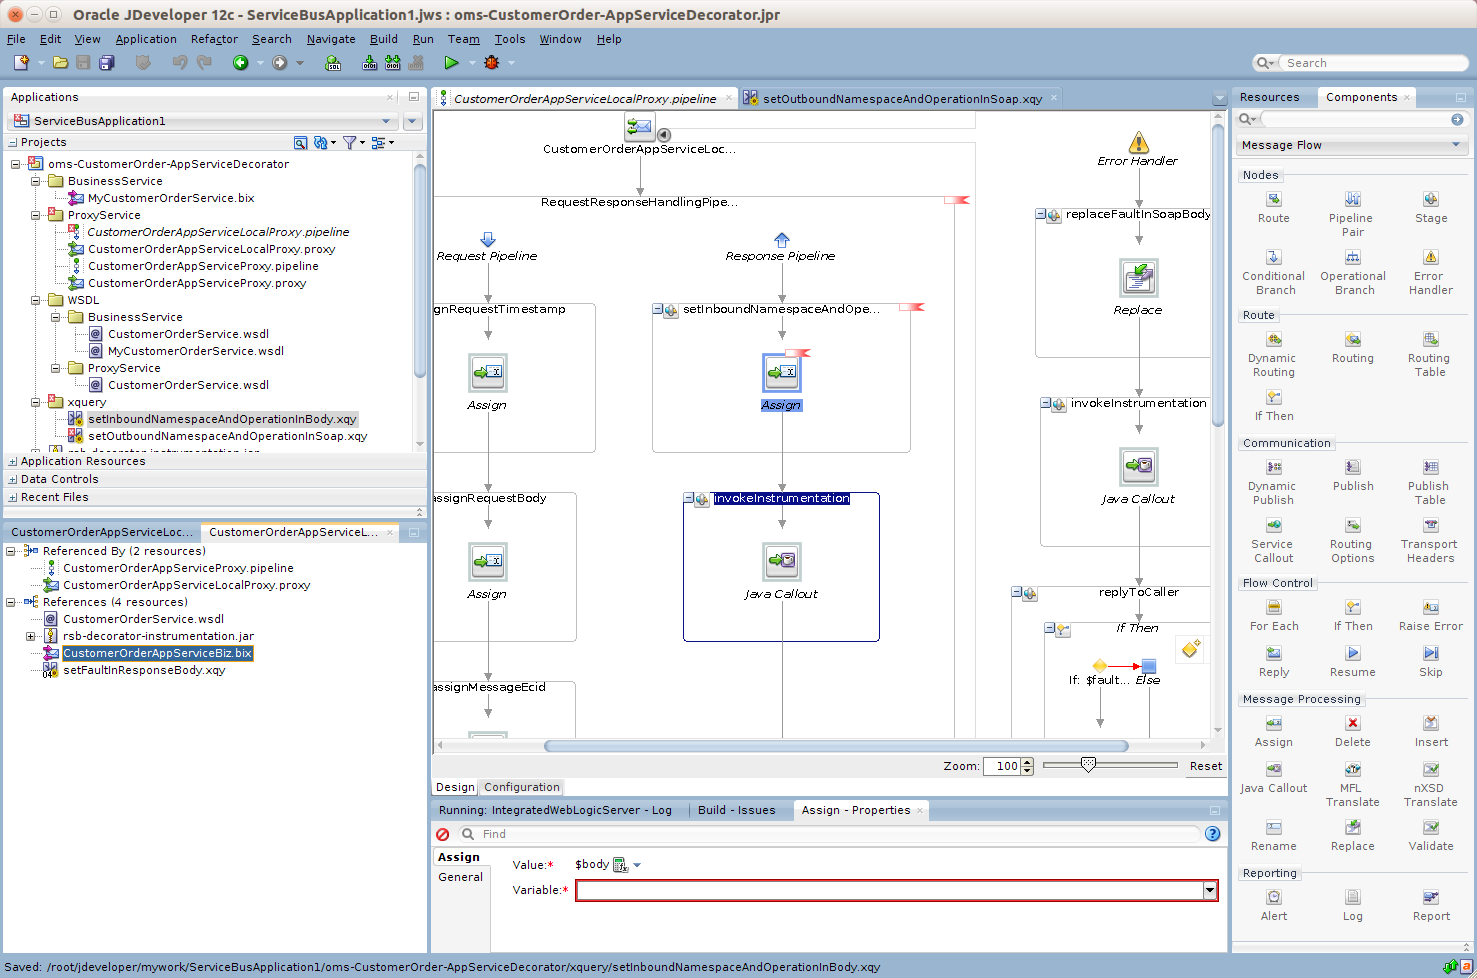
Perform similar transformation of namespaces and operation names in the response pipeline but in the reverse order. This is because the response returned from business service must be converted to the response message format which conforms to the proxy service WSDL. To do this, add a new stage in response pipeline. Drag assign component to the response pipeline.
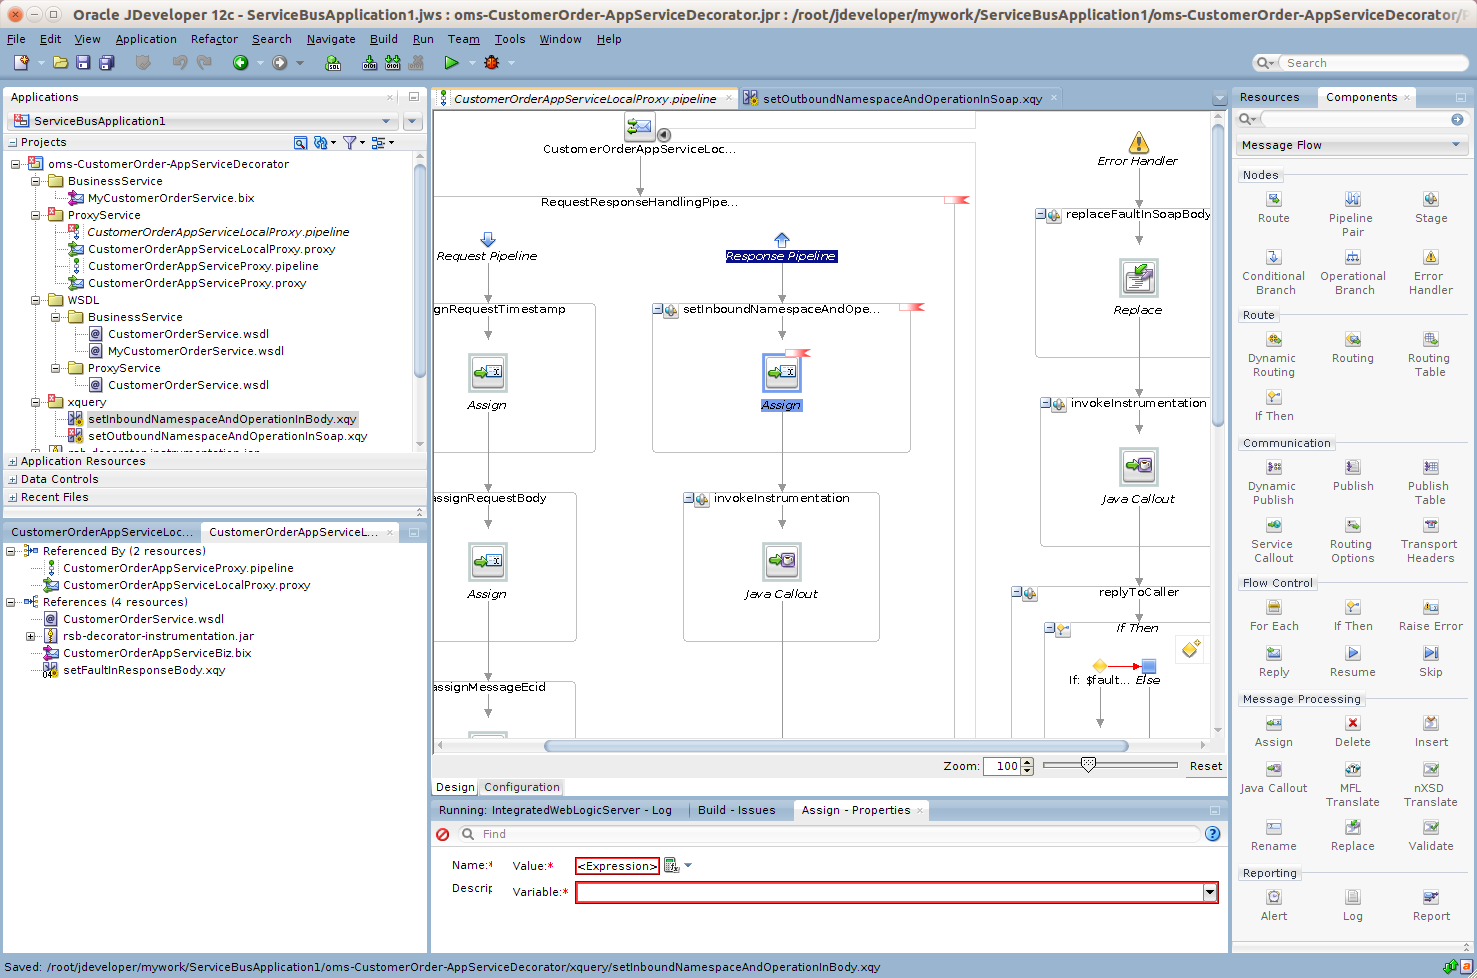
Enter the stage name as setInboundNamespaceAndOperation.
Now we need to create an xquery file to do the mapping. Right click the xquery folder and select New > XQuery File version1.0.

Enter file name as setInboundNamespaceAndOperationInBody. Select Generate Function checkbox. Enter NS URI (for example, http://tempuri.org/oms-CustomerOrder-AppServiceDecorator/xquery/setInboundNamespaceAndOperationInBody/) and prefix (for example, xf). Click add in Sources section.
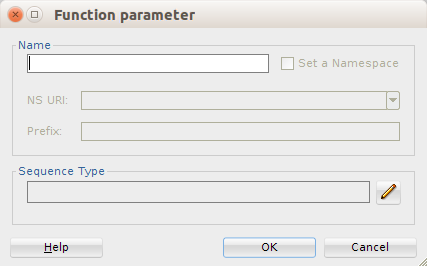
Enter "soapBody" in the Name field. Click edit in Sequence Type section:

Navigate to the Untyped tab, select Element and click OK.
Click edit in the Target section.

Navigate to the Untyped tab, select Element, and click OK. 
Navigate to the Source tab of the xquery file. Enter the code as shown below. In this code, the variable $namespace contains the namespace of the response xml and $operation contains the operation name in the response. Further, we check for each operation name and assign the corresponding proxy service operation name in $destOperation variable. For example, when response operation name is queryMyCustomerOrderResponse then the new operation name needs to be queryCustomerOrderResponse. The namespace is at service level, so we find the service namespace from the proxy service WSDL and assign it to $destNamespace variable. The sample xquery shown in the screenshot is listed in Appendix A. You can copy the code and make changes appropriate to your needs.
In the message flow, in the setInboundNamespaceAndOperation stage add an Assign action by dragging Assign component from Message Processing section of Components window.

In the Properties window of Assign action, click the Expression link to open the Expression builder.

Enter $body in Expression field and click OK.

Click OK and type "body" in the variable field.
The above completes the steps for namespace and operation mapping.
The proxy service request message payload types may be different from the payload types that are required by the new business service WSDL. Therefore we need to transform the incoming request payload to the format expected by the business service. For payload transformation, follow the steps as shown below:
In our example, the proxy service payload is of type CustOrderDesc and the business service payload is of type MyCustOrderDesc. So first we need to create xquery files which transform the payload from CustOrderDesc to MyCustOrderDesc type. Right-click the xquery folder and select New > XQuery XQuery File Ver 1.0.
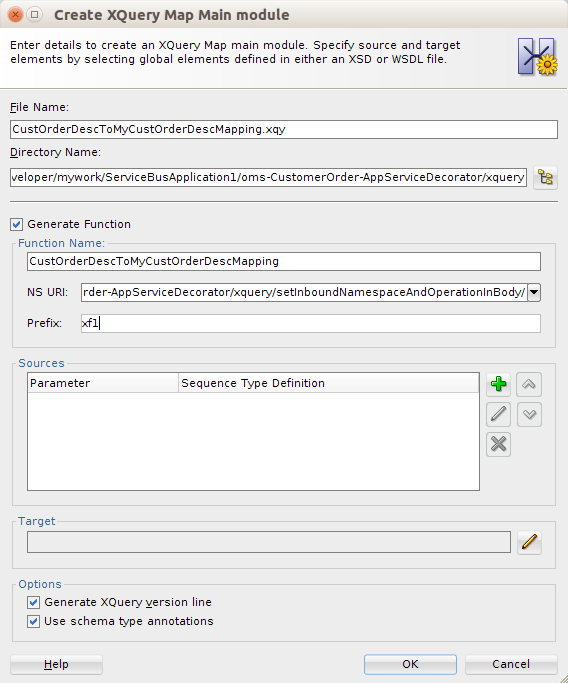
Enter file name as CustOrderDescToMyCustOrderDescMapping. Select Generate Function. Enter the NS URI and Prefix.
In the Sources section, click add.

Enter "payload" in the Name field. Click edit in the Sequence Type section.
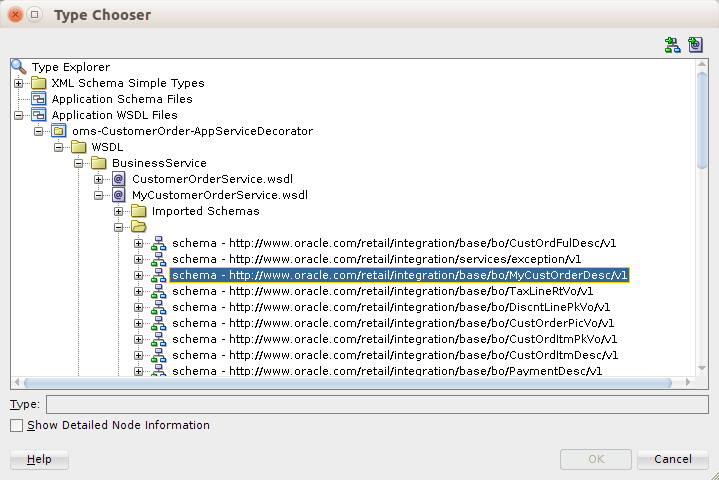
Click browse to view schema object. 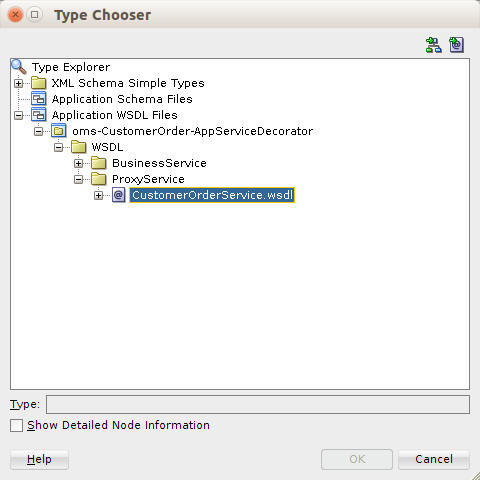
Select CustOrderDesc element from ProxyService WSDL which is CustomerOrderService.wsdl and click OK. 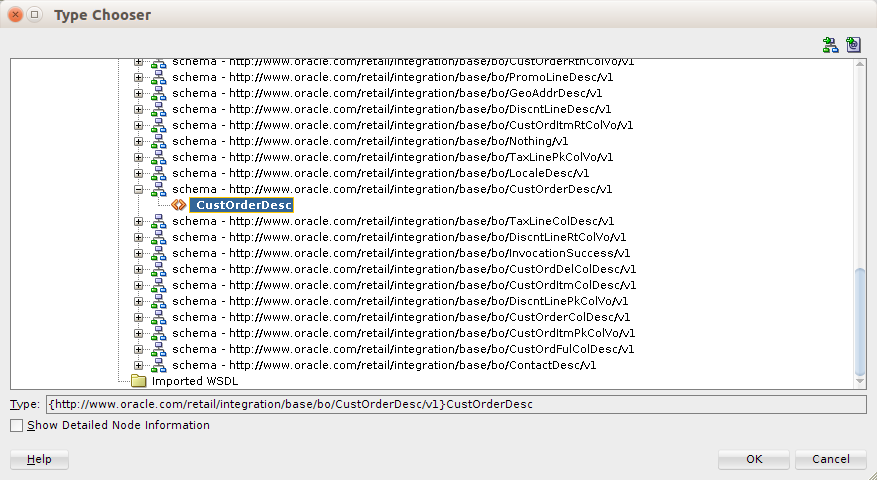
On the Type Chooser window, click OK.
On the Function parameter type window, click OK. 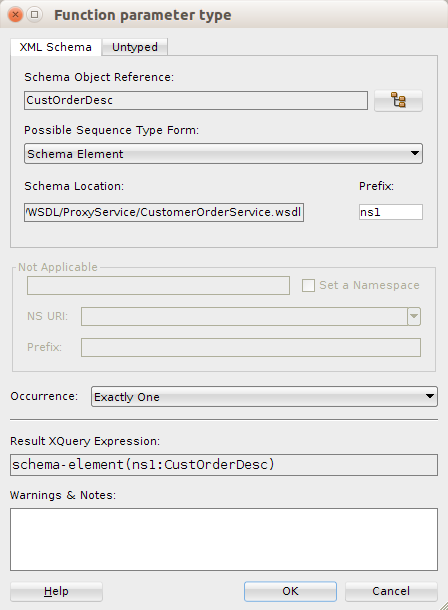
Click edit in the Target section, in the Function Parameter Window. 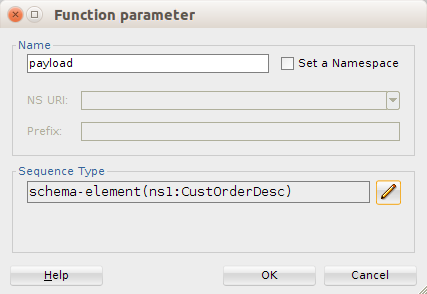
Select MyCustOrderDesc element and click OK.
On the Function result type window, click OK. 
On the Create XQuery Map Main module window, click OK. 
Click OK.
For the fields which are not auto-mapped, we need to map them manually. Drag and connect those fields one by one. You may have to write xquery functions for complex mapping. For more information, see the XQuery documentation.
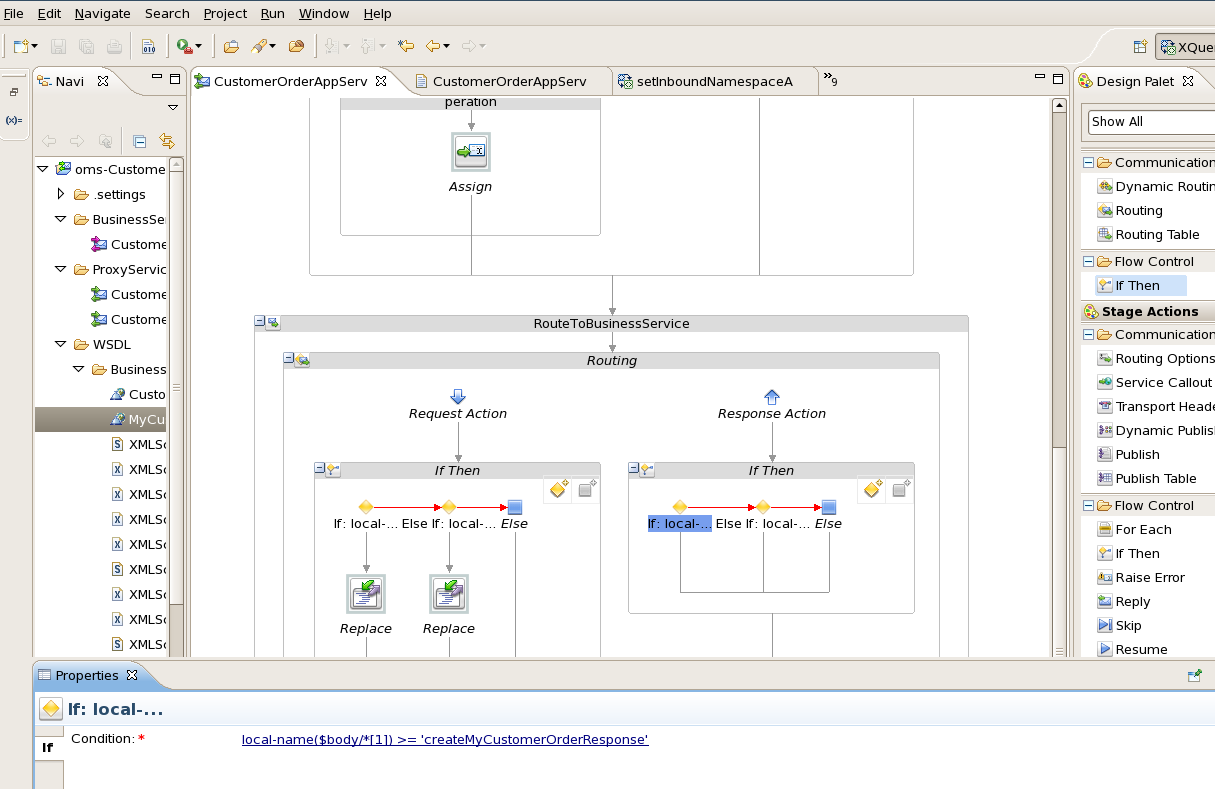
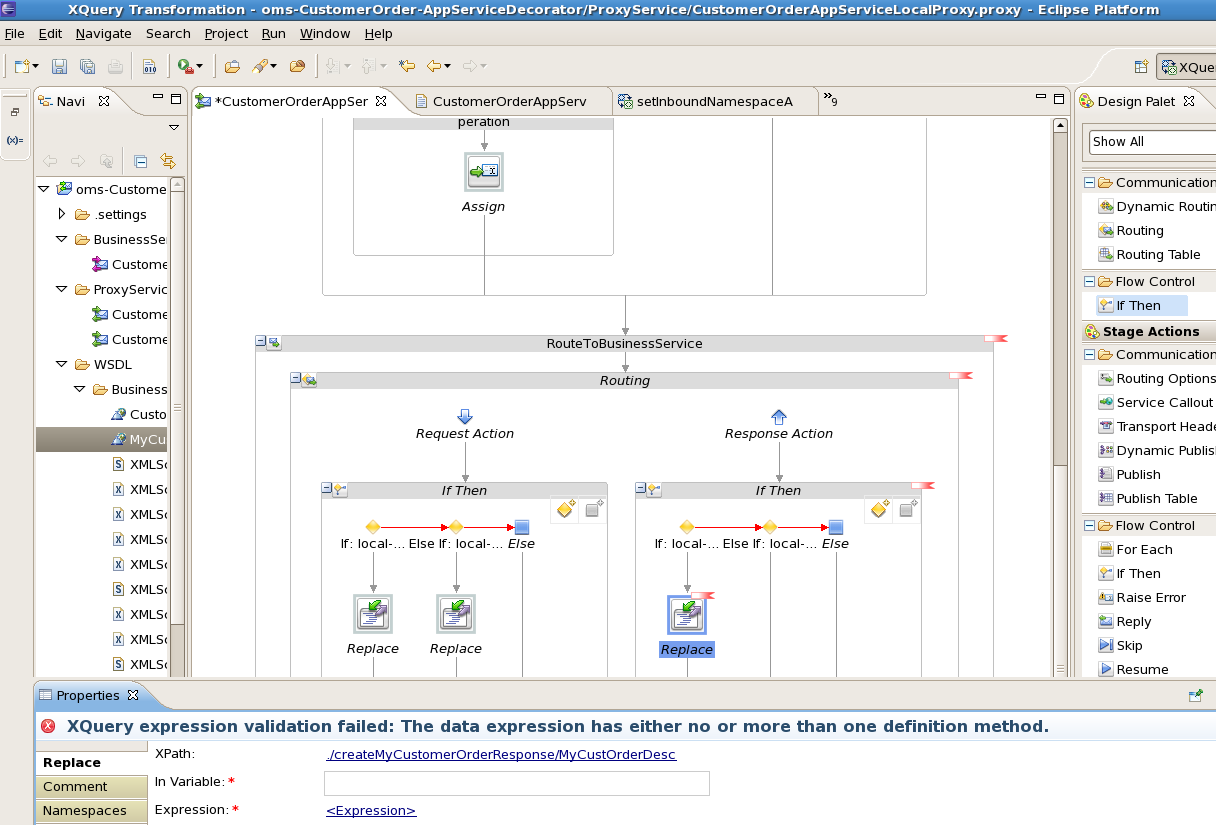
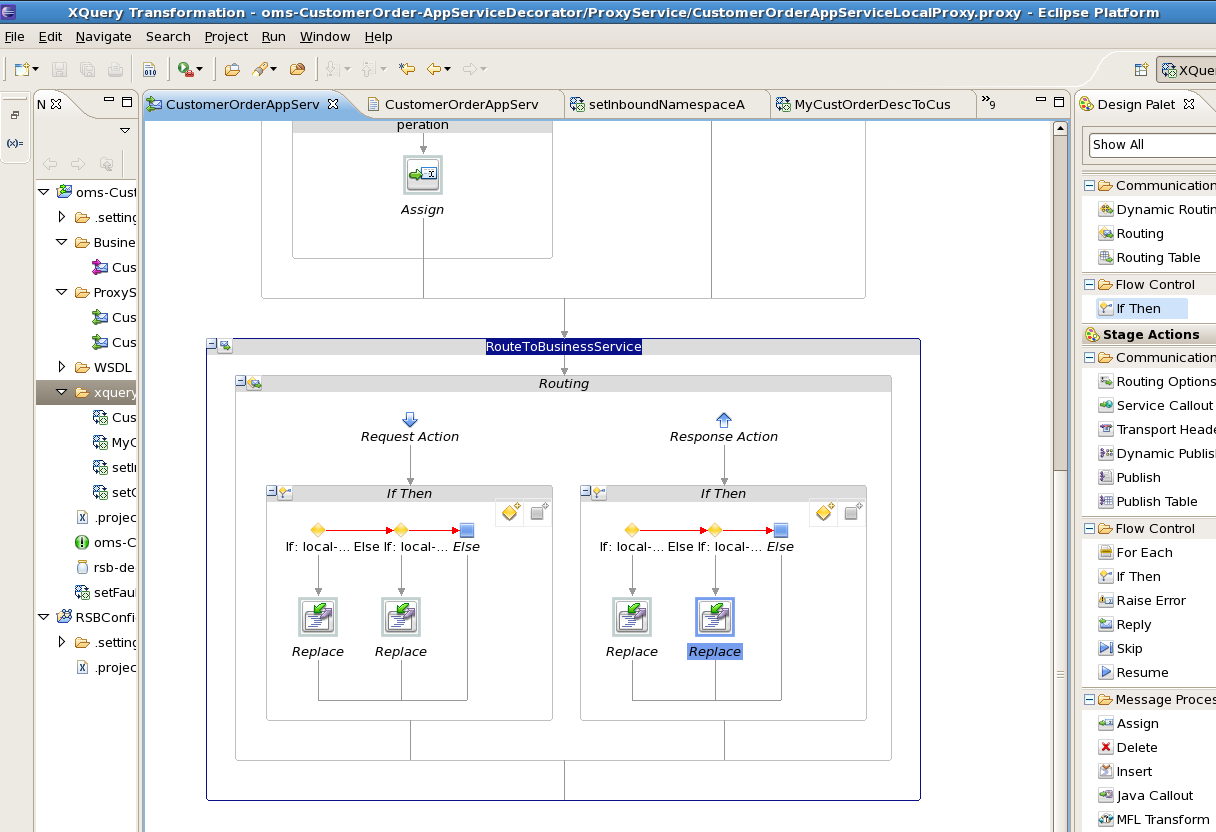
Once the mapping in xquery file is complete, navigate to the Routing node and in the Request pipeline, drag the "If Then" component, from Components window, to the request pipeline.
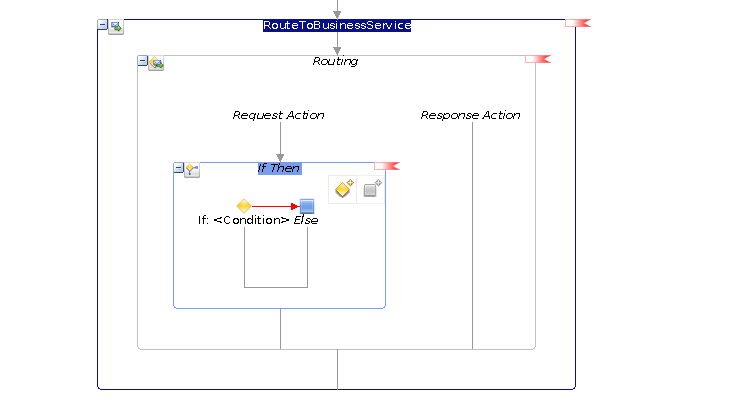
Navigate to the Properties window for the first "If" condition, in the If-Properties window. 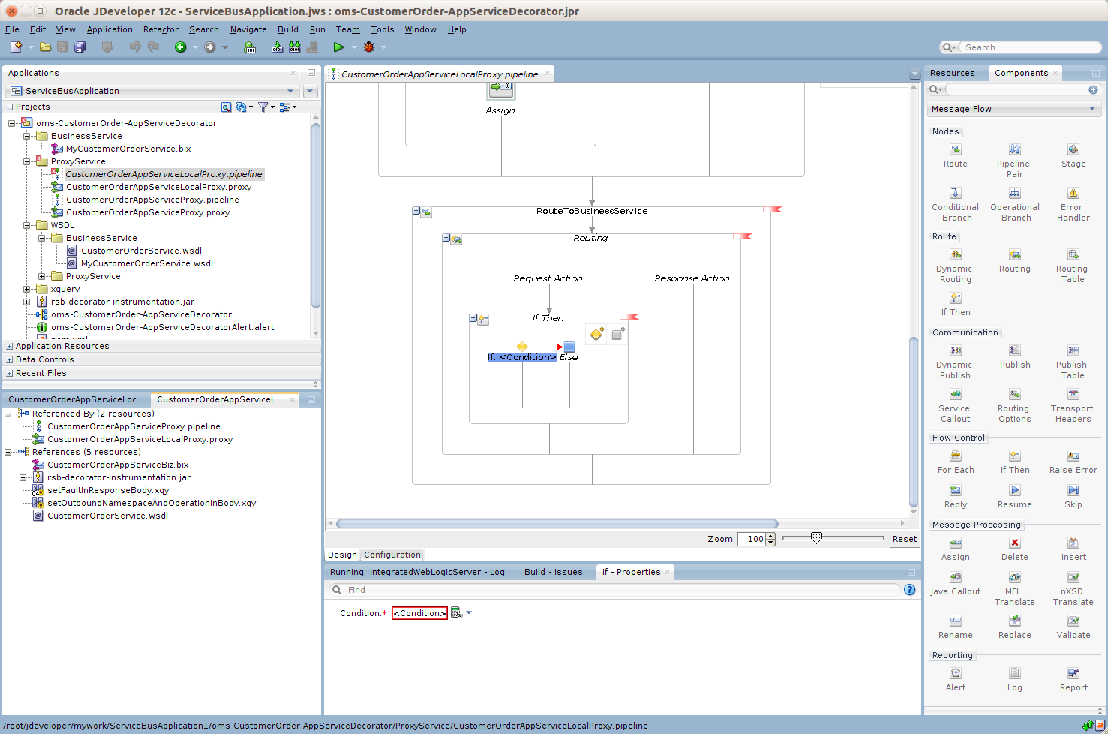
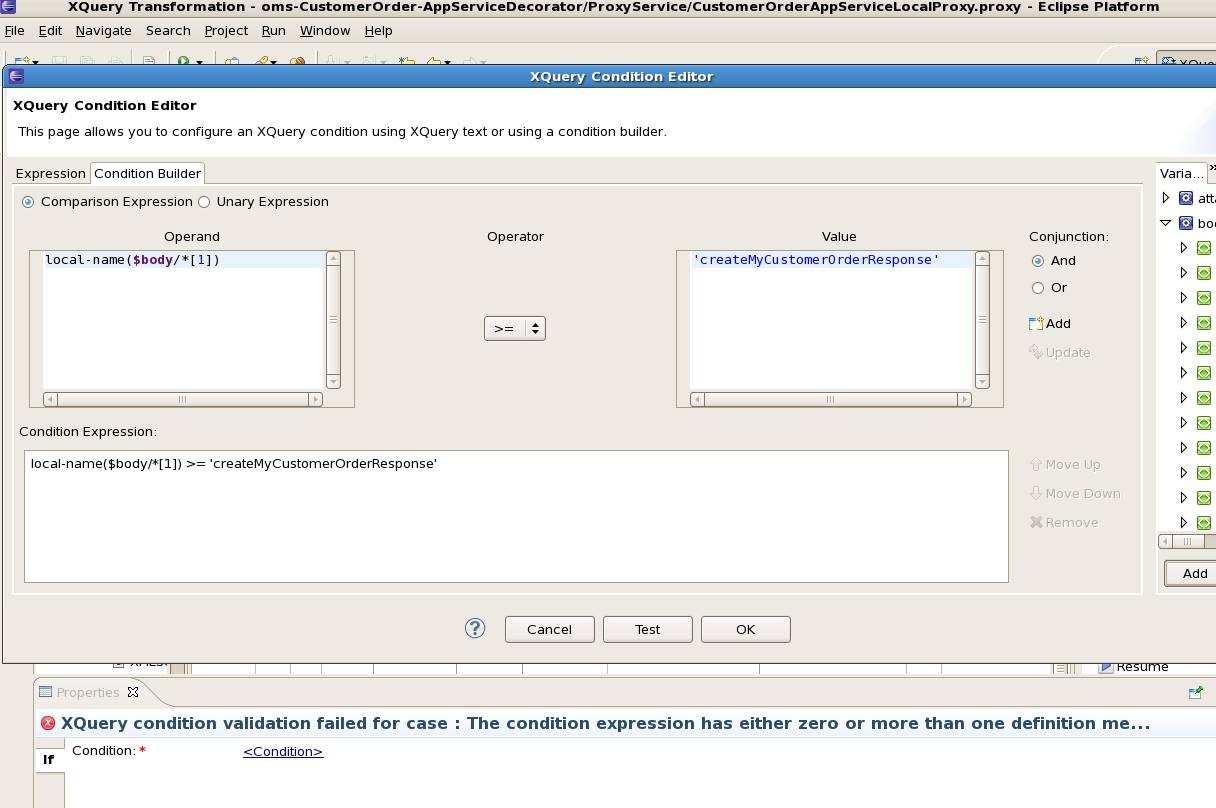
Click the <Condition> link and navigate to the Condition Expression Builder window. Here we need to build the condition for payload mapping. We will check for operation name to build the condition. Enter local-name($body/*[1]) in the Operand field, which gives the operation name in request xml. Select = in the Operator field. In the value field, we need to enter operation name which we want to look for, enter 'createMyCustomerOrder'. 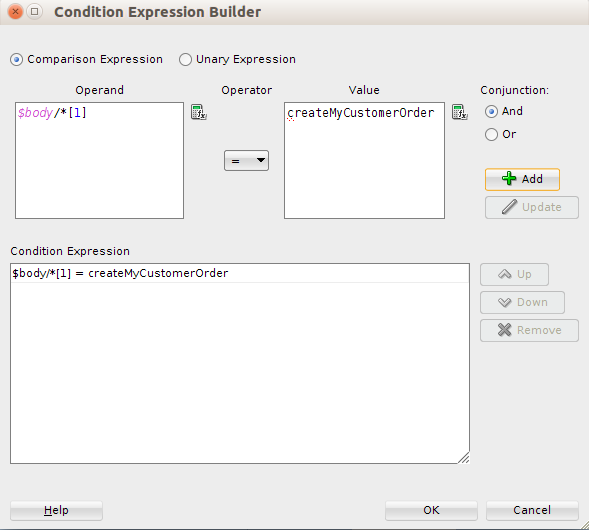
Click OK to add condition to the Condition Expression. 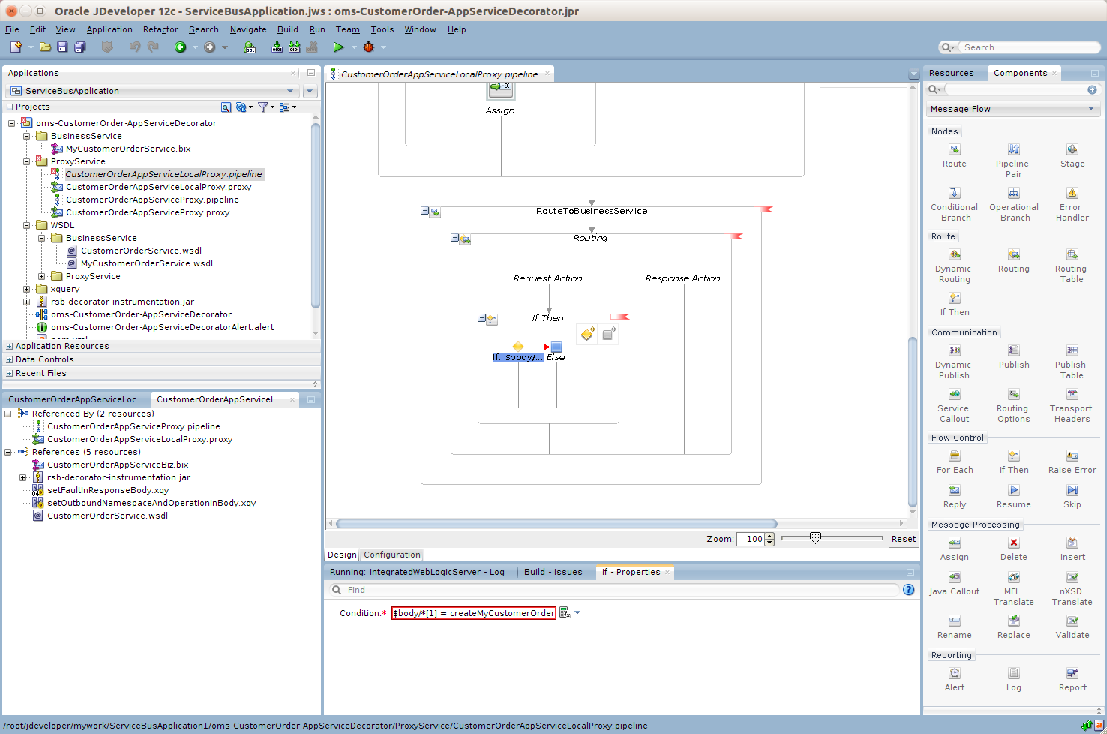
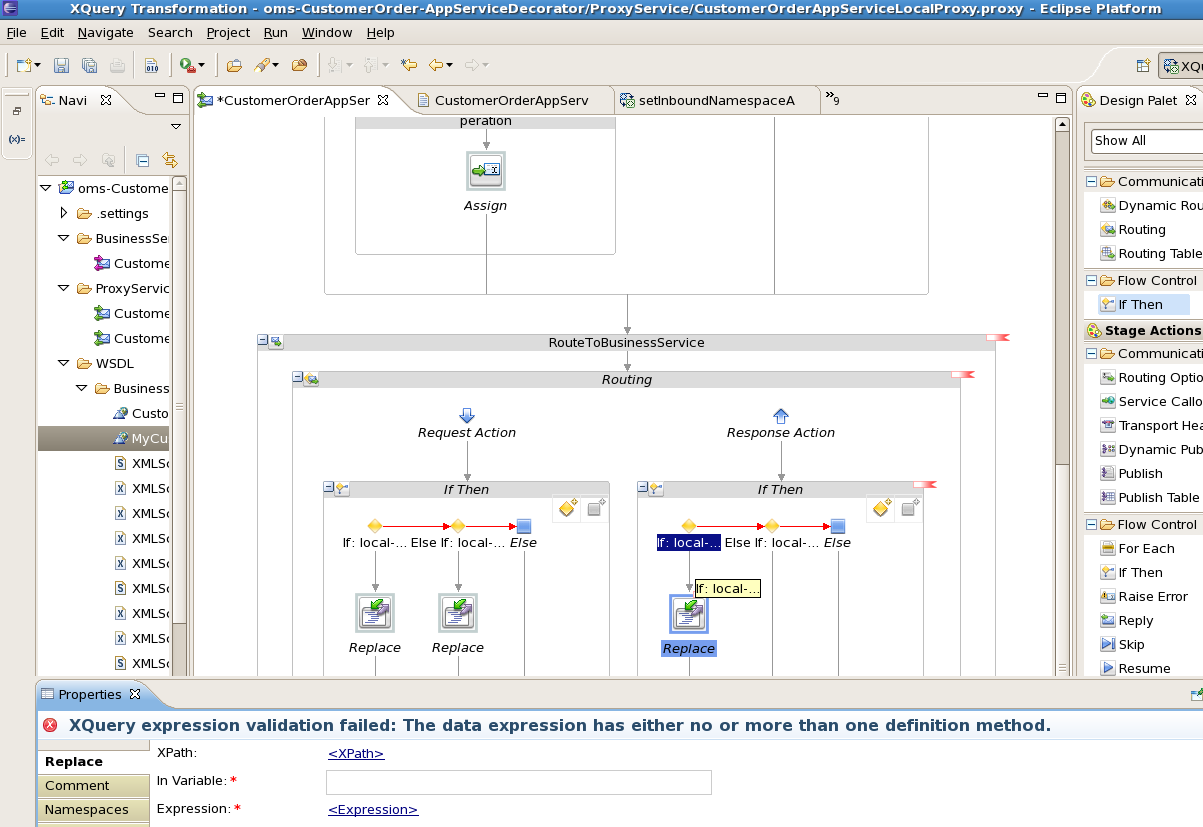
Add a Replace action for the first condition by dragging Replace component from components window. 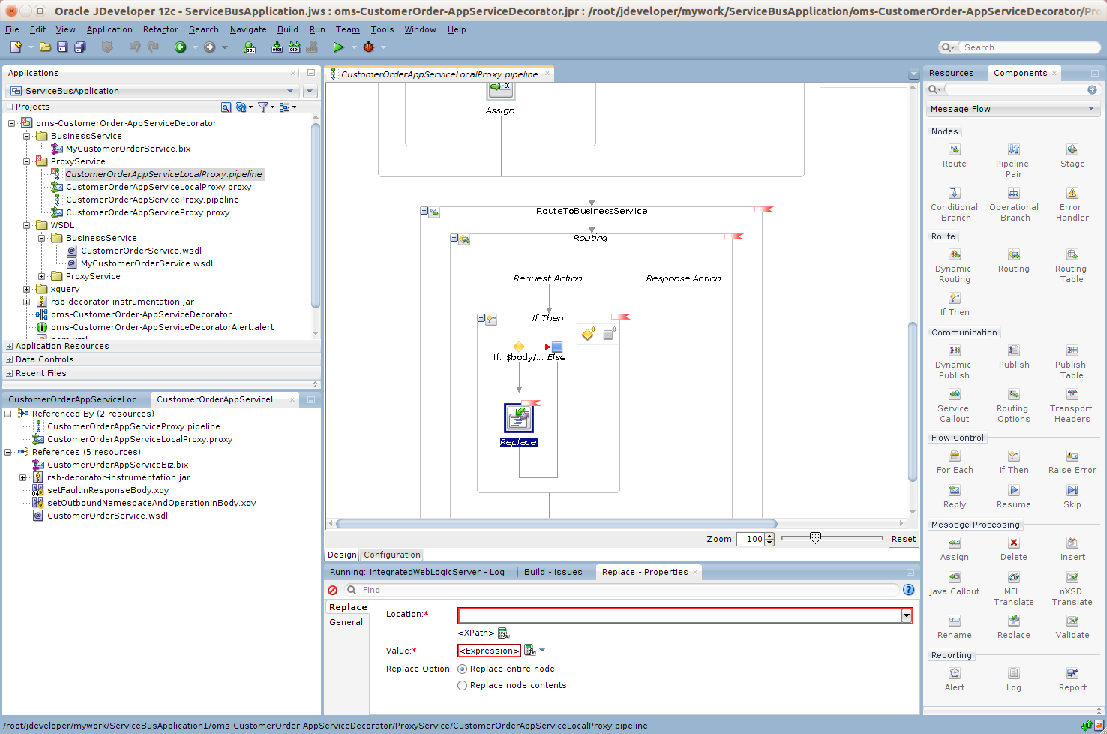
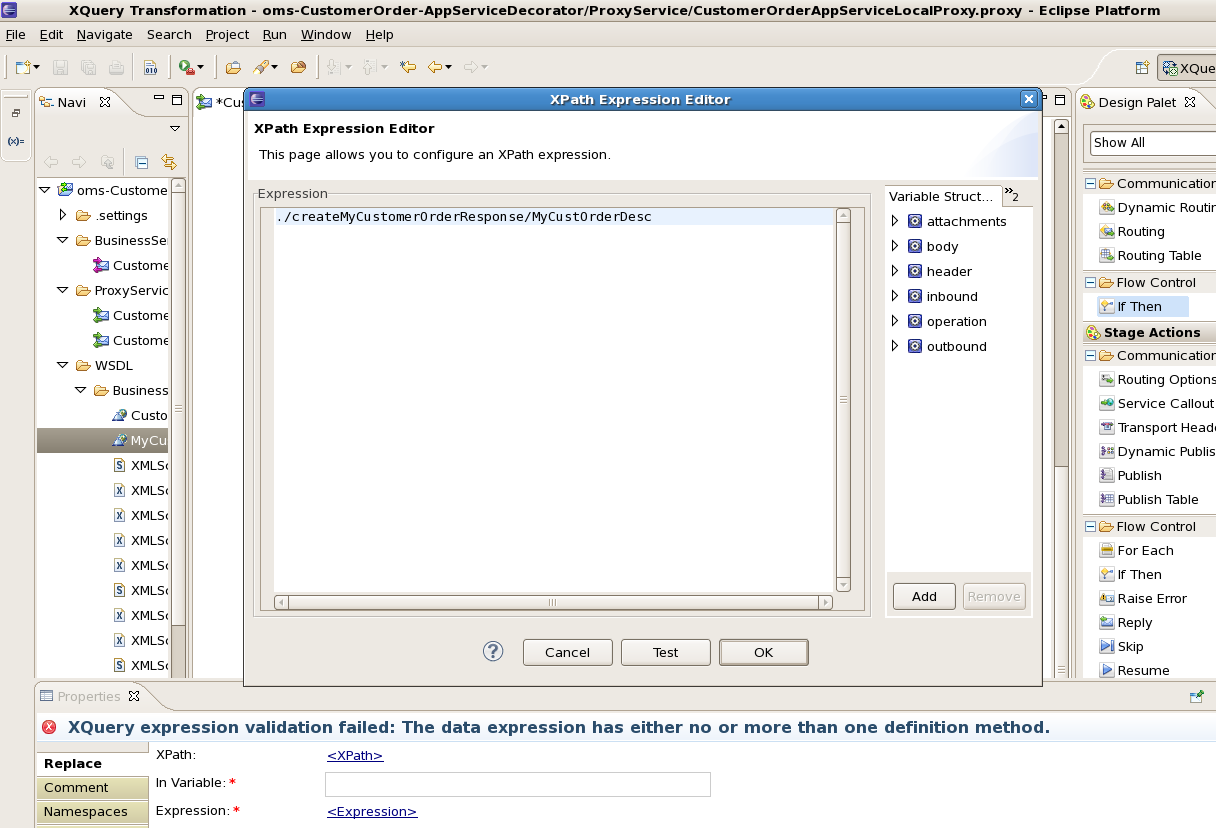
Click the XPath link under Location field of Replace Action. Here we need to provide xpath of the variable which we need to transform. 
Select CustOrderDesc and click Insert into Expression to add expression to Expression filed. 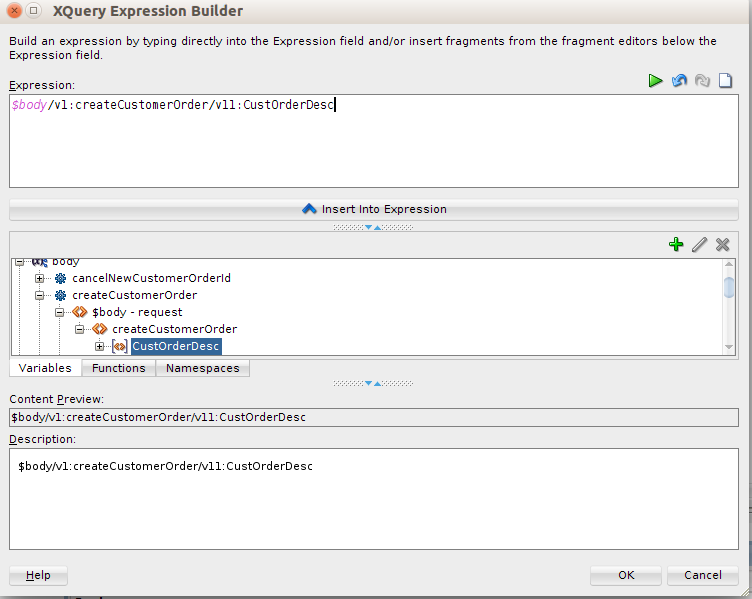
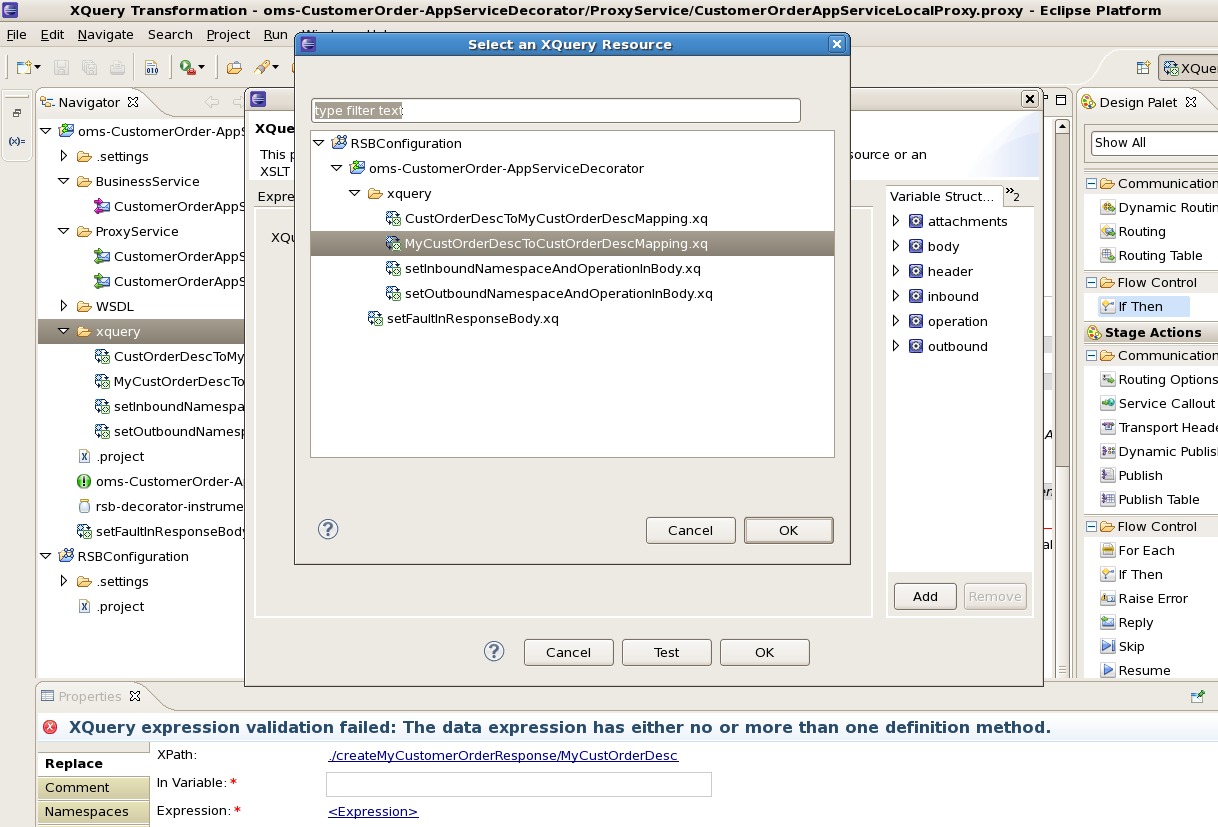
Click OK to return to the main window. Then click browse under the Xquery Resources field. Here we need to provide xquery which will return the transformed payload. 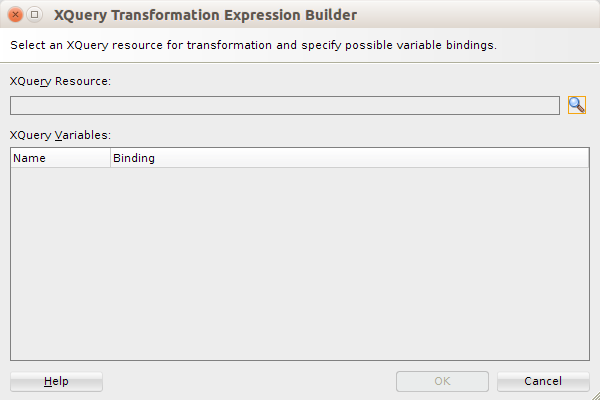
Click browse and select the xquery file.
In the Binding field, we need to provide path of the input payload which needs to be transformed. Click Xquery Expression Builder link and select CustOrderDesc. 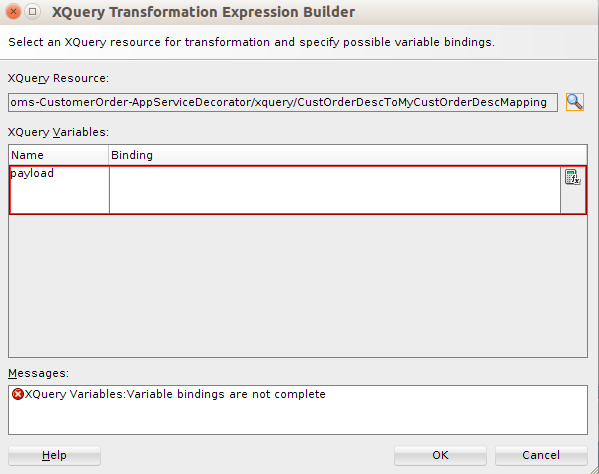
On the XQuery Expression Builder window, click OK. 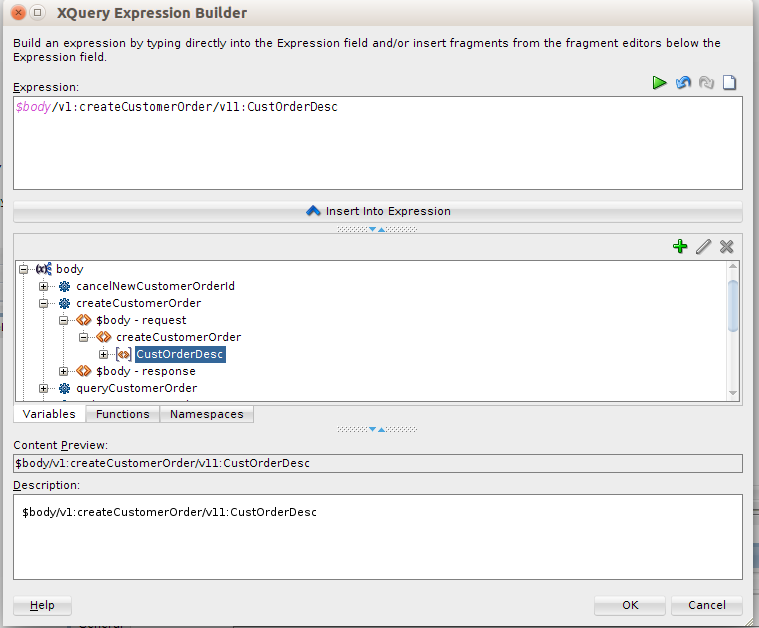
On the XQuery Transformation Expression Builder window, click OK. 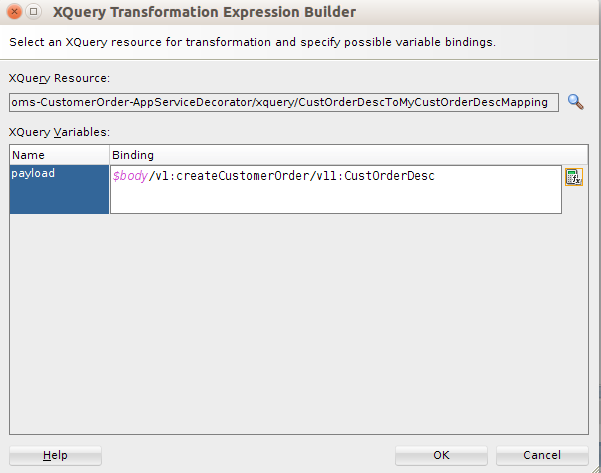
You can add more Replace actions if conditions to transform payload for each operation type are added. You will need to write xquery files for each input payload to output payload transformation. 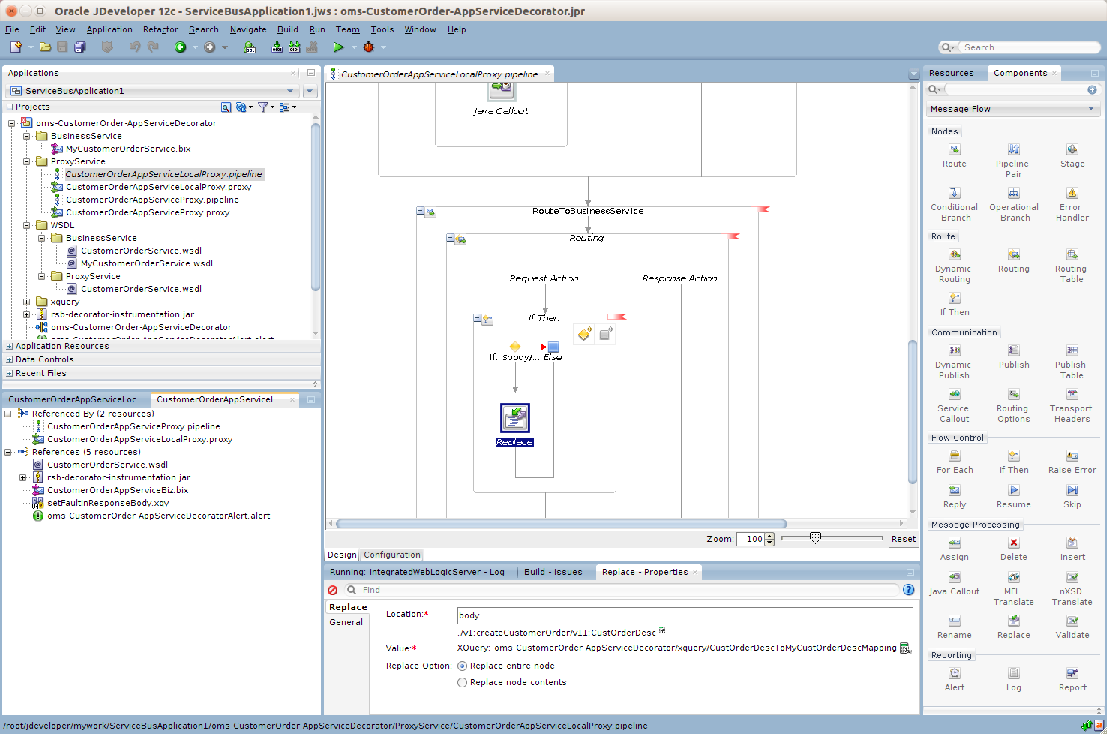
Similar transformations need to be performed, in reverse order, in the Response pipeline as well. This will transform MyCustOrderDesc to CustOrderDesc. To do this, write an xquery file which transforms MyCustOrderDesc to CustOrderDesc.
|
Note: The steps for creating xquery file will be exactly similar to the steps for creating CustOrderDescToMyCustOrderDescMapping file. The only difference will be that the source and target types will be reversed in this case. Here, the source type will be MyCustOrderDesc. |
Click OK to go back to properties window.
Add a Replace action in first if condition flow:
Click the <xpath> link. Here we need to enter the xpath of the element which needs to be transformed. Enter as shown below:
Click OK.
Click the <Expression> and go to XQuery Explorer window to select the xquery file. Select MyCustOrderDescToCustOrderDescMapping xquery file.
Click OK. In the binding field enter path to MyCustOrderDesc as that is the source payload for transformation:
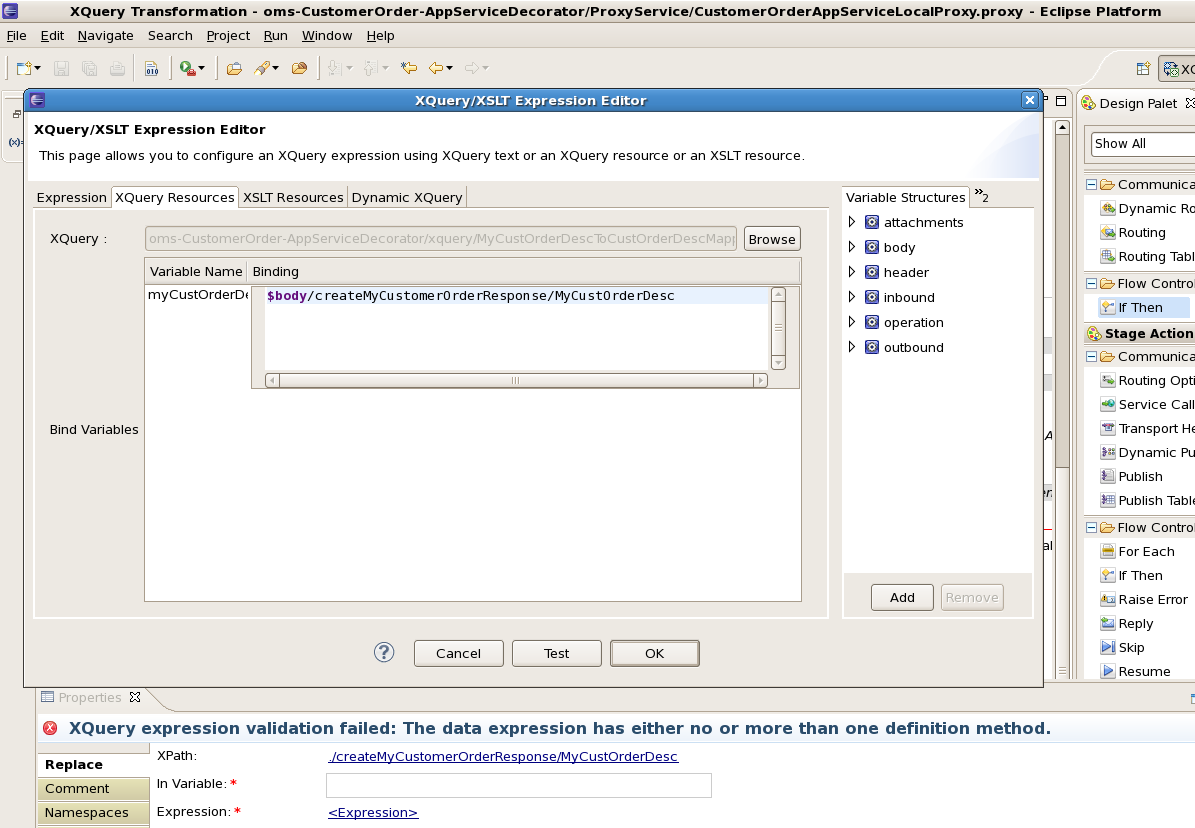
Click OK. In Variable field enter body.
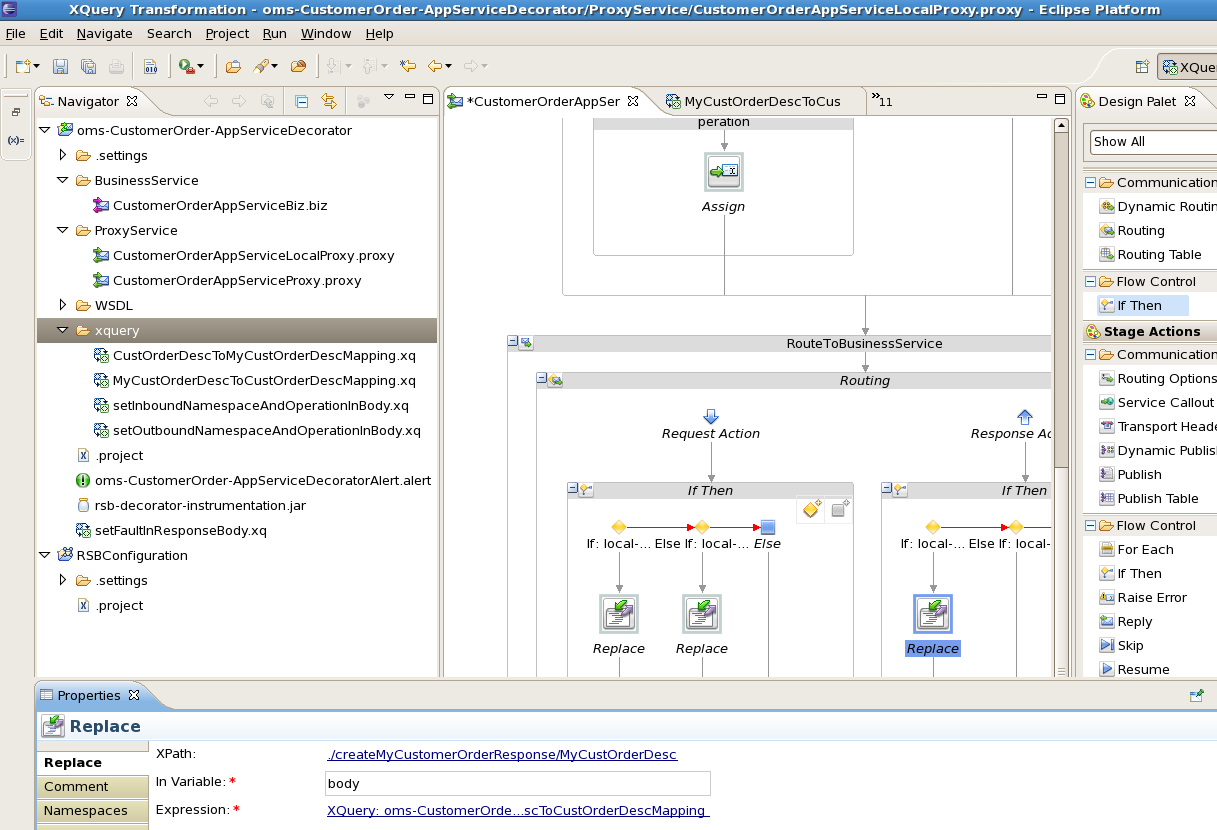
Add more replace actions for other if conditions in the if then flow:
This completes the steps for payload transformation in a message flow.
