| Oracle® Retail RICS Data Viewer (APEX/DDS) RICS Data Viewer Guide Release 19.3.000 F79086-01 |
|

 Previous |
 Next |
| Oracle® Retail RICS Data Viewer (APEX/DDS) RICS Data Viewer Guide Release 19.3.000 F79086-01 |
|
Previous |
Next |
This chapter talks about the steps to quickly set up basic users to enable querying data from the SQL Worksheet. We will be addressing the user management function for the admin user and basic functions on how to access schemas and tables, and query data.
|
Note: For more detailed usage information and instruction about APEX/ORDS please visit the following link:
|
APEX/ORDS supports adding and removing multiple users to a workspace. The admin user is the only user with the ability to manage other users. The administrator can create new user accounts, which can then be used by the respective users to query data.
|
Note: The URL to access ORDS instance setup for RICS is:https://<RICS_HOST>/ricsords |
To create a new user as an admin user, follow the steps below:
Sign into APEX/ORDS as an admin user.
At the top of the workspace home page, click the Administration menu and select Administration.
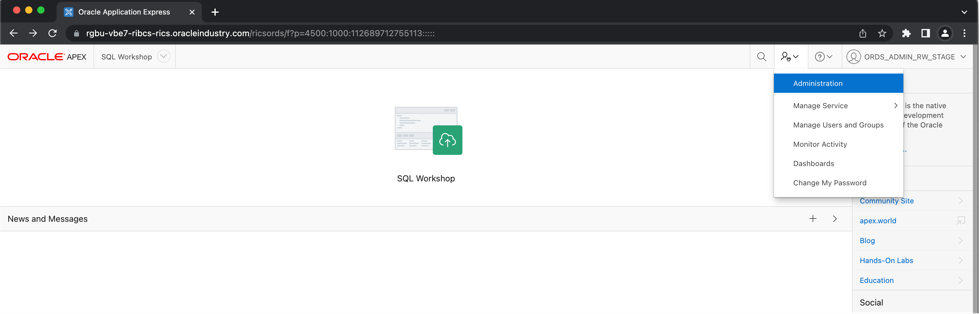
Click Manage Users and Groups.
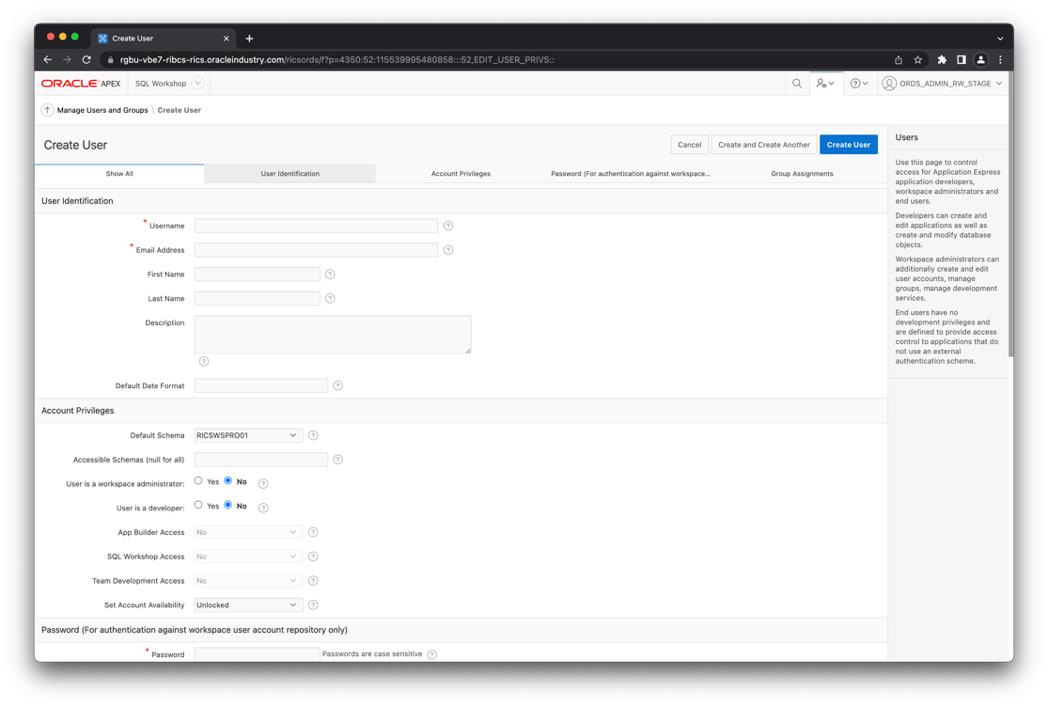
Click Create User.
The screen to enter the user details loads.
Enter the following information in the User Identification section:
Username - Enter the username used to sign into the system. Restrictions include:
Maximum length of 100 characters
No spaces
Only these special characters are permitted: ampersand (&) and period (.)
Email Address - Enter the valid email address for this user.
First Name - Enter the first or given name to further identify the user (optional).
Last Name - Enter the last or family name to further identify the user (optional).
Description - Enter comments about this user (optional).
Default Date Format - Specify the default Oracle date format for the user. This option controls the default date format within SQL Workshop.
Enter the following information in the Account Privileges section:
Default Schema - Specify the default schema used for data browsing, application creation, and SQL script execution. When using workspaces that have more than one schema available, this schema is the default. This setting does not control security, only the user's preference.
Accessible Schemas (null for all) - Enter a colon-delimited list of schemas for which this developer has permissions when using the SQL Workshop. The list of schemas you enter here restricts the user to a subset of the full set of schemas provisioned for the workspace and determines what schema names the user sees in SQL Workshop.
To specify Workspace administrator privileges:
User is an administrator - Select Yes.
|
Note: Administrator accounts automatically have all developer privileges enabled. |
To specify Developer privileges:
User is an administrator - Select No.
User is a developer - Select Yes.
App Builder Access - Determines whether a developer has access to App Builder. Use App Builder to create and manage applications and application pages. Select Yes or No.
SQL Workshop Access - Determines whether a developer has access to the SQL Workshop. SQL Workshop provides tools that enable you to view and manage database objects. Select Yes or No.
Team Development Access - Determines whether a user has access to the Team Development. Use Team Development to track and manage issues in a conversational fashion. Select Yes or No.
|
Tip: To create an End User account, disable both User is an administrator and User is a developer. End users can only run existing applications. |
Set Account Availability - Select Locked to prevent the account from being used. Select Unlocked to allow the account to be used.
Enter the following information in the Password section:
Password - Enter a case-sensitive password.
Confirm Password - Enter the password again.
Require Change of Password On First Use - Select Yes to require the user to change the password immediately when logging in the first time. Select No to allow the user to use the same password until it expires.
Group Assignments - Specify the groups to which this user belongs.
To assign a user to a group, select the group and click Move.
To select multiple groups, press and hold the [CTRL] key, select all the groups to assign, and then click Move All.
To remove a user from a group, select the group and click Remove.
Click the Create User button to create this user or the Create and Create Another button to create this user and refresh the fields to create another user.
To create multiple new users as an admin user follow the steps below:
Sign in to APEX/ORDS as an admin user.
At the top of the workspace home page, click on the Administration menu and select Administration.
Click Manage Users and Groups.
Click Create Multiple Users.
Now the screen to enter the user details loads.
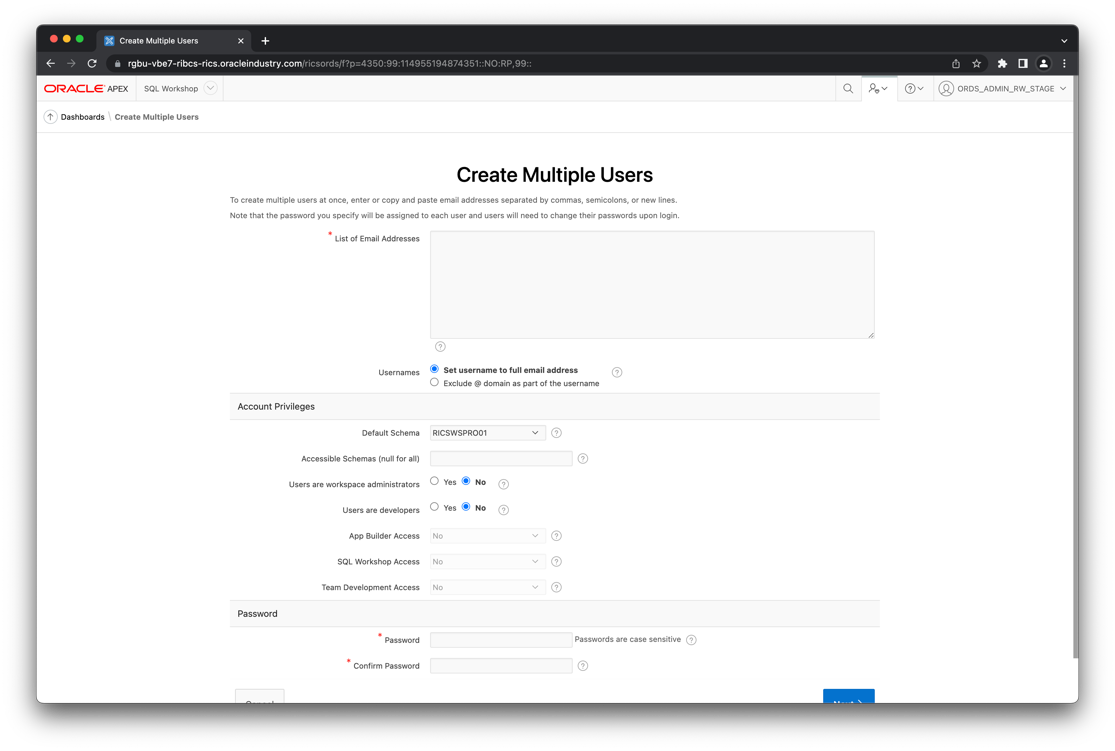
List of Email Addresses - Enter or copy and paste email addresses separated by commas, semicolons, or newlines.
|
Note: If you copy and paste email addresses from email messages, extraneous text will be filtered out. |
Usernames - Specify whether to include or exclude the domain name. Select one of the following:
Set username to full email address - Includes the full email address.
Exclude @ domain as part of the username - Removes all text after the @ symbol (for example, user1@xyz.com becomes user1)
In the Account Privileges section:
Default Schema - Specify the default schema used for data browsing, application creation, and SQL script execution. When using workspaces that have more than one schema available, this schema is the default. This setting does not control security, only the users' preferences.
Accessible Schemas (null for all) - Enter a colon-delimited list of schemas for which these developers have permissions when using the SQL Workshop. The list of schemas you enter here restricts the users to a subset of the full set of schemas provisioned for the workspace and determines what schema names the user sees in SQL Workshop.
Users are workspace administrators - Select Yes or No. Specify whether these users should have workspace administrator privileges. Like developers, workspace administrators can create and modify applications and database objects. Additionally, they can also manage user accounts, groups, and development services.
Users are developers - Select Yes or No. Specify whether these users should have developer privileges. Developers can create and modify applications and database objects.
App Builder Access - Determines whether these developers have access to App Builder. An administrator always has access to the App Builder. A Developer must have access to either the App Builder, the SQL Workshop, or both.
SQL Workshop Access - Determines whether these developers have access to the SQL Workshop. An administrator always has access to SQL Workshop. A Developer must have access to either the App Builder, the SQL Workshop, or both.
Team Development Access - Determines whether these developers have access to Team Development. An administrator always has access to Team Development.
In the Password section:
Password - Specify a password. Passwords are case-sensitive. Developers can change their own passwords. Developers with Administrator privilege can change the passwords of users within the same workspace.
Confirm Password - Enter the password again.
Click Next.
Click Create Valid Users.
Once the users have been set up you may want to immediately start working with data in the tables that have been made available through the application.
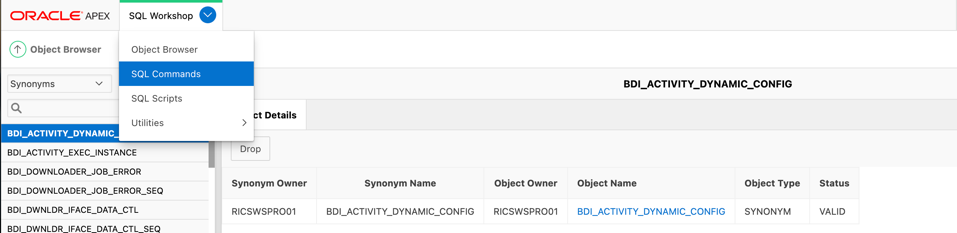
The tables available in the application are visible as synonyms of the actual tables. To view them follow these steps:
Sign into APEX/ORDS.
At the home page click SQL Workshop.
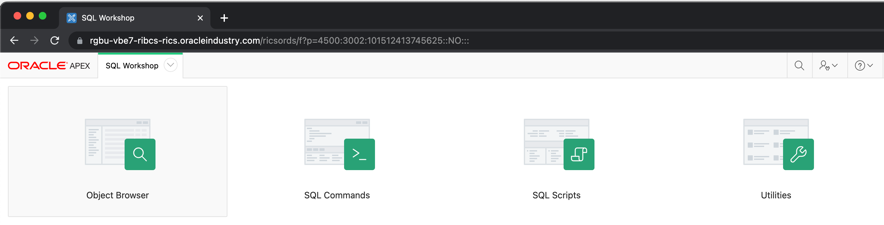
Click Object Browser.
Once the page loads, click the drop-down box that reads Tables.
Now select Synonyms from the list.
The tables that are available to be queried will now be listed. They will be listed in an alphabetical order. You can also search the list of tables using the search box.

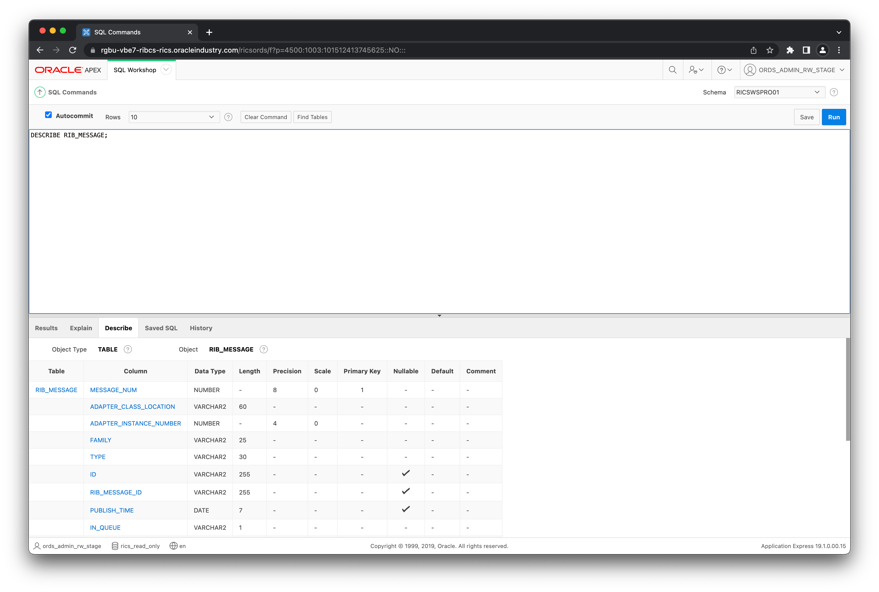
APEX can show the table definition with the DESCRIBE SQL command in the SQL Workshop in a tabular format.
To see the table definition, follow these steps:
Go to the SQL Commands window by clicking the drop-down menu next to the SQL Workshop tab at the top of the screen.
The page now loads with a large text box.

Type the SQL Command to get table definition details:
DESCRIBE RIB_MESSAGE;
Select the text and click Run.
The table definition should now appear in the results window below.
APEX can query data from the tables available and the queried data is displayed in a tabular format.
To query data do the following:
Go to the SQL Commands window by clicking the drop-down menu next to the SQL Workshop tab at the top of the screen.
The page now loads with a large text box.
Type the SQL Command to query table data. For example:
SELECT * FROM BDI_SYSTEM_OPTIONS;
Select the query which you want to run and click on Run.
The query results should now appear below in a table.
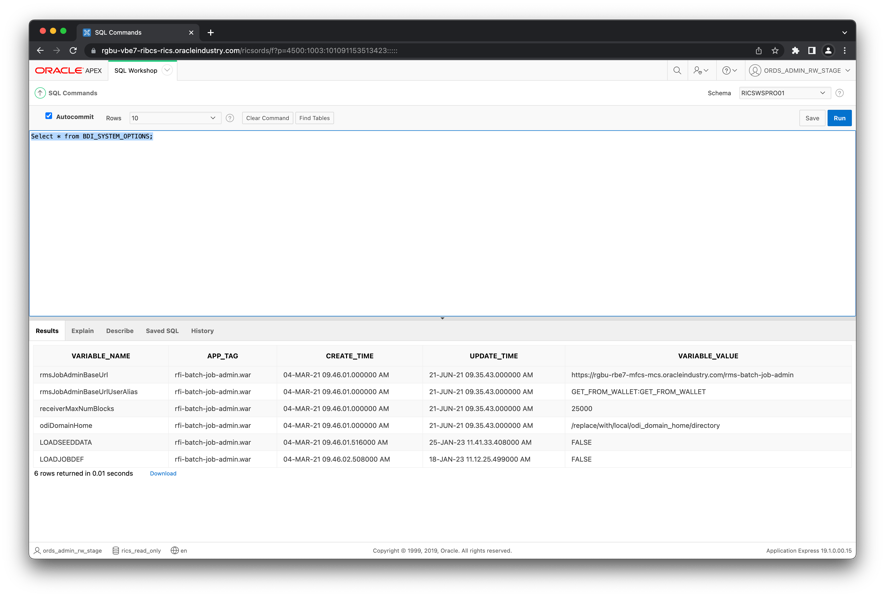
|
Tip: You can download the query results by clicking Download at the bottom of the query results table. |
