This section discusses how to set up a schedule. (Not applicable for CFIN.)
Setting Up a Schedule
This section covers the following topics:
-
Part I: Set Up Master Repository and Work Repository
-
Part II: Set up Domain Value
-
Part III: Set up EBS source
-
Part IV: Scenario test
Part I: Set Up Master Repository and Work Repository
|
Note:
If you haven't had a master and work repository created, you need to create it beforehand according to the sections F.3, F.4, F.5 and F.6 in Oracle Data Integrator Installation guide 12.2.4 or follow the steps given below. It is better to create master and work repository schema in server where ODI is installed. |
Create master repository
Pre-Requisite:
-
Create Database schemas for Master Repository and Work Repository. It is better to create master and work repository schema in server where ODI is installed.
-
Make sure RFI_ODI_TEMP schema exists in Oracle Financials (EBS or PeopleSoft) suite database. You should skip this step if the financials system is CFIN.
-
Make sure RFI Infrastructure Database setup is completed.
-
Give DBA privileges to schema "AP" in case of E-Business suite and "SYSADM in case of PeopleSoft database. You should skip this step if the financials system is CFIN.
Launch ODI Studio, Click File > New and select Master Repository Creation Wizard
Enter the Master Repository Database connection details and Click Next.
-
Database Connection
Enter valid Master Repository schema details.
|
Note:
You have to enter sysdba credentials in DBA User and DBA Password fields. |
-
Repository Configuration
Enter any Id other than 804, 805 in ID field.
Enter "SUPERVISOR" password and Click Next .
Click Next.
Click Finish.
RFI Create work repository
To create a work repository, take the following steps:
-
Login to Master Repository in Oracle Data Integrator (ODI) Studio to create a Work Repository.
-
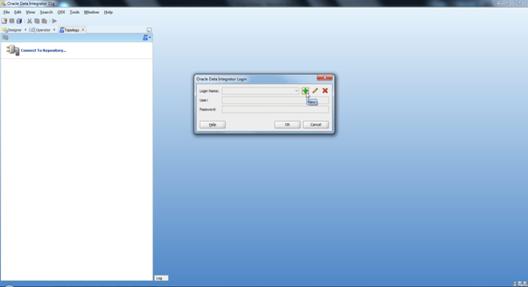
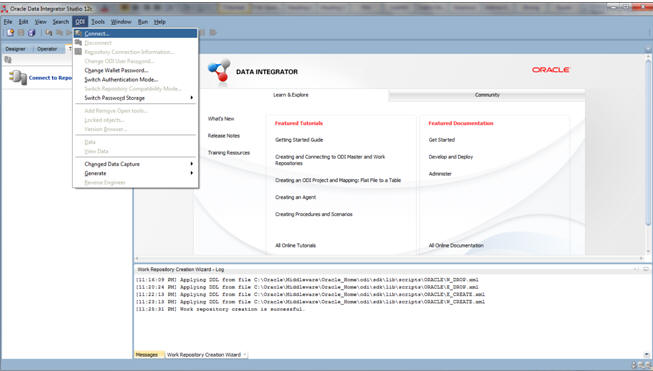
Select the ODI MenuàConnect option.
-
Create Master Repository login credentials selecting the + button from a Oracle Data Integrator Login popup.
-
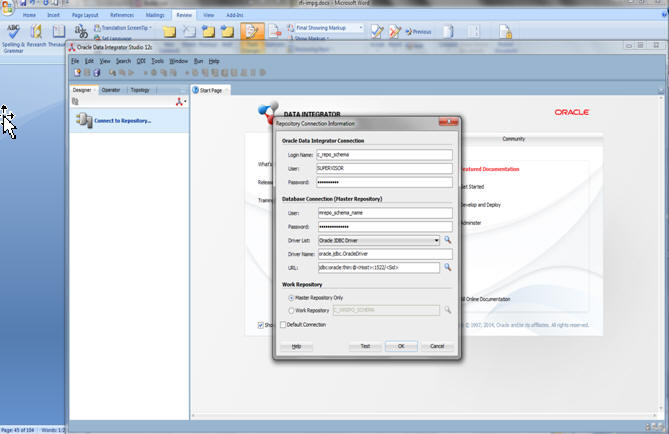
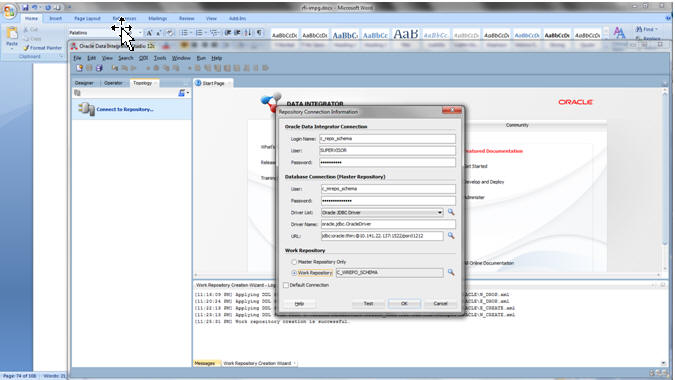
Update Repository Connection Information as below:
-
Oracle Data Integrator Connection
Login Name: <Login Name>
User: <Enter "SUPERVISOR" in this field>
Password: <Which you had entered in step 2.4 from Create Master Repository section.>
-
Database Connection (Master Repository)
Enter Master Repository database credentials for User and Password fields.
Select "Oracle JDBC Driver" from dropdown list for Driver List field.
Enter Url field as below:
jdbc:oracle:thin:@<host>:<port>:<sid>
-
Work Repository
An option should be select as "Master Repository Only".
-
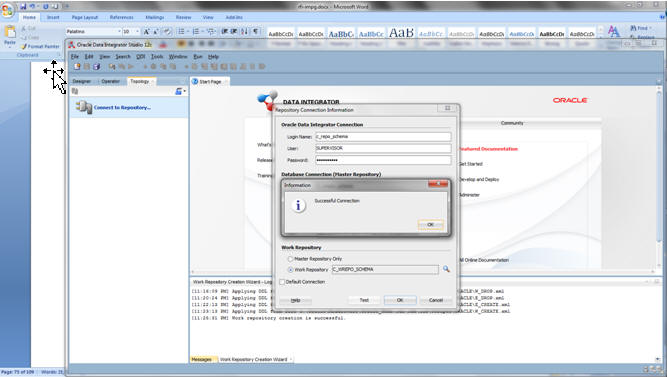
Test your credentials information by using "Test" button. If it is successful then click OK.
-
Select OK from Oracle Data Integrator Login popup.
-
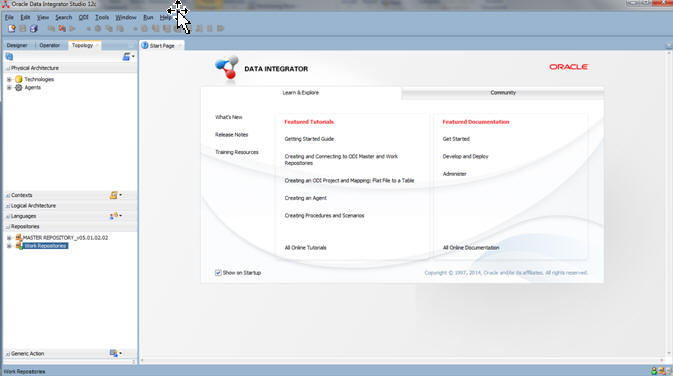
From Topology tab select Repositories, right click on the Work Repositories. Select the New Work Repository option.
-
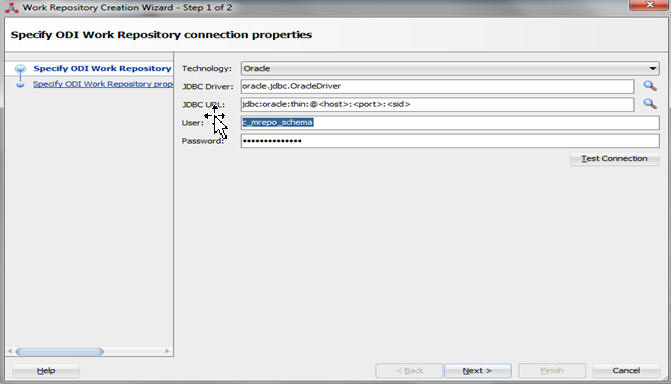
Enter the work repository database credentials details.
-
Test your credentials information with using "Test" button. If it is successful then click Next.
-
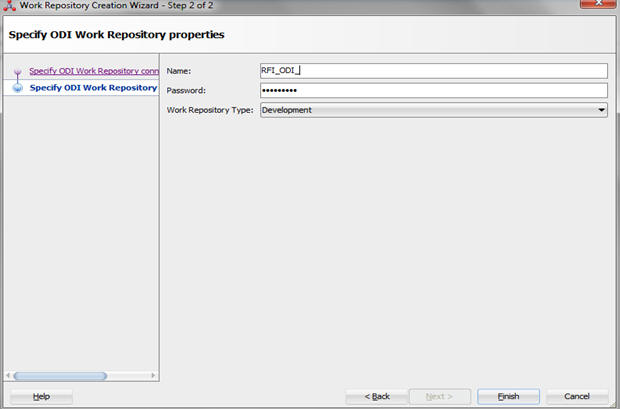
9. Update ODI Work Repository properties. Enter Name and Password (should be "SUPERVISOR" password) for work repository and click Finish.
-
-
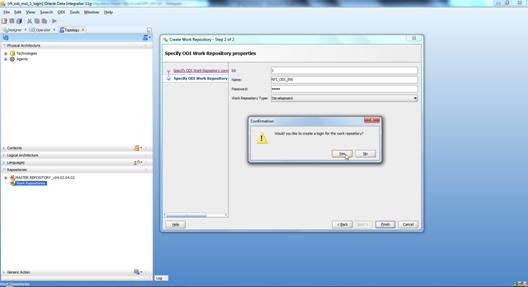
Select Yes to create an ODI login for work repository.
-
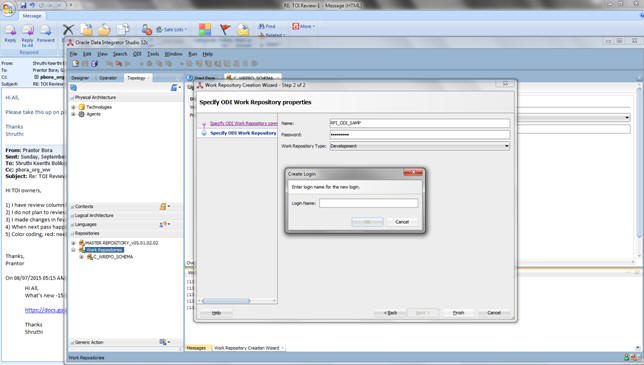
Enter ODI work repository login name in the popup.
-
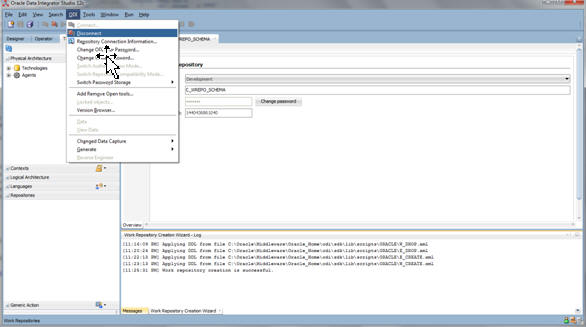
Select the ODI Menu->Disconnect option to connect Work Repository.
-
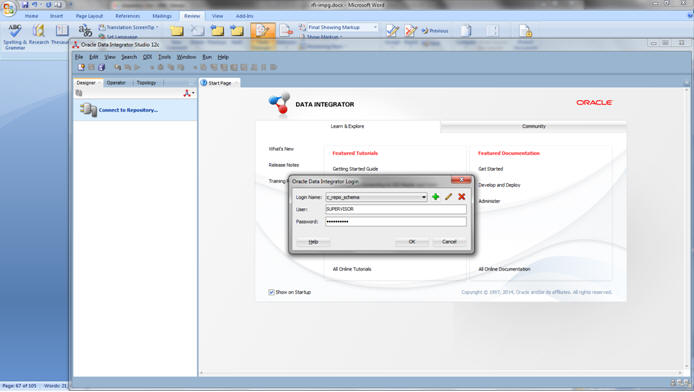
Select the ODI Menu->Connect option.
-
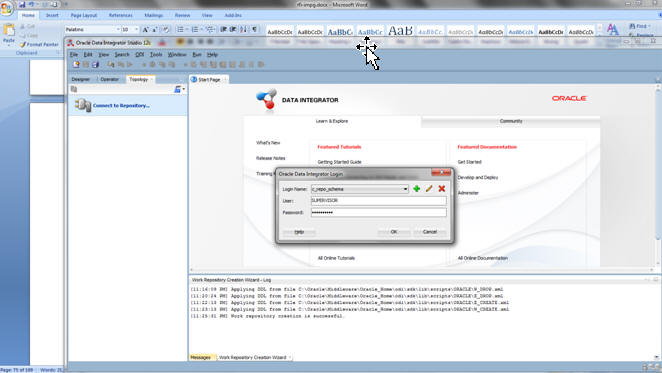
ODI Login popup select Login Name from dropdown list (select which you had created in previous step7).
-
Enter user as "SUPERVISOR".
-
Enter "SUPERVISOR" password.
-
Select edit option.
-
Validate Repository Connection Information:
-
Oracle Data Integrator Connection
-
Login Name: <work repository login name>
-
User: <"SUPERVISOR">
-
Password: <SUPERVISOR Password>
-
Database Connection (Master Repository)
-
Validate Master Repository database details.
-
Work Repository
-
Select Work Repository option and select the repository which you had created in step 1.8.
-
Test your credentials information with using "Test" button. If it is successful then click OK.
-
Select OK from Oracle Data Integrator Login popup.
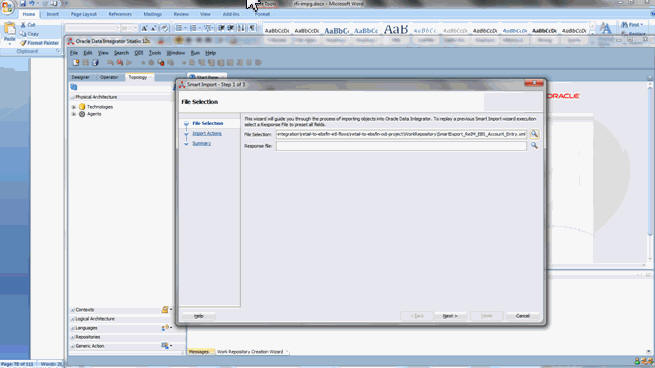
Smart Import the ODI interfaces
-
Import the ODI interface RMS to E-Business Account Entry or RMS to Peoplesoft Account Entry (Depends on the Oracle Financials System that is integrated to RFI).
-
Select SmartExport_RMS_EBS_Account_Entry.xml (EBS Integration) or SmartExport_RMS_PSFT_Account_Entry.xml (PeopleSoft Integration) file in the File Selection Field.
-
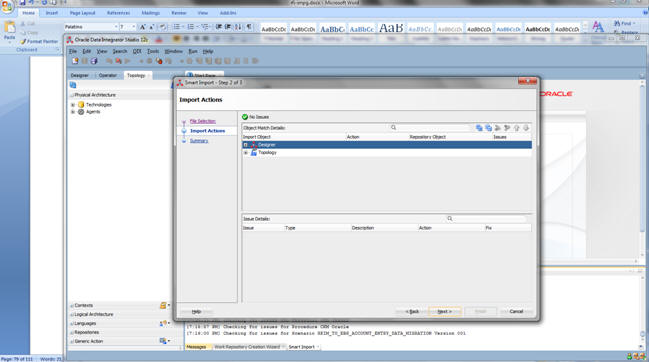
Click Next.
-
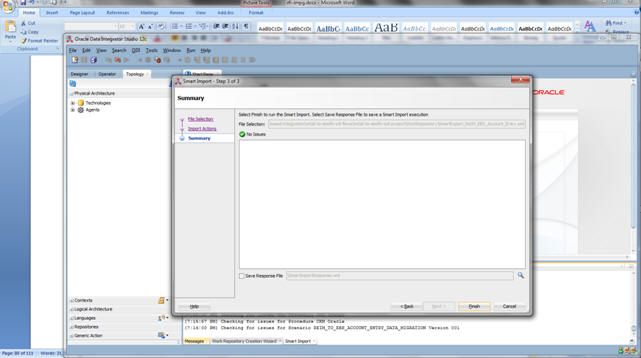
Click Next.
-
Click Finish.
Similarly perform Smart Import for the other ODI Interfaces.
-
SmartExport_ReIM_EBS_Account_Entry.xml (EBS integration) Or SmartExport_ReIM_PSFT_Account_Entry.xml (PeopleSoft integration)
-
SmartExport_ReIM_EBS_Invoice_Entry.xml (EBS integration) Or SmartExport_ReIM_PSFT_Invoice_Entry.xml(PeopleSoft integration)
|
Note:
If any of the interface is missing in ODI, please copy the missing interface from RFI to ODI.
In addition, if any of the interfaces is in an invalid state, follow the instructions below.
-
Import the interface using smart import option from ODI studio.
-
Expand all the objects to find out the invalid one and choose the second option from the dropdown and click next.
-
Continue the same steps for all the invalid objects.
|
Update Connection Information
In Topology, under Physical Architecture, Technologies > Oracle, Update Database Connection detail in Physical Servers and Physical Schemas as given in the table below.
The below table shows the Topology Configurations, if the EBS is the Oracle Financials system that is integrated with:-
In Physical Schema, make sure the context (Global and RETL_TO_EBIZ) is mapped to Logical Schemas as given in the table below. If some mapping is missing, map the Logical schemas as given in the table below:
If integrating Oracle Financials application is PeopleSoft, Please validate the below details:-
The below table shows the Topology Configurations, if the PeopleSoft is the Oracle Financials system that is integrated with:-
In Physical Schema, make sure the context (Global and (RETL_TO_PSFT) is mapped to Logical Schemas as given in the table below. If some mapping is missing, map the Logical schemas as given in the table below:
Part II: Set Up Domain Value Maps
Enter appropriate values to the DVM table (RFI_XREF_DVM).
|
Note:
EXT_SYSTEM column mentioned below can have only one of the three values, either EBS or PSFT or CFIN. It should not have any other value. On the same instance of RFI_XREF_DVM, it should have only one of three EBS, PSFT and CFIN value in the EXT_SYSTEM COLUMN. |
Enter appropriate values for Mail option (RFI_XREF_DVM).
The FROM Email Address and TO Email Address List will be specified during RFI deployment.
Part III: Set up EBS source data
If the EBS is the system RFI in integrating with then:
-
Login to EBS self-service, navigate to General Ledger responsibility, Setup > Journals, launch Categories form, enter the following categories:
-
Launch Sources form, enter the following sources:
-
Navigate to Payables responsibility, Setup > in the Lookups menu, launch Payables form.
Part IV: Scenario test
In this part, you need to do similar things to the three packages in this RFI. In this guide we only use package, Migrate RMS To EBIZ Acc Entry Package, for example.
Agents and Scenario
Oracle Data Integrator run-time Agents orchestrate the execution of jobs. The run-time agent functions as a listener and a scheduler agent. The agent executes jobs on demand (model reverses, packages, scenarios, interfaces, and so forth). The agent is also to start the execution of scenarios according to a schedule defined in Oracle Data Integrator. Schedules can be attached to scenarios and also to Load Plans. In ODI Topology, navigate to Physical Architecture > Agents.
Make sure the RFI_AGENT is available and default to port 20910.
Run Agent Scheduler
-
Modify odiparams file and set the following lines to connect them to the work repository. For example:
In Windows OS (odiparams.bat),
set ODI_MASTER_DRIVER=oracl.jdbc.driver.OracleDriver
set ODI_MASTER_URL=<JDBC Connection URL to ODI>
set ODI_MASTER_USER=<ODI Master Schema>
set ODI_MASTER_ENCODED_PASS=< ODI Master Schema password>
set ODI_SUPERVISOR=SUPERVISOR
set ODI_SUPERVISOR_ENCODED_PASS=<ODI SUPERVISOR password>
set ODI_SECU_WORK_REP=<ODI Work Repository name>
In Linux/Unix OS (odiparams.sh),
ODI_MASTER_DRIVER=oracle.jdbc.driver.OracleDriver
ODI_MASTER_URL=<JDBC Connection URL to ODI>
ODI_MASTER_USER=<ODI Master Schema>
ODI_MASTER_ENCODED_PASS=< ODI Master Schema password>
ODI_SUPERVISOR=SUPERVISOR
ODI_SUPERVISOR_ENCODED_PASS=<ODI SUPERVISOR password>
ODI_SECU_WORK_REP=<ODI Work Repository name>
You can use the following command to generate the encoded password:
encode <password>
Go to a CMD prompt and type
agent "-NAME=<physical agent name>"
For example
agent "-NAME=RFI_AGENT"
You should get a message that the agent is started successfully.
Generate scheduler
In ODI designer, navigate to Load Plans and Scenarios, select scenario MIGRATE_RMS_TO_EBIZ_ACC_ENTRY_PACKAGE (For EBS integration) or MIGRATE_RMS_TO_PSFT_ACC_ENTRY_PACKAGE (For PeopleSoft integration).
Select Existing Scheduling. Make sure the context is set to RETL_TO_EBIZ (For EBS integration) or RETL_TO_PSFT (For PeopleSoft integration) and agent is selected as RFI_AGENT.
Update schedule
Go back to Topology and find your Physical Agent, right click and update schedule.
Check
The agent runs at a predefined execution time as given in the schedule. When it runs, you can check it in the Operator. You can also check the data in Oracle Financials side in the interface tables if the execution is successful and data has flown to Oracle Financials interface tables.
Run import program
When running the import program, enter the source name you set up in previous steps.
When the import program is complete, you can check the data in the Oracle Financials transaction tables.