| Oracle® Identity Manager Design Console Guide Release 9.0.3 Part Number B32453-01 |
|
|
View PDF |
| Oracle® Identity Manager Design Console Guide Release 9.0.3 Part Number B32453-01 |
|
|
View PDF |
This chapter describes how to use the basic features of Design Console. Oracle recommends that you review this section before proceeding to later chapters of this manual.
This chapter contains the following sections:
The behavior of the basic features of Design Console is standard for all forms to enable ease of use. This section describes the standard behaviors and the field and window types in the Design Console main screen.
Data fields are display areas in forms that present information related to a specific record. For example, First Name may be a data field on the Users form.
The label of a field may be displayed in black or blue.
A black label indicates that this field is a standard field.
You can query, create, modify, or delete information in this type of field.
A blue label indicates that the data in this field is derived from a pre-defined list of values supplied using a Lookup or a Date & Time window.
When you double-click this type of field, the applicable Date & Time window or Lookup window appears. You can then select a date, time, or a lookup value.
The value of a field may be displayed in black or red.
If the field value is displayed in black, the data in this field is provided by the user.
You can query or edit the information in these types of fields.
If the field value is displayed in red, the data in this field is provided by Oracle Identity Manager.
Values of this type are read-only. This prevents users from overwriting critical information.
A lookup field enables you to search for a value. The following procedure describes how to use lookup fields.
To use lookup fields:
If the Lookup dialog box contains a short list of fields, click a field, then click OK.
Alternatively, you can select the field and press the F4 key.
Click Cancel to close the Lookup window without selecting anything.
Figure 4-1 displays the Lookup dialog box.
If the Lookup dialog box contains a long list of values, enter the first few characters of the value you want in the Find box, followed by a wildcard (*), then click the Search button.
The Lookup dialog box displays the results that match your search.
The Date & Time window enables you to select a month, year, date, and time. This window appears when you double-click a field that is equipped with it.
To select a date and time:
Double-click the field where you want to enter a date and time.
You can also display the Date & Time window by selecting the desired field and pressing the F4 key.
The Date & Time window appears.
Click the box.
From the pull-down menu, select the desired month.
From the Date scroll box, select the desired year
Click the desired date on the calendar.
From the Time scroll box, select the desired time
Click OK to save your changes.
The Date & Time window disappears. The field that you double-clicked in Step 1 now displays the date and time you selected.
Click Cancel to exit without saving.
Box fields are equipped with a list of pre-defined values. When you click a box, its values are displayed. If the list contains more values than can be displayed at one time, a vertical scroll bar appears to the right of the list.
When you select a value, the list disappears, and the selected value appears in the box.
The Notes window enables you to enter supplemental information for a record. When used with adapters, this window also displays the code that Design Console generated while compiling the adapter.
Tip:
For more information on adapters, refer to Oracle Identity Manager Tools Reference Guide.Note:
In the following procedure, if the Notes button is red, the current record already has a note. To view the note, click the button. You can enter supplemental information in this record. Each entry receives a unique date, time, and user stamp.To use the Notes window:
Query for the desired record.
Click the Notes button.
The Notes window appears.
Enter information in the text area of the Notes window.
Click the icon that represents a man to store your information into the Notes window.
Or, click Close to close the Notes window without saving.
From the Toolbar, click the Save button.
The information you entered into the Notes window is saved.
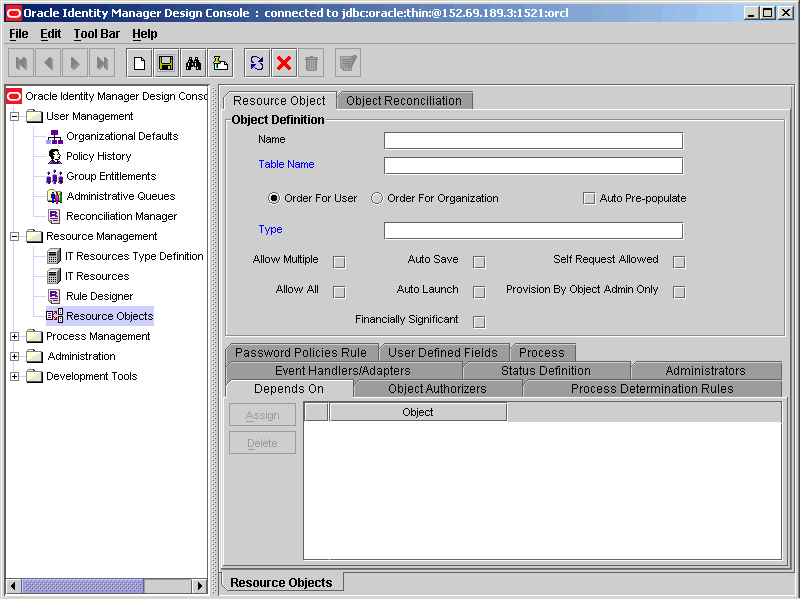
Most Design Console forms contain multiple tabs. The tabs are usually located in the lower region of the form. The tabs display additional information about a record, for example, the users who are employed at an organization, as shown in Figure 4-2.
Figure 4-2 Design Console Design Console - Tab on Forms

Each tab has its own tables and function buttons. Usually, the buttons on a tab are not enabled until the information in the upper portion of the form is saved. The table displayed in the tab enables you to view and edit the records associated with that tab item.
To modify information in a row of a tab's table, either double-click the field that contains the information you want to edit, or double-click the associated row header.
The User Form Assignment windows enable you to select and assign available entities to a record. The Assignment window appears when you click the Assign button.
The left panel of this window lists items that you can assign to the record, for example, Organization. The right panel lists the items that have already been assigned to the record. Although the values available for selection in the left and right panels are unique to what is being assigned or unassigned, the buttons and general use of this dialog box are consistent throughout the application.
The following are methods for working with this window:
To select multiple non-consecutive items, hold down the CTRL key while selecting items with the mouse.
For example, you can select the User Group, the IT Resource Type Definition object, and the Form Information object, but not the Process Definition object.
To select multiple items that are listed consecutively, hold down the SHIFT key and select the first and last items with the mouse.
To assign one or more items, select it so that it is highlighted and click the right-pointing arrow.
To unassign one or more items that are assigned already, select it, and click the left-pointing arrow.
When you are done, click OK. If you click Cancel, all assignment changes you made are discarded.
Design Console enables you to perform searches, also referred to as "queries," for records in the database. Every form in Design Console provides a search function. The search function is also available in lookup fields.
To conduct a search, click the binoculars icon on the toolbar: ![]()
Description of the illustration sight.gif
You can filter the search criteria in a form field. This limits the results that are returned to only the records that match the criteria you entered. If you leave all form fields blank prior to conducting the search, all records in the table are returned.
You can use a wildcard in a search. The asterisk (*) wildcard character represents unspecified portions of search criteria. You can use a wildcard at the beginning, middle, or end of the value that you enter in a field. For example, if you enter B* in the Location field of an Design Console form and execute a search, you retrieve all records with locations that begin with the letter B (for example, Burbank, Boston, Bristol, and so on). If the * character is placed in the middle of a search value, as in Br*on, you retrieve all records that begin with BR and end with ON (for example, Brighton, Boston, and so on) If you place the * character at the end of the search value, as in *A, you retrieve all records that end in A (for example, Philadelphia, Tampa, and so on).
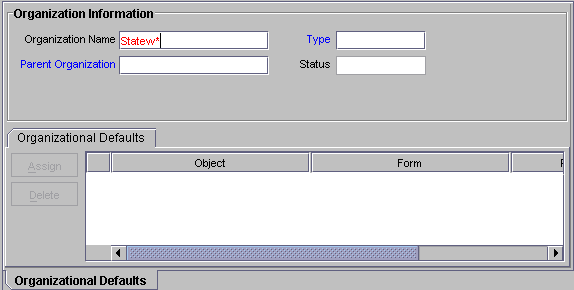
In Figure 4-3, a query is performed on the Organizational Defaults form and the Organization Name field is used to filter the search criteria. The filter Statew*; ensures that only organizations with names that begin with Statew are retrieved.
Figure 4-3 Displaying the Results of a Search Query

After you enter criteria in the query fields, click the binoculars symbol or press Ctrl+Q: ![]()
Description of the illustration sight.gif
One of the following actions occurs:
No records are returned. No records in the database matched your search criteria for this form. Either the record that you are searching for no longer exists in the database, or you should modify your search criteria.
One record is returned. One record in the database matches your search criteria. The Form view displays that record.
More than one record is returned. Multiple records in the database match your search criteria. A Table view appears, listing all records that meet your search criteria. The first record in the retrieved set of records appears in the Form view, as shown in Figure 4-4.
If multiple records in the database match your search criteria, you can view details about each record. Several buttons can assist you when viewing these records in the Form view. These directional buttons, referred to as VCR buttons, are located in the toolbar. They are described below:
| Buttons | Description |
|---|---|
Description of the illustration arr.gif |
Click this button to display the first record in the result set in the Form view. |
Description of the illustration rtarr.gif |
Click this button to display the preceding record according to the display sequence in the Table view. The record appears in the result set in the Form view. |
Description of the illustration ltarr.gif |
Click this button to display the next record (according to the display sequence in the Table view) in the result set in the Form view. |
Description of the illustration arr1.gif |
Click this button to display the last record in the result set in the Form view. |
A query that returns a large result set can require significant time to run and can consume your computer's resources. To optimize performance, employ the following search techniques:
Define the scope of a search strategy as precisely as possible.
Enter the most specific information that you can when constructing your query. For example, if the first name of a contact is JOHN and the last name is JACKSON, enter both pieces of information rather than searching only for contacts with the last name JACKSON.
Use the * wildcard character where possible.
If you place the * wildcard in front of an alphabetical character (for example, "*A"), this returns fewer records compared to leaving the value in a given field blank.
Note:
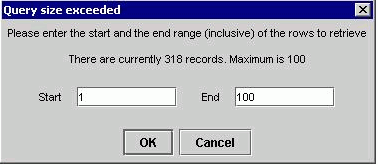
For more information on indexes, consult your System Administrator.If you have both read- and write-access to all forms and records in Design Console in the System Configuration form (that is, you are a System Administrator), this enables you to set the maximum number of records that may appear in the result set for a search. If the set of records retrieved for a search exceeds this value, Design Console displays the Query Size Exceeded dialog box, as shown in Figure 4-5.
Figure 4-5 The Query Size Exceeded Dialog Box

You are prompted to enter a specific range or subset of the result set to be viewed. In Figure 4-5, the maximum result set of 100 has been exceeded. The dialog enables you to display only records 1 through 100.
See also:
For more information on the System Configuration form, see "The System Configuration Form".