| Bookshelf Home | Contents | Index | PDF |   |
|
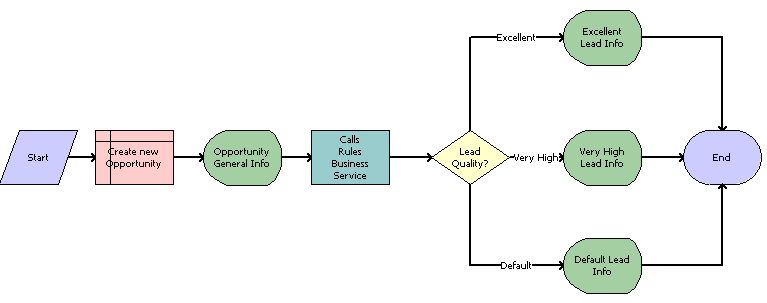
Siebel Business Rules Administration Guide > Implementing Rules in Siebel Task-Based UI > Scenario for Using Rules to Provide Dynamic Navigation in a Siebel Task > Creating the TaskThis topic is a task in the development process that is listed in Scenario for Using Rules to Provide Dynamic Navigation in a Siebel Task. To allow you to assign display names to Task objects, confirm that the following parameter is set in the [Siebel] section of \TOOLS_ROOT\bin\LANGUAGE\tools.cfg: If either parameter is not present, add it. In Siebel Tools, navigate to Project in the Object Explorer. Create a new project with which to associate all of the metadata artifacts. Name the project, for example Rules Call Back, and lock the project. To create the Create a Lead task
|
| |
| Siebel Business Rules Administration Guide | Copyright © 2007, Oracle. All rights reserved. | |