|
Configuring Siebel eBusiness Applications > Configuring Tables and Columns >
Creating New Tables Using the New Table Wizard
The Table Wizard allows you to create new stand-alone tables, extension tables, and intersection tables. It provides picklists with appropriate choices for each type of table and makes sure that the naming conventions are observed. When creating new tables, consider the following:
- You can only create tables of types: Data (Public), Data (Intersection), and Extension.
- You must explicitly grant permissions on any table that you create.
- Use the New Table Wizard only after exploring other ways of meeting your business requirements, such as using static extension tables or repurposing existing tables.
- Review Guidelines for Extending the Data Model.
To use the Table Wizard
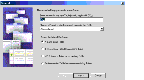
- Choose File > New Objects.
The New Objects dialog box appears.
- Select the Table Wizard icon.
The General dialog box appears.
- In the "Enter a name for the new Table" field, it is noted that you must enter a new table that starts with "CX_" or it will automatically add a prefix.
NOTE: The Table Name must be uppercase. Mixed case or lowercase names may lead to problems when applying the changes on certain databases.
If you choose 1:1 extension tables, "_X" is suffixed to the table names.
- In the "Choose a Project in which you wish to create the Table" field, choose a project.
NOTE: The Project list is restricted only to those projects that have been locked by the developer. All picklists are restricted to objects that belong to projects that are locked.
- In the "Select the type of the Table" field, choose from the options: A stand-alone Table, 1:1 Extension Table for an existing Table, M:1 Extension Table for an existing Table, An intersection Table between two existing Tables.
- Click Next.
NOTE: The next dialog box displayed depends on the type of table that is being added.
- If you choose Stand-alone Tables, the Parent Specification Table dialog box is not displayed and you are taken to the Finish dialog box, stating that the new table can now be created.
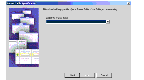
- For 1:1 Extension Tables and M:1 Tables, the Parent Specification Table dialog box allows you to select the parent table. See the following figure:
- For 1:1 Extension Tables, the picklist of available parent tables is restricted to tables of type Data (Public).
- For M:1 Extension Tables, the picklist of available parent tables is restricted to tables of type Data (Public).
- For Intersection Tables, the dialog box allows you to add both parent tables and names of foreign key columns to the parent tables. See the following figure.
- The picklist for the "Select the first Parent Table" field is restricted to all tables of type Data (Public).
- The picklist for the "Select the second Parent Table" field is restricted to tables of type Data (Public) with the following added restrictions, based on the choice of the first parent table.
- The names of the Foreign Key columns ("Enter a Foreign Key Column name for the first Parent Table" field and "Enter a Foreign Key Column name for the second Parent Table" field) are verified to make sure that they are unique (that is, do not conflict with each other or the system column names).
- Click Next on the Parent Table Specification dialog box.
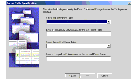
The Finish dialog box appears, which allows you to review the changes made before the objects are actually created. The Finish dialog box verifies that "The new Table can now be created" and asks you to make sure that the information about the Name, Project, Type of Table, and Parent Table 1 is correct.
- Click Finish to generate the table.
You then see the new table listed (User Name CX_X) in the Object List Editor (the Type is Extension, the Base Table is CX).
Table Wizard Actions
The following columns are generated by the Table Wizard.
- For all types of tables, the Table Wizard creates seven system columns and the P1 index on ROW_ID.
- For 1:1 Extension Tables, the Table Wizard sets Type of Table = Extension and creates the following:
- PAR_ROW_ID column
- User Key Sequence=1
- Foreign Key Table=<Base Table Name>
- U1 index comprised of PAR_ROW_ID(1) and CONFLICT_ID(2)
- Unique/Cluster=TRUE
- Type=User Key
- User Primary Key=TRUE
- For M:1 Extension Tables, the Table Wizard sets Type of Table=Data (Public) and creates the following:
- PAR_ROW_ID, TYPE, NAME columns
- U1 index comprised of PAR_ROW_ID(1), TYPE (2), NAME (3), and CONFLICT_ID (4)
- Unique/Cluster=TRUE
- Type=User Key
- User Primary Key=TRUE
- M1 index on TYPE (1) and NAME (2)
- Unique/Cluster=FALSE
- Type=System
- For intersection tables, the Table Wizard sets the type of the table to Data(Intersection) and creates the following:
NOTE: When a custom extension table is added using the Table Wizard, a U1 index is added to the table. However, the User Key column is blank and does not allow the definition of user keys. This is because there is no need to create user keys: they are only needed to resolve foreign keys while using EIM, and EIM does not work with foreign keys to custom tables.
|