In this step you'll get your workspace set up, then create two projects to get your EJB source code going. You'll start writing EJB source code in the next step.
In this section, you will:
Start Workshop
If you haven't started Workshop yet, follow these steps: Start Workshop.
Create a New Workspace (Optional)
If you would like to execute the tutorial in a separate workspace follow these steps: Create a New Workspace.
Note: If you already have a workspace open, this will restart Workshop. Before beginning, you might want to launch help in standalone mode to avoid an interruption the restart could cause, then locate this topic in the new browser. See Using Help in a Standalone Mode for more information.
Configure WebLogic Server
In this step you will add a WebLogic Server domain for use with Workshop. This server domain contains runtime libraries required by the application and the application will be deployed to this server.
- Workshop for WebLogic users should follow the instructions to Configure WebLogic Server.
- Workshop Studio and Workshop for JSP users should follow the instructions to Download, Install, and Configure WebLogic Server.
Create EJB and EAR Projects
An EAR project is a special kind of project that represents an enterprise application. When you "add" a project to an EAR project, you're actually adding a project reference. Projects added to the EAR project in this way will end up as part of a single Enterprise ARchive (EAR) file, which can be deployed to WebLogic Server. An EAR project is also a way to designate libraries that are to be shared across projects.
You will also create an EJB project within which to build your EJBs. The EJB project will contain your EJB source code.
- Click File > New > Project.
- In the New Project dialog, expand EJB, click WebLogic EJB Project, then click Next.
- In the New EJB Project dialog, in the Project name box, enter VisitEJBProject.
- Place a check next to Add project to an EAR and in the
EAR Project Name field enter EJBTutorial_EARProject.
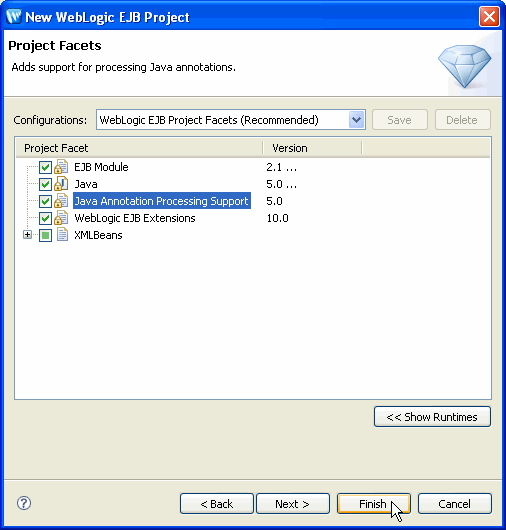
Click Next. - Under Select Project Facets, note that you're provided
support for creating EJB source code that includes annotations for faster
development.
Click Finish.
You should now see both your EAR project and EJB project in the Project Explorer view. Also, after you've created the EJB project, you'll see that the error flag on the EAR project has gone away.
Note that the new project you created, VisitEJBProject, has an error flag next to it. The error flag is present because no EJB code exists yet in the project. In the next step you will remove this error flag by adding EJB code to the project.