Step 3: Create a Data Grid
In this step you will add a data grid to your application. A data grid is a set of JSP tags that are designed to render data as an HTML table. This is especially useful for rendering database data: the data grid renders the database fields as columns of the table and it renders the database records as rows of the table.
The tasks in this step are:
- Create a JSP to Display the Customer List
- Create a Grid to Display the Customer List
- Run the Page Flow
Create a JSP to Display the Customer List
In this step you will create a new JSP and place it within the navigation scheme of your Page Flow. This JSP will be displayed when the getCustomers() action is called.
- On the Page Flow Editor tab, click on the getCustomers action icon to center the node.
- Right-click on the unspecified node and select New
JSP.
The unspecified node means that the action getCustomers does not forward to any JSP or action. Your page flow will compile if it contains unspecified nodes, but, at runtime, if the getCustomers action is ever called, an exception will be thrown. (In terms of the source code, an unspecified node depicts an empty string in the path attribute of a Forward object:@Jpf.Forward(name = "success", path = ""). - Name the JSP file customers.jsp. (If necessary,
you can right-click on the new JSP and select Rename.)

Note:Much like a Java method, a page can declare the name
and type of data it expects to receive via the NetUI declarePageInput tag.
Page flow actions pass the expected data to the page by way of action
outputs. An
action output is added to a Forward object in the method of the action. Corresponding
action output annotations declare the name and type of the data being passed,
as shown in the following code snippet:
    @Jpf.Action(
                ...
                actionOutputs = { @Jpf.ActionOutput(  name="getCustomersResult", type = model.Customer[].class) }
                ...
                )
    public Forward getCustomers() {
If the Action passes something other than the data expected by the page a runtime exception will be thrown.
The Page Flow Editor depicts action outputs with a small rectangular icon on the arrow representing a forward.

If the forward destination is unspecified, as in the case above, creating a new page as the destination via the Page Flow Explorer will automatically add matching page input declarations to the page.
<netui-data:declarePageInput name="getCustomersResult" type="model.Customer[]" required="true" />
If you ever need to edit the action output/page input declarations, right-click the arrow that passes between the Action and the JSP page and select Edit Action Outputs. The editor that appears allows you to edit both the action output annotations and the page input tags to ensure that they match.
To Create a Grid to Display the Customer List
In this task, you will add a set of JSP tags (<netui-data:dataGrid>, <netui-data:rows>, etc.) that are specially designed to render Java objects as an HTML table.
- On the Page Flow Editor tab, right-click customers.jsp and select Open to open its source code.
- On the Design Palette, in the JSP Variable section,
open the node pageInput and locate getCustomersResult[].
Drag the getCustomersResult[] icon onto the source code for customers.jsp, dropping it directly before the </netui:body> tag.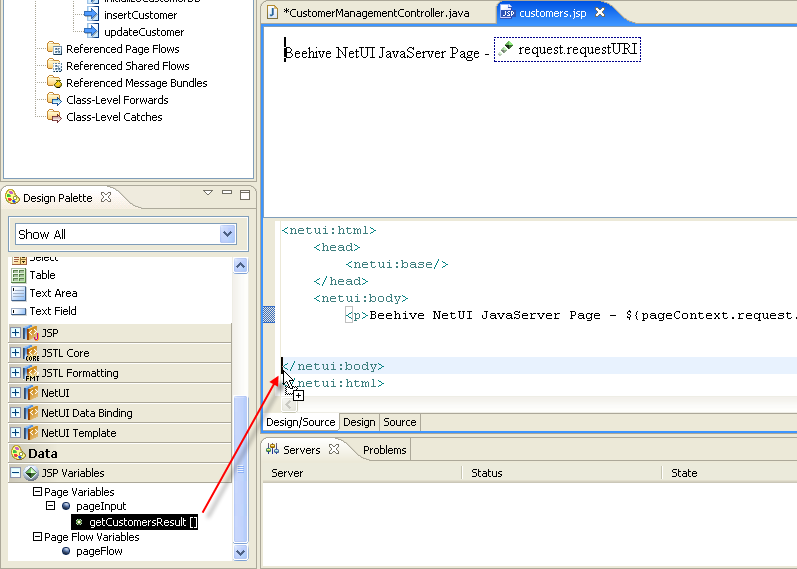
- From the Choose a wizard dialog, select Data Grid
and press OK.
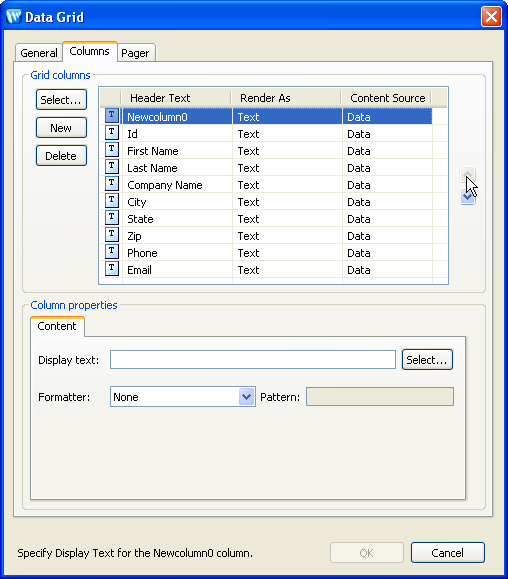
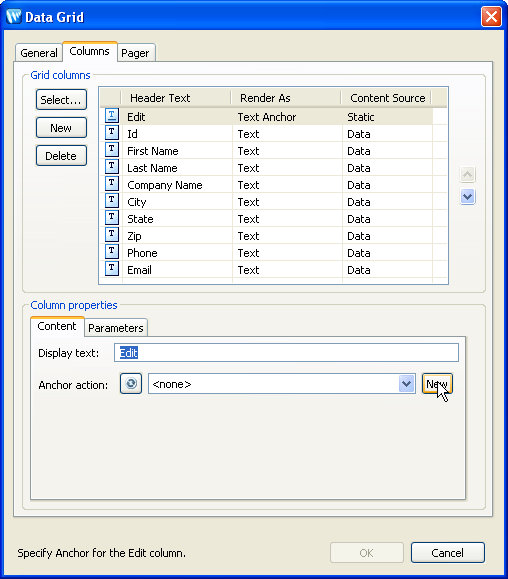
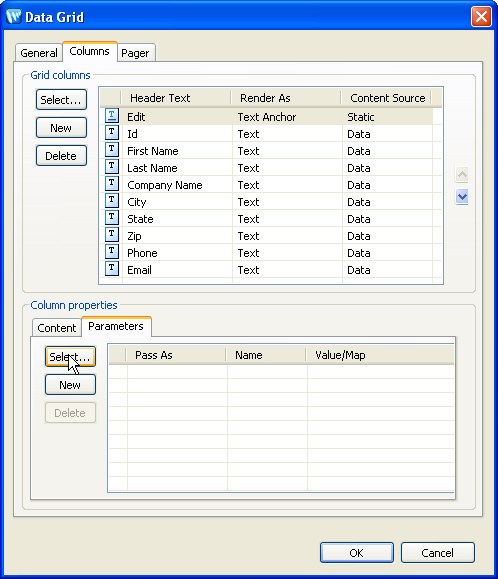
- On the Data Grid dialog, click the Columns
tab.
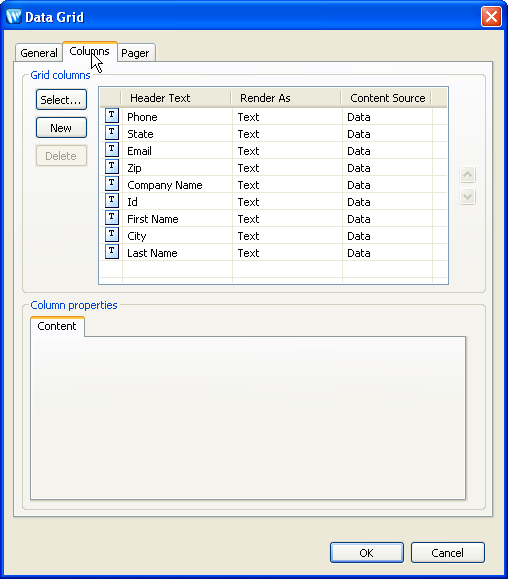
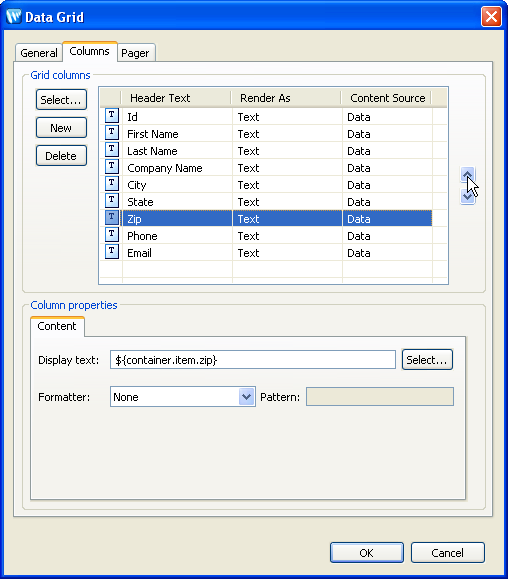
- Reorder the columns listed to match the following sequence:
Id
First Name
Last Name
Company Name
City
State
Zip
Phone
Email
- Click the New button and position the new column (named
Newcolumn0 by default) at the top of the list.
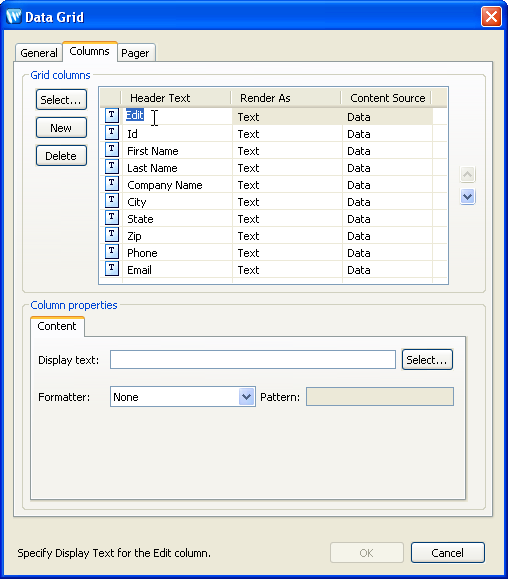
The next few tasks define an "Edit" link for each row of the table. These links take you to a editing page, where you can update the fields for a given row. - Change the Header Text of the new column from Newcolumn0
to Edit. (You can change the text by clicking
inside the cell you wish to edit.)
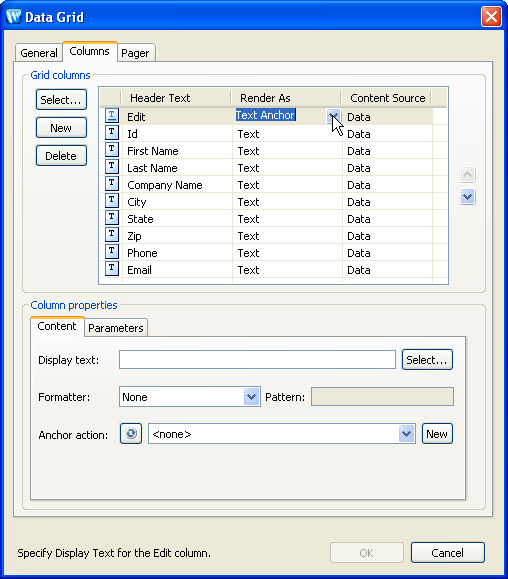
- Set the Render As column to Text
Anchor. (This causes the text to be rendered as a hyperlink
instead of plain text.)
- Set the Content Source column to Static.
By setting this dropdown to Static you are signaling your intent to display the same content in the column for each row, for example, a static image. When you set it to Data you are signaling your intent to display dynamic content in the column, typically some display text based on the data in the row, for example, the ID of the row.
Notice that when you set the dropdown to Data, fields appear in the lower part of the wizard to help you format the dynamic display text. If you set the dropdown to Static, those fields disappear.
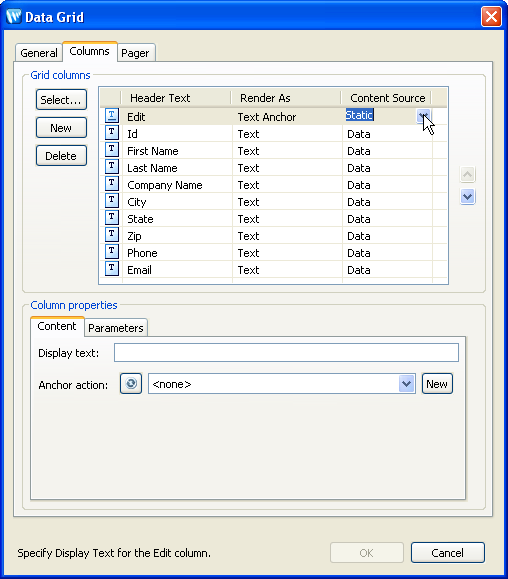
- In the Display Text field, enter Edit.

- Click the New button (next to the Anchor Action
field).
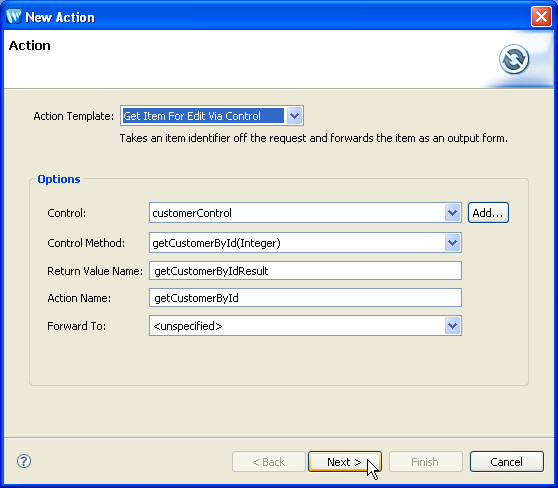
- On the New Action dialog, from the Action Template
dropdown list, choose Get Item for Edit Via Control.
This New Action wizard helps construct different actions for typical scenarios. Note the different options available for creating new actions. Choosing 'Simple' helps you set up a simple navigational action. Choosing 'Control Method Call' helps you set up a control-calling action.
From the Control Method dropdown list, confirm that the method getCustomerById(Integer) is selected.
Click Next.
- On the New Action dialog, on the Input Mapping
page, click the Finish button.
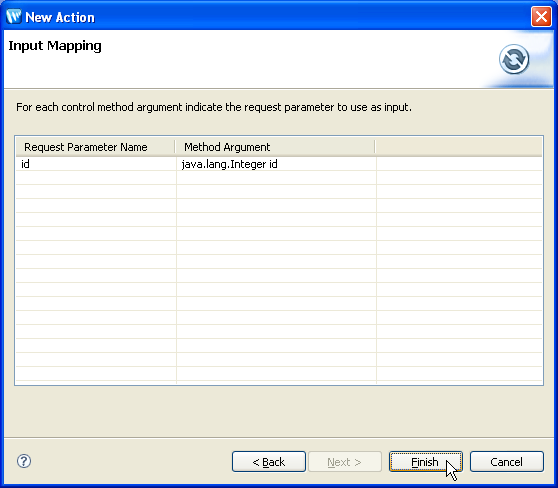
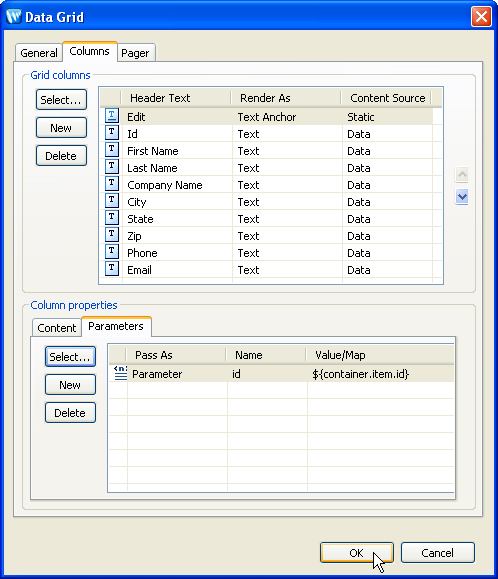
A new action called getCustomerById is created in the Page Flow controller file. - On the Data Grid dialog, click the Parameters
tab.
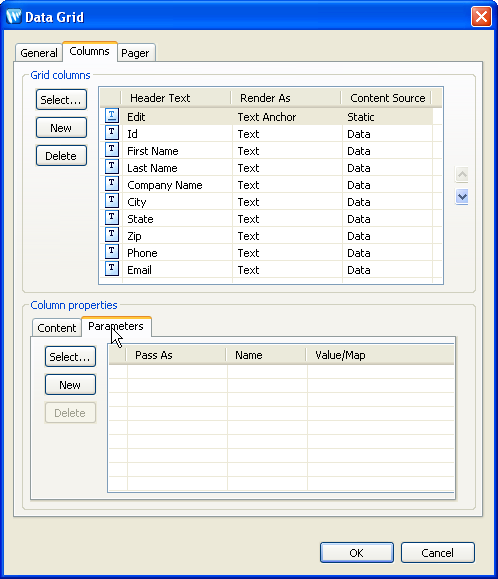
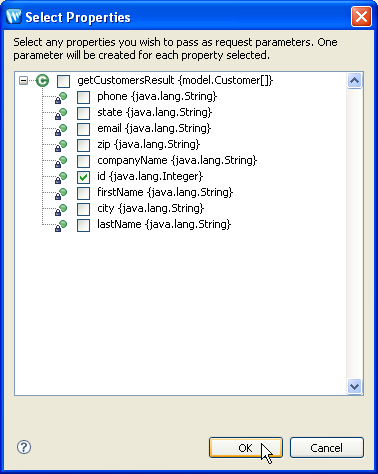
- Click the Select button (on the Parameters
tab, not the Columns tab).
- Select the id property and click OK.
- On the Data Grid dialog, click OK.
- Press Ctrl-Shift-S to save your work.
You have just added the following data grid to the customers.jsp page.
	<netui-data:dataGrid name="getCustomersResultGrid"
		dataSource="pageInput.getCustomersResult">
		<netui-data:configurePager disableDefaultPager="true" />
		<netui-data:header>
			<netui-data:headerCell headerText="Edit" />
			<netui-data:headerCell headerText="Id" />
			<netui-data:headerCell headerText="First Name" />
			<netui-data:headerCell headerText="Last Name" />
			<netui-data:headerCell headerText="Company Name" />
			<netui-data:headerCell headerText="City" />
			<netui-data:headerCell headerText="State" />
			<netui-data:headerCell headerText="Zip" />
			<netui-data:headerCell headerText="Phone" />
			<netui-data:headerCell headerText="Email" />
		</netui-data:header>
		<netui-data:rows>
			<netui-data:anchorCell value="Edit" action="getCustomerById">
				<netui:parameter name="id" value="${container.item.id}" />
			</netui-data:anchorCell>
			<netui-data:spanCell value="${container.item.id}">
			</netui-data:spanCell>
			<netui-data:spanCell value="${container.item.firstName}">
			</netui-data:spanCell>
			<netui-data:spanCell value="${container.item.lastName}">
			</netui-data:spanCell>
			<netui-data:spanCell value="${container.item.companyName}">
			</netui-data:spanCell>
			<netui-data:spanCell value="${container.item.city}">
			</netui-data:spanCell>
			<netui-data:spanCell value="${container.item.state}">
			</netui-data:spanCell>
			<netui-data:spanCell value="${container.item.zip}">
			</netui-data:spanCell>
			<netui-data:spanCell value="${container.item.phone}">
			</netui-data:spanCell>
			<netui-data:spanCell value="${container.item.email}">
			</netui-data:spanCell>
		</netui-data:rows>
	</netui-data:dataGrid>
To Run the Page Flow
- On the Page Flow Explorer tab, click the Run
on Server icon to deploy and run the Page Flow.

- You will see a browser tab appear, displaying a grid of customer data.
- Close the browser tab for http://localhost:7001/customerCare/customerManagement/CustomerManagementController.jpf.
Click one of the following arrows to navigate through the tutorial:
|
|
|
Still need help? Post a question on the Workshop newsgroup.