C Setting Up SSL on Oracle WebLogic Server
This section describes how to configure SSL on Oracle WebLogic Server for PeopleTools 8.50.
To set up SSL on Oracle WebLogic Server:
-
Generate signed public encryption key and certificate signing request (CSR).
-
Start PSKeyManager by navigating to the appropriate directory on the MS-DOS command prompt.
-
Enter the following at the command line:
pskeymanager –create
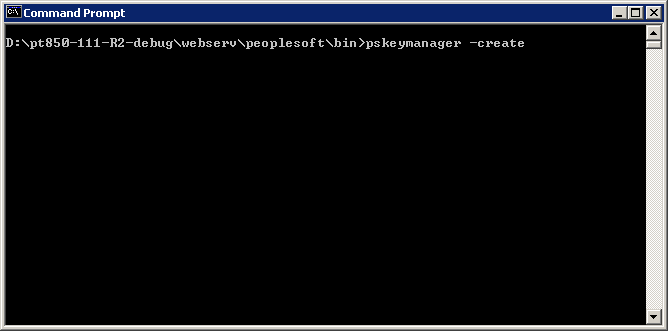
The PSKeyManager opens.
-
Enter the following at the command line:
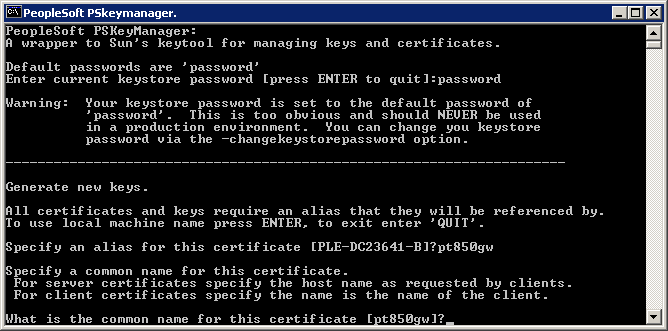
At the
Enter current keystore password [press ENTER to quit]command prompt, enter the password. The default password ispassword.At the
Specify an alias for this certificate <host_name>?command prompt, enter the certificate alias and press Enter. The default certificate alias is the local machine name.At the
What is the common name for this certificate <host_name>?command prompt, enter the host name for the certificate, for example <host_name>.corp.myorg.com.Press Enter.
Enter the appropriate information at the following command prompts:
Organization unit
Organization
City or Locality
State or Province
Country code
Number of days the certificate should be valid (Default is 90.)
Key size to use (Default is 1024.)
Key algorithm (Default is RSA.)
Signing algorithm (Default is MD5withRSA or SHA1withDSA.)
-
At the
Enter a private key password <press ENTER to use keystore password>prompt, specify the password or press Enter.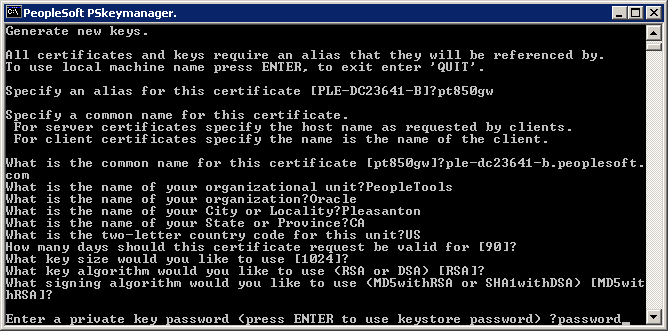
-
Verify that the values you entered are correct, and press Enter.
The PSKeyManager generates a public key and provides the CSR that you must submit to the Certificate Authority (CA) for signing.
The following example shows a sample CSR:
-----BEGIN NEW CERTIFICATE REQUEST----- MIIBtDCCAR0CAQAwdDELMAkGA1UEBhMCVVMxEDAOBgNVBAgTB0FyaXpvbmExEDAOBgNVBAcTB1Bob2VuaXgxFDASBgNVBAoTC1Blb3BsZVRvb2xzMRMwEQYDVQQLEwpZW9wbGVzb2Z0MRYwFAYDVQQDEw1NREFXU09OMDUxNTAzMIGfMA0GCSqGSIb3DQEBAQUAA4GNADCBiQKBgQC43lCZWxrsyxven5QethAdsLIEEPhhhl7TjA0r8pxpO+ukD8LI7TlTntPOMU535qMGfk/jYtG0QbvpwHDYePyNMtVou6wAs2yr1B+wJSp6Zm42m8PPihfMUXYLG9RiIqcmp2FzdIUi4M07J8ob8rf0W+Ni1bGW2dmXZ0jGvBmNHQIDAQABoAAwDQYJKoZIhvcNAQEEBQADgYEAKx/ugTt0soNVmiH0YcI8FyW8b81FWGIR0f1Cr2MeDiOQ2pty24dKKLUqIhogTZdFAN0ed6Ktc82/5xBoH1gv7YeqyPBJvAxW6ekMsgOEzLq9OU3ESezZorYFdrQTzqsEXUp1A+cZdfo0eKwZTFmjNAsh1kis+HOLoQQwyjgaxYI=
-----END NEW CERTIFICATE REQUEST-----
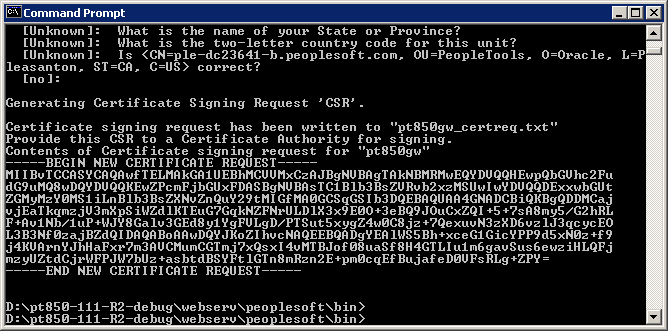
The CSR is a text file, and is written to the <PSFT_HOME>\webserv\peoplesoft directory. The file name is <host_name>_certreq.txt.
-
-
Submit CSRs to CAs for signing:
Note:
The set of pages are different depending on what CA you plan on using.
-
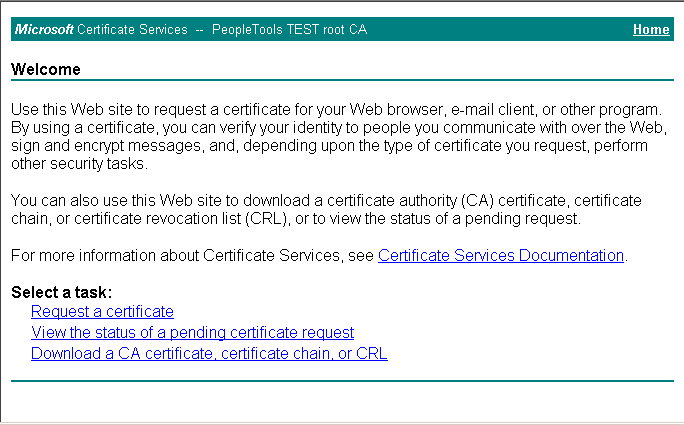
Click Download a CA certificate, certificate chain, or CRL.
-
Click advanced certificate request.

-
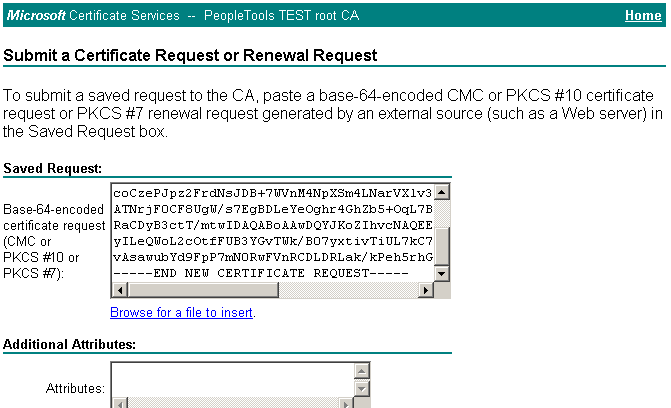
Click Submit a certificate request by using a base-64-encoded CMC or PKCS#10 file, or submit a renewal request by using a base-64-encoded PKCS #7 file.

The Submit a Certificate Request or Renewal page appears.
-
Paste the content of the CSR in the Saved Request list box.
The CA may send the signed public key (root) certificate to you by e-mail or require you to download it from a specified web page.
-
Download and save the signed public key on your local drive.

-
-
Download the root certificate.
-
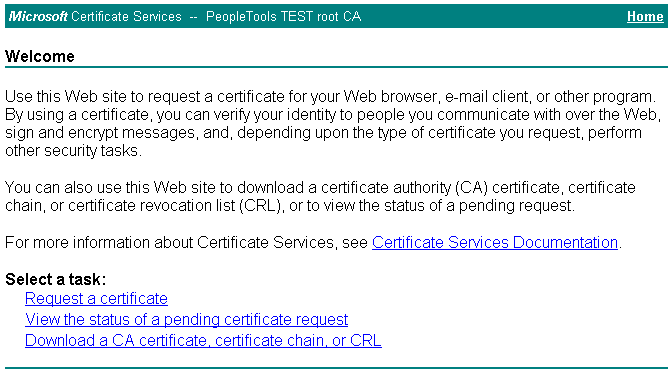
Click Download a CA certificate, certificate chain, or CRL.
-
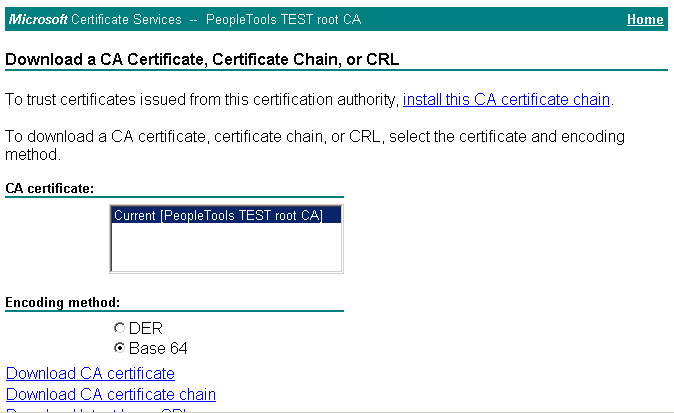
From the CA certificate list, select the certificate.
-
Download and save the root certificate on your local drive.
-
-
Import a server-side public key into a keystore.
-
Open PSKeyManager.
-
Navigate to the required directory on the MS-DOS command prompt.
-
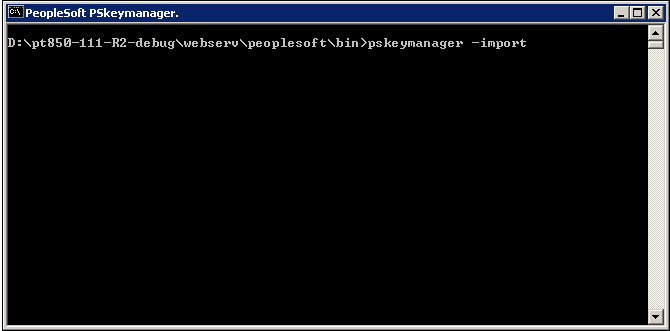
Enter the following at the command line:
pskeymanager -import
-
At the
Enter current keystore passwordcommand prompt, enter the password and press Enter. -
At the
Specify an alias for this certificate <host_name>?command prompt, enter the certificate alias and press Enter. -
At the
Enter the name of the certification file to importcommand prompt, enter the path and name of the certificate to import.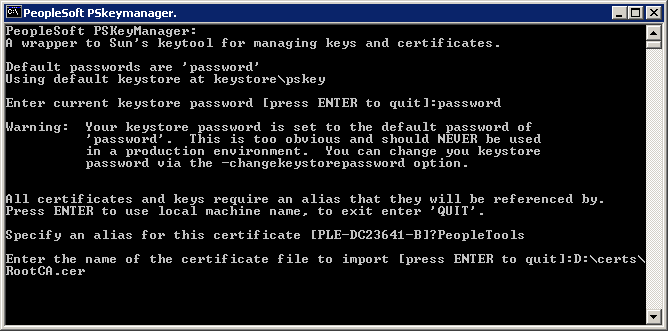
-
At the
Trust this certificatecommand prompt, enter Yes and press Enter.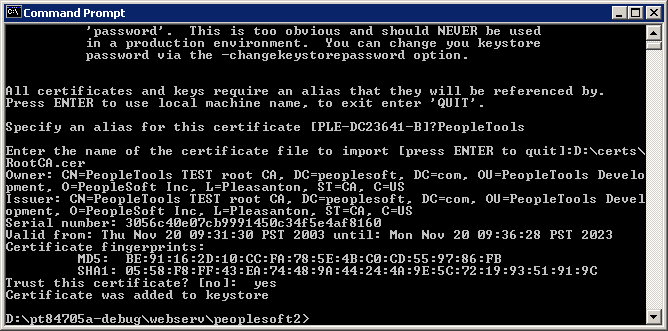
-
-
Generate and import public keys.
-
Place the public key from your CA in the keystore. The location of the keystore is as follows:
<PSFT_HOME>\webserv\peoplesoft\keystore
-
Install the certificate for server authentication SSL on Oracle WebLogic Server using the following command:
pskeymanager -import
-
At the
Enter current keystore passwordcommand prompt, enter the password and press Enter. -
At the
Specify an alias for this certificate <host_name>?command prompt, enter the certificate alias and press Enter. -
At the
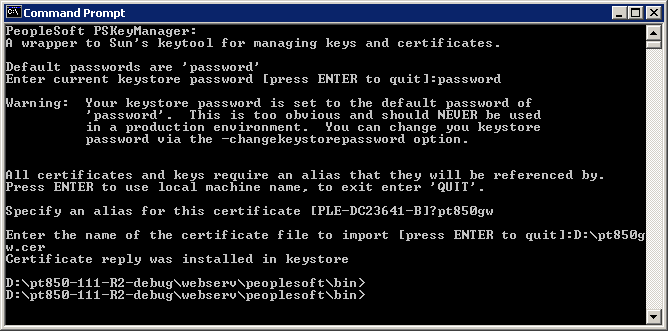
Enter the name of the certification file to importcommand prompt, enter the path and name of the certificate to import.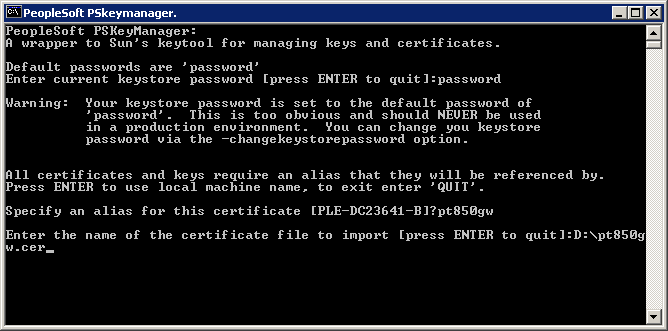
Certificate is successfully installed in the keystore.
-
-
Configuring the Oracle WebLogic Server to use the keystore.
-
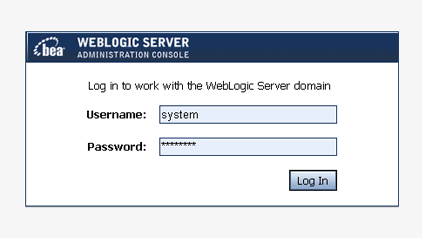
Log in to Oracle WebLogic Administration Console.
-
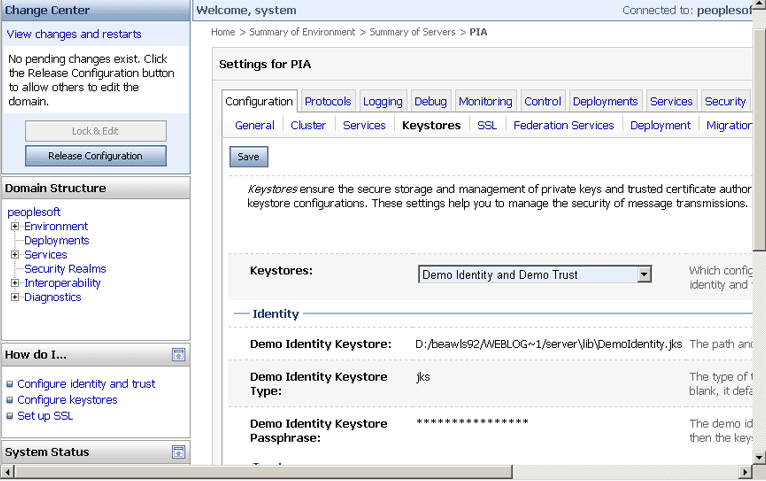
Expand PeopleSoft, Environment, Servers, PIA to setup the SSL configuration for the PIA server.
-
Click the Keystores tab.
-
From the Keystores list, select Custom Identity and Custom Trust.
-
In the Identity region, complete the following fields:
- In the Custom Identity Keystore field, enter
keystore/pskey.- In the Custom Identity Keystore Type field, enter
JKS.- In the Custom Identity Keystore Passphrase field, enter
password.- In the Confirm Custom Identity Keystore Passphrase field, enter
passwordagain.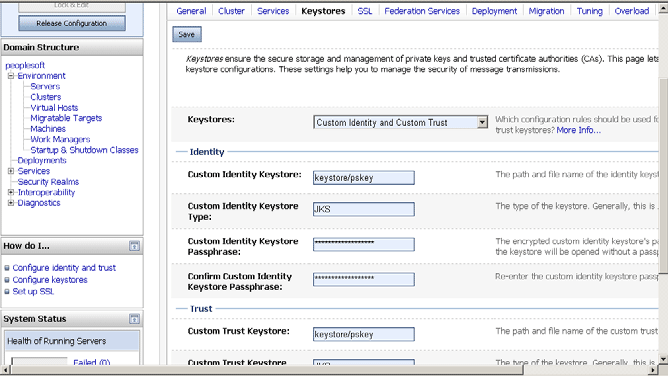
-
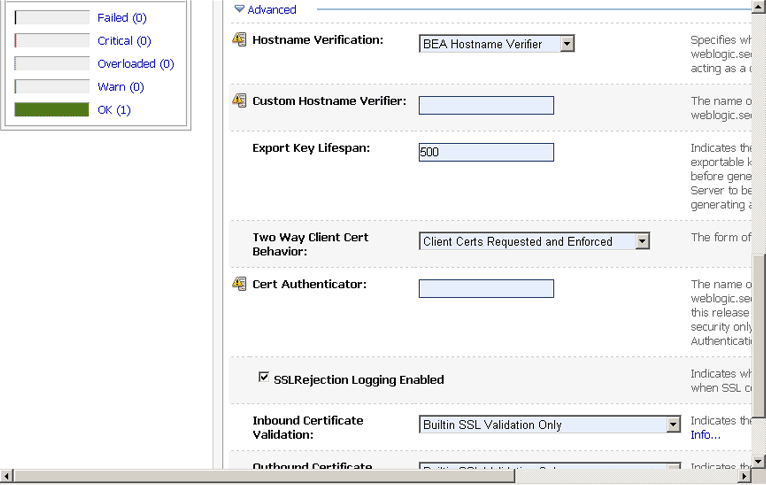
On the SSL tab, ensure that the parameter Two Way Client Cert Behavior is set to Client Certs Requested and Enforced.
-
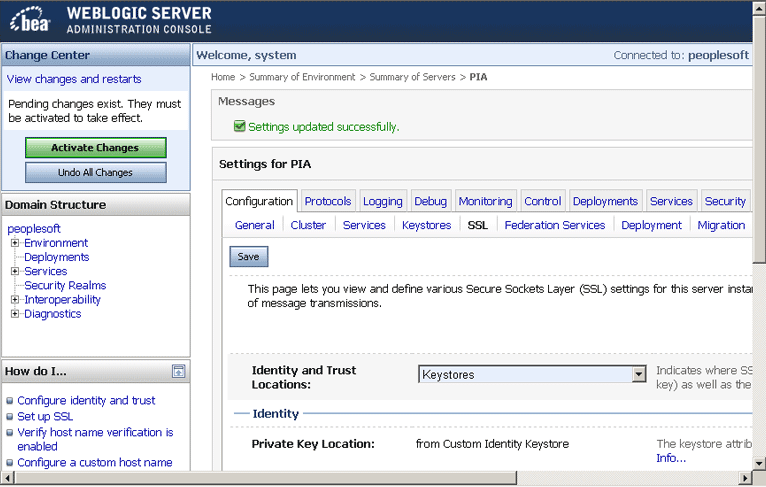
Click the Activate Changes button.
-
-
Add root certificate.
-
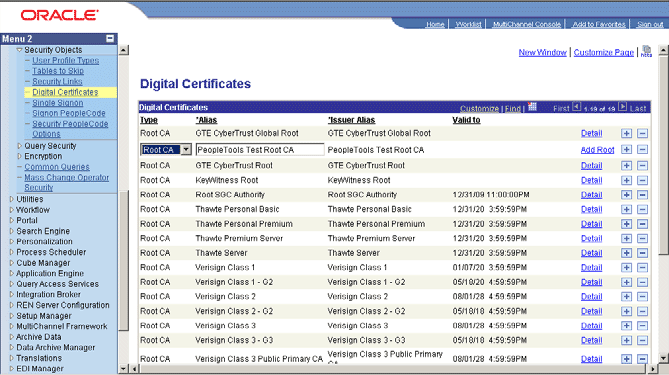
Expand Security, Security Objects, and then click Digital Certificates.
-
Click Add Root.
-
-
Configure the Peoplesoft certificates.
Note:
You can use the same root certificate generated in Step 2.
-
Expand Security, Security Objects, and then click Digital Certificates.
-
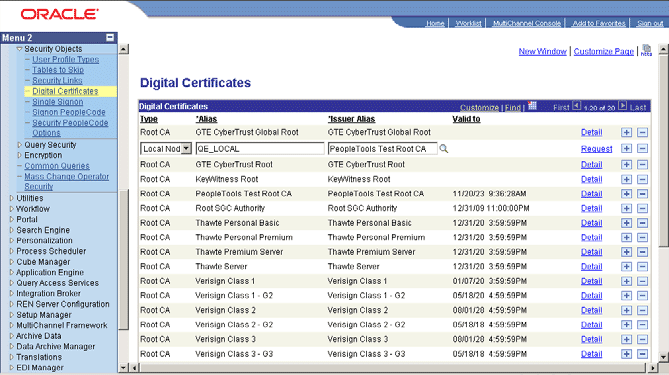
Add a local node type certificate.
-
Set Alias to the default local node.
-
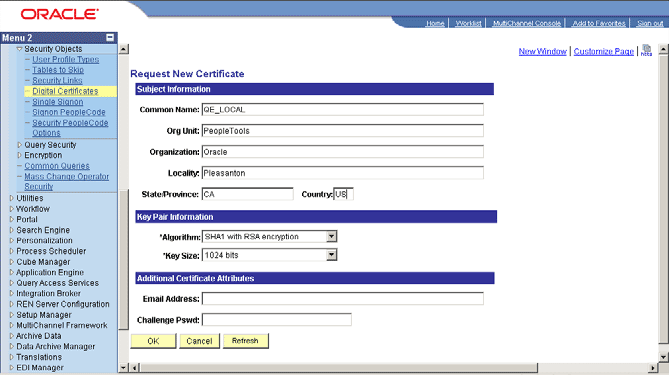
Click Request.
-
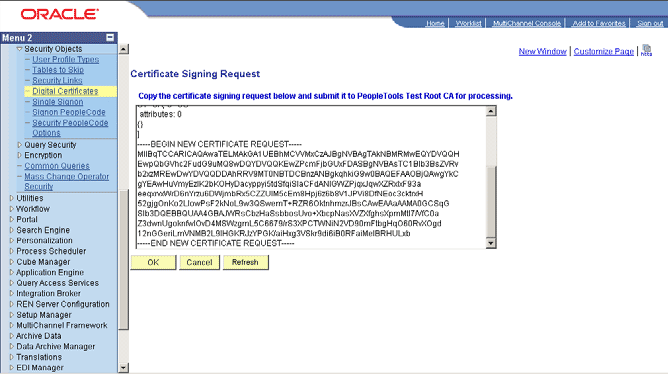
Send this certificate request to the CA to get a new certificate.
-
Click OK.
-
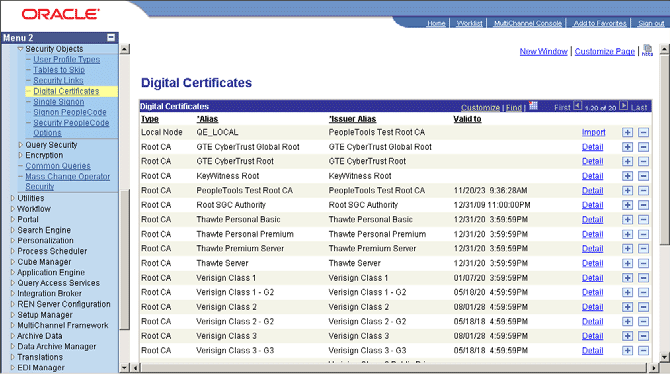
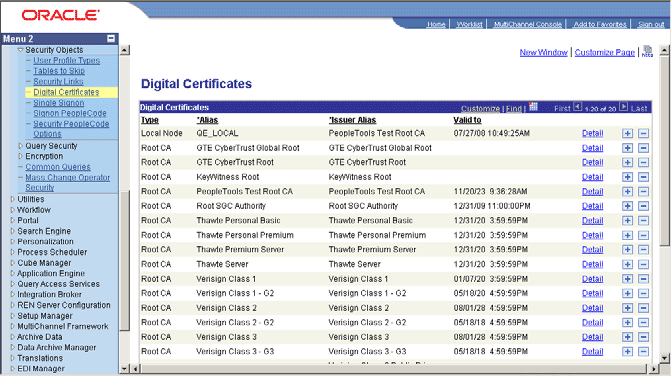
Ensure that the local node appears on the Digital Certificates list.
-
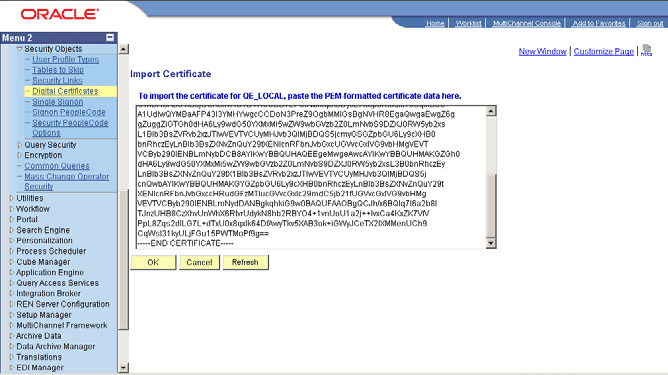
Click Import.
The Import Certificate page appears.
-
Click OK.
-
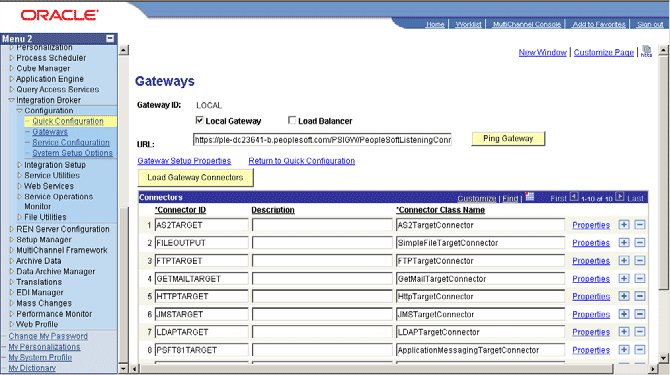
Click Load Gateway Connectors.
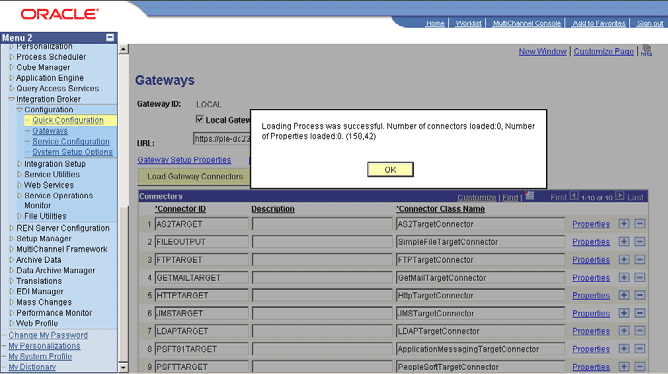
The following message appear:
Loading Process was successful. Number of connectors loaded:0. Number of Properties loaded:0. (158,42)
Click OK.
-
Click Ping Node to ping your local node.
-