| Oracle® Retail Price Management User Guide Release 13.2.9 E71079-01 |
|

 Previous |
 Next |
RPM uses strategies, calendars, and item/location information to automatically generate worksheets. The Worksheet functionality allows you to maintain the proposed price changes automatically generated by RPM.
The worksheet may contain many different columns.
The Worksheet Detail workspace allows you to:
Review the auto generated price change proposals.
Review items that met rules or were exceptions.
Make clearance decisions.
Delete the Pricing Worksheet if no price changes need to be made.
Examine the information about price change proposals and make decisions about which items to change and what retail prices to set.
Modify column values.
Perform what-if analysis on the Worksheet to help you make the best pricing decisions.
Export the worksheet to a Comma Separated Value (csv) file that can be opened in other applications such as spreadsheets and work processors.
The worksheet may contain many different columns. See the descriptions and calculations for each column below.
Table 6-1 Worksheet Column Descriptions and Calculations
| Column | Description | Editable | Calculation |
|---|---|---|---|
|
% off Regular Retail |
The percent difference between the basis regular retail and the new retail of the item. |
No |
Price Change Amount divided by Basis Regular Retail (Before VAT) Depending on your aggregation level settings: Price Change Amount = Current Retail - New Retail Price Change Amount = New Retail - Current Retail The zone level regular retail is used if it exists. |
|
% off Basis Retail |
The percent difference between the basis retail (regular or clearance) and the new retail of the item. This value is the same as % off Regular Retail if there is no clearance retail. |
No |
Price Change Amount divided by Basis Retail (Before VAT) Price Change Amount equals the difference between the New Retail and the Clearance or Regular Retail Depending on your aggregation level settings: Price Change Amount = Current Retail - New Retail Price Change Amount = New Retail - Current Retail The zone level clearance retail is used if it exists. |
|
Base Cost |
The base cost of the item on the effective date (including price change processing days). |
No |
When the record is at a zone level, the zone level base cost is used in the calculation if one exists. |
|
Basis Cost |
The pricing cost of the item on the effective date (including price change processing days). |
No |
When the record is at a zone level, the zone level basis cost is used in the calculation if one exists. |
|
Class ID |
The class hierarchy ID of the item's class. |
No |
|
|
Class Description |
The name of the class. |
No |
|
|
Clearance Indicator |
Checked and disabled if the item is on active clearance. Unchecked if the item is not on clearance. |
Yes |
|
|
Clearance |
Hyperlink that opens a window with details on approved clearances. "Pending" appears if the item is on a pending clearance. |
No |
|
|
Competitor A Alert |
"Pass" appears if there is a competitor A and the strategy rules is met. "Fail" appears if the strategy rule is not met. |
No |
|
|
Competitor A Retail |
Competitor A's retail price. |
No |
|
|
Competitor B Alert |
"Pass" appears if there is a competitor B and the strategy rules is met. "Fail" appears if the strategy rule is not met. |
No |
|
|
Competitor B Retail |
Competitor B's retail price. |
No |
|
|
Competitor C Alert |
"Pass" appears if there is a competitor C and the strategy rules is met. "Fail" appears if the strategy rule is not met. |
No |
|
|
Competitor C Retail |
Competitor C's retail price. |
No |
|
|
Competitor D Alert |
"Pass" appears if there is a competitor D and the strategy rules is met. "Fail" appears if the strategy rule is not met. |
No |
|
|
Competitor D Retail |
Competitor D's retail price. |
No |
|
|
Competitor E Alert |
"Pass" appears if there is a competitor E and the strategy rules is met. "Fail" appears if the strategy rule is not met. |
No |
|
|
Competitor E Retail |
Competitor E's retail price. |
No |
|
|
Conflict |
An exclamation point appears if conflicts were found during conflict checking. |
No |
When conflict checking is run again or the price change is taken or not taken, the column is reset. |
|
Cost Changes During Review Period |
"Yes" appears if there are approved cost changes that have an effective date during the review period of the worksheet. |
No |
|
|
Current Clearance Retail |
The clearance retail for today if the item is on clearance. |
No |
The zone level clearance retail appears if it exits. |
|
Current Clearance Retail UOM |
The unit of measure for the item clearance price. |
No |
|
|
Basis Retail |
The active retail (regular or clearance) on the effective date before the current price change. |
No |
The zone level basis retail appears if it exists. |
|
Basis Retail UOM |
The unit of measure for the item basis retail. |
No |
|
|
Basis Retail Multi-units |
The active multi-unit retail on the effective date before the current price change. |
No |
The zone level multi-unit retail appears if it exists. |
|
Basis Multi-unit Retail |
The active multi-unit retail on the effective date before the current price change. |
No |
|
|
Basis Multi-unit Retail UOM |
The unit of measure for the active multi-unit retail on the effective date before the current price change. |
No |
|
|
Current Cost |
The pricing cost today. |
No |
|
|
Current Cost Markup %. |
The cost markup of the item based on current cost and current retail. |
No |
Current Retail (regular or clearance, before VAT) minus Current Cost divided by Current Cost. The zone level current cost is used if it exists. |
|
Current Retail Markup % |
The retail markup of the item based on current cost and current retail. |
No |
Current Retail (regular or clearance, before VAT) minus Current cost divided by Current Retail. The zone level current cost is used if it exists. |
|
Current Multi-Units |
The unit value of the multi-unit retail price. For example: "2 ea." if there is a 2 for $5 multi-unit retail. |
No |
The primary zone current multi-units will appear if it exists. |
|
Current Multi-units Retail |
The retail value of the multi-unit retail price. For example: "$5.00" if there is a 2 for $5 multi-unit retail. |
No |
|
|
Current Multi-units UOM |
The unit of measure for the item multi-unit. |
No |
|
|
Current Regular Retail |
The item's regular retail value today. |
No |
The zone level current retail appears if it exists. |
|
Current Retail UOM |
The selling unit of measure for the current retail. |
No |
|
|
Current Retail/UOM |
The regular retail value per unit of measure in the package today. For example: ".05/oz" if there is a 16 oz. can of soup that retails for .89. |
No |
Current Retail divided by Package UOM |
|
Diff One |
The differentiator 1 value for a transaction level item. |
No |
|
|
Diff Two |
The differentiator 2 value for a transaction level item. |
No |
|
|
Diff Three |
The differentiator 3 value for a transaction level item. |
No |
|
|
Diff Four |
The differentiator 4 value for a transaction level item. |
No |
|
|
Effective Date |
The date that price change goes into effect. |
Yes |
End of Review Period plus Price Change Processing Days |
|
New Item Location Ind |
An indicator appears if the item/location is a new combination in RPM. |
No |
|
|
First Received Date |
The date this item was first received into the location. |
No |
|
|
Historical Sales |
The monetary historical sales of the item based on the locations in the row. |
No |
The weekly, monthly, half-yearly, or yearly historical sales depending on aggregation level setting. |
|
Historical Sales Units |
The retail sales of the item for the current period. |
No |
The weekly, monthly, half-yearly, or yearly historical sales depending on aggregation level setting. |
|
Item Description |
The name of the item. |
No |
|
|
Item ID |
The transaction or parent item ID. |
No |
|
|
Last Cost Change |
The date of the last cost change. Note: Place the cursor over this field to show the average or highest cost of the item over the locations in the zone |
No |
|
|
Last Price Change |
The date of last price change. Note: Place the cursor over this field to show the items zone price. |
No |
|
|
Last Received Date |
The date the item was last received into the location. |
No |
|
|
Link Code |
The link code assigned to the transaction level item. A hyperlink opens a link code information window. |
No |
|
|
Proposed Retail Markdown #. |
The markdown number if there is a proposed clearance price change. |
No |
|
|
Margin Market Basket Code |
The market basket code for transaction level items if one exists. |
No |
|
|
Cost Markup %. On New Retail |
The cost markup of the item based on new cost and new retail. |
No |
New Retail minus Basis Cost divided by Basis Cost The zone level basis cost is used if it exists. |
|
New Multi-Units |
The unit value of the new multi-unit retail price. For example: "2 ea." if there is a 2 for $5 multi-unit retail. |
Yes |
|
|
New Multi-units Retail |
The retail value of the new multi-unit retail price. For example: "$5.00" if there is a 2 for $5 multi-unit retail. |
Yes |
|
|
New Multi-units UOM |
The unit of measure of the new item multi-unit. For example: ea. if there is a 2 for $5 multi-unit retail. |
Yes |
|
|
New Retail |
The new proposed retail value for the effective date. Edit this field to override the proposed price. |
Yes |
|
|
New Retail/UOM |
The new retail value per unit of measure. For example: ".05/oz" if there is a 16 oz. can of soup that retails for .89 |
No |
New Retail divided by the Unit Of Measure. |
|
New Retail Markup %. |
The percent retail sales margin of the item based on the new retail. |
No |
New Retail minus New Cost divided by New Retail (Before VAT) The zone level basis cost if used if it exists. |
|
New Retail UOM |
The unit of measure for the item's new retail. If you enter a new retail, New Retail UOM is required. |
Yes |
|
|
Original Retail |
The original retail of the item. |
No |
|
|
Out of Stock Date |
The out of stock day for clearance price changes. You can change this field. |
Yes |
Default Out of Stock Days after the effective date |
|
Package Size |
The package size of the item. |
No |
|
|
Package UOM |
The package unit of measure of the item. |
No |
|
|
Parent ID |
The parent item ID if the worksheet is at transaction item level and the item has a parent. |
No |
|
|
Parent Item Description |
The name of the parent item. |
No |
|
|
Pending Cost Changes |
The date of the earliest pending cost change for the item for the primary supplier. A hyperlink opens a link to a window with more information. |
No |
|
|
Price Change Amount |
The monetary value of the price change for one unit of that item. |
No |
New Retail minus Basis Retail at the location Depending on your aggregation level settings: Price Change Amount = Basis Retail - New Retail Price Change Amount = New Retail - Current Basis The zone level basis retail is used if it exists. |
|
Price Change Indicator |
Select "Take" to accept the proposed price change for the transaction level item and lock the row for editing. Select "Don't Take" to reject the proposed price change and lock the row for editing. |
Yes |
|
|
Price Changes |
A hyperlink "NONE" if no price changes exist during review period. A hyperlink "Pending" if price changes exist during review period. Click the hyperlink to view pending price change records. Note: During the review period means between today's date and the end of the review period. |
No |
|
|
Primary Competitor Alert |
"Pass" appears if there is a primary competitor and the strategy rules is met. "Fail" appears if the strategy rule is not met. |
No |
|
|
Primary Competitor Retail Changed Ind |
"Yes" when a new or updated competitor retail is brought into RPM. Note: If more than one strategy uses the same competitor, "Yes" will only appear in the worksheet for the first strategy to find it. |
No |
|
|
Primary Competitor Retail |
The primary competitors retail. |
No |
|
|
Primary Competitor Retail UOM. |
The items selling unit of measure for the primary competitor. |
No |
|
|
Primary Competitor Multi-Units |
The unit value of the multi-unit retail price on the most recent shop date. For example: "2" if there is a 2 for $5 multi-unit retail |
No |
|
|
Primary Competitor Multi-Unit Retail |
The primary competitors multi-unit retail with the number of units on the most recent shop date. For example: 2 for $5 |
No |
|
|
Primary Competitor Multi-units UOM. |
The items unit of measure for the multi-unit price on the most recent shop date. |
No |
|
|
Primary Supplier |
The primary supplier ID for the item. Note: Place the cursor over this field to view the supplier name. |
No |
|
|
Promotions |
Hyperlink that opens a window with details on approved current or pending (after the effective date of the current price change) promotions. |
No |
|
|
Proposed Cost Markup %. |
The cost markup of the item based on proposed retail and basis cost. |
No |
Proposed Retail minus Basis Cost divided by Basis Cost. The zone level basis cost is used if it exists. |
|
Proposed Retail |
The retail on the proposed effective date. |
No |
Proposed Effective Date plus Price Prior Create Days |
|
Proposed Retail/UOM |
The proposed retail per unit of measure in the package. For example: ".05/oz" if there is a 16 oz. can of soup that retails for .89 |
No |
Proposed Retail divided by Package UOM |
|
Proposed Retail UOM |
The unit of measure for the item's proposed retail. |
No |
|
|
Proposed Retail Markup % |
The retail sales margin of the item based on the new retail. |
No |
Proposed Retail minus Basis Cost divided by Proposed Retail (Before VAT) The zone level basis cost if used if it exists. For zone level records, if a zone level basis cost exists, use that value in the calculation |
|
Replenishment Indicator |
"Yes" if the item is on an active replenishment record. |
No |
|
|
Reset Date |
The reset date for the item. Enter a date to change the default. |
Yes |
Defaults to Out of Stock Date plus one day |
|
Retail Label Type |
The retail label type of the item. |
No |
|
|
Retail Label Value |
The retail label value of the item. |
No |
|
|
Price Zone Group ID |
The price zone group ID for a zone level item. Note: Place the cursor over this field to view the price zone group description. |
No |
|
|
Price Zone ID |
The price zone ID for a zone level item. Note: The price zone description is available as a mouse over. |
No |
|
|
Rule |
Binocular icon appears if the item meets rules. Click the icon to open a window and view details of the rules met by the record. |
No |
|
|
Projected Sales Units |
The smoothed average regular price sales based on the number of weeks of sales that have occurred. |
No |
Total Sales divided by Total Weeks of Sales |
|
Sales Change Amount |
The difference between the items new retail and the basis retail on the effective date multiplied by the projected sales for a week. |
No |
Depending on your aggregation level settings: Sales Change Amount = Basis Retail - New Retail Sales Change Amount = New Retail - Current Basis On Worksheet Status the sum of all individual records. On Worksheet Detail per item. |
|
Seasonal Sell Thru % |
The sell through percent for the current season. Total sales for the stores in the zone or location divided by stock on hand for the zone/location. |
No |
Total Sales For the Season divided by Stock On Hand Depending on your aggregation level settings Warehouse Stock On Hand will be included or excluded. |
|
Season/Phase |
Hyperlink opens Season/Phase detail window. |
No |
|
|
Sell Thru % |
The sell through percent for store locations in the zone. |
No |
Sales divided by (Stock On Hand plus Sales) Depending on your aggregation level settings Warehouse Stock On Hand will be included or excluded. The type of sales and the amount of time to be considered is determined by the Sales Calculation Method. |
|
State |
The status of the details of the record. |
No |
|
|
Store On Hand |
The current stock on hand at store locations. |
No |
|
|
Store On Order |
The total on order qty for all stores in the price zone. Note: On order is in the single unit size of the item, not case size. |
No |
|
|
Store total inventory |
Total inventory for all stores in the zone. |
No |
Store On Hand plus Store On Order plus Store In_Transit + Store OBNP_INV |
|
Subclass ID |
The subclass hierarchy ID of the item's subclass. Note: Place the cursor over the field to view the subclass description. |
No |
|
|
UDA |
Hyperlink opens UDA information for the item if it exists. |
No |
|
|
VPN |
The VPN for the primary supplier of the item. |
No |
|
|
Weeks of Sales Exposure |
The number of weeks the item has had sales exposure (on had at location). |
No |
|
|
Weeks Since First Sale |
The number of weeks since the items first sale. |
No |
|
|
Total Inventory |
Total inventory for the item/location. |
No |
Total Warehouse Inventory plus Total Store Inventory |
|
WH Stock On Hand |
The current stock on hand at warehouse locations in. |
No |
|
|
Warehouse On Order |
Total on order qty for all stores in the price zone. Note: On order is in the single unit size of the item, not case size. |
No |
|
|
WH total Inventory |
The total inventory for all stores in the zone. |
No |
Warehouse On Hand plus Warehouse On Order plus Warehouse In Transit |
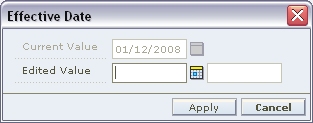
Double-click the cell.
Enter a value, change a value, or select from a drop-down list.
Press and hold the Ctrl key while selecting cells or column headings to select multiple cells or columns.
Right-click on the selected cells or columns. An editing window appears that allows you to edit the value for all selected cells.
Enter a value, change a value, or select from a drop-down list.
Click OK. The values for all selected cells change.
You can edit the worksheet to display only the columns you are concerned with, change the order the columns display, and change the number of rows that appear.
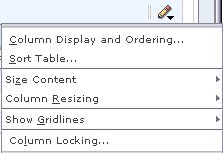
In the Worksheet Details pane, click the drop-down button. A drop-down menu is displayed.
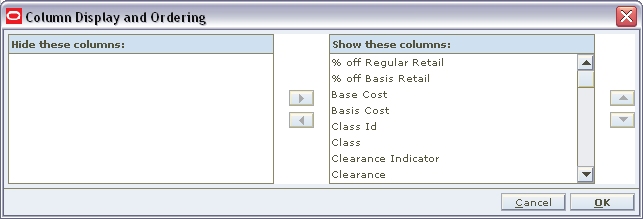
Select Column Display and Ordering from the drop-down menu. The Column Display and Ordering dialog opens.
To hide columns:
Select a column to hide in the Show these columns pane.
Click the left arrow button. The column name appears in the Hide these columns pane.
Repeat the steps above to hide additional columns.
To hide individual columns, right-click on the column heading in the Worksheet Details pane and select Hide Column from the drop-down menu.
To position columns:
Select a column to re-position in the Show these columns pane.
Click the and right and left arrow buttons as necessary to move the columns. This determines the position of the columns from left to right.
Repeat the steps above to re-position additional columns.
To reposition individual columns, click on the column heading in the Worksheet Details pane and drag it to the desired position.
Click OK. The worksheet columns are repositioned to reflect your changes.
In the Worksheet Details pane, click the drop-down menu button.
Select Sort Table from the drop-down menu. The Column Sorting and Sort Order dialog opens.
Set the sort order of the worksheet:
Select a column from the Columns pane.
Click the right arrow button. The column name appears in the Priority Column pane.
Repeat the steps above to move additional columns.
Select a column in the Priority Column pane.
Click the right and left arrow buttons as necessary to move the columns. This determines the order by which the worksheet information is sorted.
Clear the Ascending column to have the column sort date in descending order.
Repeat the steps above as necessary.
Click OK. The worksheet columns are sorted to reflect your changes.
To sort based on individual columns, right-click on the column heading in the Worksheet Details pane and select either Make Primary Sort, Ascending or Make Primary Sort, Descending from the drop-down menu.
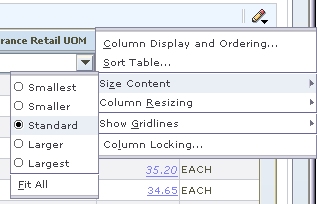
In the Worksheet Details pane, click the drop-down menu button.
Move the cursor over Size Content.
Select from the drop-down menu:
Smallest
Smaller
Standard
Larger
Largest
Fit All
The size of the content on the worksheet is adjusted.
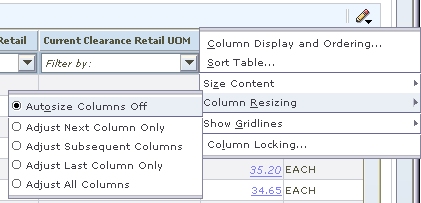
In the Worksheet Details pane, click the button.
Move the cursor over Column Resizing.
Select from the drop-down menu:
Adjust Next Column Only
Adjust Subsequent Columns
Adjust Last Column Only
Adjust All Columns
The worksheet columns are adjusted.
To resize individual columns, position the cursor on the right-hand border of the column heading. The cursor will change to a double arrow. Click and drag right or left to resize the column.
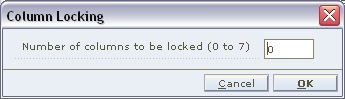
You can set up to seven columns to be locked or non-scrolling. This allows comparison of values in the locked columns to all other columns in the worksheet.
In the Worksheet Details pane, click the drop-down button.
Select Column Locking from the drop-down menu. The Column Locking dialog opens.
Enter the number of columns to lock.
Click OK. The columns are locked (non-scrolling).
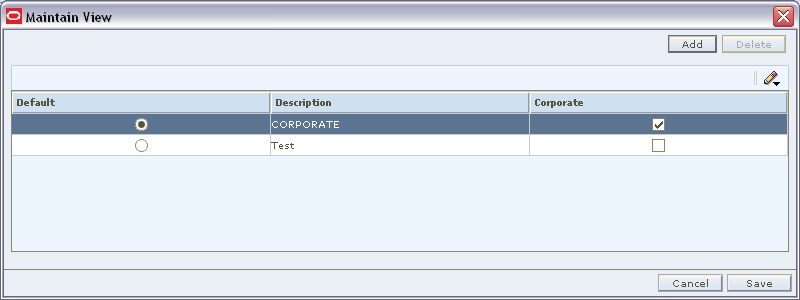
Click Maintain View. The Maintain View dialog opens.
Click Add. A new line appears in the list.
Enter a name for the view in the Description field.
Select the Default View checkbox if you would like the view you created to be the default view.
Click Save. The view is saved and is accessible from the drop-down menu at the top of the Worksheet Details pane.
Since worksheets may contain many detail records, RPM gives you the ability to filter those records so you see only the details that need attention. You can perform an ad-hoc filter on any column in the Worksheet Detail or you can create and save an advanced filter that you can continue to use in the future.
In the Worksheet Details pane, select a value from the Filter by: drop-down menu above the column you wish to filter the worksheet by. The worksheet view is refreshed, with the filter applied.
In the Worksheet Details pane, select Clear Filter from the Filter by: drop-down menu above the column that the filter was applied to. The filter is cleared and the worksheet returns to its previous state.
|
Note: Any other filters applied are still applied to the worksheet. |
In the Worksheet Details pane, select Revert to Default from the Filter by: drop-down menu above any column. The filters are cleared and the worksheet returns to its original state.
|
Note: Advanced filters override any ad hoc filters previously applied to the worksheet. |
In the Worksheet Details pane, select Advanced Filter from the Filter by: drop-down menu above the column you wish to filter the worksheet by. The Advanced Filter dialog opens.
Select a condition to apply to the column from the top drop-down list in the dialog.
Enter or select a value for the filter to look for in the next drop-down list.
You may enter an additional condition and value in the remaining drop downs.
Select a logical operator (And or Or) in the area between the drop downs.
Click OK to apply the filter to the worksheet. The worksheet refreshes, with the filter applied.
In the Worksheet Details pane, click the Filter button. The Worksheet Detail Filter window opens.
|
Note: Click the clear filter button to remove the filter criteria. |
Select Column to have the filter compare the values in two columns.
OR
Select Value to have the filter match a value in a column.
Select a column to filter by from the Column drop-down list.
Select a condition to apply to the filter from the Condition drop-down list.
Select a column to compare to the previous column in the Column drop-down list if you chose to filter by column above.
OR
Select of Enter a value for the filter to look for in the next field if you chose to filter by value above.
Click Add Criteria. The criteria is added to the Worksheet Detail Filter table.
Repeat the steps above to continue adding criteria. Continue to the next step.
Click Save As to save the filter.
Enter a name for the filter in the Save Filter dialog.
Select a filter from the Filter drop-down list.
Select criteria from the Worksheet Detail Filter table. You can select multiple criteria.
Click Apply Filter. The Worksheet Detail Filter window is closed and the filter is applied.
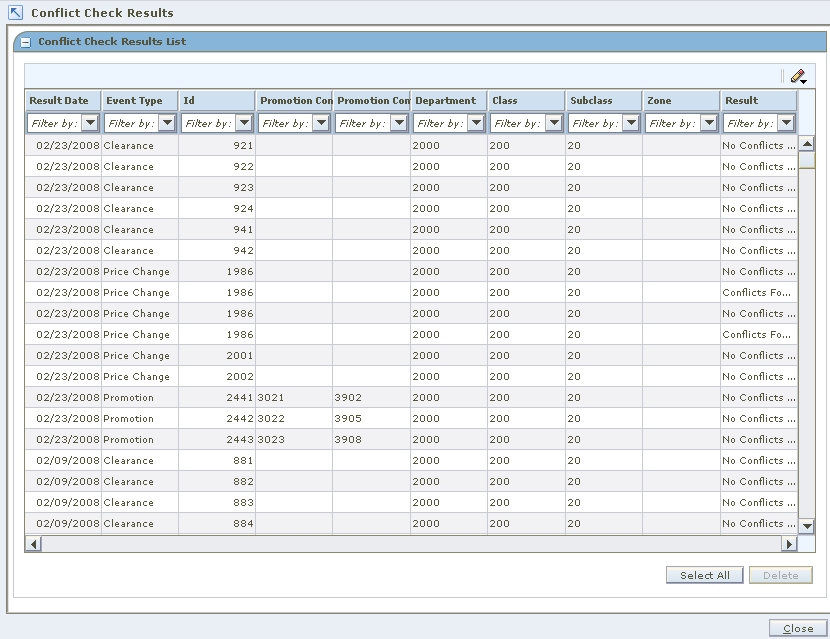
The Conflict Check Results workspace allows you to review the results of background conflict checking for worksheets, price changes, promotions, and clearances. If the background conflict checking system option is selected, conflict reviews occur in the background, or when the system is not busy performing other tasks. An alert appears in the Conflict column of the worksheet, price change, promotion, or clearance maintenance pane when conflict checking is complete. At that time, follow the procedures below to view the results of background conflict checking.
When background conflict checking is off the system performs conflict checks immediately when Conflict Check is clicked from the Price Change, Promotions, or Clearances workspaces.
Navigate: From the Task Pad, select View Tasks > View Tasks. The View Tasks workspace opens. 
In the Start Date field, enter the processing start date.
In the End date field, enter the processing end date.
Click Search. The tasks pertaining to the selected dates are listed.
The pricing worksheet can be maintained either by enabling the filter or by having the filter disabled. To enable or disable the filter, see Edit System Options.
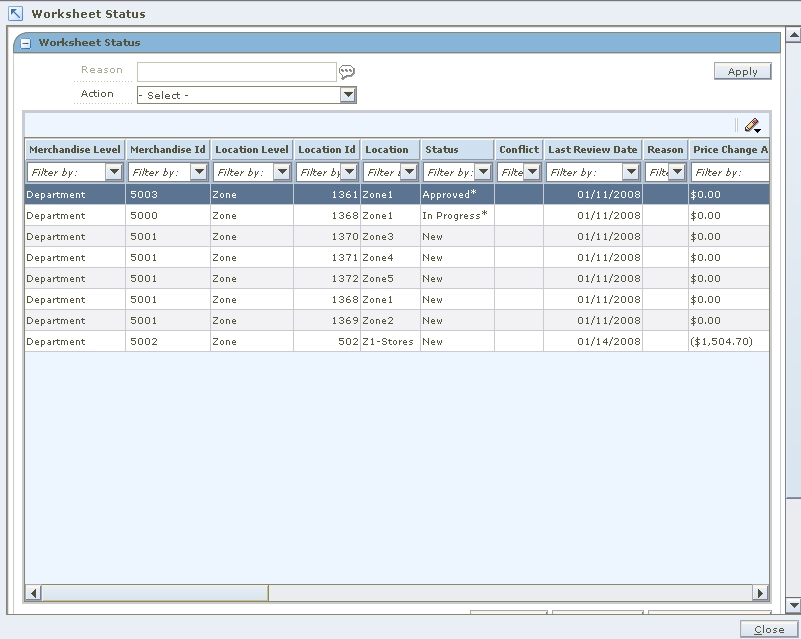
Navigate: From the Task Pad, select Worksheet > Worksheet Status. The Worksheet Status workspace opens.
Select the worksheet you want to maintain.
|
Note: You can select multiple worksheets as long as they are for the same department and currency. |
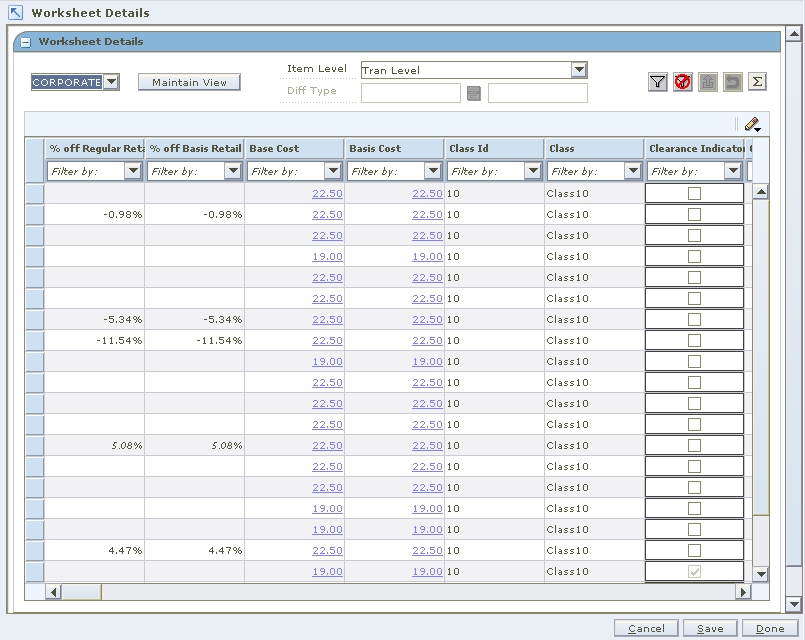
Click Worksheet Detail. The Worksheet Details screen is displayed.
In the Item Level field, select the level in which you want the worksheet to be displayed. For example, Parent Level, to display all records at the parent level.
Click Save to save the worksheet.
Click Done to go back to the Worksheet Status screen.
Navigate: From the Task Pad, select Worksheet > Worksheet Status. The Worksheet Status workspace opens.
Select the worksheet you want to maintain.
|
Note: You can select multiple worksheets as long as they are for the same department and currency. |
Click Worksheet Filter. The Worksheet Search screen is displayed.
Click Skip Filter to avoid the filtering.
In the Worksheet Search pane, select the necessary fields and click Search.
The records based on the search criteria are displayed in the Worksheet Filtered Result pane.
Click Done to go back to the Worksheet Status screen.
The Pricing Worksheet status must be in "In Progress" to enable the Submit action. To change the status of the Pricing Worksheet from New or Updated to In Progress, you need to have at least one row or item selected for price change.
Select the worksheet that you want to submit.
Review the information in the Worksheet Status window to ensure that it is correct.
From the Action drop-down list, click Submit.
Click Apply. The status is changed to Submitted and the Pricing Worksheet is ready for approval.
|
Note: Before the status changes to Submitted, RPM checks the Pricing Worksheet to ensure that there are no conflicts. The status options that are available from the Action drop-down list change based on current status of the worksheet's details. |
|
Note: The Pricing Worksheet status must be in either Submitted or Delete Pending status before you can select the approve action. |
Select the worksheet that you want to approve.
When you are ready to approve the submitted or delete Pending Pricing Worksheet, select Approve.
Click Apply. The Pricing Worksheet information is saved and applied.
|
Note: For worksheets in Submitted status, before the status changes to Approved, RPM checks the Pricing Worksheet to ensure that there are no conflicts. Delete pending status worksheets are not conflict checked before being moved to Deleted status. When the system option, Dynamic Area Differentials is off, secondary area worksheets are enabled when the primary area is approved. When the system option is on, changes to secondary areas happen dynamically after changes to the primary area. |
You can reject a Pricing Worksheet that has a status as Submitted or Delete Pending. When you reject a submitted or delete pending Pricing Worksheet, its status changes to Rejected or Delete Rejected.
|
Note: If you want to work with the Pricing Worksheet when its status is Rejected, Reset the status of the Pricing Worksheet (see the procedure below). |
Select the worksheet that you want to reject.
You can enter a Reason for the rejection in the Reason field. Click the edit (dotted) button to open an editing window where you can enter a reason up to 250 characters long.
From the Action drop-down list, select Reject.
Click Apply. The status of the Pricing Worksheet changes to Rejected or Delete Rejected.
Use the Reset action to return the worksheet to its previous status.
Select the worksheet that you need to reset the status of.
From the Action drop-down list, select Reset.
Click Apply. The Worksheet Status window refreshes and the worksheet is returned to its previous status.
Select the worksheet that you want to delete.
From the Action drop-down list, select Delete.
Click Apply. The Pricing Worksheet is moved to Delete Pending status and is ready to have your deletion approved or rejected.
|
Note: The options that are available from the Action drop-down list change based on worksheet's current status. |
Navigate: From the Task Pad, select Worksheet > Worksheet Status. The Worksheet Status workspace opens.
Select the worksheet you want to view the details of. You can select multiple worksheets or click Select All to select of all the worksheets.
Click Worksheet Detail. The Worksheet Details workspace opens.
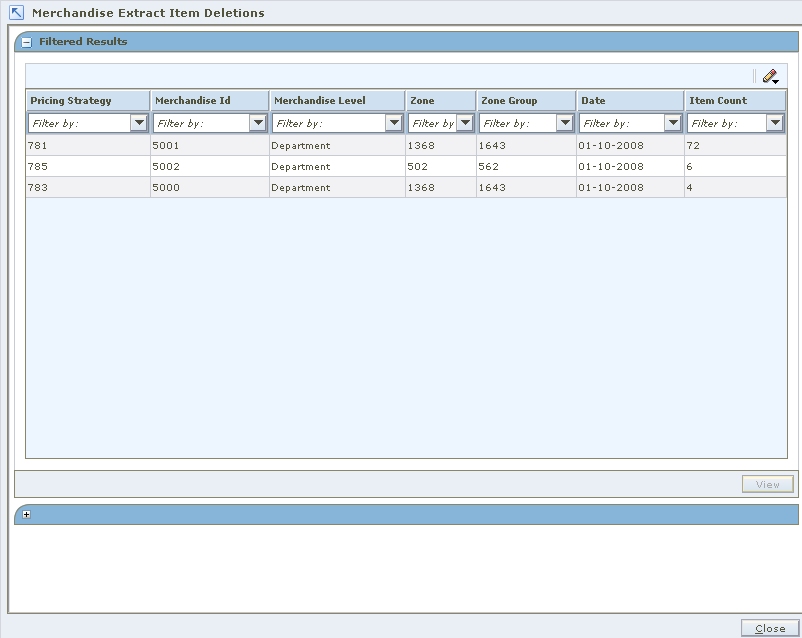
Navigate: From the Task Pad, select Worksheet > Merchandise Extract Item Deletions. The Merchandise Extract Item Deletions workspace opens.
Double-click on the row on the summary table that you would like to see more details. The details table is populated with the items and information that were excluded from the resulting worksheet for the particular run of the merchandise extract.
Filter the detail results by selecting the appropriate drop-down menus.
Table 6-2 Drop-down Menu Definitions
| Column | Definition |
|---|---|
|
Area Differential Exclusion |
Item/location combinations that have been excluded from a Secondary Area Differential. |
|
Invalid Maintain Margin Cost |
The strategy is maintain margin and the item/location does not have a cost change in the cost review period. |
|
Invalid Secondary Item |
Item/locations that meet one of the following conditions:
|
|
Missing Link Item |
When one or more item from a item-link code/zone group is missing the entire group is excluded. Item/locations that meet one of the following conditions:
|
|
New Item Location |
Item/locations that are not present in at the start of a review period cannot be added in the middle of a review period. |
|
No Cost |
No cost could be found for the item/location. |
|
No Retail |
No retail could be found for the item/location. |
|
Candidate Rule Exclusion |
The item/location meets a exclusion candidate rule. |
|
Variable Link Code |
The item does not have the same Link Code at all locations in the zone. |
|
Variable Link MBC |
The items sharing a market basket code do not have the same Link Code at all locations in the zone. |
|
Variable Link Selling UOM |
The items sharing a link code do not have the same Basis UOM at all locations in the zone. |
|
Variable Link Vat Indicator |
The items sharing a link code do not have the same vat indicator at all locations in the zone. |
|
Variable Zone Selling UOM |
The item does not have the same Basis UOM at all locations in the zone. The strategy is maintain margin and the item/location does not have a cost change in the cost review period. |
Enter a new retail price in the New Retail field as required for each item.
Select the level to view the worksheet at from the Item Level drop-down list.
Change the Price Change Indicator field in the appropriate row:
Select "Take" to accept the proposed price change for the item.
Select "Don't Take" to reject the proposed price change for the item.
Click Save. Your changes to the worksheet are saved and the Worksheet Status workspace opens.
See "Worksheet Columns" for a complete list of the editable columns in the worksheet.
Navigate: From the Task Pad, select Worksheet > Worksheet Status. The Worksheet Status workspace opens.
Select the worksheet you want to view the details of. You can select multiple worksheets or click Select All to select of all the worksheets.
Click Worksheet Detail. The Worksheet Details workspace opens.
Select the row you want to view totals for by clicking the box to the left of the row.
Press and hold the Ctrl key while selecting to select multiple rows. Click Select All to select all the rows.
|
Note: If no items are selected, the totals appear for all items where a price change would occur. |
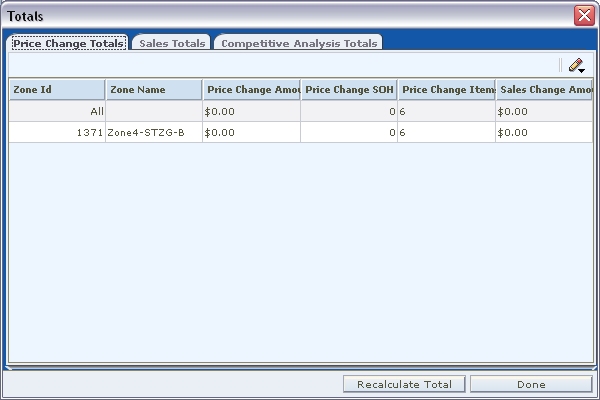
Click the Totals button. The Totals window opens.
Select the Price Change Totals tab. The totals for all of the item rows that you selected appear on the Totals window.
Click Done. The Totals window is closed.
Navigate: From the Task Pad, select Worksheet > Worksheet Status. The Worksheet Status workspace opens.
Select the worksheet you want to view the details of. You can select multiple worksheets or click Select All to select all of the worksheets.
Click Worksheet Detail. The Worksheet Details workspace opens.
Select the row you want to perform a what-if analysis on by clicking the box to the left of the row.
Press and hold the Ctrl key while selecting to select multiple rows. Click Select All to select all the rows.
Click What If. The What If window opens.
Make changes to the following fields to test what happens to the worksheet:
Price guide: Select a new price guide from the New drop-down list.
Markdown percent: Enter a markdown percent in the New Markdown Percent field.
Click Apply. The What If window is closed and the data in the Worksheet change to reflect the changes made in the What If window.
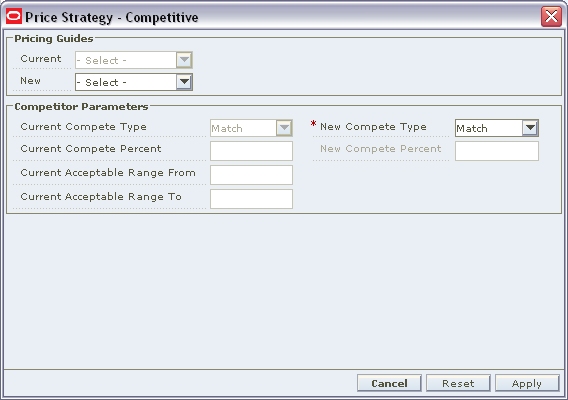
Click What If. The What If window opens.
Make changes to the following fields to test what happens to the worksheet:
Price guide: Select a new price guide from the New drop down.
Compete type: Select a different compete type for the whole worksheet or by code by selecting from the New Compete Type drop downs.
Compete percent: Enter a new compete percent in the New Compete Percent field.
Click Apply. The What If window is closed and the data in the Worksheet change to reflect the changes made in the What If window.
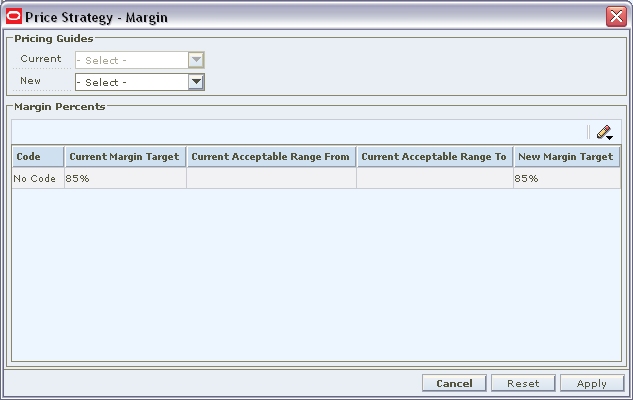
Click What If. The What If window opens.
Make changes to the following fields to test what happens to the worksheet:
Price guide: Select a new price guide from the New drop down.
Margin target: Enter a margin target in the New Margin Target field.
Click Apply. The What If window is closed and the data in the Worksheet change to reflect the changes made in the What If window.
The Export function allows you to export the current view of the worksheet to a Comma Separated Value (.CSV) file.
Navigate: From the Task Pad, select Worksheet > Worksheet Status. The Worksheet Status workspace opens.
Select the worksheet you want to view the details of. You can select multiple worksheets or click Select All to select of all the worksheets.
Click Worksheet Detail. The Worksheet Details workspace opens.
Select the row you want to export by clicking the box to the left of the row.
Press and hold the Ctrl key while selecting to select multiple rows. Click Select All to select all the rows.
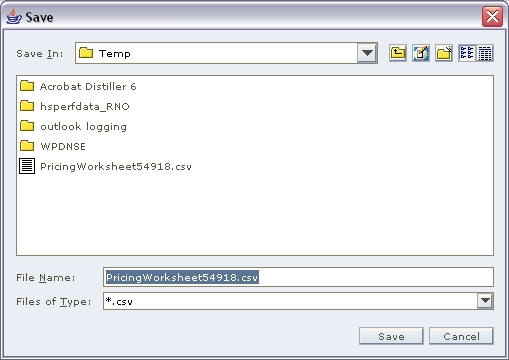
Click the Export (up arrow) button. The Save window opens.
Select a location to save the file to from the Save In drop down.
Enter a name for the file in the File Name field.
Click Save. The file is saved.
Open the file in the program of your choice such as a spreadsheet or word processor.