| Oracle® Retail Merchandising Implementation Guide Release 15.0 E65391-01 |
|

 Previous |
 Next |
Oracle Retail Application Administration Console (RAAC) is an administrative tool that is used by Oracle Retail applications built using the Retail Application Framework (RAF). It allows an administrator to manage application roles, manage application navigator and manage notifications.
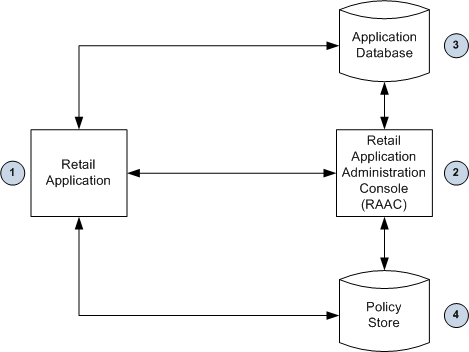
The following diagram and descriptions present a high-level technical overview of RAAC.
The RAF based applications have been designed to use RAAC. The Retail applications' installer installs RAAC as an application that can be invoked by a link in the host applications' user menu.
Retail Application Administration Console (RAAC) – This is the application that allows administrators to manage application roles, application navigator, and notifications.
Application Database – Application Navigator management and Notifications management persist settings in the database.
Policy Store – The repository for policies comprising one or more application stripes and code-based grants. Since the OPSS Management API is used to read from the policy store, the fact that the Policy Store may be file-based or database based etc, is irrelevant to RAAC. The API abstracts that deployment choice from RAAC.
RAAC is accessed from the drop down menu displayed when clicking on the logged-in administrator user ID located on the Retail application's global menu (see Figure 3-2, "RAAC User Menu"). The link launches RAAC. The Roles Mapping page in RAAC displays only the launching application's roles. The administrator can then perform roles mapping for the application.
RAAC is enabled within an application. Users can access this application from the user menu option in the Global area of the main application page and is available only for users with the following job roles:
Table 3-1 RAAC Security Privileges
| Role | Duty | Privilege |
|---|---|---|
|
ReIM Application Administrator |
Admin Console Duty |
Application Navigator Privilege |
|
Role Manager Privilege |
||
|
Notification Manage Privilege |
||
|
Allocation Application Administrator |
Admin Console Duty |
Application Navigator Privilege |
|
Role Manager Privilege |
||
|
Notification Manage Privilege |
||
|
ReSA Application Administrator |
Admin Console Duty |
Role Manager Privilege |
|
Application Navigator Privilege |
||
|
Notification Manage Privilege |
RAAC is accessed through an RAAC supported application. Attempting to access RAAC directly through the URL will result in an error.
Click the RAAC application link in the user menu.
A new tab window or browser window is launched (depending on your browser settings).
From the Retail applications' login screen (for non-single sign-on), enter your username and password.
Most retailers have their security systems and groups defined and available for them to use. As part of the Oracle Retail application security set up, default enterprise roles/groups and their mappings to application roles are provided with every application. These enterprise roles/groups may not map one-to-one to retailers' security groups. Role Manager in RAAC provides a way for retailers to modify the default enterprise roles so they map to their security groups. It also provides a way for the retailers to change the mappings of the enterprise roles/groups to the application roles.
The following is an explanation of Enterprise (or Job) Roles and Application (or Duty and Privilege) roles:
Job roles are called as such because they closely map to the jobs commonly found in most retailer organizations.
Naming Convention: All retail Job role names end with' _JOB'.
Example: ALLOCATOR_JOB.
Duties are tasks or responsibilities one must do on a job.
Duty roles are roles that are associated with a specific duty or a logical grouping of tasks. Generally, the list of duties for a job is a good indicator of what duty roles should be defined.
Duties that you create should be self-contained and pluggable into any existing or new job role.
Naming Convention: All retail duty role names end with' _DUTY'.
Example: ALC_ALLOC_POLICY_MAINTENANCE_MANAGEMENT_DUTY.
RAAC uses ADF security to implement functional security. The enforcement of functional security is delegated to the Fusion Middleware.
RAAC allows retailers to tailor Oracle Retail applications' default security models to their enterprise business model. This tool also helps retailers manage their Retail applications' security metadata. RAAC provides:
The ability to create new Application Roles (DUTY) through the Manage Roles Mapping task.
The ability for a retailer to change the default roles mapping based on its business needs.
The ability for clients to backup the roles mapping to a file in their local file system.
Export capability to facilitate the backup and migration of policies from one environment to another.
The Manage Roles area of RAAC consists of two main task flows used to fulfill the above mentioned business requirements.
Manage Duty Roles
Manage Roles Mapping
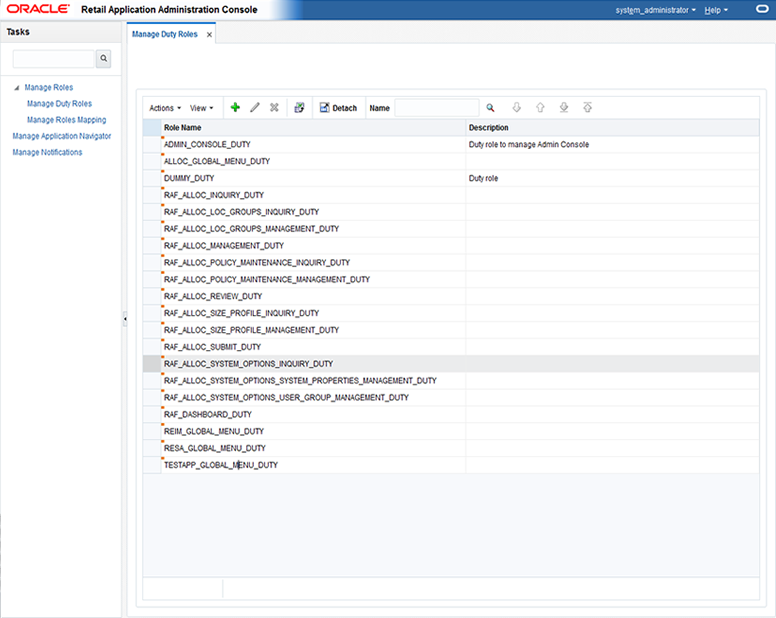
The Manage Duty Role task flow allows users to create or delete duties. Users can create a new duty role to map according to the retailers enterprise business model.
When a user clicks the manage duty role task flow from the regional area, it opens a new tab in the local area. A table is displayed with all the duties associated with the application. The table toolbar has the following action menu:
Add
Edit
Delete
Export to Excel
A quick search component is provided on the table toolbar to quickly look up any desired record.
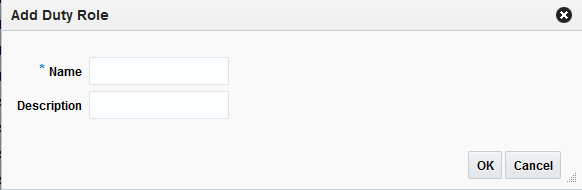
The Add action is enabled at all times and allows you to add a new duty role.
From the Actions menu, select Add. The Add Duty Role dialog is displayed.
Enter a duty name and (optionally) a description for the new duty role and click OK.
Upon entering a name and moving to the Description field or when you click OK, RAAC performs a validation to prevent name duplication. If the name entered already exists, the following error message is displayed; A Duty with this name already exists. Enter a unique name. If the duty name is unique, the new duty is created.
All newly created duties are reflected in the Policy Store, allowing them to be mapped to a role.
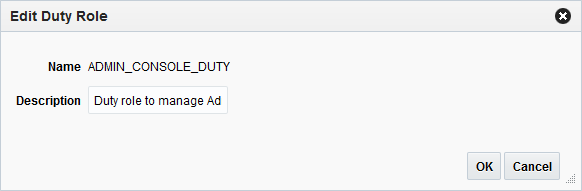
The Edit action is enabled when a duty role is selected. The Edit action is used to add or modify the description of an existing duty role.
The Delete action is enabled when you select a level that can be deleted from the database.
Only empty duty roles that do not contain any child duty or child privilege roles can be deleted. This is because a child privilege is associated with application code. Therefore, to delete the duty role, you must first remove all mappings between the duty and the child duties and privileges. If you attempt to delete a duty role without first removing the mapping, the following error message is displayed; You cannot delete duty because it has duties or privileges associated with it. Remove these mappings using Manage Roles Mapping task.
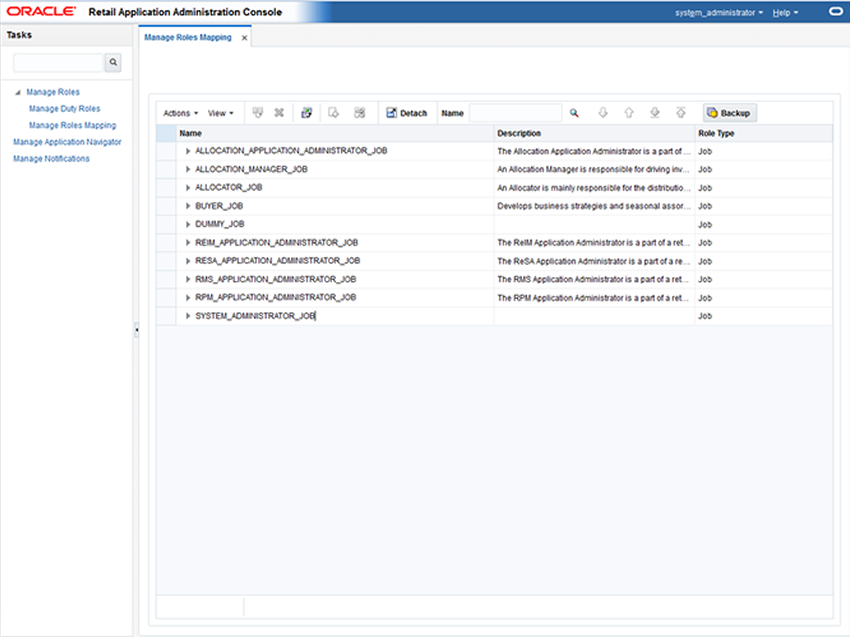
The Manage Roles Mapping task allows you to add or remove duties or privileges associated with a job role.
When you click the Manage Roles Mapping link, a new tab is opened in the local area that displays a tree table with the already associated roles of the respective application (that is, the source application from which RAAC was launched). You can then choose to perform the following actions:
Duplicate
Delete
Export to Excel
Select and Add
Remap
A quick search component is provided on the table toolbar to quickly look up any desired record.
The Duplicate action allows you to copy and paste existing job roles to create a new role. For example:
Within a retailer enterprise security system there are two security groups called Allocator_xyz and Assistant_ Allocator_xyz. By default, only the Allocator role is provided. The Assistant Allocator role is a trimmed down version of the Allocator role with fewer privileges. You can use the Duplicate action to copy the Allocator role and then edit the privileges of the new role.
Select the job role you want to duplicate.
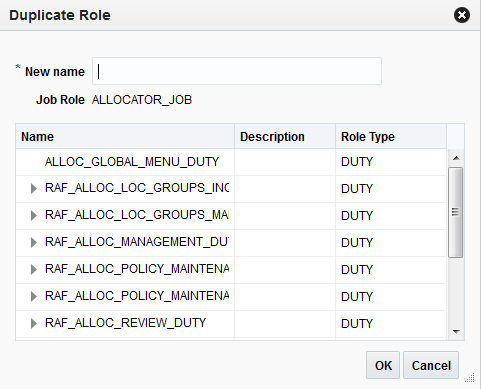
From the Actions menu, select Duplicate. The Duplicate Role dialog is displayed.
Enter a name for the duplicated role and click OK.
Upon clicking OK or tabbing out of the field, the New name is validated. The validation checks for a valid name in the enterprise security solution of the retailer. If it finds a match, then it allows the user to proceed. If the name is not valid, an error is displayed.
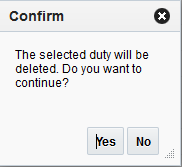
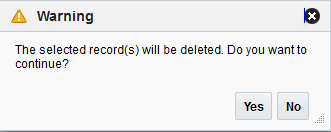
The Delete action is enabled when a duty or privilege role is selected.
When the user selects a duty or privilege role and clicks Delete, the user is prompted with a warning message. Click Yes and the selected role and all its associated roles mapping are removed.
|
Note: The Delete action does not delete the role from the database, it only removes the mapping. |
The Export to Excel action is enabled whenever you have the Manage Roles Mapping window open. This action allows you to export the Manage Roles Mapping list to a Microsoft Excel spreadsheet.
Select and Add is enabled when a job, duty, or privilege is selected. Select and Add allows you to do the following:
Add duty roles to job roles
Add duty and privilege roles to duty roles
Add privilege roles to privilege roles.
Select the job role to which you want to add a duty role.
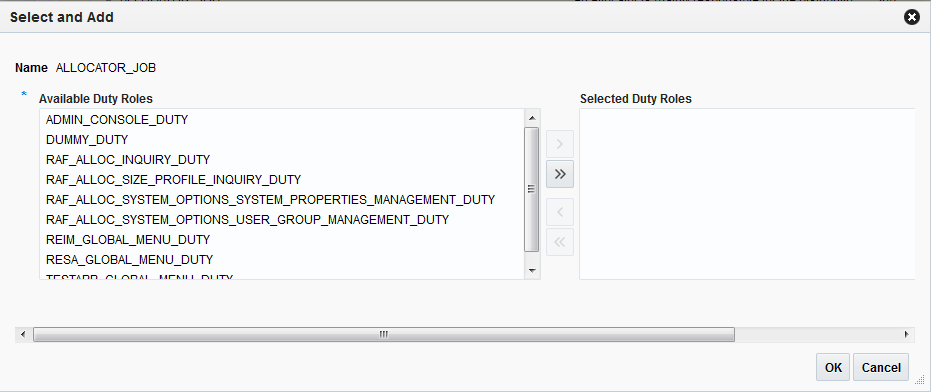
From the Actions menu, select Select and Add. The Select and Add dialog is displayed.
The Select and Add dialog has selected job, duty, or privilege fields populated and a shuttle component for the user to select from all the available duties or privileges for the applications.
Select one or multiple duties and privileges and click OK to select and add them to the job role.
If you select a duty level then all the associated privileges with it are inherited to the job role. If a privilege is selected then only that privilege is added under the selected duty role.
|
Note: To add a new job role, the user should use the Duplicate feature. |
The Remap action is enabled when a job, duty, or privilege is selected. the Remap action is used to move mapping from one role to another role. During this process, a new role is created and all the associated roles beneath the previous role are moved into the new role, leaving the old role as an orphan or with other roles associated with it.
Select the role you want to remap.
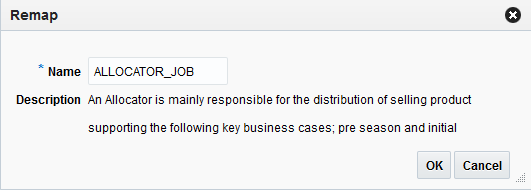
From the Actions menu, select Remap. The Remap dialog is displayed.
Enter a Name and (optionally) a Description for the remapped role.
Upon clicking OK, the New name is validated. The validation checks for a valid name in the enterprise security solution of the retailer. If it finds a match, then it allows the user to proceed. If the name is not valid, an error is displayed.
Job roles are handled in a different manner. The owner of job role creation is the Enterprise manager so when a job role is selected and remapped it will just change the current mapping to the new mapping without creating any new job role to be left as an orphan. This validation should be done once the user enters the new name and clicks OK. If there is no matching record found an error is displayed.
The Backup Roles Mapping option allows users to backup roles onto a system so that the same file can be used to load the customized roles mapping onto another server. When the user clicks on this selection, a dialog is displayed where the user can enter in the desired backup location.
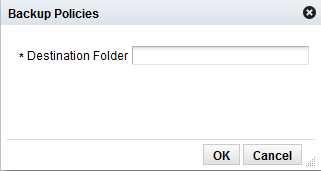
From the Manage Roles Mapping window, click the Backup button. The Backup Policies dialog is displayed.
Enter the Destination Folder in which to store the backup roles mapping and click OK.
If the backup is successful, a confirmation message is displayed.
Application Navigator allows users to launch different applications from their current application. This lets users shuffle between multiple applications based on their privileges and avoid having to open a new tab and enter a new URL to launch an application. Users can instead click on the application, which will launch that application in a new tab or window based on the browser settings. If the application is a Single Sign-On (SSO) deployment then the user will be logged in by default and the default application page is displayed. If the deployment is non-SSO then the user is prompted to log in.
If a user has access to multiple applications (based on their defined role) they are able to see the list of available applications using application Navigator icon. When the Application Navigator icon is clicked, the drop down menu displays a list of available applications. If the user does not have access to any other applications, the icon is not displayed.
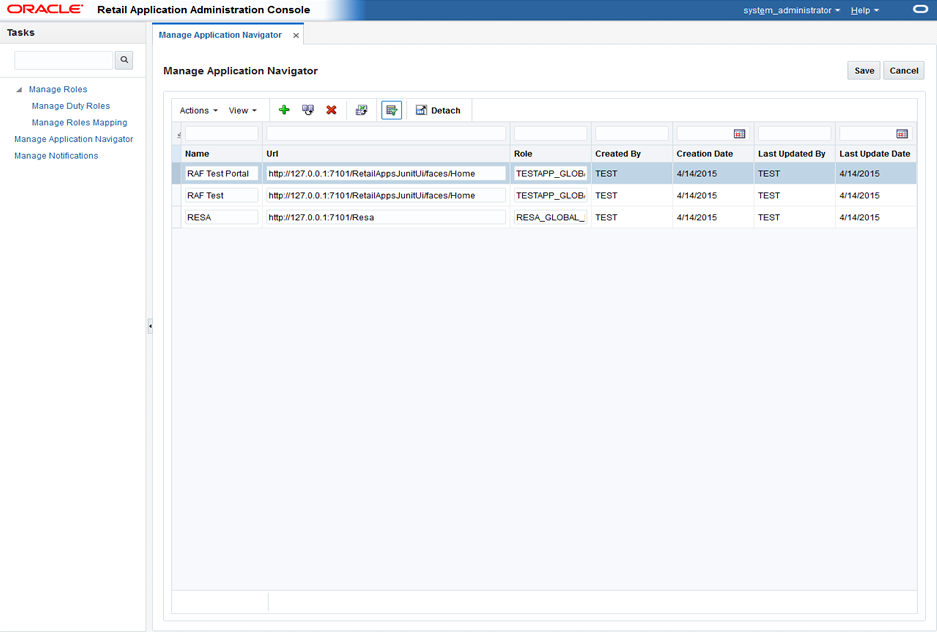
In order for users to see an application in the Application Navigator menu, they need to belong to the role associated with that application on the Manage Application Navigator screen. Only an application administrator is aware of the links to the different installed applications. RAAC provides the ability to add, modify and remove the links so they appear or not appear in the Application Navigator menu. Application administrator can determine which application role has access to which application based on customer's security model. For example, suppose Allocation users belonging to Allocation role X are to see the Invoice Match application link in the Allocation's Application Navigator menu. The administrator would launch RAAC from Allocation, navigate to Manage Application Navigator, add an entry for Invoice Match and enter X for the role.
The Add action is enabled at all times and allows an administrator to add a new Application Navigator URL.
The Duplicate action adds a copy of each selected row below its originating row. The object name or unique identifier of the duplicate row is "Copy of Object Name" and appears in edit mode. Validation is performed so that a user is not presented with multiple applications with the same application name.
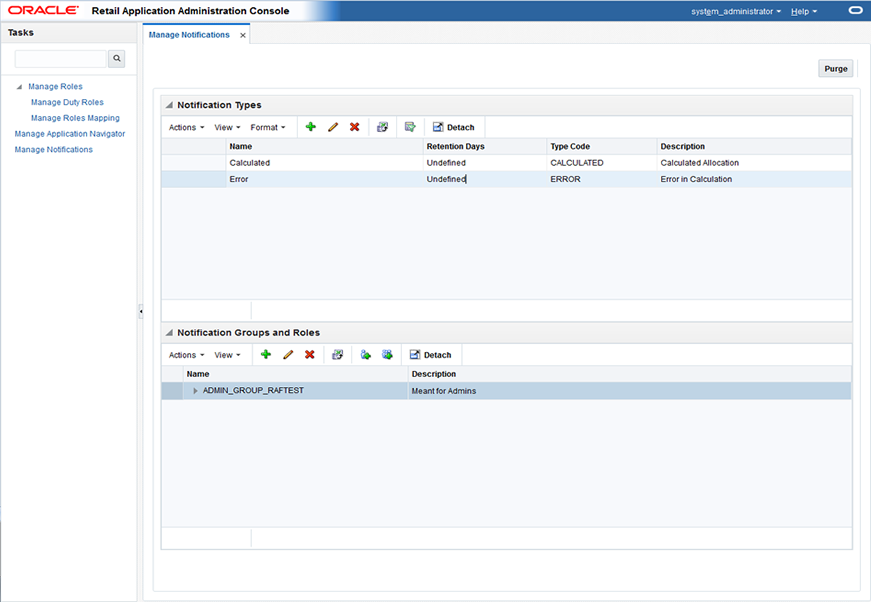
From the RAAC left hand navigation menu, the user can access the Manage Notifications link. The Manage Notifications tab displays the Manage Notifications table. This table is laid out using a master table and a detail table. The master table consists of Notification Types and the detail table consists of Notification Groups and Roles associated with the notification types.
Notification Types drive how users are notified about the result of their action. This result can be communicated to one user or a group of users based on the job roles.
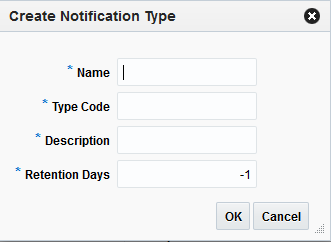
The Add action is enabled at all times and allows you to add a new notification type.
From the Actions menu, select Add. The Create Notification Type dialog is displayed.
Each notification type requires the following information:
Name – The name of the notification type
Type Code – A meaningful name to identify the notification type
The type code provides applications a way to uniquely identify a notification type.
Description – The description of the notification type
Retention Days – The number of days a notification of this type should be retained
The reason for capturing this information at event type is that it allows users to have flexibility to delete certain types of notification quickly without cluttering notification views. To retain records infinitely, this value should be set to -1.
|
Note: Administrators are discouraged from using '-1' for Retention Days as associated notifications will never be purged automatically. Only a system administrator can delete those manually through a sql script or direct row deletes through a sql tool. |
|
Note: Retention Days cannot be set to zero. |
Click OK to create the new notification type.
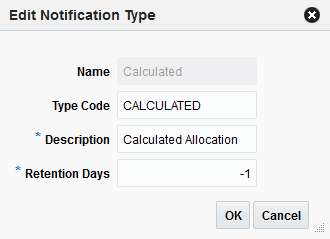
The Edit action is enabled when a notification type is selected. The Edit action is used to add or modify the description and retention days of an existing notification type.
The Delete action is enabled when you select a notification type that can be deleted from the database.
Deleting a notification type removes the notification type and all of the notification type's associated roles and groups. Any past notifications are also removed in order to maintain data integrity.
The Notification Groups and Roles table consists of all the roles associated with a notification type master record. If there are no records associated with the notification type then a "no data to display" message appears in the Notification Groups and Roles table when the notification type is selected in the Notification Types table.
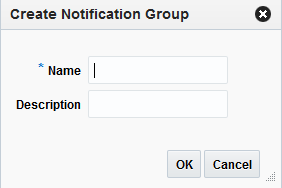
The Create action is enabled at all times when a notification type is selected and allows you to create a new notification group associated with the selected notification type.
Once a notification group is created, you can add job roles that apply to the selected group.
The Edit action is enabled when a notification group or job role is selected. The Edit action is used to modify the name and description of an existing notification group or job role.
Select the notification group or job role you want to edit.
From the Actions menu, select Edit. The Edit Notification Group (or Edit Job Role) dialog is displayed.
Modify the notification group or job role attributes and click OK.
Upon clicking OK, the New name is validated. The validation checks for a valid name in the enterprise security solution of the retailer. If it finds a match, then it allows the user to proceed. If the name is not valid, an error is displayed.
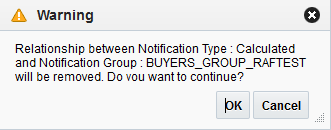
The Delete action is enabled when you select a notification group or job role that can be deleted from the database.
Deleting a notification type removes the notification type and all of the notification type's associated roles and groups. Any past notifications are also removed in order to maintain data integrity.