| Oracle® Retail Merchandising System User Guide 14.1.1 E60812-02 |
|

 Previous |
 Next |
A contract is a legally binding agreement with a supplier to supply items at a negotiated price. In RMS, the contracting functions fit closely with the replenishment and ordering functions. The main function of the Contracts windows is to source stock from the best contract, track supplier availability and commitments, and match them with business requirements. The main business benefit of contracting is to achieve supplier involvement during the planning phase of your business.
The following types of contracts can be created and maintained:
Type A (Plan/Availability): The contract contains a plan of manufacturing quantity by ready date. Supplier availability is matched to the ready date. Orders are raised against the plan as suggested by replenishment requirements, provided there is sufficient supplier availability. The user can also raise manual orders.
Type B (Plan/No Availability): The contract contains a plan of manufacturing quantity by ready date and dispatch-to location or locations. There are one or more ready dates, which is the date that the items are due at the dispatch-to location. Supplier availability is not required. Orders are raised automatically from the contract based on ready dates.
Type C (No Plan/No Availability): The contract is an open contract with no production schedule and no supplier availability declared. The contract lists the items that will be used to satisfy a total commitment cost. Orders are raised against the contract based on replenishment requirements. The user can also raise manual orders.
Type D (No Plan/Availability): The contract is an open contract with no production schedule. The supplier declares availability as stock is ready. The contract lists the items that will be used to satisfy a total commitment cost. Orders are raised against the contract, based on replenishment requirements and supplier availability. The user can raise manual orders.
More information can be found in these related topics:
See "Edit Supplier Availability for Items" in the System Administration chapter
See "Filter Cost Records on a Contract" in the Purchasing chapter
See "View a Contract" in the Purchasing chapter
See "View a Summary of a Contract by Parent/Diff" in the Purchasing chapter
See "View Supplier Availability for Items" in the Foundation Data chapter
See "View the Audit Trail for a Contract" in the Oracle Retail Sales Audit User Guide
See "View the Cost History of Items by Contract" in the Purchasing chapter
See "View the Items on a Contract" in the Purchasing chapter
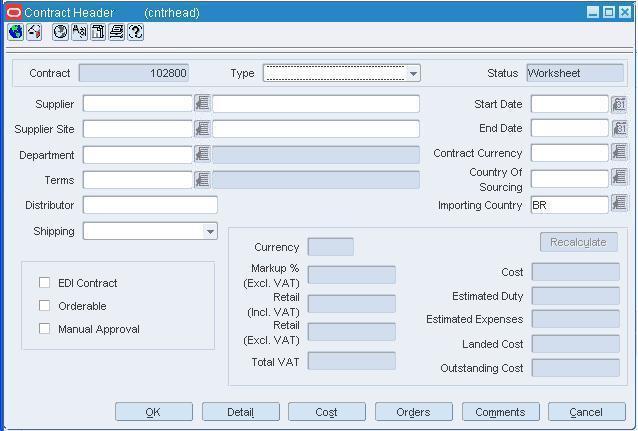
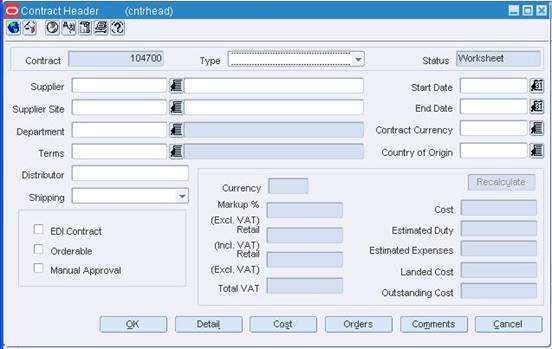
The Contract Header window allows you to create, copy, edit, or view a contract.
See "View a Contact" in the Purchasing chapter
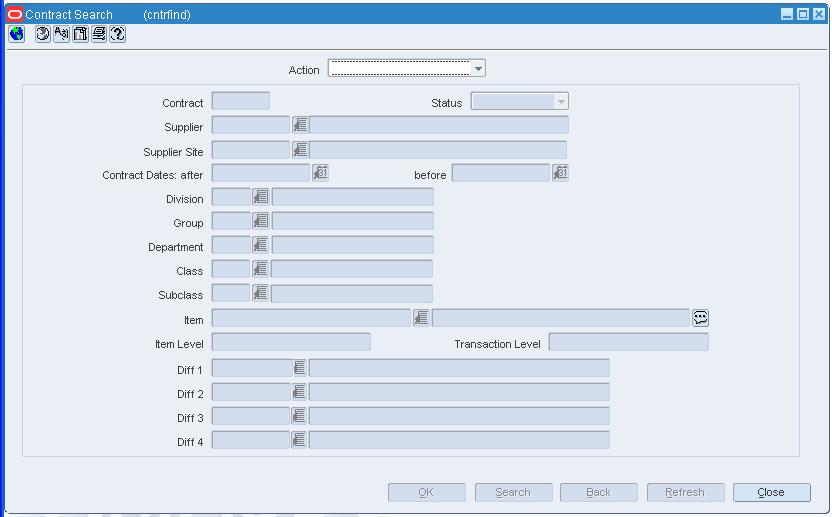
Navigate: From the main menu, select Ordering > Contracts. The Contract Search window opens.
In the Action field, select New.
Click OK. The Contract Header window opens.
In the Type field, select Plan/Availability.
In the Supplier field, enter the ID of the supplier, or click the LOV button and select the supplier. The supplier defaults for other fields are filled in automatically.
In the Department field, enter the ID of the department, or click the LOV button and select the department. Only items from this department can be placed on contract.
In the Start Date and End Date fields, enter the dates, or click the calendar button and select the dates.
In the Country of Origin field, enter the code for the country, or click the LOV button and select the country.
In the Importing Country field, enter the code for the country, or click the LOV button and select the country.
Enter or edit the enabled fields as necessary.
|
Note: Select the Orderable checkbox to indicate that orders can be placed against this contract.Select Manual Approval to indicate that all purchase orders will be created in Worksheet status and must be manually approved. |
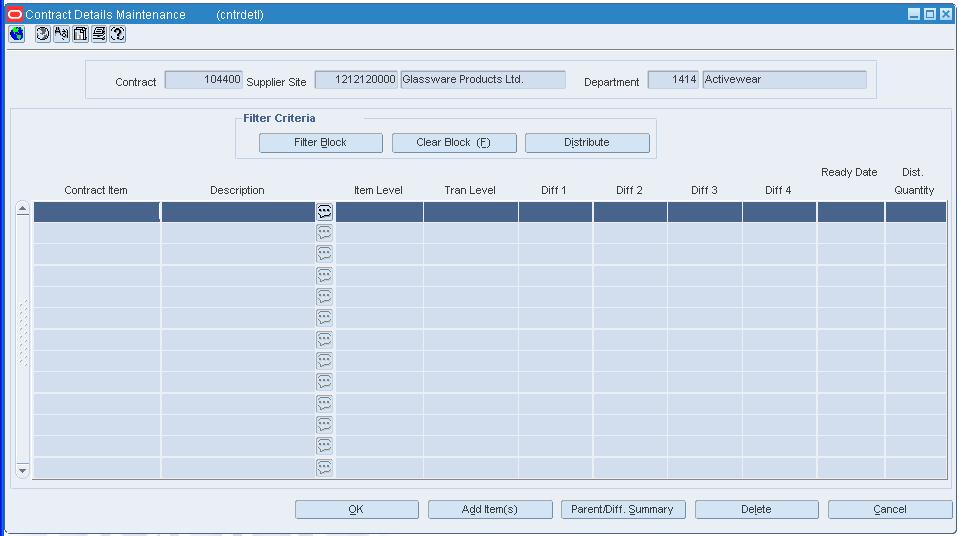
From the Contract Header window, click Detail. The Contract Details Maintenance window opens.
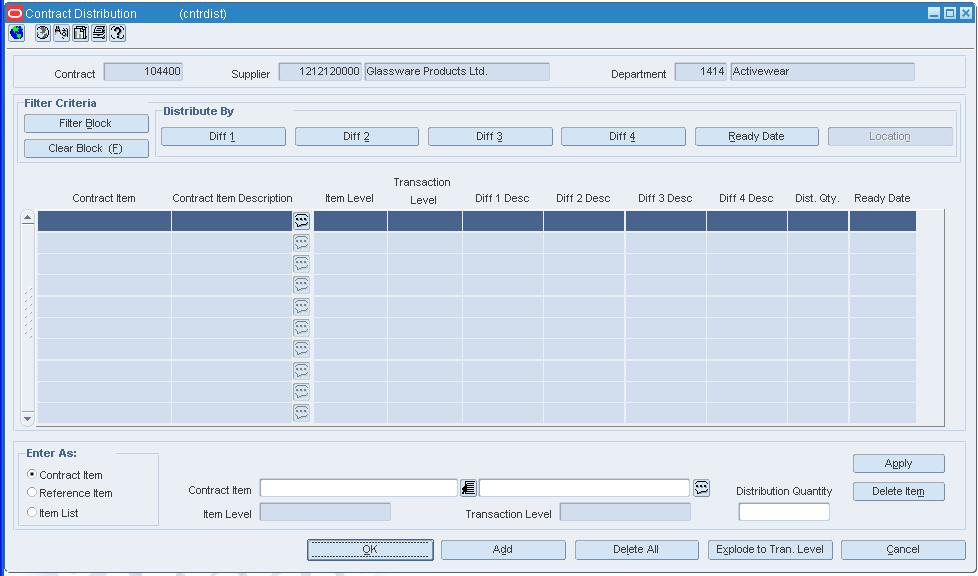
Click Add Item to add an item or Add Item Parent to add a item parent. The Contract Distribution window opens.
In the Enter As field, select an item type.
Enter a specific item in the available field, or enter a partial description and click the LOV button to select a value.
In the Dist Qty field, enter the number of units to be distributed.
|
Note: When selecting items for a contract, the number of levels in the group and the transaction level of the item group must be considered. Items above the transaction level can only be added to a contract if the Soft Contract Indicator is selected in System Variables. |
Click Apply.
Click Distribute.
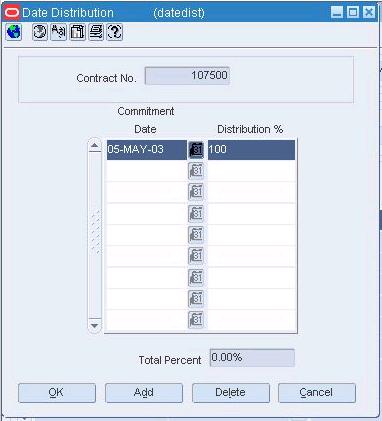
Click Date. The Date Distribution window opens.
Click Add.
In the Commitment Date field, enter the date.
In the Distribution field, enter the percentage of the goods that are due by the commitment date.
Click OK to save your changes and close the windows until you are returned to the Contract Header window.
Navigate: From the main menu, select Ordering > Contracts. The Contract Search window opens.
|
Note: When using a Type B contract, purchase orders are generated automatically. Manual and Replenishment orders are never created from a type B contract. |
In the Action field, select New.
Click OK. The Contract Header window opens.
In the Type field, select Plan/No Availability.
In the Supplier field, enter the ID of the supplier, or click the LOV button and select the supplier. The supplier defaults for other fields are filled in automatically.
In the Department field, enter the ID of the department, or click the LOV button and select the department. Only items from this department can be placed on contract.
In the Start Date and End Date fields, enter the dates, or click the calendar button and select the dates.
In the Country of Origin field, enter the code for the country, or click the LOV button and select the country.
In the Importing Country field, enter the code for the country, or click the LOV button and select the country.
Enter or edit the enabled fields as necessary.
Click Detail. The Contract Details Maintenance window opens.
Click Add Item to add an item or Add Item Parent to add a item parent. The Contract Distribution window opens.
To add an item, click Add Item. Enter the information on the next available line.
If you select item parent and want to list all the component items, click Explode Items.
To add an item list, click Add Item List. Select the item list from the list of values that pop up.
In the Dist Qty field, enter the number of units to be distributed.
|
Note: When selecting items for a contract, the number of levels in the group and the transaction level of the item group must be considered. Items above the transaction level can only be added to a contract if the Soft Contract Indicator is selected in System Variables. |
|
Note: Because the automatic ordering process does not determine locations for the ordered goods from a Recommended Order Quantity, You must designate the locations for distribution with a Type B contract. |
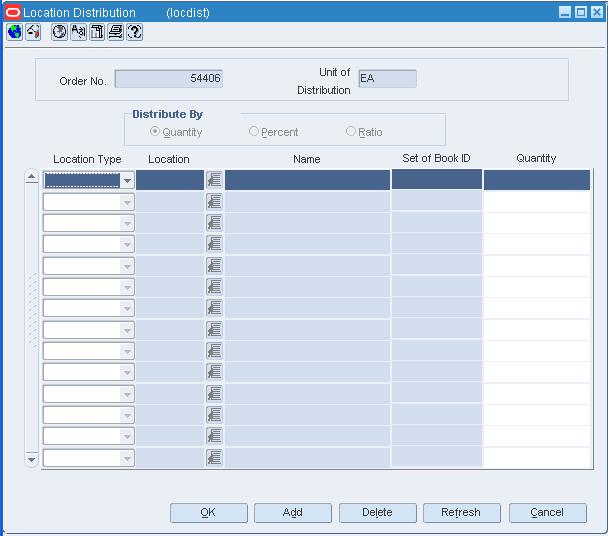
Click Location. The Location Distribution window opens.
To distribute the items by location:
Select the method of distribution.
Click Add.
In the Location Type field, select the type of location.
In the Location field, enter the ID of the location, or click the LOV button and select the location.
In the next field, enter the quantity, percentage, or ratio of items to be distributed to the location.
Click OK to save your changes and close the window.
On the Contract Distribution window, click Date. The Date Distribution window opens.
Click Add.
In the Commitment Date field, enter the date on which the supplier must provide the goods.
In the Distribution field, enter the percentage of the goods that are due by the commitment date.
Click OK to exit until you are returned to the Contract Header window.
|
Note: RMS will generate orders on the plan dates whether or not the specified locations need the items. Therefore, it is possible that orders will be placed which the supplier cannot fulfill. |
Navigate: From the main menu, select Ordering > Contracts. The Contract Search window opens.
In the Action field, select New.
Click OK. The Contract Header window opens.
In the Type field, select No Plan/No Availability.
In the Supplier field, enter the ID of the supplier, or click the LOV button and select the supplier. The supplier defaults for other fields are filled in automatically.
|
Note: A Type C contract does not require a supplier to provide availability information; therefore, it is possible that an order can be placed that a supplier cannot fulfill. |
In the Department field, enter the ID of the department, or click the LOV button and select the department. Only items from this department can be placed on contract.
In the Start Date and End Date fields, enter the dates, or click the calendar button and select the dates.
In the Country of Origin field, enter the code for the country, or click the LOV button and select the country.
In the Importing Country field, enter the code for the country, or click the LOV button and select the country.
In the Cost field, enter the monetary commitment.
Enter or edit the enabled fields as necessary.
|
Note: To indicate that orders created through replenishment should be created in Worksheet status and then approved manually, select the Manual Approval option. |
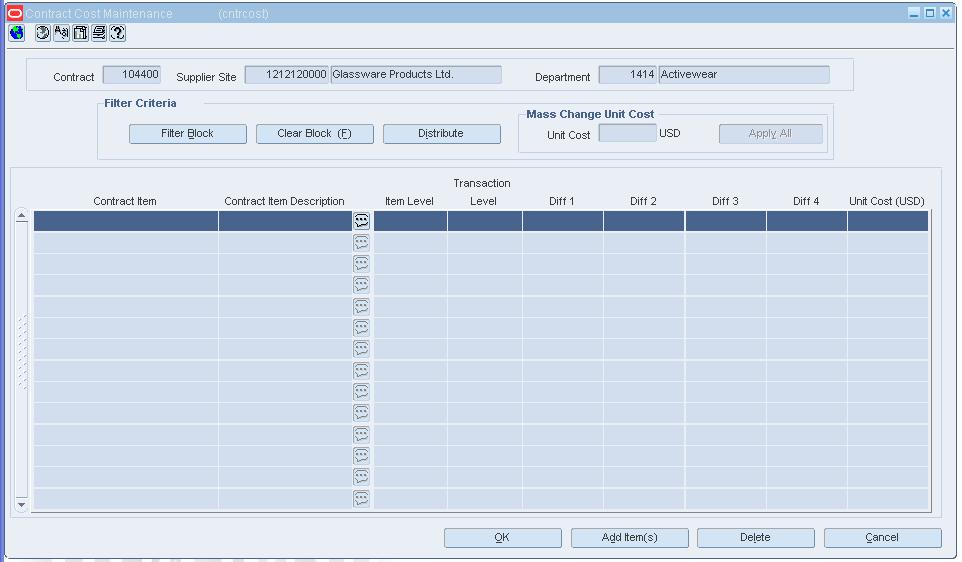
Click Cost. The Contract Cost Maintenance window opens.
Click Add Item to add an item or Add Item Parent to add a ref item. The Contract Distribution window opens.
To add an item, click Add Item. Enter the information on the next available line.
If you added a item parent and want to list all the component items, click Explode Items.
To add an item list, click Add Item List. Select the item list from the list of values that pop up.
|
Note: When selecting items for a contract, the number of levels in the group and the transaction level of the item group must be considered. Items above the transaction level can only be added to a contract if the Soft Contract Indicator is selected in System Variables. |
Click OK to return to the Contract Cost Maintenance window.
Navigate: From the main menu, select Ordering > Contracts. The Contract Search window opens.
In the Action field, select New.
Click OK. The Contract Header window opens.
In the Type field, select No Plan/Availability.
In the Supplier field, enter the ID of the supplier, or click the LOV button and select the supplier. The supplier defaults for other fields are filled in automatically.
In the Department field, enter the ID of the department, or click the LOV button and select the department. Only items from this department can be placed on contract.
In the Start Date and End Date fields, enter the dates, or click the calendar button and select the dates.
In the Country of Origin field, enter the code for the country, or click the LOV button and select the country.
In the Importing Country field, enter the code for the country, or click the LOV button and select the country.
In the Cost field, enter the monetary commitment.
Enter or edit the enabled fields as necessary.
Click Cost. The Contract Cost Maintenance window opens.
Click Add Item to add an item or Add Item Parent to add a item parent.
The Contract Distribution window opens.
To add an item or item parent, click Add Item. Enter the information on the next available line.
If you added a item parent and want to list all the component Items, click Explode Items.
To add an item list, click Add Item List. Select the item list from the list of values that pop up.
|
Note: When selecting items for a contract, the number of levels in the group and the transaction level of the item group must be considered. Items above the transaction level can only be added to a contract if the Soft Contract Indicator is selected in System Variables. |
Click OK to save your changes and close the window.
Navigate: From the main menu, select Ordering > Contracts. The Contract Search window opens.
Search for and retrieve a contract in Edit mode. The Contract Header window opens.
Edit the enabled fields as necessary.
Click Cost. The Contract Cost Maintenance window opens.
To edit the unit cost of all the items:
Enter the amount in the Unit Cost field next to Apply All.
Click Apply All.
To edit the unit cost of one item, edit the amount in the Unit Cost field in the table.
Click OK to save your changes and close the window.
Navigate: From the main menu, select Ordering > Contracts. The Contract Search window opens.
Search for and retrieve a contract in Edit mode. Restrict the search to records in Worksheet status. The Contract Header Maintenance window opens.Click Cost or Detail. Either the Contract Cost Maintenance window or the Contract Details Maintenance window opens.
Click Add Item(s) to add an item. The Contract Distribution window opens.
|
Note: When selecting items for a contract, the number of levels in the group and the transaction level of the item group must be considered. Items above the transaction level can only be added to a contract if the Soft Contract Indicator is selected in System Variables. |
In the Enter As selection field, click an option to enter the new item as a contract item, reference item, or item list.
Enter a valid item or item list for the department that opens, or select an item or item list using the LOV button.
Enter a Distribution Quantity.
Click Apply to add the new item or item list to the contract.
Click OK to return to the Contract Cost Maintenance window or the Contract Details window.
If you are in the Contract Cost Maintenance window, edit the unit cost of the items as necessary.
If you are in the Contract Details Maintenance window, enter the number of units to be distributed.
Click OK to save your changes and close the window.
Navigate: From the main menu, select Ordering > Contracts. The Contract Search window opens.
Search for and retrieve a contract in Edit mode. Restrict the search to contracts in Worksheet status. The Contract Header window is displayed. Click Cost or Detail. Either the Contract Cost Maintenance window or the Contract Details Maintenance window opens.
Select an item and click Delete.
When prompted to delete the record, click Yes.
Click OK to save your changes and close the window.
Navigate: From the main menu, select Ordering > Contracts. The Contract Search window opens.
In the Action field, select either Create from Existing, Edit, or View.
Enter additional criteria as desired to make the search more restrictive.
Click Search. The Contract Search window displays the contracts that match the search criteria.
Select a task:
To perform another search, click Refresh.
To display the details of a contract, select a record and click OK. The Contract Header window opens.
Click Close to exit.
Navigate: From the main menu, select Ordering > Contracts. The Contract Search window opens.
Search for and retrieve a contract in Create from Existing mode. The Contract Header window opens.
Edit the enabled fields as necessary.
Click Cost. The Contract Cost Maintenance window opens.
To edit the unit cost of all the items, enter the amount in the Unit Cost field next to Apply All, and click Apply All.
To edit the unit cost of one item, edit the amount in the Unit Cost field in the table.
Click OK to save your changes and close the window.
Navigate: From the main menu, select Ordering > Contracts. The Contract Search window opens.
Search for and retrieve a contract in Edit mode. The Contract Header window opens.Click Print. The Report Parameters Web page opens.
In the Destination field, select where you want the finished report to be sent. Select Cache to view the report online.
Verify that the contract number is correct in the Contract field.
Click Submit Query. The contract is generated and sent to the destination that you selected.
The Contract Cost Maintenance window allows you to view and edit the cost per unit of the items on a contract. You can also view the remaining contract balance on orders for a contract.
To display information specific to items or item parents, select the appropriate option from the View menu.
To display monetary amounts in the primary currency of the company or the currency of the contract, select the appropriate option from the Options > Currency menu.
See "View the Items on a Contract" in the Purchasing chapter
The Contract Cost Filter window allows you to filter the items that appear on the Contract Cost Maintenance window. You can then view, edit, or copy the resulting subset of items.
See "Filter Cost Records on a Contract" in the Purchasing chapter
The Contract Cost History window allows you to enter search criteria in order to search for and view the cost of items by contract.
See "View the Cost History of Items by Contract" in the Purchasing chapter
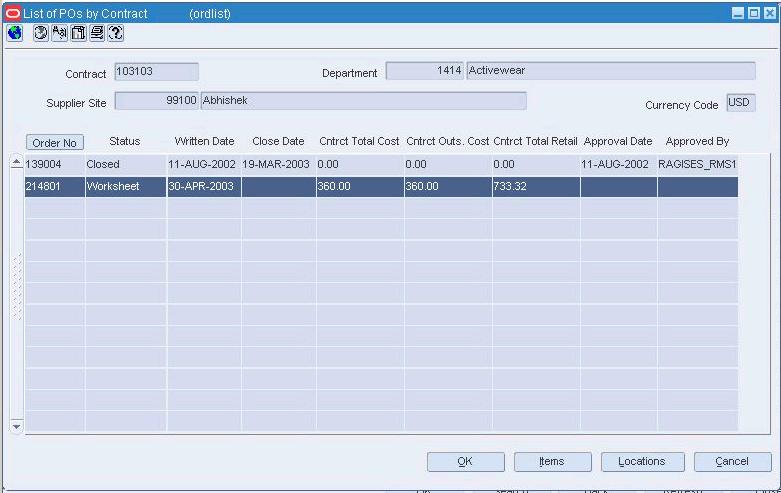
The List of POs by Contract window allows you to view the details of the purchase orders that have been raised against a contract. You can change the status of each purchase order as necessary.
Edit the Status of a Purchase Order Raised Against a Contract
See "View the Purchase Orders Raised Against a Contract" in the Purchasing chapter
The Contracted Items to be Ordered window allows you to select an item list containing contracted items. After selecting the item list, you can select the appropriate contract and destinations for each item on the item list. Next you can build one or more purchase orders from the information that you enter.
See "Create a Purchase Order from Contracted Items" in the Purchasing chapter
The Contracted Items Order Locations window allows you to select a contract and distribute an item to multiple locations. You use this window to distribute contracted items from an item list. After the items are distributed, you can build purchase orders for the items.
See "Create a Purchase Order from Contracted Items" in the Purchasing chapter
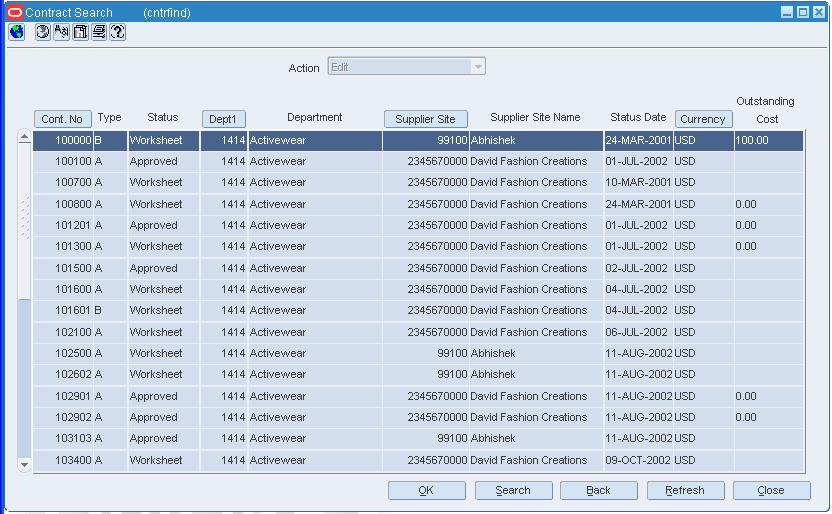
The Contract Search window allows you to enter criteria in order to search for contracts and view the results of the search.
The default view for the Contract Search window opens when you open the window for the first time. You can also create a custom view.
The Contract Header Dates window allows you to view the audit trail of a contract. The dates on which the status of the contract was changed appear. Also, the user IDs of the persons who changed the status of the contract appear.
See "View a Contract" in the Purchasing chapter
The Contract Parent/Diff Summary Window allows you to view the details of the diffs for an item parent on a contract. You can view the quantity contracted, quantity ordered, quantity received, and the ready date by diff value.
See "View a Summary of a Contract by Parent/Diff" in the Purchasing contract
The Date Distribution window allows you to distribute items on a Type A (Plan/Availability) or Type B (Plan/No Availability) contract by commitment date.
Navigate: From the main menu, select Ordering > Contracts. The Contract Search window opens.
Search for and retrieve a contract in Edit mode. Restrict the search to Type A and Type B contracts in Worksheet status. The Contract Header Maintenance window opens.Click Detail. The Contract Details Maintenance window opens.Click Distribute. The Contract Distribution window opens.
Filter the items as necessary.
Click Date. The Date Distribution window opens.
Click Add. The next available line becomes enabled.
In the Commitment Date field, enter the date.
In the Distribution % field, enter the appropriate percentage for each date.
Click OK to save your changes and close the window.
Navigate: From the main menu, select Ordering > Contracts. The Contract Search window opens.
Search for and retrieve a contract in Edit mode. Restrict the search to contracts in Worksheet status. The Contract Header window opens. Click Detail. The contracted items appear in the Contract Details Maintenance window.Click Distribute. The Contract Distribution window opens.
Filter the items as necessary.
Click Location. The Location Distribution window opens.
In the Distribute By area, select the method of distribution.
In the Location Type field, select the type of location.
In the Location field, enter the ID of the location, or click the LOV button and select the location.
In the Quantity, Distribution %, or Ratio field, enter the appropriate amount for the location.
Click OK to save your changes and close the window.
Navigate: From the main menu, select Ordering > Contracts. The Contract Search window opens.
Search for and retrieve a contract in Edit mode. Restrict the search to Type A or Type B contracts in Worksheet status. The Contract Header window opens.Click Detail. The Contract Details Maintenance window opens.
In the Dist Quantity field, edit the quantities as necessary.
Click OK to save your changes and close the window.
Navigate: From the main menu, select Ordering > Contracts. The Contract Search window opens.
Search for and retrieve a contract in Edit mode. The Contract Header window opens.Click Orders. The List of POs by Contract window opens.
Select a purchase order.
From the Options menu, select the appropriate status.
When prompted to change the status, click Yes.
To cancel an approved purchase order:
Select Cancel from the Options menu.
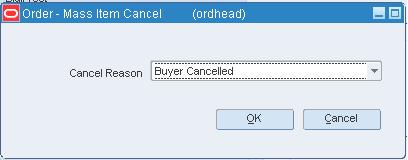
When prompted to cancel the items on the purchase order, click Yes. The Order Mass Item Cancel window opens.
In the Cancel Reason field, select the reason for canceling the items.
Click OK to save your changes and close the window.
Click OK to save your changes and close the window.
Navigate: From the main menu, select Ordering > Contracts. The Contract Search window opens.
Search for and retrieve a contract in Edit mode. Restrict the search to contracts in Worksheet status. The Contract Header window opens. Click Cost. The Contract Cost Maintenance window opens.
To edit the unit cost of all the items:
Enter an amount in the Unit Cost field.
Click Apply All.
You may edit the unit cost of a single item by changing the amount in the Unit Cost field of the table.
Click OK to save your changes and close the window.
The Contract Distribution window allows you to add or delete items on a contract and distribute those items at the item, item parent, or option level. Items can be distributed by item parent or diffs.
View "Edit the Distribution of Items on a Contract" in the Purchasing chapter
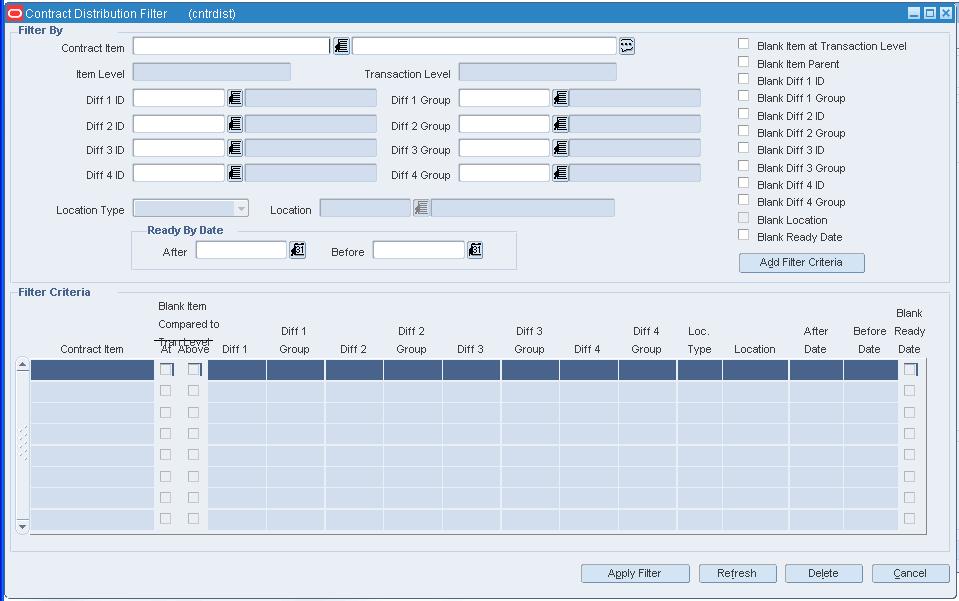
The Contract Distribution Filter window allows you to filter the items that appear on the Contract Distribution window. You can then view, edit, or copy the resulting subset of items.
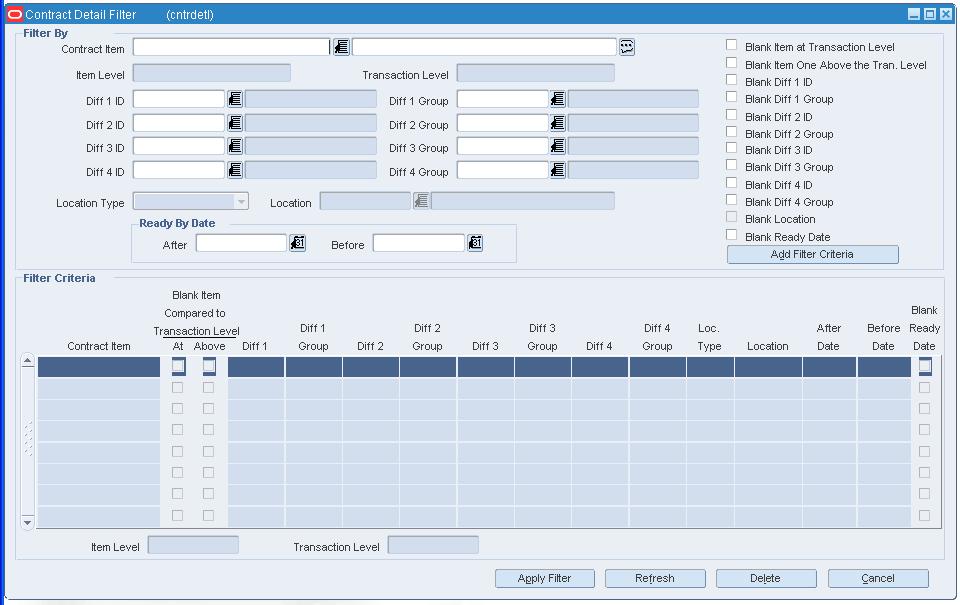
The Contract Detail Filter window allows you to filter the items that appear on the Contract Details Maintenance window. You can then view, edit, or copy the resulting subset of items.
The Contract Details Maintenance window allows you to view and edit the quantities of the items for Type A and Type B contracts.
See "View the Items on a Contract" in the Purchasing chapter
Navigate: From the main menu, select Ordering > Contracts. The Contract Search window opens.
Search for and retrieve a contract in Edit mode. Restrict the search to contracts in Worksheet status. The Contract Header window opens.Click Cost or Detail. Either the Contract Cost Maintenance window or the Contract Details Maintenance window opens.Click Distribute. The Contract Distribution window opens.
|
Note: Use this procedure to filter item distribution records on a contract. You can then view or edit the subset of the items on the contract. |
Click Filter Block. The Contract Distribution Filter window opens.
Enter or select the criteria by which you want to filter in the Filter By area.
Click Add Filter Criteria. The filter criteria are added to the Filter Criteria table.
To delete a criterion from the Filter Criteria table:
Select the record.
Click Delete.
Click Apply Filter. The Contract Distribution window opens with the filter results.
Edit the items as necessary.
To clear the filter, click Clear Filter. All the items appear.
Navigate: From the main menu, select Ordering > Contracts. The Contract Search window opens.
Search for and retrieve a contract in Edit or View mode. Restrict the search to Type A or Type B contracts in Worksheet status. The Contract Header window opens.Click Detail. The Contract Details Maintenance window opens.
|
Note: Use this procedure to filter quantity records on a contract. You can then view or edit the subset of the items. |
Click the Filter button. The Contract Detail Filter window opens.
Enter or select the criteria by which you want to filter in the Filter By area.
Click Add Filter Criteria. The filter criteria are added to the Filter Criteria table.
To delete a criterion from the Filter Criteria table, select the record and click Delete.
Click Apply Filter. You are returned to the Contract Details Maintenance window where you can view or edit the results of the filter.
To clear the filter, click Refresh. All the quantity records are again displayed.
Click OK to close the window.
When a contract is added to the system, it must go through a series of checks before it is accessible in the system. Depending on your user role, you may not be able to move the contract to the next status. A contract may be in any of the following statuses:
| Status | Definition |
|---|---|
| Worksheet | The contract has been started, but not completed. |
| Submitted | The contract has been completed and is pending review. |
| Approved | The contract has been reviewed and has been approved. |
| Canceled | The contract has been manually closed and is no longer valid. |
| Completed | The contract is complete. |
| Reviewed | The contract has been reviewed, but not completed. |
Navigate: From the main menu, select Ordering > Contracts. The Contract Search window opens.
Search for and retrieve a contract in Edit mode. Restrict the search to contracts in Worksheet status. The Contract Header window opens.
From the Options menu, select Submit.
When prompted to submit the contract, click Yes. The status of the contract is changed to Submitted.
Click OK to save your changes and close the window.
From the main menu, select Ordering > Contracts. The Contract Search window opens.
Search for and retrieve a contract in Edit mode. Restrict the search to contracts in Submitted status. The Contract Header window opens.
From the Options menu, select Approve.
|
Note: Orders created from replenishment batch programs are created in Approved status. |
When prompted to approve the contract, click Yes. The status of the contract is changed to Approved.
Click OK to save your changes and close the window.
Navigate: From the main menu, select Ordering > Contracts. The Contract Search window opens.
Search for and retrieve a contract in Edit mode. Restrict the search to contracts in Approved status. The Contract Header window opens.
From the Options menu, select Complete.
When prompted to complete the contract, click Yes. The status of the contract is changed to Complete.
Click OK to save your changes and close the window.
Navigate: From the main menu, select Ordering > Contracts. The Contract Search window opens.
Search for and retrieve a contract in Edit mode. Restrict the search to contracts in Approved status. The Contract Header window opens.
From the Options menu, select Cancel.
When prompted to cancel the contract, click Yes. The status of the contract is changed to Cancelled.
Click OK to save your changes and close the window.
Navigate: From the main menu, select Ordering > Contracts. The Contract Search window opens.
Search for and retrieve a contract in Edit mode. Restrict the search to contracts in Cancelled status. The Contract Header window opens.
From the Options menu, select Reinstate.
When prompted to reinstate the contract, click Yes. The status of the contract is changed to Worksheet.
Click OK to save your changes and close the window.
Navigate: From the main menu, select Ordering > Contracts. The Contract Search window opens.
Search for and retrieve a contract in Edit mode. Restrict the search to contracts in Approved status. The Contract Header window opens.
From the Options menu, select Unapprove.
When prompted to unapprove the contract, click Yes. The status of the contract is changed to Worksheet.
Click OK to save your changes and close the window.