| Oracle® Retail Merchandising System User Guide 16.0 E65443-01 |
|

 Previous |
 Next |
This chapter includes the following topics to help you understand and manage prices:
In the Price Change History window you can view the transactions for an item, the locations, pricing, and margins.
In this window you can perform the following actions.
Search for transactions for an item, locations, pricing, and margins by using various search criteria
View the search results
You can access the Price Change History window from the Task menu, select Price > Price Change History. The Price Change History window appears.
The Price Change History window contains the following two sections.
Price Lookup
For more information about this section, see the Looking Up a Price History section.
To look up a price history:
From the Task menu, select Price > Price Change History. The Price Change History window appears.
Enter, select or search for one or all of the following search criteria.
Table 8-1 Price Change History Lookup - Search Criteria and Description
| Fields | Description |
|---|---|
|
Transaction Date |
Enter a transaction date or use the Calendar icon to select a date. |
|
Transaction Type |
Select the transaction type from the list. |
|
Location Type |
Select a location type from the list. Then enter, select or search for the location ID. |
|
Item/Item Parent |
Select item or item parent from the list. Then enter, select or search for the item or item parent |
Click Lookup. The transactions that match the search criteria are displayed in the Results section.
Click Reset to refresh the window. All entries are reset and not saved.
Click Done to close the window.
The Results section lists the retrieved item/location price changes.
Use the Actions Menu and icons to apply actions to the table. You can perform the actions listed below.
You can customize the view of the table by using the options in the View Menu.
Table 8-3 Results - View Menu/Icons and Description
| View Menu/Icons | Description |
|---|---|
|
Columns |
You can manage which of the columns will be shown in the table by clicking the Show All and Manage Columns options. |
|
Detach and Detach icon |
You can view the tables in the application in a separate window by clicking Detach or using the Detach icon |
|
Sort |
You can sort columns by the following options:
|
|
Reorder Columns |
You can reorder columns by clicking the Reorder Columns option. |
|
Query by Example and Query by Example icon |
You can filter the items by one or multiple column values by clicking the Query by Example option or by using the Query by Example icon |
The toolbar contains the following icons and buttons.
The Competitor Price History window you can perform the following actions.
Search for competitor prices by various search criteria
View the search results
View competitor price information
Edit competitor price information
You can access Competitor Price History window from the Task menu, select Price > Competitor Price History. The Competitor Price History window appears.
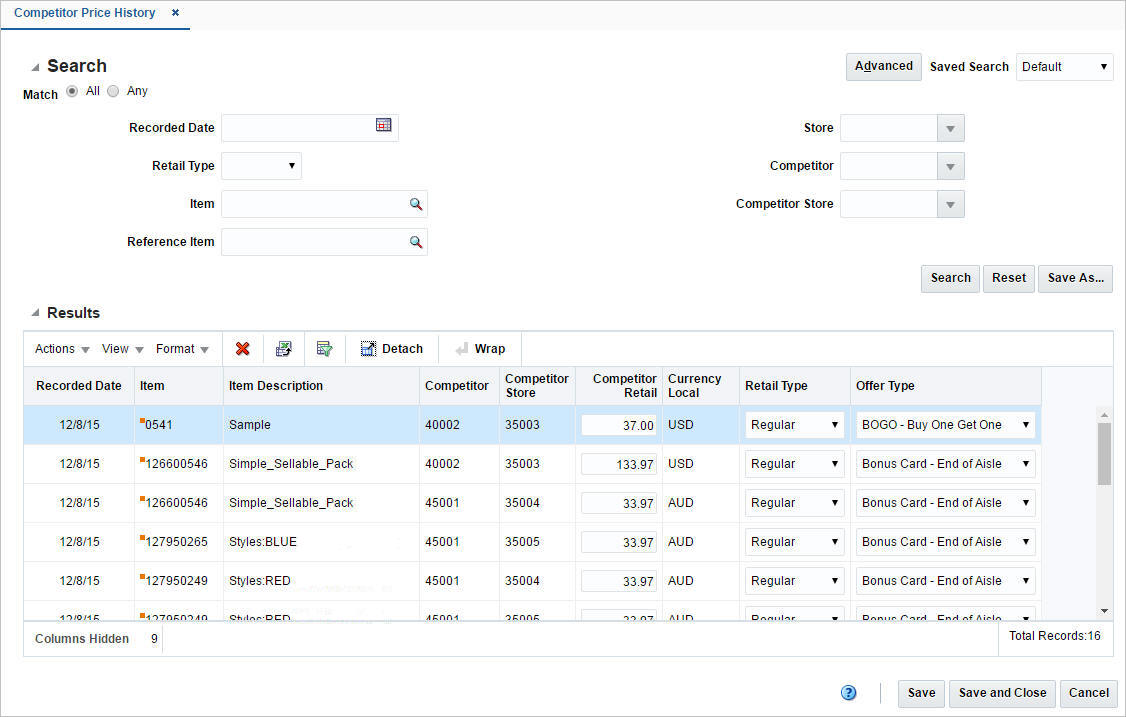
The Competitor Price History window contains the following sections.
Search
For more information about this section, see the Searching for a Competitor Price section.
To search for a competitor price:
From the Task menu, select Price > Competitor Price History. The Competitor Price History window appears.
You can search for a competitor price using basic or advanced search criteria, depending on the requirement. The basic mode is the default search mode.
Click Advanced to access the search section in advanced mode.
Click Basic to return to the basic mode.
To search for a competitor price using basic search criteria:
Enter, select or search for one or all of the following basic search criteria.
Table 8-5 Competitor Price History - Basic Search Criteria and Description
| Fields | Description |
|---|---|
|
Match option |
Check radio button All or Any. All - only competitor price matching all entered search criteria are shown. Any - competitor prices matching any of the entered search criteria are shown. |
|
Recorded Date |
Enter a recorded date or use the Calendar icon to select a date. |
|
Retail Type |
Select a retail type from the list. |
|
Item |
Enter, select or search for an item. |
|
Reference Item |
Enter, select or search for the reference item. |
|
Store |
Enter, select or search for the store. |
|
Competitor |
Enter, select or search competitor. |
|
Competitor Store |
Enter, select or search for the competitor store. |
Click on the Saved Search list to select one of the saved search criteria. Selecting a saved search populates the search section with the saved search criteria. If the run automatically function is enabled for the search, the search is executed immediately.
You can also personalize your saved searches by selecting Personalize. The Personalize Saved Searches window appears.
For more information about the Personalized Saved Search, see the Common User Interface Controls chapter, section "Personalize Saved Search".
Click Search. The competitor prices that match the search criteria are displayed in the Results section.
Click Reset to clear the search section and results.
Click Save As... to save the current search criteria. The Create Saved Search window appears.
For more information about how to save your search criteria, see the Common User Interface Controls chapter, section "Create Saved Search".
Click Done to close the window.
To search for a competitor price using advanced search criteria:
To search using advanced search criteria, enter or select one or all of the advanced search criteria.
To narrow down the search, use the list next to the search fields. For example, determine if the entered value should equal or not equal the search result.
Click on the Saved Search list to select one of the saved search criteria. Selecting a saved search populates the search section with the saved search criteria. If the run automatically function is enabled for the search, the search is executed immediately.
You can also personalize your saved searches by selecting Personalize. The Personalize Saved Searches window appears.
For more information about the Personalized Saved Search, see the Common User Interface Controls chapter, section "Personalize Saved Search".
Click Search. The competitor prices that match the search criteria are displayed in the Results section.
Click Reset to clear the search section and results.
Click Save As... to save the current search criteria. The Create Saved Search window appears.
For more information about how to save your search criteria, see the Common User Interface Controls chapter, section "Create Saved Search".
Click Add Fields to add more fields for the advanced search. To remove the field from the search, click the x right next to the field.
Click Reorder to change the order of the available search fields. The Reorder Search Fields window appears.
Select the desired search field and use the up and down arrows to rearrange the order of the fields.
Click OK to confirm the new order of the fields and close the window.
Click Cancel to reject any changes and close the window.
Click Done to close the window.
The Results section lists the retrieved suppliers and supplier sites.
Use the Actions Menu and icons to apply actions to the Results table. You can perform the actions listed below.
Table 8-6 Results - Actions Menu/Icons and Description
| Actions Menu/Icons | Description |
|---|---|
|
Delete and Delete icon |
You can delete competitor price:
|
|
Export to Excel and Export to Excel icon |
You can export the records in the table to a Microsoft Excel spreadsheet by selecting Actions > Export to Excel or by using the Export to Excel icon |
|
Wrap icon |
You can wrap the values in the table column by first clicking the column on which you would like the text to wrap and then using the Wrap icon |
You can customize the view of the table by using the options in the View Menu.
Table 8-7 Results - View Menu/Icons and Description
| View Menu/Icons | Description |
|---|---|
|
Saved Views |
You can select one of the saved views by clicking the Saved View option. |
|
Currency |
You can toggle between the local and primary currency. |
|
Columns |
You can manage which of the columns will be shown in the table by clicking the Show All and Manage Columns options. |
|
Detach and Detach icon |
You can view the tables in the application in a separate window by clicking Detach or using the Detach icon |
|
Sort |
You can sort columns by the following options:
|
|
Reorder Columns |
You can reorder columns by clicking the Reorder Columns option. |
|
Query by Example and Query by Example icon |
You can filter the items by one or multiple column values by clicking the Query by Example option or by using the Query by Example icon |
The toolbar contains the following icons and buttons.
Table 8-8 Competitor Price History Toolbar - Icons/Buttons and Description
| Icons/Buttons | Description |
|---|---|
|
Help icon |
You can access the online help for a particular page by clicking the Help icon |
|
Save |
Click Save to save the entered records. |
|
Save and Close |
Click Save and Close to save the entered records and close the window. |
|
Cancel |
Click Cancel to reject all entries and close the window. |
To edit a competitor price, follow the steps below.
From the Tasks menu, select Price > Competitor Price Change. The Competitor Price History window appears.
Enter or select search criteria as desired to make the search more restrictive.
Click Search. The competitor prices that match the search criteria are displayed in the Results section.
In the Competitor Retail column, enter the price for the item.
In the Retail Type column, select the retail type from the list.
In the Offer Type column, select the offer type from the list.
Then choose one of the following options.
Click Save to save your changes.
Click Save and Close to save your change and close the window.
Click Cancel to reject all entries and close the window.
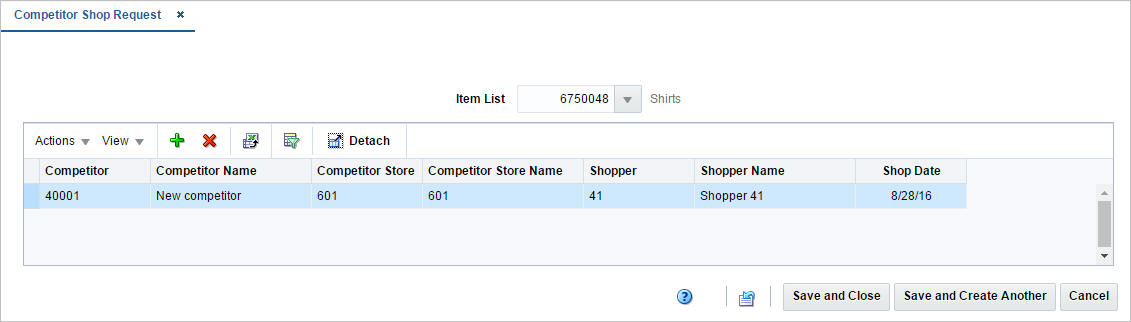
In the Competitor Shop Request window you can create a list of competitor's shops for an item list. You can than record the competitor's prices of these items.
The Competitor Shop Request window contains the following sections.
Header
The header displays the item list ID and description.
In this table you can maintain a list of competitor shops. The table displays the name, store, store name, shopper, shopper name and shop date.
Use the Actions Menu and icons to apply actions to the table. You can perform the actions listed below.
Table 8-9 Competitor Shop Request Table - Actions Menu/Icons and Description
| Actions Menu/Icons | Description |
|---|---|
|
Add and Add icon |
You can add new competitor shops by selecting Actions > Add or by using the Add icon For more information about how to add new competitor shops, see the Creating a Competitive Shop List section. |
|
Delete and Delete icon |
You can delete competitors:
|
|
Export to Excel and Export to Excel icon |
You can export the records in the table to a Microsoft Excel spreadsheet by selecting Actions > Export to Excel or by using the Export to Excel icon |
You can customize the view of the table. Use the View Menu and icons to customize the view as listed below.
Table 8-10 Competitor Shop Request - View Menu/Icons and Description
| View Menu/Icons | Description |
|---|---|
|
Columns |
You can manage which of the columns will be shown in the table by clicking the Show All and Manage Columns options. |
|
Detach and Detach icon |
You can view the tables in the application in a separate window by clicking Detach or by using the Detach icon |
|
Sort |
You can sort columns by the following options:
|
|
Reorder Columns |
You can reorder columns by clicking the Reorder Columns option. |
|
Query by Example and Query by Example icon |
You can filter the items by one or multiple column values by clicking the Query by Example option or by using the Query by Example icon |
The toolbar contains the following icons and buttons.
Table 8-11 Competitor Shop Request Toolbar - Icons/Buttons and Description
| Icons/Buttons | Description |
|---|---|
|
Help icon |
You can access the online help for a particular page by clicking the Help icon |
|
Reset icon |
You can reset the window to its initial state by using the Reset icon |
|
Save and Close |
Click Save and Close to save the entered records and close the window. |
|
Save and Create Another |
Click Save and Create Another to save the entered records and add additional entries. |
|
Cancel |
Click Cancel to reject all entries and close the window. |
|
Done |
If you open the window in view mode, the Done button is displayed. Click Done to close the window. |
You can create a competitive shop list in two different ways, either through the Price module or in the Foundation Data module.
To create a competitive shop list in the Foundation Data module, follow the steps below.
From the Tasks menu, select Foundation Data > Items > Manage Item Lists. The Item List window appears.
Enter or select search criteria as desired to make the search more restrictive.
Click Search. The item lists that match the search criteria are displayed in the Results section.
Select a record in the Results table.
Then select Actions > Create > Competitive Shop List. The Competitor Shop Request window appears.
To create a competitive shop list in the Price module, follow the steps below.
From the Tasks menu, select Price > Competitor Shop Request. The Competitor Shop Request window appears.
In the Item List field, enter, select or search for the item list.
|
Note: If you have opened the Competitor Shop Request window through the Item List Search, the item list ID and description of the selected item list is displayed. |
Select Actions > Add, or use the Add icon ![]() . The Add Competitor Shop Request window appears.
. The Add Competitor Shop Request window appears.
In the Competitor field, enter, select or search for the competitor.
In the Competitor Store field, enter, select or search for the store.
In the Shopper field, enter, select or search for the shopper.
In the Shop Date field, enter a shop date or use the Calendar icon to select a date.
Then choose one of the following options.
Click OK to add the competitor and close the window.
Click OK and Add Another to add additional competitors.
Click Cancel to reject all entries and close the window.
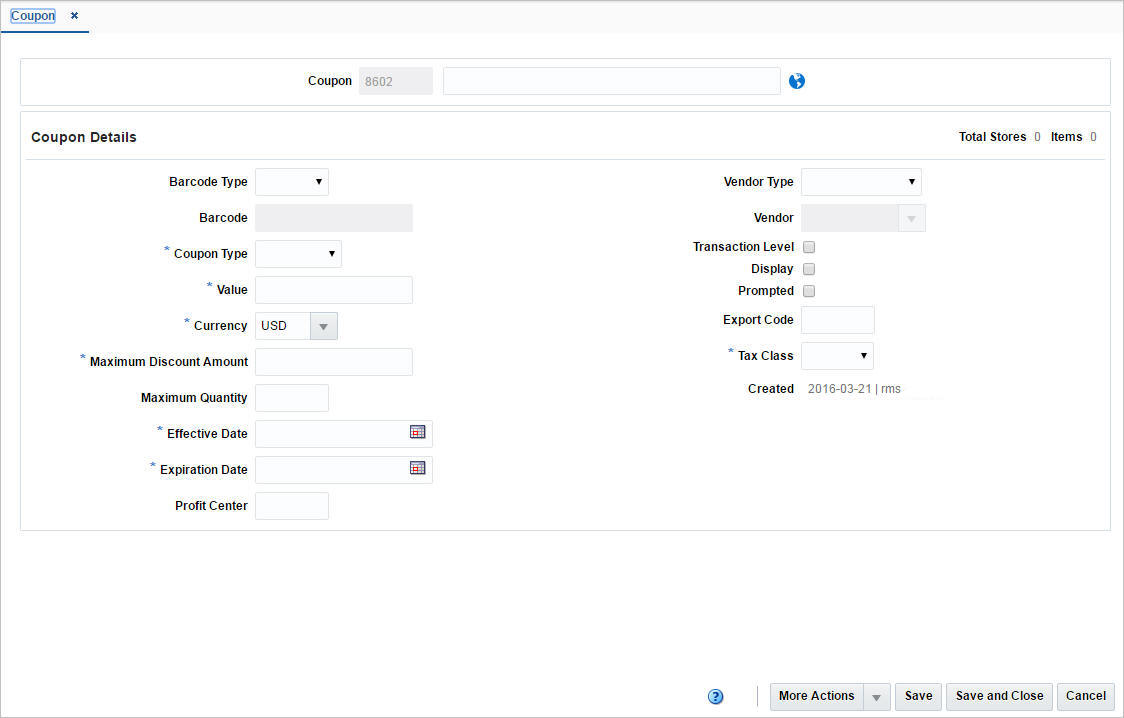
The Create Coupon option opens the Coupon window. The Coupon window allows you to create, edit, and copy point of sale (POS) coupon configurations.
You can specify each expense coupon that can be used at the stores. You can specify the coupon type, the coupon amount, and the tax class for the coupon. You can also select the dates on which the configuration is valid at the stores.
You can associate stores and items with the configuration. You can indicate what items the coupon can be used for by associating items with the configuration. You can only associate stores with the coupons that have the same currency as the configuration. The configuration is then downloaded to the POS registers of the associated stores in a nightly batch process. How the coupon configuration is interpreted, depends on the type of POS system your organization uses.
When you copy a configuration, the basic configuration information, such as coupon type and amount, is copied into a new configuration and assigned a new ID. However, the associated stores and items are not copied, therefore you must add stores and items to the new configuration.
The Coupon window contains the following sections.
The header section contains the following fields and icon.
The Coupon Details section contains the following fields and checkboxes.
Table 8-13 Coupon Details - Fields/Checkboxes and Description
| Fields/Checkboxes | Description |
|---|---|
|
Total Stores |
In the title of the Coupon Details section, the system displays the total number of stores associated with the current coupon configuration. |
|
Items |
In the title of the Coupon Details section, the system displays the total number of items associated with the current coupon configuration. |
|
Barcode Type |
Select the barcode type from the list. |
|
Barcode |
Enter the barcode. You can only enter an EAN13 barcode or free text. |
|
Coupon Type |
Select the coupon type from the list. This field is a required field. |
|
Value |
Enter the value of the coupon. |
|
Currency |
Enter, select, or search for the currency of the coupon. This field is a required field. |
|
Maximum Discount Amount |
Enter the maximum discount amount value that can be gained from the coupon. This field is a required field. |
|
Maximum Quantity |
Enter the maximum quantity for the coupon. |
|
Effective Date |
Enter the date on which the coupon is active or use the Calendar icon to select a date. |
|
Expiration Date |
Enter the date on which the coupon expires or use the Calendar icon to select a date. |
|
Profit Center |
Enter the profit center which specifies that the data is exported to a back office accounting system. |
|
Vendor Type |
Select the vendor type from the list. |
|
Vendor |
Enter, select or search for the vendor for which the coupon is related to. |
|
Transaction Level checkbox |
Select the checkbox to indicate that the coupon is a transaction coupon. |
|
Display checkbox |
Select the checkbox to specify that the coupon is displayed in the list of valid coupons on the register. |
|
Prompted checkbox |
Select the checkbox to indicate that the cashier is prompted to ask for a coupon. |
|
Export Code |
Enter the export code which specifies that the data is exported to a back office accounting system. |
|
Tax Class |
Select the tax class from the list. |
|
Created |
Displays the user who created the coupon. |
The toolbar contains the following icons and buttons.
Table 8-14 Coupon Toolbar - Icons/Buttons and Description
| Icons/Buttons | Description |
|---|---|
|
Help icon |
You can access the online help for a particular page by clicking the Help icon |
|
More Actions |
Click More Actions to see a list of additional actions that can be performed in the Coupon window.
|
|
Save |
Click Save to save the entered records. |
|
Save and Close |
Click Save and Close to save the entered records and close the window. |
|
Cancel |
Click Cancel to reject all entries and close the window. |
You can create a coupon in two different ways.
From the Tasks menu, select Price > Create Coupon. The Coupon window appears.
From the Tasks menu, select Price > Manage Coupons. In the Results section, select Actions > Create. The Coupon window appears.
Then follow the steps below:
In the Coupon Description field, enter a description for the coupon.
In the Coupon Details section, enter, select or search the coupon details, as necessary. For more information about the Coupon section, see the Coupon Details section.
You can add stores to the coupon configuration. For more information about this function, see the Adding a Store to a Configuration section.
You can add item restrictions to the coupon configuration. For more information about this function, see the Adding an Item to a Configuration section.
Then select one of the following options.
Click Save to save the entered records.
Click Save and Close to save the entered record and close the window.
Click Cancel to reject all entries and close the window.
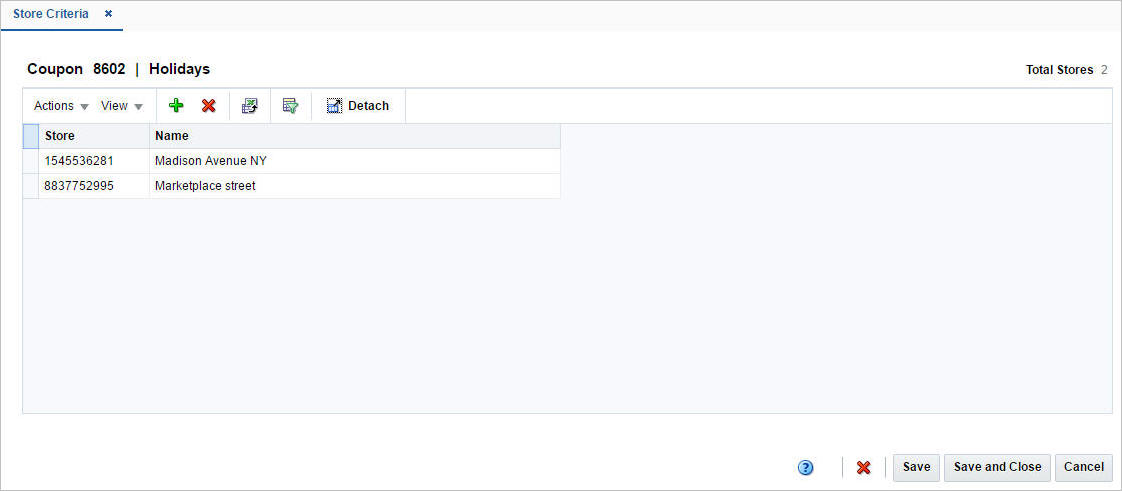
The Store Criteria Window allows you to associate stores with the following point of sales configurations.
Coupon
Product restriction
The configurations are downloaded to the POS registers of the associated stores in a nightly batch process. You can add individual stores to a configuration, or you can add all stores in your organization. You can also associate stores using the following groups:
Area
Region
District
Location List
The Store Criteria window contains the following sections.
The configuration ID and description are displayed in the table title. Additionally, the total number of stores already associated with the configuration is displayed in the top right corner.
Use the Actions Menu and icons to apply actions to the table. You can perform the actions listed below.
Table 8-15 Table - Actions Menu/Icons and Description
| Actions Menu/Icons | Description |
|---|---|
|
Add and Add icon |
You can add stores by selecting Actions > Add or by using the Add icon For more information about how to add new stores, see the Adding a Store to a Configuration section. |
|
Delete and Delete icon |
You can delete associated stores:
|
|
Export to Excel and Export to Excel icon |
You can export the records in the table to a Microsoft Excel spreadsheet by selecting Actions > Export to Excel or by using the Export to Excel icon |
You can customize the view of the table by using the options in the View Menu.
Table 8-16 Table - View Menu/Icons and Description
| View Menu/Icons | Description |
|---|---|
|
Columns |
You can manage which of the columns will be shown in the table by clicking the Show All and Manage Columns options. |
|
Detach and Detach icon |
You can view the tables in the application in a separate window by clicking Detach or by using the Detach icon |
|
Reorder Columns |
You can reorder columns by clicking the Reorder Columns option. |
|
Query by Example and Query by Example icon |
You can filter the items by one or multiple column values by clicking the Query by Example option or by using the Query by Example icon |
The toolbar contains the following icons and buttons.
Table 8-17 Store Criteria Toolbar - Icons/Buttons and Description
| Icons/Buttons | Description |
|---|---|
|
Help icon |
You can access the online help for a particular page by clicking the Help icon |
|
Delete icon |
You can delete all stores for a configuration by using the Delete icon
|
|
Save |
Click Save to save the entered records. |
|
Save and Close |
Click Save and Close to save the entered records and close the window. |
|
Cancel |
Click Cancel to reject all entries and close the window. |
|
Done |
If you open the window in view mode, the Done button is displayed. Click Done to close the window. |
To add a store to the coupon configuration, follow the steps below.
In the Coupon Toolbar, select More Actions > Stores. The Store Criteria window appears.
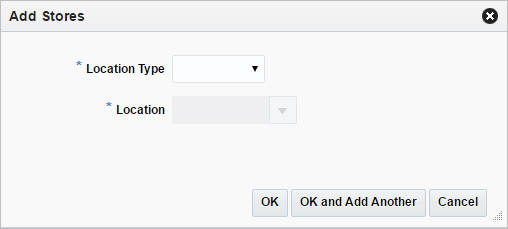
In the table, select Actions > Add, or use the Add icon ![]() . The Add Stores window appears.
. The Add Stores window appears.
In the Location Type field, select a location type from the list. This field is a required field.
In the Location field, enter, select or search for the location. This field is a required field.
Then choose one of the following options.
Click OK to add the location and close the window.
Click OK and Add Another to add additional locations.
Click Cancel to reject all entries and close the window.
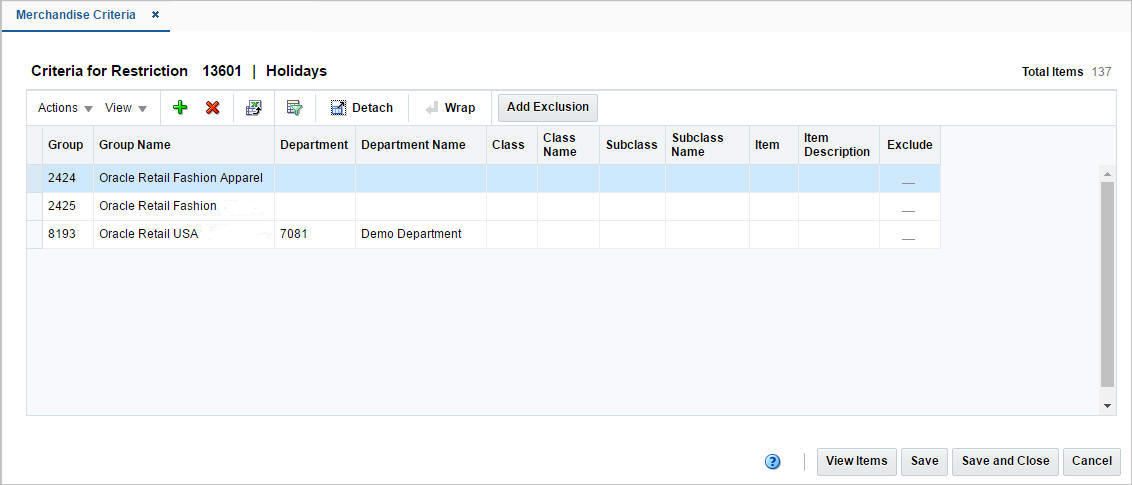
The Merchandise Criteria window allows you to associate items with the following point of sale (POS) configurations:
Coupon
Product restriction
You can associate all the items in a group, department, class, or subclass with the configuration. You can also associate an individual item or all items on an item list with the configuration. After you have associated items with a configuration, you can exclude items from the configuration. You can either exclude individual items or all items on an item list from the configuration.
The Merchandise Criteria window contains the following sections.
The configuration ID and description are displayed in the table title. Additionally, the total number of items already associated with the configuration are displayed in the top right corner.
Use the Actions Menu and icons to apply actions to the table. You can perform the actions listed below.
Table 8-18 Table - Actions Menu/Icons and Description
| Actions Menu/Icons | Description |
|---|---|
|
Add and Add icon |
You can add items by selecting Actions > Add or by using the Add icon For more information about how to add new items, see the Adding an Item to a Configuration section. |
|
Delete and Delete icon |
You can delete associated items:
|
|
Export to Excel and Export to Excel icon |
You can export the records in the table to a Microsoft Excel spreadsheet by selecting Actions > Export to Excel or by using the Export to Excel icon |
|
Add Exclusion and Add Exclusion button |
You can exclude a single item, multiple items or all items of an item list from an item restriction. For more information about this function, see the Adding an Item Exclusion section. |
|
Wrap icon |
You can wrap the values in the table column by first clicking the column on which you would like the text to wrap and then using the Wrap icon |
The toolbar contains the following icons and buttons.
Table 8-19 Merchandise Criteria Toolbar - Icons/Buttons and Description
| Icons/Buttons | Description |
|---|---|
|
Help icon |
You can access the online help for a particular page by clicking the Help icon |
|
View Items |
You can view the individual items of a criteria, for example, of a group:
|
|
Save |
Click Save to save the entered records. |
|
Save and Close |
Click Save and Close to save the entered records and close the window. |
|
Cancel |
Click Cancel to reject all entries and close the window. |
|
Done |
If you open the window in view mode, the Done button is displayed. Click Done to close the window. |
To add an item to a configuration, follow the steps below.
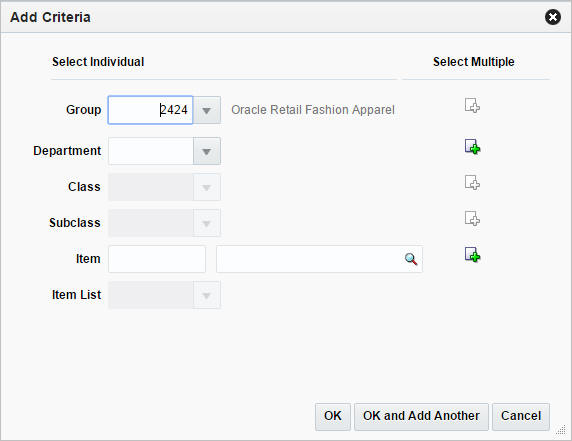
In the table, select Actions > Add, or use the Add icon ![]() . The Add Criteria window appears.
. The Add Criteria window appears.
You can add criteria for restrictions by individual or by multiple criteria:
Select individual criteria:
Enter, select or search for one of the following criteria in the individual fields:
Group
Department
Class
Subclass
Item
Item List
Then choose one of the following options.
Click OK to add the criteria and close the window.
Click OK and Add Another to add additional criteria.
Click Cancel to reject all entries and close the window.
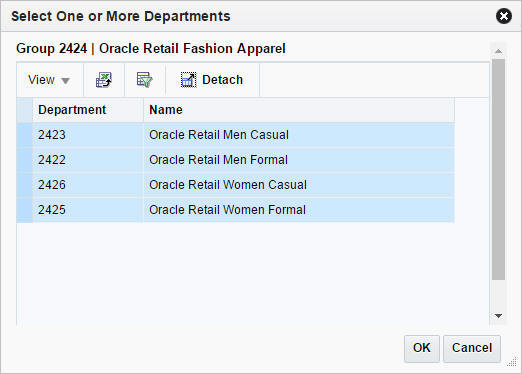
Select multiple criteria:
Select the Select One or More icon, for the desired field.
For example, select the Select One or More Department icon, the Select One or More window appears.
Select one or more rows in the table to add as criteria and confirm with OK. The criteria is added to the table. The window is closed.
Click Cancel to reject all entries and close the window.
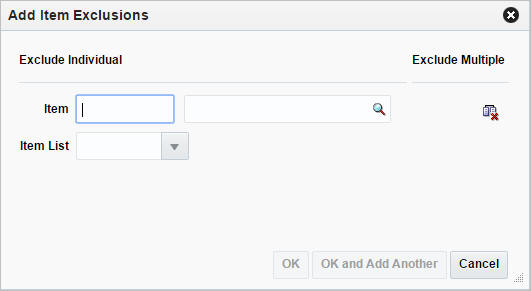
After you have entered all criteria for item restriction, you can exclude an individual item, multiple items or all items of an item list from this restriction. To add an item exclusion, follow the steps below.
In the table, select Actions > Add Exclusion, or use the Add Exclusion button to add an item exclusion. The Add Item Exclusions window appears.
To exclude a single item:
In the Item field, enter, select or search for an individual item.
To exclude multiple items:
Select the Exclude One or More Items icon. The Select One or More window appears.
Select the items you want to exclude from the item restriction.
Then click OK to exclude the items from the item restriction and close the window.
Click Cancel to reject all entries and close the window.
Exclude all items of an item list:
In the Item List field, select an item list.
Then choose one of the following options.
Click OK to exclude the items and close the window.
Click OK and Add Another to add additional items.
Click Cancel to reject all entries and close the window.
The Manage Coupons option opens the Coupon Search window. In this window you can perform the following actions.
Search for coupons by various search criteria
View the search results
View coupon information
Create coupon information
Edit coupon information
You can re-sequence how the coupons appear on the POS register. This allows you to group similar coupons together.
You can access the Coupon Search window from the Task menu, select Price > Manage Coupons. The Coupon Search window appears.
The Coupon Search window contains the following sections.
Search
For more information about this section, see the Searching for a Coupon section.
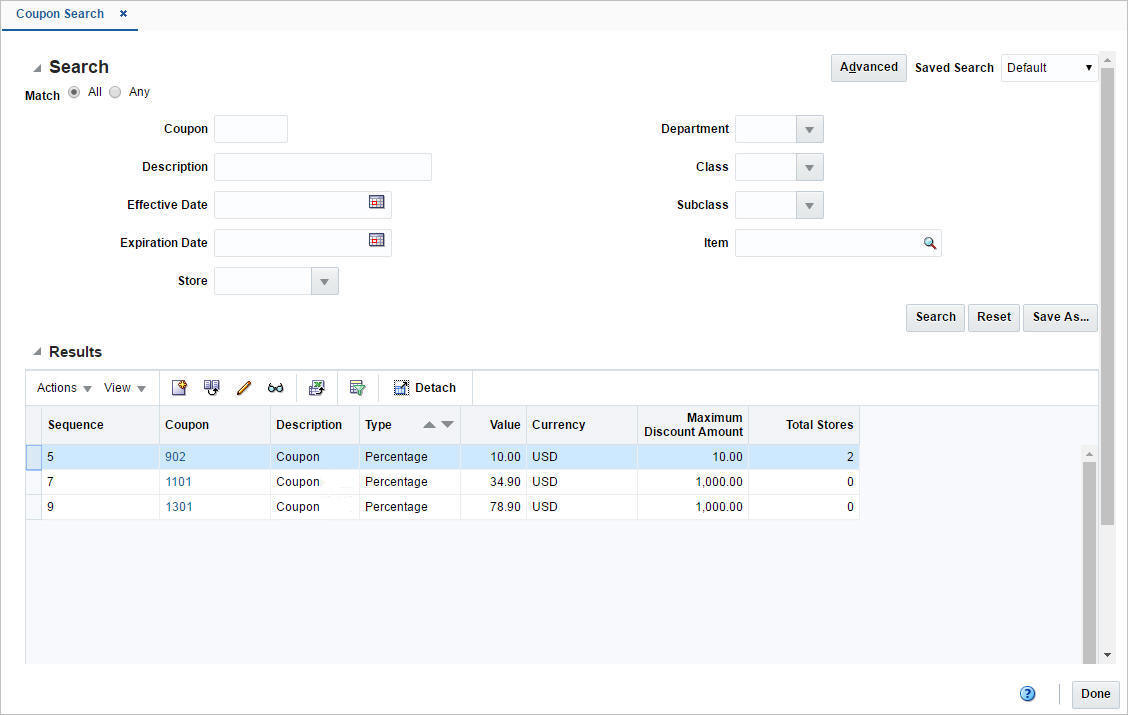
To search for a coupon:
From the Task menu, select Price > Manage Coupons. The Coupon Search window appears.
You can search for a coupon using basic or advanced search criteria, depending on the requirement. The basic mode is the default search mode.
Click Advanced to access the search section in advanced mode.
Click Basic to return to the basic mode.
To search for a coupon using basic search criteria:
Enter, select or search for one or all of the following basic search criteria.
Table 8-20 Coupon Search - Basic Search Criteria and Description
| Fields | Description |
|---|---|
|
Match option |
Check radio button All or Any. All - only coupons matching all entered search criteria are shown. Any - coupons matching any of the entered search criteria are shown. |
|
Coupon |
Enter the coupon ID. |
|
Description |
Enter the coupon description. |
|
Effective Date |
Enter the effective date or use the Calendar icon to select a date. |
|
Expiration Date |
Enter the expiration date or use the Calendar icon to select a date. |
|
Store |
Enter, select or search for the store associated to the coupon. |
|
Department |
Enter, select or search for the department associated to the coupon. |
|
Class |
Enter, select or search for the class associated to the coupon. |
|
Subclass |
Enter, select or search for the subclass associated to the coupon. |
|
Item |
Enter, select or search for the item associated to the coupon. |
Click on the Saved Search list to select one of the saved search criteria. Selecting a saved search populates the search section with the saved search criteria. If the run automatically function is enabled for the search, the search is executed immediately.
You can also personalize your saved searches by selecting Personalize. The Personalize Saved Searches window appears.
For more information about the Personalized Saved Search, see the Common User Interface Controls chapter, section "Personalize Saved Search".
Click Search. The coupons that match the search criteria are displayed in the Results section.
Click Reset to clear the search section and results.
Click Save As... to save the current search criteria. The Create Saved Search window appears.
For more information about how to save your search criteria, see the Common User Interface Controls chapter, section "Create Saved Search".
Click Done to close the window.
To search for a coupon using advanced search criteria:
To search using advanced search criteria, enter or select one or all of the advanced search criteria.
To narrow down the search, use the list next to the search fields. For example, determine if the entered value should equal or not equal the search result.
Click on the Saved Search list to select one of the saved search criteria. Selecting a saved search populates the search section with the saved search criteria. If the run automatically function is enabled for the search, the search is executed immediately.
You can also personalize your saved searches by selecting Personalize. The Personalize Saved Searches window appears.
For more information about the Personalized Saved Search, see the Common User Interface Controls chapter, section "Personalize Saved Search".
Click Search. The coupons that match the search criteria are displayed in the Results section.
Click Reset to clear the search section and results.
Click Save As... to save the current search criteria. The Create Saved Search window appears.
For more information about how to save your search criteria, see the Common User Interface Controls chapter, section "Create Saved Search".
Click Add Fields to add more fields for the advanced search. To remove the field from the search, click the x right next to the field.
Click Reorder to change the order of the available search fields. The Reorder Search Fields window appears.
Select the desired search field and use the up and down arrows to rearrange the order of the fields.
Click OK to confirm the new order of the fields and close the window.
Click Cancel to reject any changes and close the window.
Click Done to close the window.
The Results section lists the retrieved coupons.
Use the Actions Menu and icons to apply actions to the Results table. You can perform the actions listed below.
Table 8-21 Results - Actions Menu/Icons and Description
| Actions Menu/Icons | Description |
|---|---|
|
Create and Create icon |
Select Actions > Create, or use the Create Supplier icon For more details about how to create a coupon configuration, see the Creating a Coupon section. |
|
Create from Existing and Create from Existing icon |
Select Actions > Create from Existing or use the Create from Existing icon For more information about how to create a coupon from an existing one, see the Creating a Coupon from an Existing Coupon section. |
|
Edit and Edit icon |
Select Actions > Edit, use the Edit icon For more information about how to edit a coupon, see the Editing a Coupon section. |
|
View and View icon |
To view a coupon
|
|
Export to Excel and Export to Excel icon |
You can export the records in the table to a Microsoft Excel spreadsheet by selecting Actions > Export to Excel or by using the Export to Excel icon |
|
Resequence Coupon |
Opens the Coupon Resequence window. For more information about this function, see the Resequencing the Coupon Order section. |
You can customize the view of the table by using the options in the View Menu.
Table 8-22 Results - View Menu/Icons and Description
| View Menu/Icons | Description |
|---|---|
|
Currency |
You can toggle between the coupon and the system's primary currency. |
|
Columns |
You can manage which of the columns will be shown in the table by clicking the Show All and Manage Columns options. |
|
Detach and Detach icon |
You can view the tables in the application in a separate window by clicking Detach or using the Detach icon |
|
Sort |
You can sort columns by the following options:
|
|
Reorder Columns |
You can reorder columns by clicking the Reorder Columns option. |
|
Query by Example and Query by Example icon |
You can filter the items by one or multiple column values by clicking the Query by Example option or by using the Query by Example icon |
The toolbar contains the following icons and buttons.
When you copy a configuration, the basic configuration information, such as coupon type, are copied into a new configuration and assigned a new ID. However, the associated stores and items are not copied, you must add stores and items to the new configuration.
To create a coupon from an already existing one, follow the steps below.
From the Tasks menu, select Price > Manage Coupons. The Coupon Search window appears.
Enter or select search criteria as desired to make the search more restrictive.
Click Search. The coupons that match the search criteria are displayed in the Results section.
Select a record in the table.
Then select Actions > Create from Existing, or use the Create from Existing icon ![]() . The Coupon window appears. All data from the selected coupon is displayed.
. The Coupon window appears. All data from the selected coupon is displayed.
In the Coupon Details section, change the coupon details, as necessary. For more information about the Coupon section, see the Coupon Details section.
You can add stores to the coupon configuration. For more information about this function, see the Adding a Store to a Configuration section.
You can add item restrictions to the coupon configuration. For more information about this function, see the Adding an Item to a Configuration section.
Then select one of the following options.
Click Save to save the entered records.
Click Save and Close to save the entered record and close the window.
Click Cancel to reject all entries and close the window.
To edit a coupon, follow the steps below.
From the Tasks menu, select Price > Manage Coupons. The Coupon Search window appears.
Enter or select search criteria as desired to make the search more restrictive.
Click Search. The coupons that match the search criteria are displayed in the Results section.
In the coupon column, click the coupon link, or mark a record and select Actions > Edit, or use the Edit icon ![]() . The Coupon window appears. The data of the selected coupon is displayed.
. The Coupon window appears. The data of the selected coupon is displayed.
In the Coupon Details section, change the coupon details, as necessary. For more information about the Coupon section, see the Coupon Details section.
You can add stores to the coupon configuration. For more information about this function, see the Adding a Store to a Configuration section.
You can add item restrictions to the coupon configuration. For more information about this function, see the Adding an Item to a Configuration section.
Then select one of the following options.
Click Save to save the entered records.
Click Save and Close to save the entered record and close the window.
Click Cancel to reject all entries and close the window.
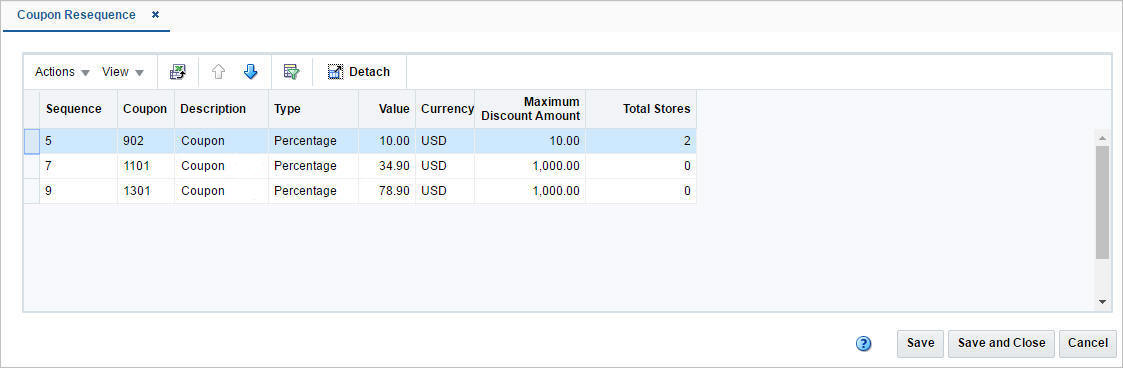
In the Coupon Resequence Window you can change the sequence of how the coupons are displayed on the POS register.
The Coupon Resequence Window contains the following sections.
The table displays the available coupons with the current sequence.
Use the Actions Menu and icons to apply actions to the table. You can perform the actions listed below.
Table 8-24 Coupon Resequence Table - Actions Menu/Icons and Description
| Actions Menu/Icons | Description |
|---|---|
|
Move Up and Move Down or Move Up and Down icons |
Use the Move Up and Move Down option, or the corresponding icons to change the order of the displayed coupons. |
|
Export to Excel and Export to Excel icon |
You can export the records in the table to a Microsoft Excel spreadsheet by selecting Actions > Export to Excel or by using the Export to Excel icon |
The toolbar contains the following icons and buttons.
Table 8-25 Coupon Resequence Toolbar - Icons/Buttons and Description
| Icons/Buttons | Description |
|---|---|
|
Help icon |
You can access the online help for a particular page by clicking the Help icon |
|
Save |
Click Save to save the entered records. |
|
Save and Close |
Click Save and Close to save the entered records and close the window. |
|
Cancel |
Click Cancel to reject all entries and close the window. |
|
Done |
If you open the window in view mode, the Done button is displayed. Click Done to close the window. |
To change the sequence of how the coupons are displayed on the POS register, follow the steps below.
From the Tasks menu, select Price > Manage Coupons. The Coupon Search window appears.
Enter or select search criteria as desired to make the search more restrictive.
Click Search. The coupons that match the search criteria are displayed in the Results section.
Select a record in the table.
Then select Actions > Resequence Coupons. The Coupon Resequence window appears.
Select Actions > Move Up/Move Down, or use the corresponding icons to rearrange the order of the coupons.
Then select one of the following options.
Click Save to save the changed order.
Click Save and Close to save the changed order and close the window.
Click Cancel to reject all entries and close the window.