| Oracle® Retail Trade Management User Guide Release 14.1 E56591-01 |
|

 Previous |
 Next |
The Harmonized Tariff Schedule (HTS) for an import country can be stored and accessed online. It provides the tariff rates and statistical categories for imported merchandise. By means of an HTS batch program, the data can be updated as new files are released by the customs agencies. The data can also be maintained manually.
You can maintain the following information in the HTS module:
HTS headings
Heading restraints
Quota categories
HTS classifications
Generally, HTS classifications are updated from files received from the customs agency. These classifications can be updated manually.
You can associate the HTS classifications and assessments with items or items on purchase orders.
The following sections describe the features associated with setting up the harmonized tariff schedule foundation.
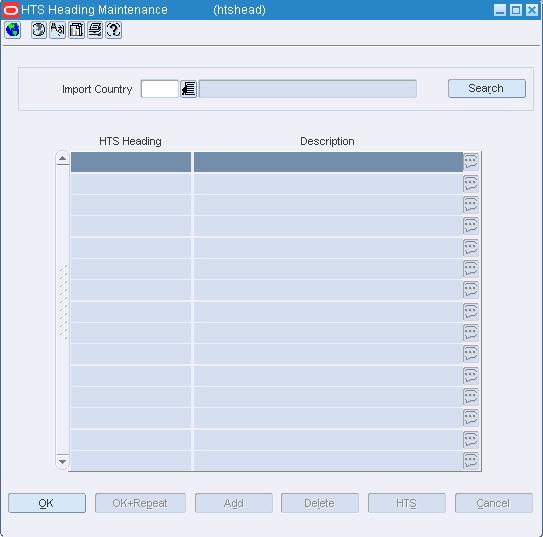
The HTS Heading Maintenance window allows you to edit and view the headings of a harmonized tariff schedule.
Navigate: From the main menu, select Control > Landed Cost > HTS Maintenance > HTS Heading Maintenance > Edit. The HTS Heading Maintenance window opens.
Select an Import Country and click Search. The HTS Heading list box populates with the matching items.
Select an item and edit the description as necessary.
To add an HTS heading:
Click Add. The next available line is enabled.
In the HTS Heading field, enter the number of the HTS heading.
In the Description field, enter the description of the HTS heading.
To enter additional comments, click the comments button.
To delete an HTS heading:
Select an HTS heading and click Delete.
When prompted to delete the record, click Yes.
Click OK to save your changes and close the window.
Navigate: From the main menu, select Control > Landed Cost > HTS Maintenance > HTS Heading Maintenance > View. The HTS Heading Maintenance window opens. Select an Import Country and click Search.
Click OK to close the window.
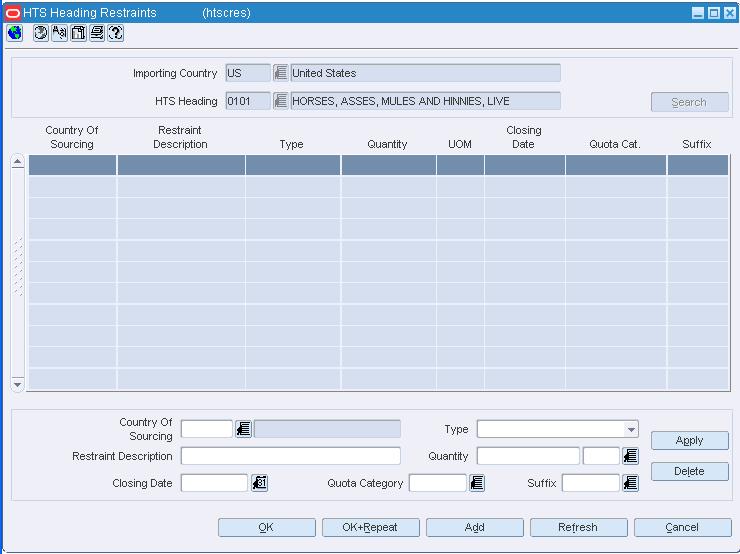
The HTS Heading Restraints window allows you to edit and view the restraints applied at the heading level of the harmonized tariff schedule. The most common restraints are quota levels.
Navigate: From the main menu, select Control > Landed Cost > HTS Maintenance > HTS Heading Maintenance > Edit. The HTS Heading Maintenance window opens. Select an Import Country and click Search.
Select an HTS heading. From the Options menu, select HTS Heading Restraints. The HTS Heading Restraints window opens.
Select a Country of Sourcing, Type, Restraint Description, Quantity, and all other required fields.
Click Apply to complete the edit.
To add a restraint:
Click Add. The fields in the Apply area are cleared.
Enter the details in the Apply area.
Click Apply. The restraint is added to the table.
To delete a restraint:
Select a restraint and click Delete.
When prompted to delete the record, click Yes.
Click OK to save your changes and close the window.
Navigate: From the main menu, select Control > Landed Cost > HTS Maintenance > HTS Heading Maintenance > Edit. The HTS Heading Maintenance window opens. Select an Import Country and click Search.
Select an HTS heading. From the Options menu, select HTS Heading Restraints. The HTS Heading Restraints window opens. The current restraints for the country appear.
Click OK to close the window.
Navigate: From the main menu, select Control > Landed Cost > HTS Maintenance > HTS Heading Maintenance > Edit. The HTS Heading Maintenance window opens. Select an Import Country and click Search.
Select an HTS heading.
From the Options menu, select HTS Heading Documents. The Required Documents window opens.
Select a document and click Delete.
When prompted to delete the document, click Yes.
Click OK to save your changes and close the window.
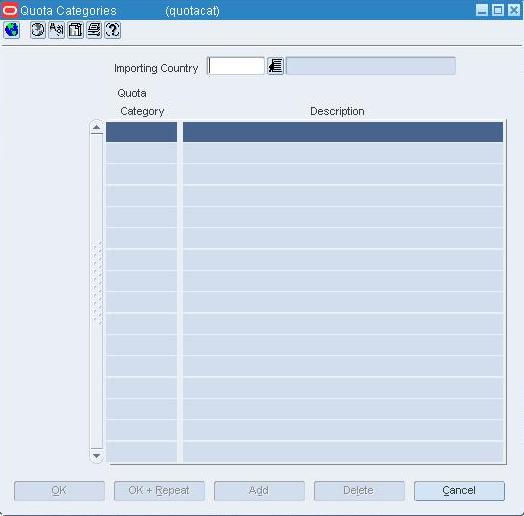
The Quota Categories window allows you to edit and view quota categories by import country. Customs agencies group items with related characteristics into quota categories. Restrictions can then be placed on the category rather than on individual items.
Navigate: From the main menu, select Control > Landed Cost > HTS Maintenance > Quota Category > Edit. The Quota Categories window opens.
In the Importing Country field, enter the code for the import country, or click the LOV button and select the import country.
Click Add. The next available line becomes enabled.
In the Quota Category field, enter the ID of the quota category.
In the Description field, enter the description of the quota category.
Click OK to save your changes and close the window.
Navigate: From the main menu, select Control > Landed Cost > HTS Maintenance > Quota Category > Edit. The Quota Categories window opens.
In the Importing Country field, enter the code for the import country, or click the LOV button and select the import country.
Select a quota category and click Delete.
When prompted to delete the record, click Yes.
Click OK to save your changes and close the window.
Navigate: From the main menu, select Control > Landed Cost > HTS Maintenance > Quota Category > View. The Quota Categories window opens.
In the Importing Country field, enter the code for the import country, or click the LOV button and select the import country.
Click OK to close the window.
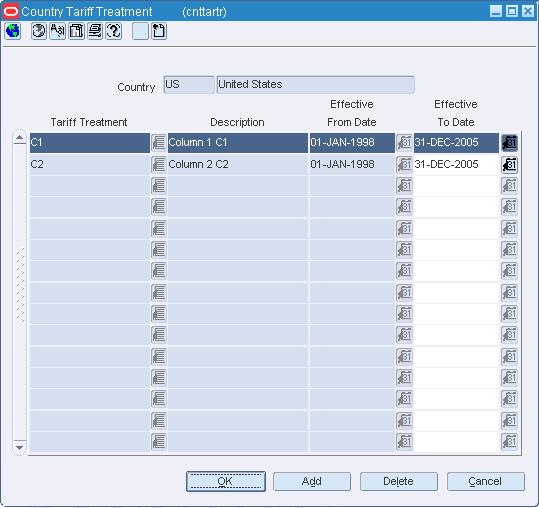
Navigate: From the main menu, select Control > Setup > Country >Edit. The Country Maintenance window opens. Select a country.
From the Options menu, select Tariff Treatments. The Country Tariff Treatment window opens.
Navigate: From the main menu, select Control > Setup > Country > View. The Country Maintenance window opens. Select a country.
From the Options menu, select Tariff Treatments. The Country Tariff Treatment window opens.
Click OK to close the window.
Navigate: From the main menu, select Control > Setup > Country > Edit. The Country Maintenance window opens. Select a country.
From the Options menu, select Tariff Treatments. The Country Tariff Treatment window opens.
Edit the Effective To Date field as necessary.
To add a tariff treatment:
Click Add. The next available line is enabled.
In the Tariff Treatment field, enter the code the tariff treatment, or click the LOV button and select the tariff.
In the Effective From Date field, enter the date on which the tariff treatment becomes effective, or click the calendar button and select the date.
In the Effective To Date field, enter the date on which the tariff treatment is no longer effective, or click the calendar button and select the date.
To delete a tariff treatment:
Select a tariff treatment and click Delete.
When prompted to delete the record, click Yes.
Click OK to save your changes and close the window.
The harmonized tariff schedule for an import country can be stored and accessed online. It provides the tariff rates and statistical categories for imported merchandise. By means of an HTS batch program, the data can be updated as new files are released by the customs agencies. The data can also be maintained manually.
You can maintain the following information in the HTS module:
HTS headings
Heading restraints
Quota categories
HTS classifications
Generally, HTS classifications are updated from files received from the customs agency. These classifications can be updated manually.
Navigate: From the main menu, select Control > Landed Cost > HTS Maintenance > HTS. The HTS Selection window opens.
In the Action field, select New.
In the Importing Country field, enter the code for the import country, or click the LOV button and select the import country.
Click OK. The Harmonized Tariff Schedule window opens.
In the HTS field, enter the number of the classification.
In the HTS Description field, enter the description of the HTS classification. For extensive descriptions, click the comments button and enter the description.
In the Effect From and Effect To fields, enter the effective dates, or click the calendar buttons and select the dates.
In the Duty Comp Code field, enter the code for the duty calculation, or click the LOV button and select the duty calculation.
In the Units field, enter the number of units of measure that you want to define for the HTS classification.
In the Unit 1 UOM, Unit 2 UOM, and Unit 3 UOM fields, enter the codes for the applicable units of measure, or click the LOV buttons and select the units of measure.
Enter any additional information as necessary.
Click OK to save your changes and close the window.
Navigate: From the main menu, select Control > Landed Cost > HTS Maintenance > HTS. The HTS Selection window opens.
Search for and retrieve an HTS classification in Edit mode and select an Importing Country. The Harmonized Tariff Schedule window opens.
Edit the enabled fields as necessary.
To edit additional information for a classification, select the appropriate option from the Options menu.
Edit the enabled fields as necessary.
Click OK to save your changes and close the window.
Navigate: From the main menu, select Control > Landed Cost > HTS Maintenance > HTS. The HTS Selection window opens.
Search for and retrieve an HTS classification in Edit mode and select an Importing Country. The Harmonized Tariff Schedule window opens.
From the Options menu, select Countervailing Duties. The current countervailing duties appear in the HTS Countervailing Duties window.
Edit the enabled fields as necessary.
To add a countervailing duty:
Click Add.
Enter the details on the next available line.
To delete a countervailing duty:
Select a countervailing duty and click Delete.
When prompted to delete the record, click Yes.
Click OK to exit the HTS Countervailing Duties window.
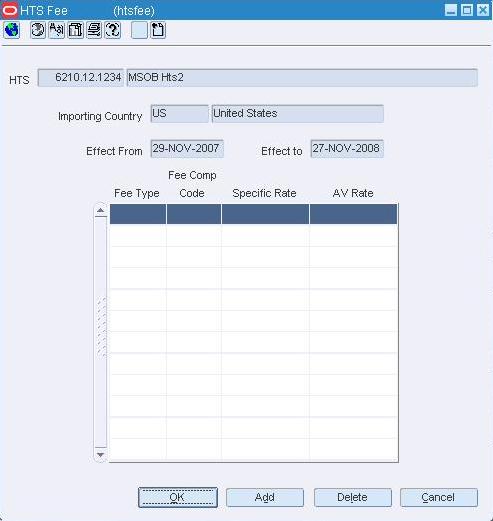
From the Options menu, select Fees. The current fees appear in the HTS Fee window.
Edit the enabled fields as necessary.
To add a fee:
Click Add.
Enter the details on the next available line.
To delete a fee:
Select a fee and click Delete.
When prompted to delete the record, click Yes.
Click OK to exit the HTS Fee window.
From the Options menu, select References. The current references appear in the HTS Reference window.
Edit the Reference field as necessary.
To add a reference:
Click Add.
Enter the information on the next available line.
To delete a reference:
Select a reference and click Delete.
When prompted to delete the record, click Yes.
Click OK to exit the HTS Reference window.
From the Options menu, select Tariff Treatments. The current tariff treatments appear in the HTS Tariff Treatment window.
Edit the enabled fields as necessary.
To add a tariff treatment:
Click Add Treatment.
Enter the details on the next available line.
To exclude an origin country from the tariff treatment:
Select a tariff treatment.
Click Add Exclusion.
In the Excluded Country field, enter the code for the country, or click the LOV button and select the country.
To delete an excluded country from the tariff treatment:
Select a tariff treatment.
Select an excluded country and click Delete Exclusion.
When prompted to delete the record, click Yes.
To delete a tariff treatment:
Select a tariff treatment and click Delete Treatment.
When prompted to delete the record, click Yes.
Click OK to save your changes and close the window.
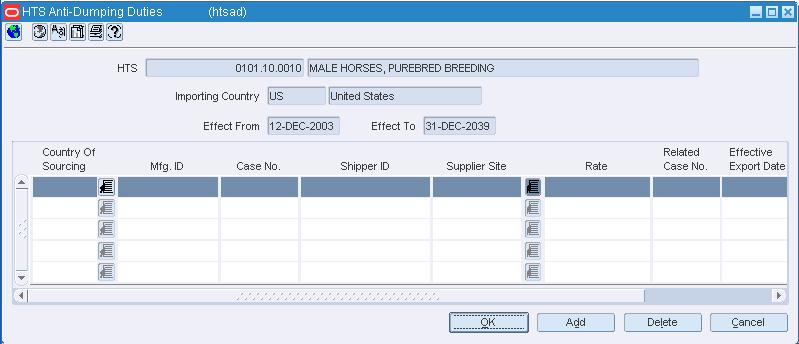
From the Options menu, select Anti-Dumping Duties. The current anti-dumping duties appear in the HTS Anti-Dumping Duties window.
Edit the enabled fields as necessary.
To add an anti-dumping duty:
Click Add.
Enter the details on the next available line.
To delete an anti-dumping duty:
Select an anti-dumping duty and click Delete.
When prompted to delete the record, click Yes.
Click OK to save your changes and close the window.
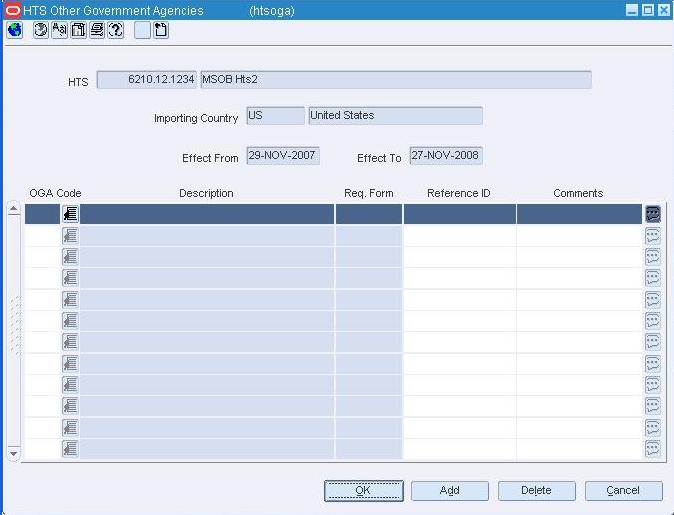
From the Options menu, select Other Government Agencies. The current requirements appear in the HTS Other Government Agencies window.
Edit the enabled fields as necessary.
To add a requirement:
Click Add.
Enter the details on the next available line.
To delete a requirement:
Select a requirement and click Delete.
When prompted to delete the record, click Yes.
Click OK to save your changes and close the window.
From the Options menu, select Taxes. The current taxes appear in the HTS Tax window.
Edit the enabled fields as necessary.
To add a tax:
Click Add.
Enter the details on the next available line.
To delete a tax:
Select a tax and click Delete.
When prompted to delete the record, click Yes.
Click OK to save your changes and close the window.
The following sections describe the features associated with maintaining the harmonized tariff schedule.
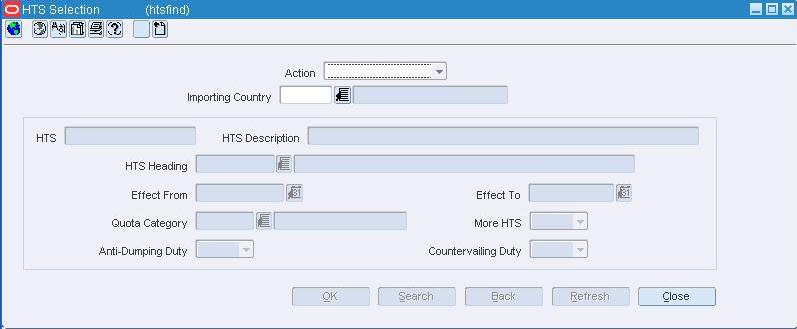
The HTS Selection window allows you to enter criteria in order to search for harmonized tariff schedule (HTS) classifications and view the results of the search. It is also the starting point for creating, editing, or viewing an HTS classification.
The default view for the HTS Selection window opens when you open the window for the first time. You can also create a custom view.
Navigate: From the main menu, select Control > Landed Cost > HTS Maintenance > HTS. The HTS Selection window opens.
In the Action field, select either View or Edit.
In the Importing Country field, enter the code for the import country, or click the LOV button and select the import country.
Enter additional criteria as desired to make the search more restrictive.
Click Search. The HTS Selection window displays the HTS classifications that match the search criteria.
Select a task:
To perform another search, click Refresh.
To display the details of an HTS classification, select a record and click OK. The Harmonized Tariff Schedule window opens.
Click Close to close the window.
The Harmonized Tariff Schedule window allows you to create, edit, and view an HTS classification.
Navigate: From the main menu, select Control > Landed Cost > HTS Maintenance > HTS. The HTS Selection window opens.
Search for and retrieve an HTS classification in Edit mode and select an Importing Country. The details appear in the Harmonized Tariff Schedule window.
Click Delete.
When prompted to delete the record, click Yes.
Click OK to save your changes and close the window.
From the main menu, select Control > Landed Cost > HTS Maintenance > HTS. The HTS Selection window opens.
Search for and retrieve an HTS classification in View mode and select an Importing Country. The Harmonized Tariff Schedule window opens.
Click OK to close the window.
The HTS Tariff Treatment window allows you to add and maintain the tariff treatments that are associated with an HTS classification. In addition to maintaining the tariff treatment, you can indicate which origin countries are excluded from the tariff treatment.
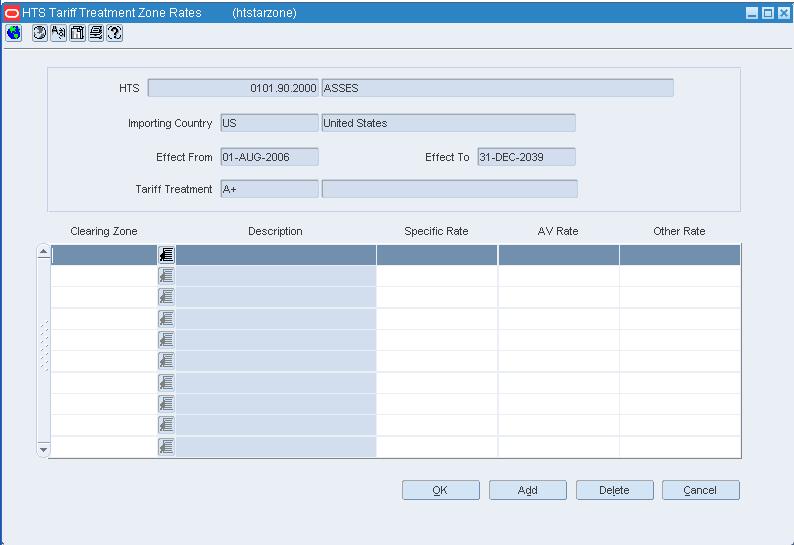
The HTS Tariff Treatment Zone Rates window allows the user to set up duty rates by clearing zone for the HTS code. Zone level rates are only used for those countries that require varying rates depending on where within the country of import the goods are cleared.
Navigate: From the main menu, select Control > Landed Cost > HTS Maintenance > HTS. The HTS Selection window opens.
Search for and retrieve an HTS classification in Edit mode and select an Importing Country. The Harmonized Tariff Schedule window opens.
From the Option menu, select Tariff Treatments. The HTS Tariff Treatment window opens.
Select an item from the table.
Click Zone Rates. The HTS Tariff Treatment Zone Rates window opens.
In the Clearing Zone column, enter a zone or click the LOV button to select a zone.
In the Specific Rate field, enter a rate.
In the AV Rate field, enter a rate.
In the Other Rate field, enter another rate.
Click OK to save your changes and close the window.
Navigate: From the main menu, select Control > Landed Cost > HTS Maintenance > HTS. The HTS Selection window opens.
Search for and retrieve an HTS classification in Edit mode and select an Importing Country. The Harmonized Tariff Schedule window opens.
From the Option menu, select Tariff Treatments. The HTS Tariff Treatment window opens.
Select an item from the table.
Click Zone Rates. The HTS Tariff Treatment Zone Rates window opens.
In the Clearing Zone column, select a zone to edit.
Make changes to the rate as necessary.
Click OK to save your changes and close the window.
Navigate: From the main menu, select Control > Landed Cost > HTS Maintenance > HTS. The HTS Selection window opens.
Search for and retrieve an HTS classification in Edit mode and select an Importing Country. The Harmonized Tariff Schedule window opens.
From the Option menu, select Tariff Treatments. The HTS Tariff Treatment window opens.
Select an item from the table.
Click Zone Rates. The HTS Tariff Treatment Zone Rates window opens.
Select a zone to be deleted.
Click Delete. The Clearing Zone and its associated rates are deleted.
Click OK to save your changes and close the window.
The HTS Fee window allows you to add and maintain the fees that are associated with an HTS classification.
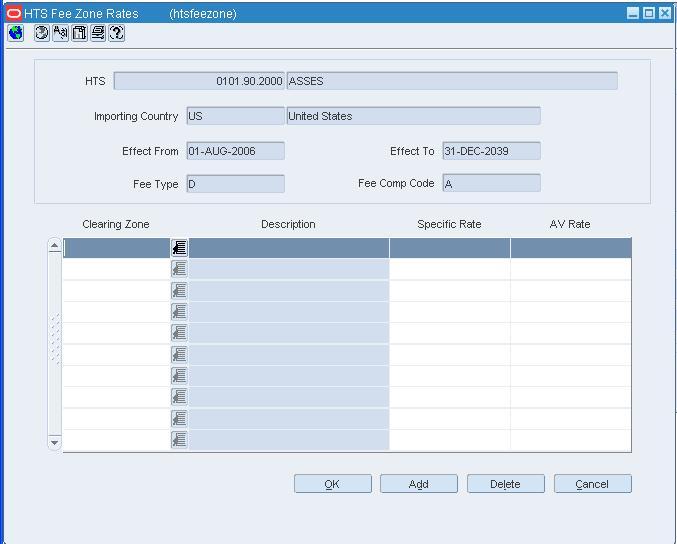
The HTS Fee Zone Rates window allows the user to set up fee rates by clearing zone for the HTS code. Zone level rates are only used for those countries that require varying rates depending on where within the country of import the goods are cleared.
Navigate: From the main menu, select Control > Landed Cost > HTS Maintenance > HTS. The HTS Selection window opens.
Search for and retrieve an HTS classification in Edit mode and select an Importing Country. The Harmonized Tariff Schedule window opens.
From the Option menu, select Fees. The HTS Fee window opens.
Select an item from the table.
Click Zone Rates. The HTS Fee Zone Rates window opens.
In the Clearing Zone column, enter a zone or click the LOV button to select a zone.
In the Specific Rate field, enter a rate.
In the AV Rate field, enter a rate.
Click OK to save your changes and close the window.
Navigate: From the main menu, select Control > Landed Cost > HTS Maintenance > HTS. The HTS Selection window opens.
Search for and retrieve an HTS classification in Edit mode and select an Importing Country. The Harmonized Tariff Schedule window opens.
From the Option menu, select Fees. The HTS Fee window opens.
Select an item from the table.
Click Zone Rates. The HTS Fee Zone Rates window opens.
In the Clearing Zone column, click the LOV button to select a zone.
In the Specific Rate field, update the rate.
In the AV Rate field, update the rate.
Click OK to save your changes and close the window.
Navigate: From the main menu, select Control > Landed Cost > HTS Maintenance > HTS. The HTS Selection window opens.
Search for and retrieve an HTS classification in Edit mode and select an Importing Country. The Harmonized Tariff Schedule window opens.
From the Option menu, select Fees. The HTS Fee window opens.
Select an item from the table.
Click Zone Rates. The HTS Fee Zone Rates window opens.
Select the Clearing Zone that you want to delete
Click Delete.
Click OK to save your changes and close the window.
The HTS Tax window allows you to add and maintain the taxes that are associated with an HTS classification.
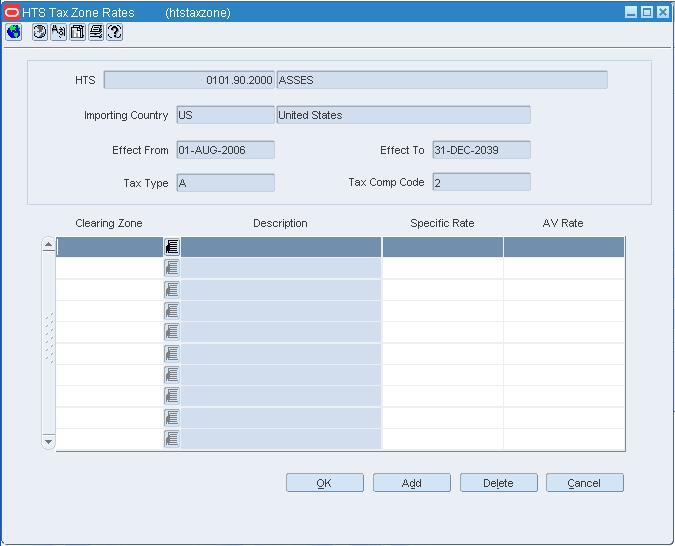
The HTS Tax Zone Rates window allows the user to set up tax rates by clearing zone for the HTS code. Zone level rates are only used for those countries that require varying rates depending on where within the country of import the goods are cleared.
Navigate: From the main menu, select Control > Landed Cost > HTS Maintenance > HTS. The HTS Selection window opens.
Search for and retrieve an HTS classification in Edit mode and select an Importing Country. The Harmonized Tariff Schedule window opens.
From the Option menu, select Taxes. The HTS Tax window opens.
Select an item from the table.
Click Zone Rates. The HTS Tax Zone Rates window opens.
Click Add.
In the Clearing Zone column, enter a zone or click the LOV button to select a zone.
In the Specific Rate field, enter a rate.
In the AV Rate field, enter a rate.
Click OK to save your changes and close the window.
Navigate: From the main menu, select Control > Landed Cost > HTS Maintenance > HTS. The HTS Selection window opens.
Search for and retrieve an HTS classification in Edit mode and select an Importing Country. The Harmonized Tariff Schedule window opens.
From the Option menu, select Taxes. The HTS Tax window opens.
Select an item from the table.
Click Zone Rates. The HTS Tax Zone Rates window opens.
In the Clearing Zone column, click the LOV button to select a zone.
In the Specific Rate field, update the rate.
In the AV Rate field, update the rate.
Click OK to save your changes and close the window.
Navigate: From the main menu, select Control > Landed Cost > HTS Maintenance > HTS. The HTS Selection window opens.
Search for and retrieve an HTS classification in Edit mode and select an Importing Country. The Harmonized Tariff Schedule window opens.
From the Option menu, select Taxes. The HTS Tax window opens.
Select an item from the table.
Click Zone Rates. The HTS Tax Zone Rates window opens.
Select the Clearing Zone to be deleted.
Click Delete. The clearing zone and its associated rates are deleted.
Click OK to save your changes and close the window.
The HTS Anti-Dumping Duties window allows you to add and maintain the anti-dumping duties that are associated with an HTS classification.
The HTS Countervailing Duties window allows you to add and maintain the countervailing duties that are associated with an HTS classification.
The HTS Other Government Agencies window allows you to add and maintain the requirements from other government agencies that have jurisdiction over an HTS classification.
The following sections describe the features associated with maintaining the item harmonized tariff schedule.
Navigate: From the main menu, select Items > HTS. The Item HTS Maintenance window opens.
Navigate: From the main menu, select Items > Items. The Item Search window opens.
Search for and retrieve an item in Edit mode. The Item Maintenance window opens.
Select the HTS option. The Item HTS Maintenance window opens.
Select an HTS classification and edit the status as necessary.
To add an HTS classification:
Click Add.
In the Import Country field, enter the code for the import country, or click the LOV button and select the import country.
In the Quota Category field, enter the ID of a quota category or click the LOV button and select the category. The quota category is optional.
In the HTS field, enter the HTS classification, or click the LOV button and select the HTS classification.
In the Origin Country field, enter the code for the origin country, or click the LOV button and select the origin country.
In the Status field, select Approved, if applicable.
Click Apply. The HTS classification is added to the HTS table.
To delete an HTS classification:
Select an HTS classification and click Delete.
When prompted to delete the record, click Yes.
Click OK to save your changes and close the window.
Navigate: From the main menu, select Items > Items. The Item Search window opens.
Search for and retrieve an item in View mode. The Item Maintenance window opens.
Click on the HTS option. The Item HTS Maintenance window opens.
To view the cost components for an HTS classification:
Select an HTS classification and click Assessments. The cost components appear in the Item HTS Assessment Maintenance window.
Click OK to close window.
To view the details of an HTS classification:
Select an HTS classification and click HTS Details. The details appear in the HTS Details window.
Click OK to close the window.
Click OK to close the window.
The HTS Details window allows you to view the details of an HTS classification that is associated with an item.
Navigate: From the main menu, select Items > Items. The Item Search window is displayed.
Search for and retrieve an item in Edit mode. The Item Maintenance window opens.
Select the HTS option. The Item HTS Maintenance window opens.
Select an HTS classification.
In the Status field of the Apply area, select Approved.
Click Apply.
Click OK to save your changes and close the window.
The Item HTS Assessment Maintenance window allows you to maintain the assessments that are associated with an item. The assessments are calculated at the item, origin country, import country level.
Assessment cost components include duties, fees, and taxes a retailer must pay in order to bring their goods into a particular country of import. The rates associated with each assessment are determined by the HTS classification. Assessments differ from expenses in that they are defined by a government agency. To view the calculations in which a particular assessment is included, select Nomination Flags from the View menu.
Navigate: From the main menu, select Items> Items. The Item Search window opens.
Search for and retrieve an item in Edit mode. The Item Maintenance window opens.
Click the HTS option. The Item HTS Maintenance window opens.
Select an HTS classification and click Assessments. The Item HTS Assessment Maintenance window opens.
Edit the assessment details as necessary.
To add an assessment:
Click Add. The next available line is enabled.
In the Component field, enter the code for the cost component, or click the LOV button and select the cost component.
Enter additional information in the enabled fields.
From the View menu, select Nomination Flags. The Nomination Flags appear in the table.
In the Nomination Flag fields, the value of the Nomination Flags indicate if the cost component is added to (+), subtracted from (-), or not included (N/A) in the calculation of another cost component's value. Each flag represents a specific calculation. The In Duty nomination flag is used to determine which components are part of the calculation of Total Duty. The In Exp nomination flag is used to determine which components are part of the calculation of Total Expense. The In ALC flag is used for cost components for which the retailer does not expect to receive a invoice, but the retailer still wants the value included in the calculation of Actual Landed Cost.
Select N/A if the assessment is not included in the calculation of total assessments and estimated landed costs.
Select + (plus sign) to add the assessment to the total.
Select - (minus sign) to subtract the assessment from the total.
Click Recalculate to update the estimated values.
To delete an assessment:
Select an assessment and click Delete.
When prompted to delete the record, click Yes.
Click OK to save your changes and close the window.
Navigate: From the main menu, select Items > Items. The Item Search window opens.
Search for and retrieve an item in View mode. The Item Maintenance window opens.
Click on the HTS option. The Item HTS Maintenance window opens.
Select an HTS classification and click Assessments. The Item HTS Assessment Maintenance window opens.
Click OK to close the window.
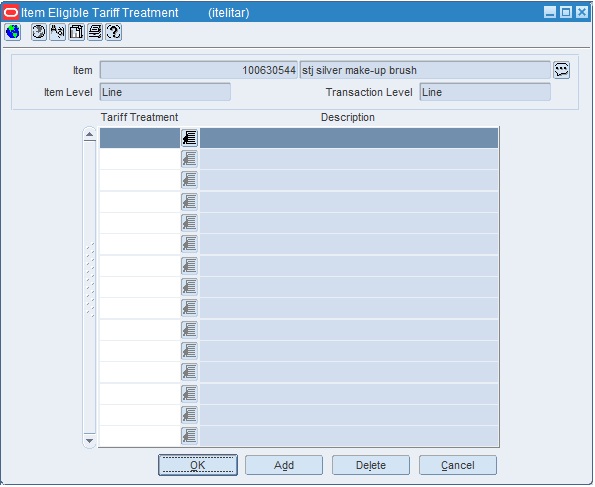
Navigate: From the main menu, select Items > Eligible Tariff Treatments. The Item Eligible Tariff Treatment window opens.
Navigate: From the main menu, select Items > Items. The Item Search window opens.
Search for and retrieve an item in View mode. The Item Maintenance window opens.
Click on the Eligible Tariff Treatments option. The Item Eligible Tariff Treatment window opens.
Click OK to close the window.
Navigate: From the main menu, select Items > Items. The Item Search window is displayed.
Search for and retrieve an item in Edit mode. The Item Maintenance window opens.
Select the Eligible Tariff Treatments option. The current tariff treatments appear in the Item Eligible Tariff Treatment window.
Click Add. The next available line is enabled.
In the Tariff Treatment field, click the LOV button and select the appropriate tariff treatment.
Click OK to save your changes and close the window.
Navigate: From the main menu, select Items > Items. The Item Search window is displayed.
Search for and retrieve an item in Edit mode. The Item Maintenance window opens.
Click the Eligible Tariff Treatments option. The current tariff treatments appear in the Item Eligible Tariff Treatment window.
Select a tariff treatment and click Delete.
When prompted to delete the record, click Yes.
Click OK to save your changes and close the window.
The following sections describe the features associated with maintaining the purchase order item harmonized tariff schedule.
Navigate: From the main menu, select Ordering > Orders. The Order Selection window opens. Search for and retrieve a purchase order in Edit mode. Restrict the search to import orders in Worksheet status. The PO Header Maintenance window opens. Click Items. The PO Item Maintenance window opens. Select an item.
From the Options menu, select HTS. The Order Item HTS Maintenance window opens. Select an HTS classification in the HTS Information table. The Assessment Details table opens.
Navigate: From the main menu, select Ordering > Orders. The Order Selection window opens.
Search for and retrieve a purchase order in View mode. The purchase order must by an import type purchase order. The PO Header Maintenance window opens.
Click Items. The Order Item Maintenance window opens. Select an item.
From the Options menu, select HTS. The Order Item HTS Maintenance window opens.
To view the details of an HTS classification:
Select an HTS classification and click HTS Details. The HTS Details window opens.
Click Close to close the window.
Click OK to close the window.
Navigate: From the main menu, select Ordering > Orders. The Order Selection window opens.
Search for and retrieve a purchase order in Edit mode. Restrict the search to import orders in Worksheet status. The PO Header Maintenance window opens.
Click Items. The Item Maintenance window opens. Select an item.
From the Options menu, select HTS. The Order Item HTS Maintenance window opens.
Select an HTS classification in the HTS Information table. The Assessment Details table opens.
Edit the assessments as necessary.
To add an assessment:
Select an HTS classification. The current assessments appear in the Assessment Details table.
Click Add Comp Details. The next available line is enabled.
In the Component field, enter the code for the cost component, or click the LOV button and select the cost component.
Enter additional information in the enabled fields.
From the View menu, select Nomination Flag. The Nomination Flag fields appear in the Assessment Details table.
In the Nomination Flag fields,the value of the Nomination Flags indicate if the cost component is added to (+), subtracted from (-), or not included (N/A) in the calculation of another cost component's value. Each flag represents a specific calculation. The In Duty nomination flag is used to determine which components are part of the calculation of Total Duty. The In Exp nomination flag is used to determine which components are part of the calculation of Total Expense. The In ALC flag is used for cost components for which the retailer does not expect to receive a invoice, but the retailer still wants the value included in the calculation of Actual Landed Cost.
Select N/A if the assessment is not included in the calculation of total assessments and estimated landed costs.
Select + (plus sign) to add the assessment to the total.
Select - (minus sign) to subtract the assessment from the total.
Click Recalculate in order to update the values.
To delete an assessment:
Select an HTS classification. The current assessments appear in the Assessment Details table.
Select an assessment and click Delete Comp Details.
When prompted to delete the record, click Yes.
Click OK to save your changes and close the window.
Navigate: From the main menu, select Ordering > Orders. The Order Selection window opens.
Search for and retrieve a purchase order in Edit mode. Restrict the search to import orders in Worksheet status. The PO Header Maintenance window opens.
Click Items. The Order Item Maintenance window opens. Select an item.
From the Options menu, select HTS. The Order Item HTS Maintenance window opens.
Select an HTS classification in the HTS Information table. The Assessment Details table opens.
Select an HTS classification. The details appear in the Apply HTS area.
In the Status field, select Approved.
Click Apply HTS.
Click OK to save your changes and close the window.
Navigate: From the main menu, select Ordering > Orders. The Order Selection window opens.
Search for and retrieve an import purchase order in View mode. The PO Header Maintenance window opens.
Click Items. The Order Item Maintenance window opens. Select an item.
From the Options menu, select HTS. The Order Item HTS Maintenance window opens.Select an HTS classification. The assessments appear in the Assessment Details table.
Click OK to close the window.