| Oracle® Retail Trade Management User Guide Release 14.1 E56591-01 |
|

 Previous |
 Next |
The movement of goods from origin country to final destination can be tracked through the transportation module.
The following information must be set up for the transportation module:
Freight types
Freight sizes
Standard carrier alpha codes
For more information, see:
The following sections describe the features associated with the transportation module.
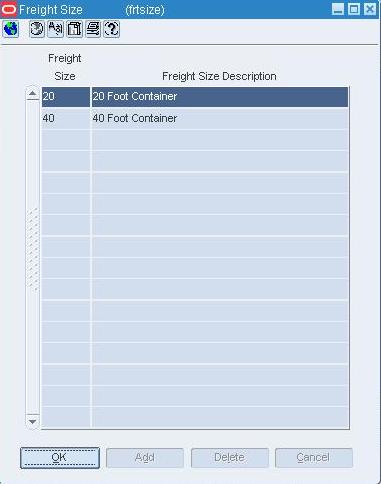
Navigate: From the main menu, select Control > Setup > Freight Size Maintenance > Edit. The Freight Size window opens.
Click Add. The next available line is enabled.
In the Freight Size field, enter the ID of the freight size.
In the Freight Size Description field, enter a description of the freight size.
Click OK to save your changes and close the window.
Navigate: From the main menu, select Control > Setup > Freight Type Maintenance > Edit. The Freight Type window opens.
Click Add. The next available line is enabled.
In the Freight Type field, enter the ID of the freight type.
In the Description field, enter a description of the freight type.
Click OK to save your changes and close the window.
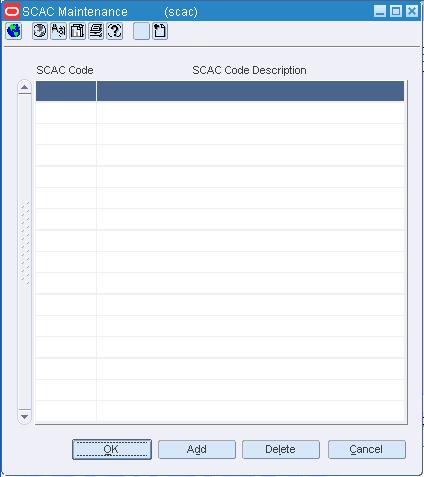
Navigate: From the main menu, select Control > Setup > SCAC Maintenance > Edit. The SCAC Maintenance window opens.
Click Add. The next available line is enabled.
In the SCAC Code field, enter the standard carrier alpha code.
In the SCAC Code Description field, enter a description of the SCAC code.
Click OK to save your changes and close the window.
Navigate: From the main menu, select Control > Setup > Freight Size Maintenance > Edit. The Freight Size window opens.
Navigate: From the main menu, select Control > Setup > Freight Type Maintenance > Edit. The Freight Type window opens.
Navigate: From the main menu, select Control > Setup > SCAC Maintenance > Edit. The SCAC Maintenance window opens.
The movement of goods from origin country to final destination can be tracked through the transportation module.
You can track the following information in the transportation module:
Shipments
Countries and ports
Departure, arrival, and delivery dates
Commercial invoices
Freight sizes, SCAC codes, and freight types
Measurements, weights, and quantities
Deliveries to final destinations
Packing methods
Licenses and visas
Claims against trading partners
Missing documents
Timelines
Members of an item family
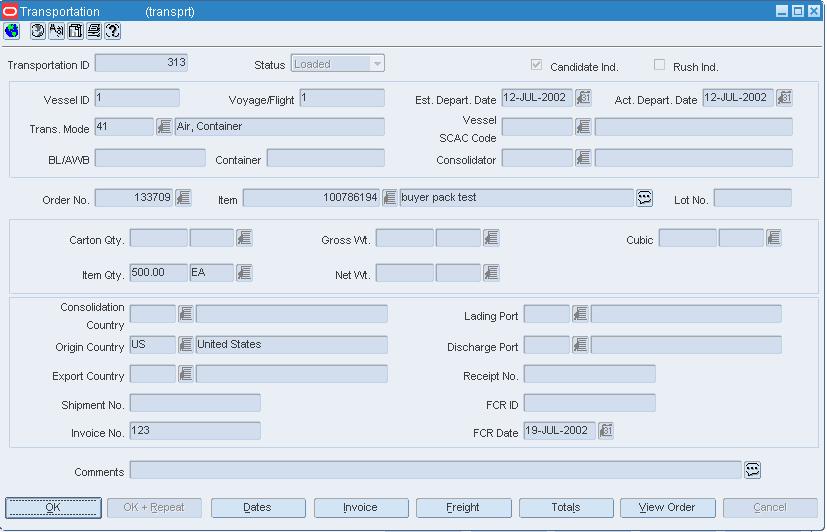
A transportation upload batch program converts data received from trading partners into a standard Oracle Retail file format. As additional information is acquired, it can be entered manually. When a transportation record is complete, you can finalize the record. Finalized transportation records are used to automatically create customs entries. The goods can then be tracked as they move through customs.
Navigate: From the main menu, select Inventory > Transportation > Maintenance. The Transportation Selection window opens.
In the Action field, select New. Click OK. The Transportation window opens.
Provide as much information in the enabled fields as you have available.
|
Note: The Candidate Ind check box can only be selected for Items that have an approved HTS code. |
Click OK to save your changes and close the window.
Navigate: From the main menu, select Inventory > Transportation > Maintenance. The Transportation Selection window opens.
Search for and retrieve a transportation record in Edit mode. The Transportation window opens.
From the Options menu, select Child/Diffs. The Transportation Item window opens.
|
Note: The Child/Diffs option is available when the item on a transportation record is an item parent. |
Click Add.
In the Item field, enter the number of the item, or click the LOV button and select the item.
In the Quantity field, enter the number of units.
In the UOM field, enter the code for the unit of measure, or click the LOV button and select the unit of measure.
Click OK to save your changes and close the window.
Navigate: From the main menu, select Inventory > Transportation > Maintenance. The Transportation Selection window opens.
Search for and retrieve a transportation record in Edit mode. The Transportation window opens.
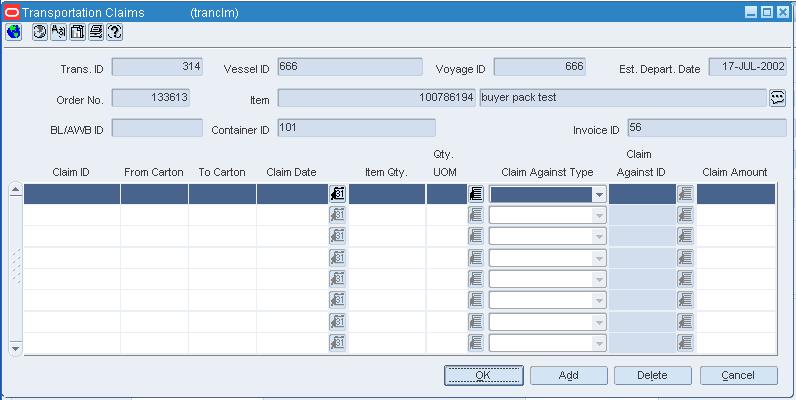
From the Options menu, select Claims. The Transportation Claims window opens.
Click Add.
In the Claim ID field, enter the number of the claim.
In the From Carton and To Carton fields, enter the ID of the first and last carton in the series of cartons.
In the Claim Date field, enter the date of the claim, or click the calendar button and select the date.
In the Item Qty field, enter the number of units included on the claim.
In the Qty UOM field, enter the code for the unit of measure, or click the LOV button and select the unit of measure.
In the Claim Against Type field, select the type of partner against whom the claim is made.
In the Claim Against ID field, enter the ID of the partner, or click the LOV button and select the partner.
In the Claim Amount field, enter the monetary amount of the claim.
To enter the type of discrepancy or damage and any comments:
Select Custom from the View menu. The Customize toolbar opens.
Click the Add button.
Clear the check box next to a couple of fields and select the check boxes for the Discrepancy Type, Damage Code, and Comments fields.
Click OK. The selected fields appear.
Enter the information in the Discrepancy Type, Damage Code, and Comments fields as necessary.
Click OK to save your changes and close the window.
Navigate: From the main menu, select Inventory > Transportation > Maintenance. The Transportation Selection window opens.
Search for and retrieve a transportation record in Edit mode. The Transportation window opens.
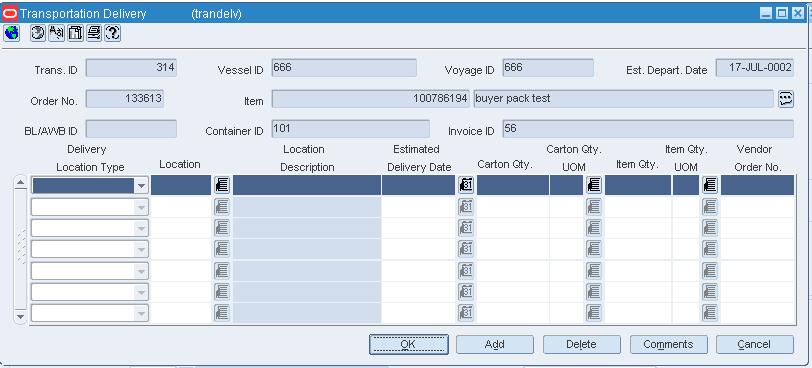
From the Options menu, select Delivery. The Transportation Delivery window opens.
Click Add.
In the Delivery Location Type field, select the type of location.
In the Location field, enter the ID of the location, or click the LOV button and select the location.
In the Estimated Delivery Date field, enter the date, or click the calendar button and select the date.
Enter as much additional information as you have available.
Click OK to save your changes and close the window.
Navigate: From the main menu, select Inventory > Transportation > Maintenance. The Transportation Selection window opens.
Search for and retrieve a transportation record in Edit mode. The Transportation window opens.
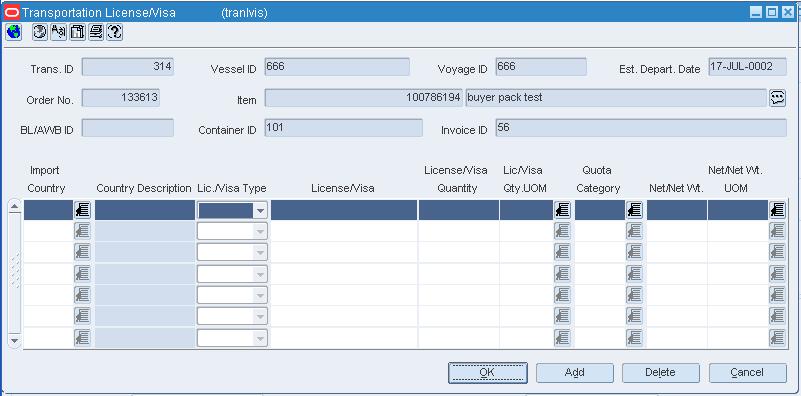
From the Options menu, select License/Visa. The Transportation License/Visa window opens.
Click Add.
In the Import Country field, enter the code for the import country, or click the LOV button and select the import country.
In the Lic/Visa Type field, select the type of document.
In the License/Visa field, enter the description of the license or visa.
In the Lic/Visa Qty field, enter the number of units affected by the license or visa.
In the Lic/Visa Qty UOM field, enter the code for the unit of measure, or click the LOV button and select the unit of measure.
Enter as much additional information as you have available.
To enter the ID of the license or visa holder and any comments:
Select Custom from the View menu. The Customize toolbar opens.
Click the add button.
In order to make room for the Holder ID and Comments fields, clear the check boxes next to fields that you don't need to display. Then select the check boxes next to the Holder ID and Comments fields.
Click OK. The selected fields appear.
Enter the information in the Holder ID and Comments fields as necessary.
Click OK to save your changes and close the window.
Navigate: From the main menu, select Inventory > Transportation > Maintenance. The Transportation Selection window opens.
Search for and retrieve a transportation record in Edit mode. The Transportation window opens.
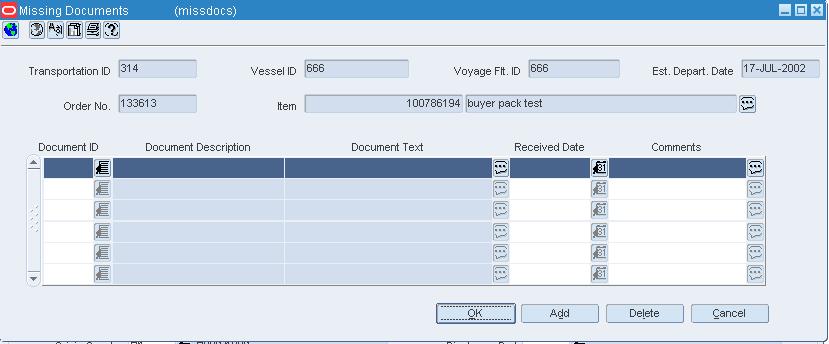
From the Options menu, select Missing Documents. The Missing Documents window opens.
Click Add.
In the Document ID field, enter the ID of the document, or click the LOV button and select the document.
In the Received Date field, enter the date received if applicable, or click the calendar button and select the date.
In the Comments field, enter a comment as necessary, or click the comments button and enter the comment.
Click OK to save your changes and close the window.
Navigate: From the main menu, select Inventory > Transportation > Maintenance. The Transportation Selection window opens.
Search for and retrieve a transportation record in Edit mode. The Transportation window opens.
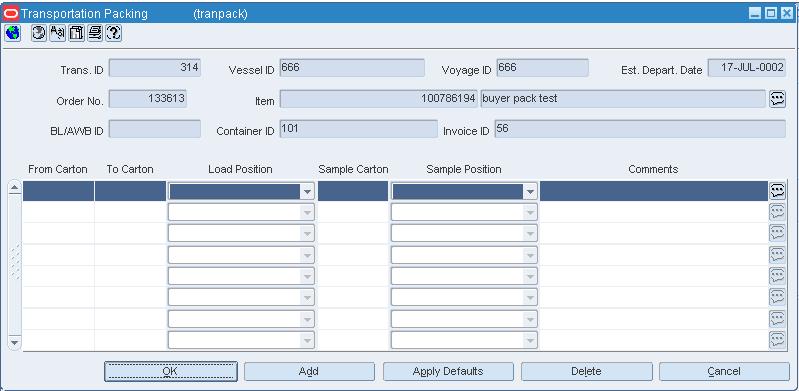
From the Options menu, select Packing. The Transportation Packing window opens.
Click Add.
In the From Carton and To Carton fields, enter the ID of the first and last carton in a series of cartons.
In the Load Position field, select the position of the load in the series of containers.
Enter as much additional information as you have available, including the location of a sample carton.
To enter shipped quantities:
Select Quantity from the View menu. Several quantity and UOM fields appear.
Enter the information that you have available.
To enter received quantities:
Select Received Quantity from the View menu. Several received quantity and UOM fields appear.
Enter the information that you have available.
Click OK to save your changes and close the window.
Navigate: From the main menu, select Inventory > Transportation > Maintenance. The Transportation Selection window opens.
Search for and retrieve a transportation record in View mode. The Transportation window opens.
From the Options menu, select License/Visa. The Transportation License/Visa window opens.
To view the ID of the license or visa holder and any comments:
Select Custom from the View menu. The Customize toolbar opens.
Click the Add button.
In order to make room for the Holder ID and Comments fields, clear the check boxes next to fields that you don't need to display. Then select the check boxes next to the Holder ID and Comments fields.
Click OK. The selected fields appear.
Click OK to close the window.
Navigate: From the main menu, select Inventory > Transportation > PO-Level Maintenance > New. The PO-Level Transportation window opens.
In the Order No. field, enter the purchase order number, or click the LOV button and select a purchase order.
In the Vessel ID field, enter the ID of the vessel the items are arriving on, or click the LOV button and select the vessel ID.
In the Voyage Flt ID field, enter the ID of the vessel's voyage, or click theLOV button and select the Voyage Flt ID.
In the Estimated Depart Date field, enter the date the vessel left the point of origin, or click the calendar button and select a date.
In the Item Default Level field, select Above the transaction level. Items above the transaction level appear.
To default items at the child/diff level, select the Default Child/Diff Values check box.
Click Query Details. Items that match the criteria appear in the detail area.
Click Child/Diff. The Transportation Item window opens.
In the Item field, enter the number of the item, or click the LOV button and select the item.
In the Quantity field, enter the number of units.
In the UOM field, enter the code for the unit of measure, or click the LOV button and select the unit of measure.
Click OK to save your changes and close the window.
Navigate: From the main menu, select Inventory > Transportation > Maintenance. The Transportation Selection window opens.
Search for and retrieve a transportation record in Edit mode. The Transportation window opens.
From the Options menu, select Claims. The Transportation Claims window opens.
Edit the enabled fields as necessary.
To edit the type of discrepancy or damage and any comments:
Select Custom from the View menu. The Customize toolbar opens.
Click the add button.
Clear the check box next to a couple of fields and select the check boxes for the Discrepancy Type, Damage Code, and Comments fields.
Click OK. The selected fields appear.
Edit the information in the Discrepancy Type, Damage Code, and Comments fields as necessary.
Click OK to save your changes and close the window.
Navigate: From the main menu, select Inventory > Transportation > Maintenance. The Transportation Selection window opens.
Search for and retrieve a transportation record in Edit mode. The Transportation window opens.
From the Options menu, select Delivery. The Transportation Delivery window opens.
Navigate: From the main menu, select Inventory > Transportation > Maintenance. The Transportation Selection window opens.
Search for and retrieve a transportation record in Edit mode. The Transportation window opens.
From the Options menu, select License/Visa. The Transportation License/Visa window opens.
Navigate: From the main menu, select Inventory > Transportation > Maintenance. The Transportation Selection window opens.
Search for and retrieve a transportation record in Edit mode. The Transportation window opens.
From the Options menu, select Missing Documents. The Missing Documents window opens.
Navigate: From the main menu, select Inventory > Transportation > Maintenance. The Transportation Selection window opens.
Search for and retrieve a transportation record in Edit mode. The Transportation window opens.
From the Options menu, select Packing. The Transportation Packing window opens.
Edit the enabled fields as necessary.
To edit shipped quantities:
Select Quantity from the View menu. Several quantity and UOM fields appear.
Edit the enabled fields as necessary.
To edit received quantities:
Select Received Quantity from the View menu. Several received quantity and UOM fields appear.
Edit the enabled fields as necessary.
Click OK to save your changes and close the window.
Navigate: From the main menu, select Inventory > Transportation > Maintenance. The Transportation Selection window opens.
Search for and retrieve a transportation record in Edit mode. The Transportation window opens.
Edit the enabled fields as necessary.
If the record is complete and ready for finalization, select the Candidate Ind check box.
|
Note: The Candidate Ind check box can only be selected for Items that have an approved HTS code. |
Click OK to save your changes and close the window.
Navigate: From the main menu, select Inventory > Transportation > Maintenance. The Transportation Selection window opens.
Search for and retrieve a transportation record in Edit mode. The Transportation window opens.
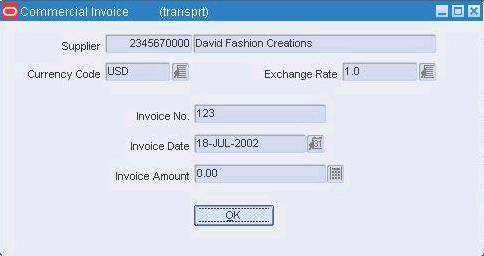
Click Invoice. The Commercial Invoice window opens.
In the Currency Code field, enter the code for the invoice currency, or click the LOV button and select the currency.
If the invoice currency differs from the primary currency, enter the exchange rate in the Exchange Rate field, or click the LOV button and select the exchange rate.
In the Invoice Date field, enter the date of the invoice, or click the calendar button and select the date.
In the Invoice Amount field, enter the amount on the invoice for the item.
Click OK to save your changes and close the window.
Navigate: From the main menu, select Inventory > Transportation > Maintenance. The Transportation Selection window opens.
Search for and retrieve a transportation record in Edit mode. The Transportation window opens.
Click Dates. The Transportation Dates window opens.
Enter the dates that are known, or click the calendar buttons and select the dates.
Click OK to save your changes and close the window.
Navigate: From the main menu, select Inventory > Transportation > Maintenance. The Transportation Selection window opens.
Search for and retrieve a transportation record in Edit mode. The Transportation window opens.
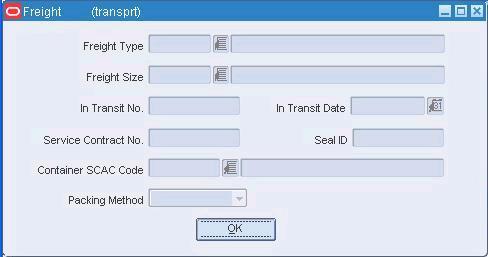
Click Freight. The Freight window opens.
Enter the freight information that is known.
Click OK to save your changes and close the window.
Navigate: From the main menu, select Inventory > Transportation > Maintenance. The Transportation Selection window opens.
In the Action field, select either View or Edit.
Enter additional criteria as desired to make the search more restrictive.
Click Search. The Transportation Selection window displays the transportation records that match the search criteria.
Select a task:
To perform another search, click Refresh.
To display the details of a transportation record, select a record and click OK. The Transportation window opens.
Click Close to close the window.
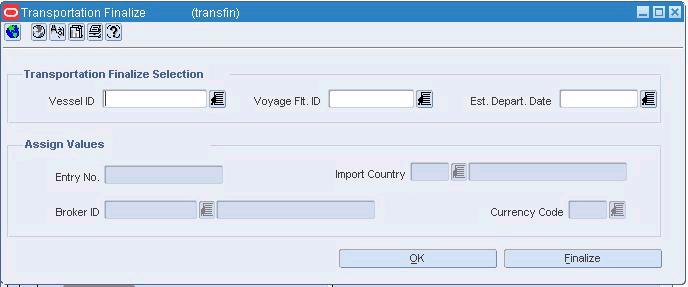
Navigate: From the main menu, select Inventory > Transportation > Finalize. Transportation Finalize window opens.
|
Note: A transportation record must be marked as a Candidate before it can be finalized. |
Enter the criteria for the transportation record to be finalized.
|
Note: If you leave all fields empty and click Finalize, all transportation records marked as candidates are finalized. |
In the Vessel ID field, enter the ID of the vessel, or click the LOV button and select the vessel.
In the Voyage Flt ID field, enter the voyage or flight number, or click the LOV button and select the voyage or flight number.
In the Est Depart Date field, enter the estimated departure date, or click the LOV button and select the date.
Enter the customs entry values that you want to apply to the record.
In the Entry No field, enter the entry number assigned by the Customs agency.
In the Import Country field, enter the ID of the import country, or click the LOV button and select the import country.
In the Broker ID field, enter the ID of the broker, or click the LOV button and select the broker.
In the Currency Code field, enter the code for the currency of the import country, or click the LOV button and select the currency.
Click Finalize. The transportation records that match the criteria are copied to the Customs Entry module. The status of the transportation records is automatically changed to Finalized.