| Oracle® Retail Warehouse Management System Radio Frequency User Guide Release 14.1 E58974-01 |
|


 Previous |
 Next |
| Oracle® Retail Warehouse Management System Radio Frequency User Guide Release 14.1 E58974-01 |
|
Previous |
Next |
The shipping module allows you to open, load, unload, close, and ship trailers using RF devices.
From the Main Menu select Shipping, the Shipping menu opens.
On the Main Menu screen, select Shipping. On the Shipping screen, select Conveyor Cutoff. The Conveyor Cutoff screen opens.
Scan the container ID of the next container on the spur (this is the first container that will not fit on the trailer).
|
Note: If the container ID is valid, the LOAD_TS (Load Timestamp) field is populated with the current date. |
The trailer must be opened before containers can be loaded. Refer to the Ship Trailers or Open Trailers section for more information about opening trailers.
Trailers may be opened by single destination or by multiple destinations using a carrier/service/route combination. A separate manifest is built automatically for each destination in the trailer.
If using Load Sequencing you are prompted if you begin to load another destination while containers remain for the previous destination. You can access a series of screens which assist you in finding the unloaded containers. You can drill down from a destination to the locations of the unloaded containers, and the IDs of the unloaded containers. Even without the prompt, you can look up unloaded containers after identifying the trailer and the door.
If you scan a master container with children, the master is deleted upon completion of the loading process.
Loading of containers / pallets to a trailer is done using the Load Container screen. During the loading process, you must scan the trailer ID, door and container ID. If the value of the SCP parameter ship_door_scan is set to Y, you must scan the door after scanning the container ID to confirm the loading process. This ensures that you load the correct trailer for each pallet.
You may load a group of containers together. The maximum number of containers that can be scanned at a time is indicated using the scp parameter loading_max_nbr_cids. If the value of loading_max_nbr_cids is set to "1", then you must confirm the door for every container loaded. If the value of loading_max_nbr_cids is set to a value greater than 1, then you must confirm the door only once for that many containers indicated by the loading_max_nbr_cids value.
|
Note: When the trailer is full, or all the containers for the destination are loaded, you can close the trailer. You can open another trailer or manifest in order to continue the shipping process. Refer to the Ship Trailers section for instructions on how to complete the operation. |
Loading Single Container
To load single container, set ship_door_scan set to Y and loading_max_nbr_cids to 1.
On the Main Menu screen, select Shipping. On the Shipping screen, select Load Container. The Load Single Container screen opens.
If ship_door_scan is set to N, the following screen is displayed:
On the Load Container screen, enter the ID of the trailer to be loaded in the Trailer ID field
In the Door field, enter the door ID.
From the container picking label, scan the container ID.
Confirm the door ID in the Door field and press Enter.
Press the F3 (Exit) key to exit the Load Container screen.
Loading Multiple Containers
To load multiple containers, ship_door_scan must be set to Y and loading_max_nbr_cids must be set to a value greater than 1. If ship_door_scan is set to N you will not be required to scan the shipping door after a container is loaded.
On the Main Menu screen, select Shipping. On the Shipping screen, select Load Container. The Load Multiple Container screen opens.
On the Load Container screen, enter the ID of the trailer to be loaded in the Trailer ID field
In the Door field, enter the door ID.
From the container picking label, scan the container IDs one after the other. The CIDs Scanned field indicates the number of container IDs you scan.
Press the F9 (View CIDs) key. The scanned container IDs and their corresponding destination IDs are displayed on the View CIDs screen.
|
Note: The F9 (View CIDs) option is available only when ship_door_scan is set to Y and loading_max_nbr_cids has a value greater than 1. |
Confirm the door ID in the Door field and press Enter.
|
Note: If the number of containers to be loaded to a trailer is less than the scp parameter loading_max_nbr_cids, then enter the door ID in the Container ID field after the last container is scanned to indicate that all the containers are scanned and to confirm the door ID. |
Press the F3 (Exit) key to exit the Load Container screen.
On the Load Container screen, enter the ID of the trailer to be loaded in the Trailer ID field.
In the Door field, enter the door ID.
Press the F7 (Unloaded Containers) key. The destinations assigned to the trailer are displayed on the Unloaded Containers (destination) screen.
Select the destination that you want to review. Then press the F1 (Display) key. The locations of the unloaded containers assigned to the selected destination are displayed on the Unloaded Containers (locations) screen.
Select the location ID that you want to review. Then press the F1 (Display) key. The containers found at the selected location are displayed in the Unloaded Containers (containers) screen.
When done reviewing the information, press the F3 (Exit) key to exit each screen.
The Print Ship Label option triggers the printing of a UCC128-compliant shipping label for each valid container id as it is scanned.
Containers must have a status of Distributed or Manifested. Shipping labels cannot be printed for stock containers. When a master container ID is scanned, labels are printed for the child containers only, unless the master container contains merchandise.
On the Main Menu screen, select Shipping. On the Shipping screen, select Print Ship Label. The Print Ship Label screen opens.
You can print both 4X6 and 4X4 labels using this screen. Press F7 (Size Toggle) key to toggle the Print Label Size field values between 4X6 and 4X4. The default value for the Print Label Size field is determined by the def_ship_label_size SCP.
Enter the print queue for the label printer in the Ship Label field, or press the F6 (Ship Label) key. The List Of Values screen opens. Select a print queue and press the Enter key. The selected print queue is automatically entered in the Ship Label field.
Scan the container label. The shipping label is created and is printed. An audible, double-beep sound verifies a successful container scan and print.
|
Note: For a consumer direct container, the TO data on the label is the ship data from the stock order customer data and CONSUMER DIRECT or PARTIAL CONSUMER DIRECT is printed on the label. The printing of CONSUMER DIRECT is for all consumer direct containers except Put To Store containers (PTS). The PARTAIL CONSUMER DIRECT is for PTS containers which contain both consumer direct orders/merchandise and non consumer direct order/merchandise for shipment to a store. |
The QC Outbound Audit screen allows the DC to verify the pick accuracy prior to shipment. The Outbound Quality Audit Report is automatically generated upon completion of the audit.
Containers must be valid, have a status of Distributed, and contain items. A master container with labeled child containers is not eligible for audit.
If you press the F3 (Exit) key while the audit is in progress, all processing is aborted and no information is retained with respect to the container.
If a container is re-audited, all previously captured information is overwritten by the new audit.
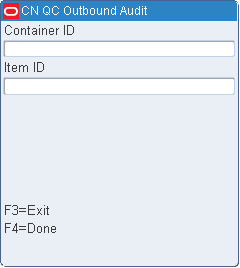
On the Main Menu screen, select Shipping. On the Shipping screen, select QC Outbound Audit. The QC Outbound Audit screen opens.
On the QC Outbound Audit screen, enter the container ID in the Container ID field.
Enter the ID of each item found in the container.
Press the F4 (Done) key after recording all items in the container. The Outbound Quality Audit Report is printed automatically.
Trailers can be opened by specific destination or carrier/service/route combination.
You must open a trailer to begin loading containers or to continue loading merchandise that does not fit on the original trailer. After opening a trailer, you can choose to print the Unloaded Container report. The report provides you with a list of all the containers that are candidates to be loaded onto the current trailer
On the Main Menu screen, select Shipping. On the Shipping screen, select Ship Trailer. The Ship Trailer screen opens.
Open a Trailer By Single ship destination
On the Ship Trailer screen, enter the ID of the trailer to be opened in the Trailer ID field.
|
Note: Skip the Carrier, Service, and Route fields. |
In the Destination field, enter the specific destination ID.
In the Door field, enter the door ID.
Press the F5 (Open) key.
When prompted to acknowledge the action, press the Enter key.
Open a Trailer By Carrier/Service/Route
On the Ship Trailer screen, enter the ID of the trailer to be opened in the Trailer ID field.
In the Carrier Code field, enter the carrier.
In the Service Code field, enter the service code.
In the Route field, enter the route.
|
Note: Skip the Dest field. |
In the Door field, enter the door ID.
Press the F5 (Open) key.
When prompted to acknowledge the action, press the Enter key.
|
Note: All destinations with the specified carrier/service/route as either their expedite carrier/service/route or default carrier/service/route, as defined in the Ship Destination table, are opened on the trailer. |
Generate the Report for a Trailer with a Single Destination
On the Ship Trailer screen, enter the ID of the trailer to be closed.
In the Dest field, enter the specific destination ID.
In the Door field, enter the door ID.
Press the F7 (Unloaded Containers) key.
When prompted to confirm the request, enter Y (Yes). Press the Enter key. The report is sent to the printer.
Generate the Report for a Trailer with Multiple Destinations
On the Ship Trailer screen, enter the ID of the trailer to be closed.
Leave the Dest field blank in order to close all destinations.
In the Door field, enter the door ID.
Press the F7 (Unloaded Containers) key.
When prompted to confirm the request, enter Y (Yes). Press the Enter key. The report is sent to the printer.
You can close trailers either when they are full or when you are finished loading merchandise for the destination.
Closing a trailer also closes the associated manifest.
When closing a trailer, you might be warned about qualified containers that have not yet been loaded onto the trailer. If you want to close the trailer even though such containers exist, type Y (Yes), then press the Enter key. The trailer will be closed. If you want to investigate the matter, enter N (No), then press the Enter key. The trailer is not closed.
To investigate unloaded containers, you can run the Unloaded Containers report.
Close a Trailer with a Single Destination
On the Ship Trailer screen, enter the ID of the trailer to be closed.
In the Dest field, enter the specific destination ID.
In the Door field, enter the door ID.
Press the F8 (Close) key.
When prompted to acknowledge the action, press the Enter key.
Close a Trailer with Multiple Destinations
On the Ship Trailer screen, enter the ID of the trailer to be closed.
Leave the Dest field blank in order to close all destinations.
In the Door field, enter the door ID.
Press the F8 (Close) key.
When prompted to acknowledge the action, press the Enter key.
If a trailer was not previously closed, it will be closed when you choose to ship it. You might be warned about qualified containers that have not yet been loaded onto the trailer. If you want to close and ship the trailer even though such containers exist, type Y (Yes), then press the Enter key. The trailer will be marked as closed and shipped. If you want to investigate the matter, enter N (No), then press the Enter key. The trailer is neither closed nor shipped.
To investigate unloaded containers, you can run the Unloaded Containers report.
On the Ship Trailer screen, enter the ID of the trailer to be shipped.
In the Dest field, enter the destination ID.
In the Door field, enter the door ID.
In the Seal field, enter the seal number for the shipment.
Press the F9 (Ship) key.
A message is displayed asking you to confirm shipping. If you enter N (No), the trailer is not shipped. If you enter Y (Yes), the trailer is shipped.
Depending on system settings, you have the following options regarding seal numbers:
A trailer can be closed and shipped without any seal numbers.
A trailer can be closed and shipped with a single seal number for the trailer.
A trailer can be closed and shipped with one seal number per destination for the trailer.
If only a single seal number is needed, you can simply enter it on the Ship Trailer screen. When multiple seal numbers are used for a trailer, you would enter the seal numbers on the Ship Trailer (Multiple Seal) screen.
If a seal number is entered when closing a trailer, you can accept or change the seal number when shipping the trailer.
Close or Ship a Trailer with Multiple Seals
On the Ship Trailer screen, enter the ID of the trailer to be shipped.
In the Carrier, Service, and Route fields, enter the appropriate information. Or, enter the ID of the destination in the Dest field.
In the Door field, enter the door ID.
Press the F6 (MSeal) key. The Ship Trailer (Multiple Seal) screen opens.
Enter the seal number next to each destination.
After all the seal numbers are entered, press the F9 (Ship) key. Respond to any prompts that may appear.
You can unload containers only from an open manifest. Because the master container is deleted during the loading process, each child container must be scanned individually.
On the Main Menu screen, select Shipping. On the Shipping screen, select Unload Container. The Unload Container screen opens.
On the Unload Container screen, scan the container ID that you are unloading.
When prompted to acknowledge the action, press the Enter key.
Continue unloading and scanning containers until you are finished.
Press the F3 (Exit) key to exit the Unload Container screen.