| Oracle® Retail Warehouse Management System UI User Guide Release 15.0 E66766-01 |
|


 Previous |
 Next |
| Oracle® Retail Warehouse Management System UI User Guide Release 15.0 E66766-01 |
|
Previous |
Next |
Distribution planning can begin when stock orders are received from the host system or manually entered (not recommended) into RWMS. Some stock orders received from the host are processed automatically. Manually-entered orders and orders marked as Manual or PO by the host system must be processed manually by creating a wave.
|
Note: PO type stock orders are not supported by Oracle Retail Merchandising System (RMS). |
Stock orders are replenishment requests by stores. These stock orders are referred to as distros. For a distribution center that supplies merchandise directly to the consumer, a stock order represents a customer order.
Stock orders are categorized as pre-allocations, post allocations, and post allocations by PO depending on how the orders are filled.
Pre-allocation (also referred to as Predist): The creation of stock orders prior to merchandise receipt. When received the stock order is processed against the received merchandise generating crossdock and flowthrough tasks
Predist enters RWMS in one of two ways:
Stock order and stock allocation records are received from the host
Stock Orders are entered into RWMS directly if the SCP parameter allow_predist_create is set to Y. All appointment types take advantage of the Predist stock orders to generate crossdock and flowthrough shipments.
|
Note: Predist is a distinct form of distributing containers and is different from the full distribution as completed through the other Waving steps and processes. Thus, different logic is used for Predist versus full distribution.The regular distribution logic is part of the distribution engine whereas the pre-distribution logic is handled at the time of receiving. |
Post allocation: Distribution of merchandise after it is received and put away in storage locations. RWMS distributes merchandise by identifying all containers eligible for picking.
Post allocation by purchase order: RWMS examines all containers in storage and staging locations and retrieves eligible inventory based on the user-entered purchase order that is associated with a stock order.
When manual and PO type stock orders are selected for distribution, they are assigned to available waves. Each wave may use one of the following distribution methods:
Efficiency: The picker is sent to a sequence of locations that fulfills the demand with the least number of picks.
Pick to clean: The picker is sent to the most locations that can be picked clean in order to meet the demand. This frees up the most locations, which can then be used to store other inbound merchandise.
Business Process
If you manually select stock orders, you must assign it to an available wave. If all available wave numbers are already assigned to a wave you can create new wave number using the Wave Editor. Manual and PO type stock orders that are received from the host must also be assigned to waves. You can select such stock orders using predefined queries or sets of queries.
A wave is a group of stock orders that can be released together for picking and shipment. The distribution process varies by the type of wave used to distribute merchandise. The type of wave may be:
Automatic: All open, automatic type orders that are eligible for distribution are assigned to the next available wave of the type Automatic.
Manual: DC personnel select manual type orders and assign them to available waves of the type Manual.
PO: DC personnel select PO type orders and assign them to available waves of the type PO.
Predist: Inbound appointments access Predist order types to generate crossdock and flowthrough shipments.
Wave: DC personnel assign specific destinations to daily pick waves of the type Wave.
Repair: When there is a need for repair to the merchandise at the DC, DC personnel select Repair as the stock order type which is picked and sent to third party vendors or finishers. The Repair type stock order can be initiated in RMS or RWMS.
There are several windows that allow you to monitor the progress of orders, pick waves, and pack waves. You can view the percentages of an order that are at the various stages of processing. You can view the planned and picked quantities for bulk, case, and unit operations by wave and by destination. Pick directives can be viewed and purged from RWMS.
This chapter contains the following topics:
The Distribution Queue Inquiry informs you of the status of orders that have been placed in the distribution queue.
To view distribution queue, navigate to Distribution Planning -> Distribution Queue Inquiry. The progress of the individual pick waves opens in the Distribution Queue Inquiry window.
Exit the Distribution Queue Window
Click Exit to close the window.
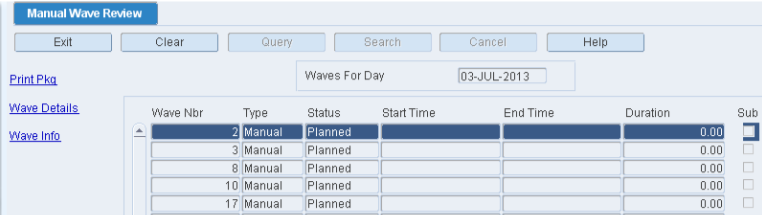
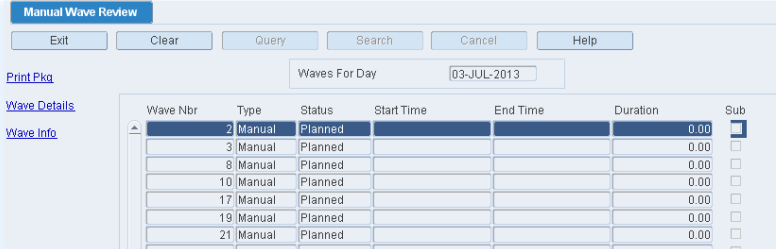
The Manual Wave Review allows you to print pick packages for manual stock orders, review the distribution plan, purge distros and parts of distros, and manage the picking resources and hours.
To view the Manual Wave Review window, navigate to Distribution Planning -> Manual Wave Review. The manual waves for the current date appear in the Manual Wave Review window.
Display Manual Waves for Another Date
If any manual waves are currently displayed, click Clear.
In the Waves for Day field, enter the date that you want to review, or click the Calendar icon and select the date. The manual waves for the selected date appear.
View Details by Distro
On the Manual Wave Review window, select the manual wave that you want to view in detail.
Click Wave Details. The distros appear in the Wave Details window.
To view details by destination, select the distro that you want to view in detail.
Click Order Details. The destinations appear in the Order Details window.
Click Exit to close the Order Details window. Then click Exit to close the Distributions for Wave window.
Purge a Distro from a Manual Wave
|
Note: When you purge a distro from a manual wave, the picks are deleted from the wave and the allocations are reset. |
On the Manual Wave Review window, select the manual wave that you want to edit.
Click Wave Details. The distros appear in the Distributions for Wave window.
Select the distro that you want to purge.
Click Purge.
Purge a Destination/Item from a Distro
|
Note: When you purge a destination/item from a distro, the picks are deleted from the wave and the allocations are reset. |
On the Manual Wave Review window, select the manual wave that you want to edit.
Click Wave Details. The distros appear in the Distributions for Wave window.
Select the distro that you want to edit.
Click Order Details. The Order Details window opens.
Select the destination/item that you want to purge.
Click Purge.
Edit Resources and Hours for a Manual Wave
On the Manual Wave Review window, select the manual wave that you want to edit.
Click Wave Info. The projected operations appear in the Wave Info window.
Double click a field. The Modify window opens.
Edit the resources and hours as necessary.
Click Save to save any changes and close the Modify window.
Click Exit to close the Wave Information window.
Exit the Manual Wave Review Window
Click Exit to close the window.
To generate pick packages for manual waves, navigate to Distribution Planning -> Manual Wave Review. The manual waves for the current date appear in the Manual Wave Review window.
Display Manual Waves for Another Date
If any manual waves are currently displayed, click Clear.
In the Waves for Day field, enter the date that you want to review, or click the Calendar icon and select the date. The manual waves for the selected date appear.
Print a Pick Package
On the Manual Wave Review window, select the manual wave for which a pick package is needed.
Click Print Pkg.
When prompted to confirm the request, click Yes.
Exit the Manual Wave Review Window
Click Exit to close the window.
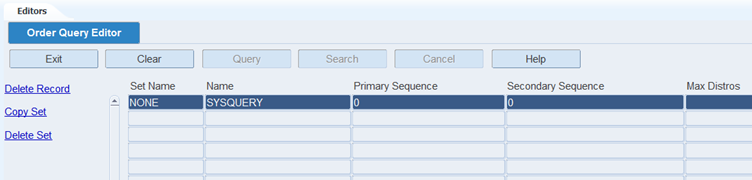
The Order Query Editor window is used to view and modify saved order queries (created through Select Stock Order -> Build Query). You can also use this window to copy queries from one set to another, delete one or more queries from a set, or delete the complete set. Order queries are used in the Automate Wave process.
To access the Order Query Editor window, navigate to Distribution Planning -> Order Query Editor. The current queries appear in the Order Query Editor window.
Edit a Query
On the Order Queries Editor window, double-click the query that you want to edit. The Modify window opens.
Edit the enabled fields as necessary.
Click Save to save any changes and close the Modify Order Queries window.
Copy a Query Set
On the Order Queries Editor window, click Copy Set. The Copy Set window opens.
In the New Set Name field, enter the name of the new set.
In the From Set Name field, enter the name of the set to be copied.
In the Start Primary Seq and End Primary Seq fields, enter the first and last primary sequence numbers that you want to include in the range of queries.
Click Copy to save the changes and close the window. Any queries from the selected set that have primary sequence numbers within the selected range are copied to the new set.
Delete a Query
On the Order Queries Editor window, select the query that you want to delete.
Click Delete Record.
When prompted to delete the record, click Yes.
Delete a Query Set
On the Order Queries Editor window, click Delete Set. The Delete Set window opens.
In the Delete Set Name field, enter the name of the set that you want to delete.
To delete only a range of queries from the selected set, enter the Start Primary Seq and End Primary Seq numbers in the appropriate fields.
Click Delete. The queries within the range of sequence number are deleted. If no sequence numbers were entered, the entire query set is deleted.
Exit the Order Query Editor Window
Click Exit to close the window.
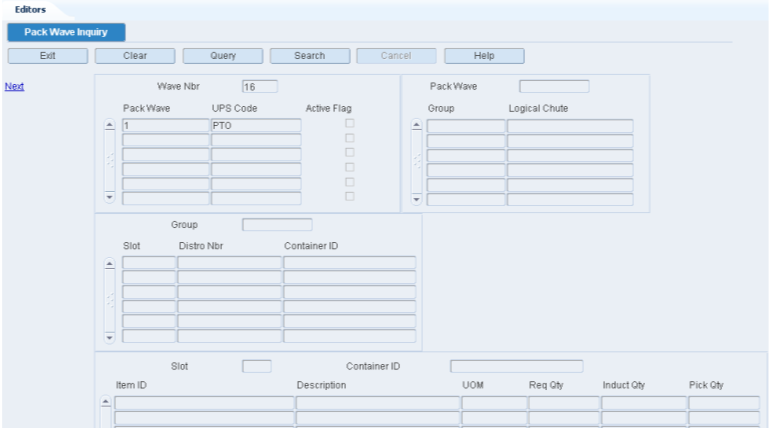
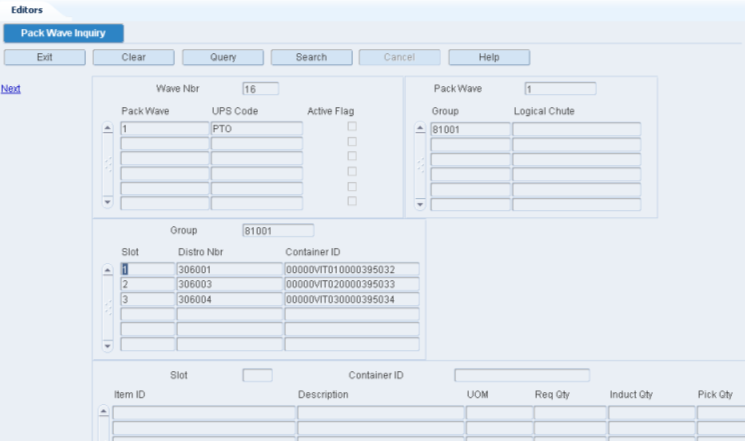
The Pack Wave Inquiry allows you to select a wave number and view how the wave is broken out into pack waves, groups, and slot order.
To view pack waves, navigate to Distribution Planning -> Pack Wave Inquiry. The Pack Wave Inquiry window opens.
Display Pack Waves by Wave
There are four blocks on this window. From top to bottom, they are referred to as the Wave block, Pack Wave block, Group block, and Slot block.
If any pack waves are currently displayed, click Clear.
Click Query.
In the Wave Nbr field, enter the wave number, or click the LOV button and select the wave.
Click Search. The pack wave details for the selected wave are displayed.
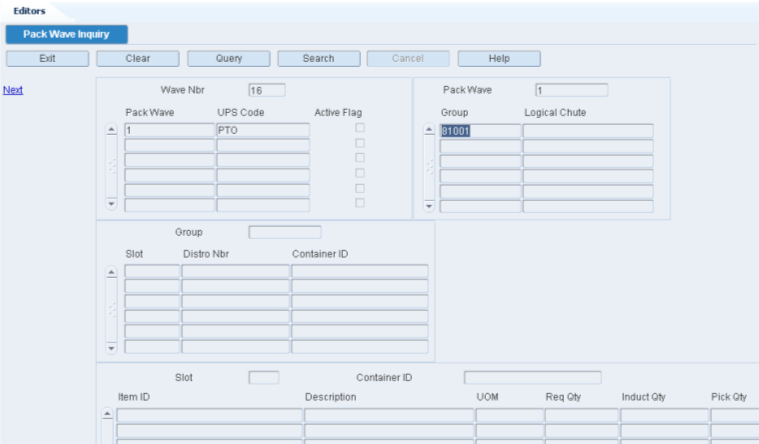
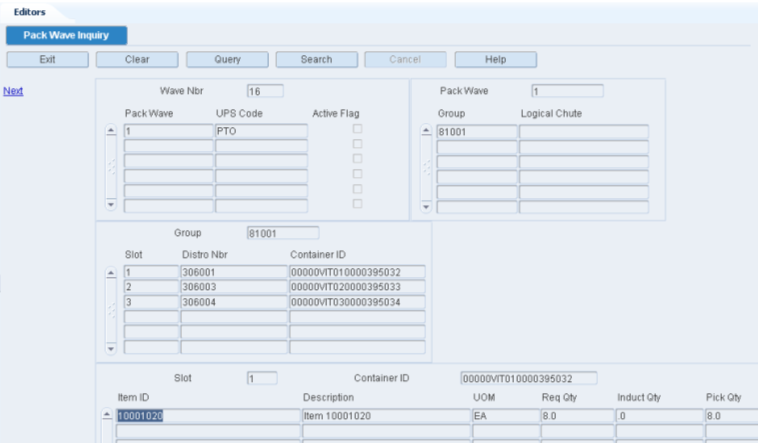
View Additional Pack Wave Details
On the Pack Wave Inquiry window, select the pack wave that you want to view in detail.
Click Next. The groups associated with the selected pack wave appear in the Pack Wave block.
Select the group that you want to view in detail.
Click Next. The slots associated with the selected group appear in the Group block.
Select the slot that you want to view in detail.
Click Next. The container and items associated with the selected slot appear in the Slot block.
Exit the Pack Wave Inquiry Window
Click Exit to close the window.
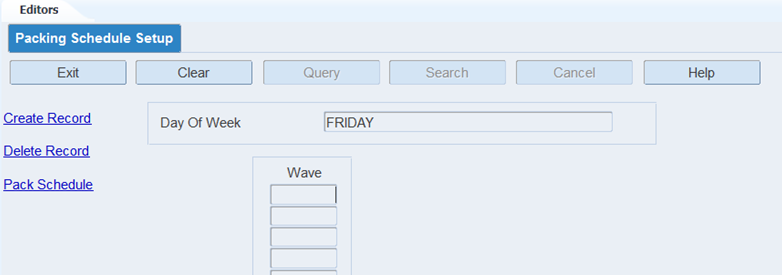
The Packing Schedule window allows you to maintain daily packing schedules for the current week.
You can access the Pack Schedule Summary window in order to view daily packing schedules for the entire week.
To maintain packing schedules, navigate to Distribution Planning -> Packing Schedule Setup. The Packing Schedule Setup window opens.
Display the Packing Schedule for a Day of the Week
If a packing schedule is currently displayed, click Clear.
Click Query.
In the Day of Week field, enter the name of the day, or click the LOV button and select the day.
Click Search. The waves associated with the selected day appear.
View the Packing Schedules for the Week
The Pack Schedule Summary allows you view daily packing schedules for the entire week.
On the Packing Schedule window, click Pack Schedule. The packing schedules for each day of the week appear on the Pack Schedule Summary window.
Click Exit to close the Pack Schedule Summary window.
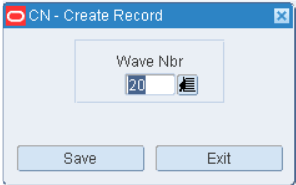
Add a Wave to a Packing Schedule
On the Packing Schedule window, click Create Record. The Create Record window opens.
Enter the wave number to be added to the schedule.
Click Save to save the changes and close the Create Record window.
Delete a Wave from a Packing Schedule
On the Packing Schedule window, select the wave that you want to delete.
Click Delete Record.
When prompted to delete the record, click Yes.
Exit the Packing Schedule Window
Click Exit to close the window.
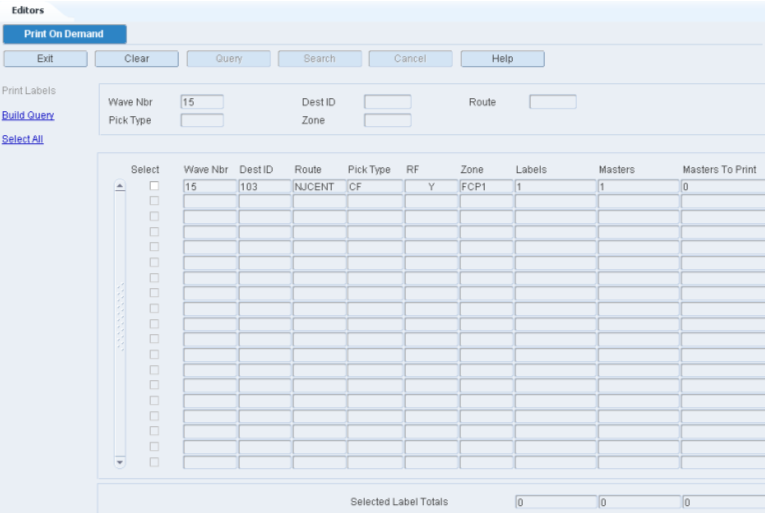
The Print on Demand Editor allows you to print labels when desired rather than when a wave is created. The option to print on demand is set when you:
Define a label configuration, and
Associate the label configuration with a process that requires labels for pick activities.
To print labels, navigate to Distribution Planning -> Print on Demand. The Print on Demand window opens.
The option to print on demand is set when you:
Define a label configuration, and
Associate the label configuration with a process that requires labels for pick activities.
The Put to Store Status window allows you to view the containers currently assigned to each Put to Store location and to see when that container was initially opened.
To view open PTS containers, navigate to Distribution Planning -> Put to Store Status. The Put to Store Status window opens.
Display All Destinations
Click Query.
Display a Destination
If any destinations are currently displayed, click Clear.
Click Query.
In the Dest ID field, enter the destination ID, or click the LOV button and select the destination.
Click Search. The details for the selected destination are displayed.
View Container Level Details
On the Put to Store Status window, select the destination that you want to view in detail.
Click Status Detail. The container level details appear.
Click Exit to close the window.
Exit the Put to Store Status Window
Click Exit to close the window.
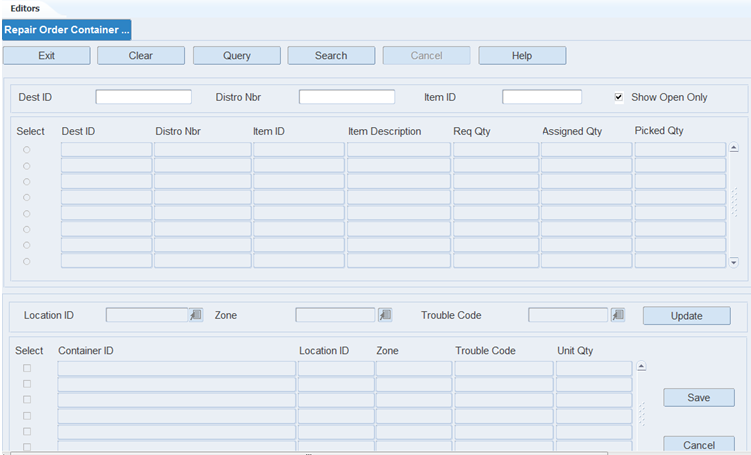
When merchandise stored in the DC needs to be repaired or finished it can be sent to a third party by creating a Repair Stock Order/Allocation. Once the Repair Order is created, this window automatically imports the orders and allows you to specify the Dest ID / Distro Nbr / Item ID combination for picking through the RF Repair Picking window. When you select a line item from the upper block, RWMS automatically displays eligible containers in the lower block. You must select the specific containers that must be picked for repair shipment. These containers must be in staging locations (not storage or bulk).
Repair Stock Orders can be initiated in either RMS or RWMS. When initiated in RMS, it starts as a transfer with context type as Repair. These are reflected in the RWMS as Repair Orders.
|
Note: Repair Orders are not distributed through the waving/pick directive process. |
Navigate to Distribution Planning -> Repair Order Container Assignments. The Repair Order Container Assignments window opens.
Display Repair Orders
You can filter existing stock orders for repair using DestID, Distro Nbr, and Item ID.
If an order is currently displayed, click Clear.
Click Query. The existing repair orders are displayed on the window.
You may also search using either a Dest ID, Distro Nbr, or any combination. Click Search. The repair orders for the selected option appear.
You may opt to view all the repair orders by clearing the Show Open Only check box.
Assign Containers
The upper block is populated with Stock Orders that are of the Order Type: Repair.
To assign containers:
Click Query.
Enter the Dest ID, Distro Nbr, Item ID to search the Repair Stock Order data. Select the Show Open Only check box to search only the Open Repair Stock Orders. You can use one or a combination of search criteria to filter the search results.
Click Search. The upper block is populated based upon search criteria.
One line in the upper block can be selected using the Select option.
Update Containers
Once a row has been selected in the upper block, 'in process' container data displays in the lower block. To display the eligible containers for the chosen row, click Update. The Update functionality may be used with search criteria.
Click Query.
Enter either the Location ID, Zone, Trouble Code fields or all the fields to search for required containers. You can search only individual cases that are in a staging location.
Select the containers for processing using the Select check box. Click Save . These containers are now available for RF Repair Picking.
The Req Qty and Assigned Qty fields display the Required Quantity and the currently Assigned Quantity
Unassign Containers
Uncheck the Select check box against the container ID.
Click Save. The container is removed from the list of containers.
Exit the Repair Order Container Assignment Window
Click Exit to close the window.
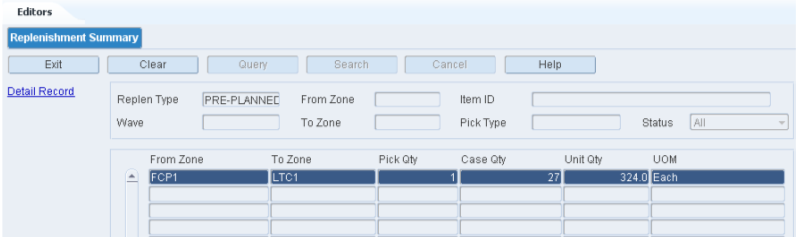
The Replenishment Summary allows you to view a real-time picture of any remaining picks. You can view pick, case, and unit quantities by From zone/To zone combination. In addition, you can view and delete individual replenishment directives.
To view the Replenishment Summary window, navigate to Distribution Planning -> Replenishment Summary. The Replenishment Summary window opens.
Display the Remaining Picks
If any replenishment records are currently displayed, click Clear.
Click Query.
In the Replen Type field, select a replenishment type.
To narrow the scope of the query, enter criteria in one or more of the fields.
Click Search. The remaining picks that match the criteria appear.
View the Pick Directives
On the Replenishment Summary window, select the record that you want to view in detail.
Click Detail Record. The pick directives associated with the selected record appear in the Detail Record window.
Click Exit/Cancel to close the Detail window.
Delete a Pick Directive
On the Replenishment Summary window, select the record that you want to view in detail.
Click Detail Record. The pick directives associated with the selected record appear in the Detail window.
Select the pick directive that you want to delete.
Click Delete Record.
When prompted to delete the record, click Yes.
Click Exit/Cancel to close the Detail window.
Exit the Replenishment Summary Window
Click Exit to close the window.
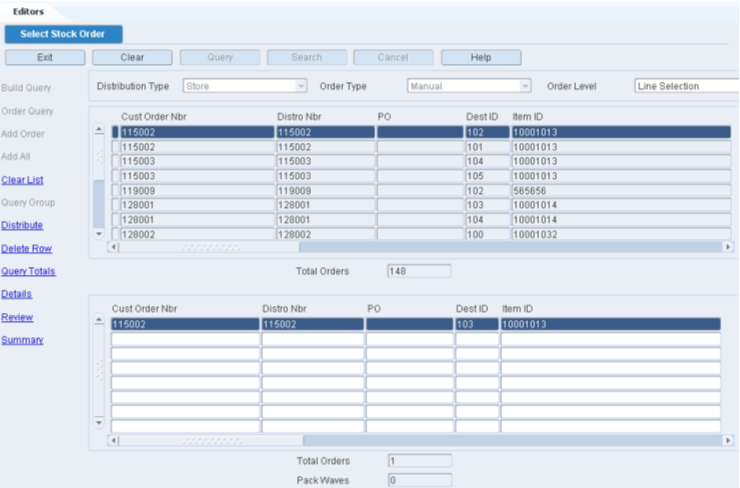
The Select Stock Order Editor allows the Wave Management Team to build custom waves utilizing query capabilities. RWMS allows users to select from over 100 discreet fields (stock order and item master) to build wave queries to slice and dice the stock orders into desired waves.
To review manual stock orders, navigate to Distribution Planning -> Select Stock Order. The Select Stock Order window opens.
View Details by Distro
On the Select Stock Order window, select the stock order in the Distribute Orders block.
Click Details. The details appear in the Details for Distro window.
Click Exit to close the Details for Distro window.
View Planned Waves by Day
On the Select Stock Order window, click Review. The waves for the current date appear in the Manual Wave Review window.
Click Exit to close the Manual Wave Review window.
View a Distribution Summary
On the Select Stock Order window, click Summary. The details appear in the Summary window.
Click Exit to close the Summary window.
Exit the Select Stock Order Window
Click Exit to close the window.
To distribute manual stock orders, navigate to Distribution Planning -> Select Stock Order. The Select Stock Order window opens.
|
Note: You can also access this window from the Stock Order Creation window. |
Query the Stock Orders
|
Note: There are two blocks on this window. They are referred to as the Query Results block and the Distribute Orders block. |
Select a distribution type. The type may be:
Consumer Direct: Restricts the query to all stock orders indicated for shipment to a virtual store and stock orders with Consumer Direct flag set to Y.
Store: Restricts the query to all stock orders indicated for shipment to a specific non virtual store. There is a System Control Parameter (SCP) default_dist_type that sets this field to a user selected default value.
Select a stock order type. The type may be:
Manual: Restricts the query to stock orders that are associated with customer orders. The customer orders may be received from the host system or entered manually.
PO: Restricts the query to stock orders that are associated with inbound purchase order receipts.
Select a stock order level. The level may be:
Customer Order: Customer Order is not supported in the base environment. Customer Order may be an option for large scale custom Consumer Direct environments.
Distro: For a distro to be selected, at least one item on the distro must match the selection criteria.
Line: For a line item to be selected, it must match the selection criteria.
Full distro: For a distro to be selected, all items on the distro must match the selection criteria.
To display all stock orders that match the previously listed criteria:
Click Build Query. The Build Query window opens.
Click List All Ord.
When prompted to run the query, click Yes. The results of the query appear in the Query Results block.
|
Note: You have several tools available in order to query the stock orders. You can create and save a query, load and run a query, run a set of queries and adjust the results by query. |
Select Stock Orders for Distribution
After performing a query, move stock orders to the Distribute Orders block or remove any unnecessary stock orders from the block.
To move a stock order to the Distribute Orders block, select the stock order and click Add Order.
To move all the stock orders to the Distribute Orders block, click Add All.
To remove a stock order from the Distribute Orders block, select the stock order and click Delete Row.
To remove all stock orders from the Distribute Orders block, click Clear List.
Review the Selected Stock Orders
You can access several windows in order to review additional details for selected stock orders.
Details for Distro Nbr: Displays the details of a selected distro by destination.
Wave Preview: Displays details of the pick wave. You can also generate the Wave Preview report.
Order Summary: Displays a summary of the stock orders in the Distribute Orders block.
Distribute Selected Stock Orders
On the Select Stock Order window, click Distribute. The current pick waves appear in the Distribute window.
Select a Manual or PO pick wave with a status of Available. If there is no available wave, you can add a wave.
On the Select Available Wave window, click Create Record. The Create Record window opens.
In the Wave Nbr and Description fields, enter a number and description for the wave.
In the Distribution Method field, select the appropriate method.
In the Wave Type field, select the type of wave. The type may be PO or Manual.
In the Group Qty field, enter the number of slots if slotted picking carts are used by the pickers.
Click Save to save the changes and close the Create Record window. You can then select the new pick wave if desired.
Click Process.
When prompted to assign the stock orders to the wave, click Yes. The stock orders are assigned and you are returned to the Select Stock Order window.
Exit the Select Stock Order Window
Click Exit to close the window.
To run query sets on manual stock orders, navigate to Distribution Planning -> Select Stock Order. The Select Stock Order window opens.
Run a Set of Queries
On the Select Stock Order window, click Query Group. The Query Group window opens.
In the Set Name field, enter the name of a query set, or click the LOV button and select the query set.
Enter any chute constraints as necessary:
Max Distros: Limits the number of distros returned.
Max Pack Waves: Limits the number of pack waves generated. It does not exceed the number of pack waves designated for the sorter group.
Fill Sorter Capacity: Limits the number of orders to what is needed in order to fill the sorter.
Click Run Set. The set of queries is run, chute logic is applied, and the results appear on the Query Results block of the Select Stock Order window.
Adjust the Results
On the Select Stock Order window, click Query Totals. The Query Totals window opens.
To remove the order lines returned by a specific query in the query set, select the query and click Delete. The lines are removed from the Distribute Orders block on the Select Stock Order window.
Exit the Select Stock Order Window
Click Exit to close the window.
To query manual stock orders, navigate to select Distribution Planning -> Select Stock Order. The Select Stock Order window opens.
Run a Query
On the Select Stock Order window, click Build Query. The Build Query window opens.
If a query opens, click Clear.
To load a query, click Load Query. The Load Query window opens:
Select the query that you want to use.
Click Load Query. The query opens on the Build Query window.
Click Run Query. The query is run and the results appear on the Query Results block of the Select Stock Order window.
Build a Query
The Build Query window allows you to select fields to use in your query that will be used to match against stock orders. The stock orders selected then can be processed as a wave if desired or you can simply create a new query to select different stock orders.
On the Select Stock Order window, click Build Query. The Build Query window opens.
In the Column field, select a limiting element.
In the Operator field, select a relational operator.
In the Value field, enter the value of the element selected in the Column field.
In the Logical field, enter the logical operator used to join two or more conditions.
Enter additional conditions as necessary.
After entering all the conditional statements, enter any chute criteria in the lower half of the window as necessary.
To include incomplete orders in the results, select the Incomplete Orders check box.
To save a query:
Click Save Query. The Select Order Queries window opens.
In the Save field, enter a name for the query.
If the query is to be saved as part of a query set, select the query set in the Set Name field, or click the LOV button and select the query set.
Click Save to save the query and close the Select Order Queries window.
On the Build Query window, click Run Query to run the query or click Exit/Cancel to close the Build Query window.
Enter Store Cube/Wt Definition
On the Select Stock Order window, click Build Query.
On the Build Query window, click Store Cube/Wt Definition. The Store Cube/Wt Definition window opens.
Select a store and enter the weights.
Click Save.
Click Exit to close the Store Cube/Wt Definition window.
Delete a Query
On the Select Stock Order window, click Build Query. The Build Query window opens.
Click Delete Query. The Select Order Queries window opens.
Select the query that you want to delete.
Click Delete Query.
When prompted to delete the record, click Yes. The query is deleted and you are returned to the Build Query window.
Click Exit to close the Build Query window.
Exit the Select Stock Order Window
Click Exit to close the window.
The Stock Order Creation window allows you to manually create non-consumer direct store stock orders in RWMS. RWMS supports the creation of Manual, Predist, and Repair stock order types. To create a stock order you must provide a pick not before date (in future), a pick not after date (in future), a destination, an item, and a quantity.
To maintain manual stock orders, navigate to Distribution Planning -> Stock Order Creation. The Stock Order Creation window opens.
Display a Manual Stock Order
If a stock order is currently displayed, click Clear.
Click Query.
In the Customer Order Number field, enter the customer order number, or click the LOV button and select the customer order number.
In the Stock Order Number field, enter the stock order number, or click the LOV button and select the stock order number.
|
Note: The stock order number is required if more than one stock order is associated with the customer order. |
Click Search. The details of the selected stock order appear.
Edit a Manual Stock Order
On the Stock Order Creation window, double-click any field other than a text field. The Modify window opens.
|
Note: You cannot edit a Consumer Direct stock order. |
Edit the enabled fields as necessary.
Click Save to save the changes and close the Modify window.
Edit Destination Details
Click Details. The Detail window opens.
|
Note: For a Consumer Direct stock order, the Create Record and Delete Record links are disabled. |
Double-click the destination record that you want to edit. The Create Record window opens.
Edit the enabled fields as necessary.
Click Save to save any changes and close the Create Record window.
Click Exit to close the Details window.
Add a Manual Stock Order
On the Stock Order Creation window, click Create Record. The Create Record window opens.
|
Note: It is not possible to create Consumer Direct stock order using the Stock Order Creation window. |
On the Order Type field, select from the drop down list. The available options are:
Manual: This type of stock order generates picks from storage.
PreDist: This type of stock order generates picks from inbound receipts. The PO Number field is mandatory when PreDist is selected.
|
Note: Only when the system control parameterallow_predist_create is set to Y, you can create PreDist type stock orders. |
Repair: This type of stock order generates repair/finisher picks from staging.
Enter other stock order details.
Click Save to save the changes and close the Create Record window.
To add destination details:
Click Details. The Details window opens.
Click Create Record. The Create Record window opens.
In the Dest ID field, enter the destination ID, or click the LOV button and select the destination.
In the Item ID field, enter the item ID, or click the LOV button and select the item.
In the Order Line Nbr, enter a line number that is unique for the current stock order.
Enter as many details as are known.
Click Save to save the changes and close the Create Record window.
Click Exit to close the Details window.
To create another stock order under the same customer order number, click Add Stock Order. The Create Record window opens.
Delete Location Details
On the Stock Order Creation window, click Details. The Stock Order Detail window opens.
Select the record that you want to delete.
Click Delete Record.
When prompted to delete the record, click Yes.
Click Exit to close the Stock Order Detail window.
Delete a Manual Stock Order
On the Stock Order Creation window, click Delete Record.
|
Note: You cannot delete a Consumer Direct stock order. |
When prompted to delete the record, click Yes.
Exit the Stock Order Creation Window
Click Exit to close the window.
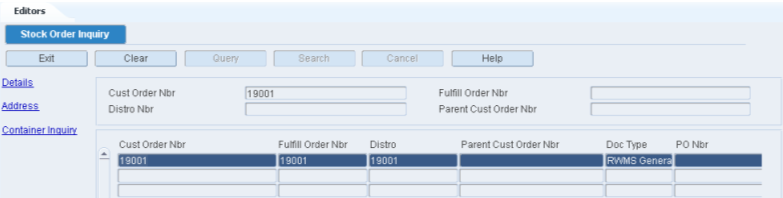
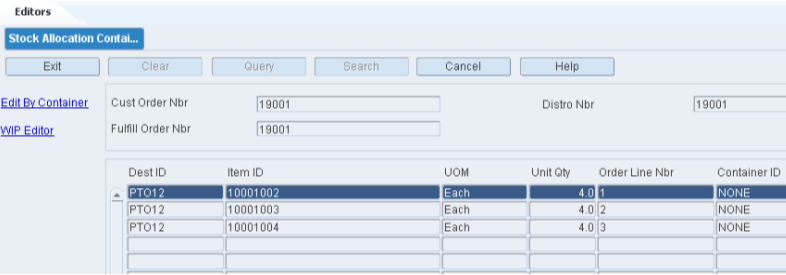
The Stock Order Inquiry window allows you to view the line item details for a selected stock order.
To view stock orders, navigate to Distribution Planning -> Stock Order Inquiry. The Stock Order Inquiry window opens.
Display All Stock Orders
Click Query.
Display a Subset of the Stock Orders
If any stock orders are currently displayed, click Clear.
Click Query.
Enter a customer order number, distro number, or parent customer order number in the appropriate field, or click the LOV button and select the desired number.
Click Search. The details of the selected stock orders are displayed.
|
Note: You cannot modify a stock order using the Stock Order inquiry window. |
View Address and Shipping Details
On the Stock Order Inquiry window, select the stock order that you want to view in detail.
Click Address. The details appear on the Address window.
Click Exit to close the Stock Order Address window.
View Destinations
On the Stock Order Inquiry window, select the stock order that you want to view in detail.
Click Details. The details appear on the Details window.
Click Exit to close the Details window.
View Containers
On the Stock Order Inquiry window, select the stock order that you want to view in detail.
Click Container Inquiry. The details appear on the Stock Allocation Container ID Inquiry window.
Click Exit to close the Stock Order CID Inquiry Screen window.
Exit the Stock Order Inquiry Window
Click Exit to close the window.
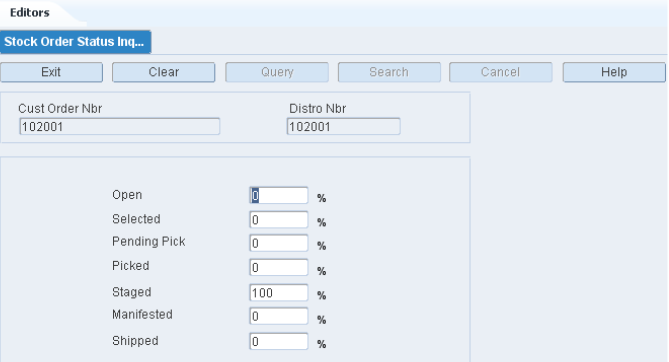
The Stock Order Status Inquiry allows you to view the progress of a stock order. It is possible for portions of a stock order to be at various stages of processing. You can view the percentage processed at each stage of the processing cycle.
To view stock order statuses, navigate to Distribution Planning -> Stock Order Status Inquiry. The Stock Order Status Inquiry window opens.
Display the Progress of a Stock Order
If a stock order is currently displayed, click Clear.
Click Query.
In the Cust Order Nbr field, enter the customer order number, or click the LOV button and select the customer order number.
In the Distro Nbr field, enter the distro number, or click the LOV button and select the distro number.
Click Search. The progress of the selected stock order opens.
Exit the Stock Order Status Inquiry Window
Click Exit to close the window.
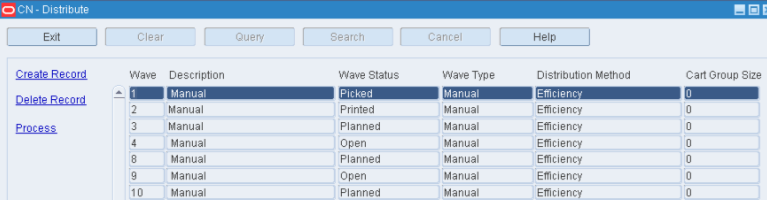
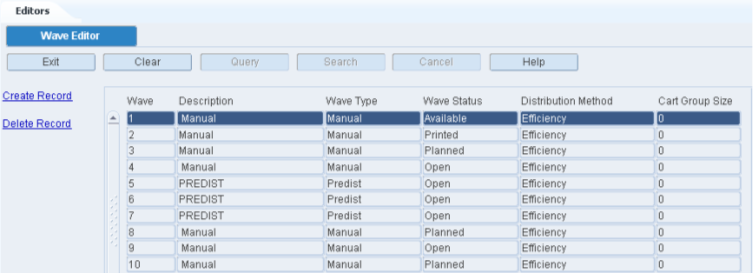
The Wave Editor allows you to create new waves, define the wave type, and select a distribution method. For existing waves, you can view their current status and delete them if not used.
To maintain waves, navigate to Distribution Planning -> Wave Editor. The current waves appear in the Wave Editor window.
Edit a Wave
|
Note: Only waves with a status of Available may be edited. |
On the Wave Editor window, double-click the wave that you want to edit. The Modify window opens.
Edit the enabled fields as necessary.
Click Save to save any changes and close the Modify window.
Add a Wave
On the Wave Editor window, click Create Record. The Create Record window opens.
In the Wave field, enter a unique wave number.
In the Description field, enter a description for the wave.
In the Distribution Method field, select the appropriate method.
In the Wave Type field, select the type of wave.
In the Cart Group Size field, enter the number of containers to group in a wave.
|
Note: A group refers to the maximum number of customer orders that can be picked as a group at one time on the wave. The Cart Group Size field controls the group size for only those orders which will be fulfilled using the Cart Unit Picking method. |
Click Save to save the changes and close the Create Record window.
Delete a Wave
|
Note: Only waves with a status of Available may be deleted. |
On the Wave Editor window, select the wave that you want to delete.
Click Delete Record.
When prompted to delete the record, click Yes.
Exit the Wave Editor Window
Click Exit to close the window.
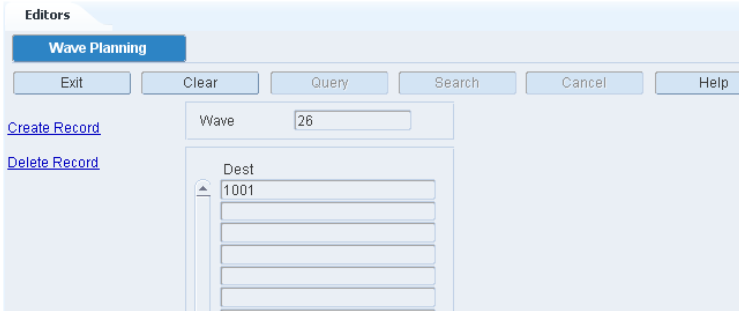
The Wave Planning window allows you to plan daily picking activities based on waves. Waves can consist of one or many destinations that are logically grouped according to some criteria such as geographic location. RWMS coordinates the daily picking activities based on these individual waves.
To maintain wave plans, navigate to Distribution Planning -> Wave Planning. The Wave Planning window opens.
Display a Wave Plan
If a wave is currently displayed, click Clear.
Click Query.
In the Wave field, enter the wave number, or click the LOV button and select the wave.
Click Search. The destinations for the selected wave are displayed.
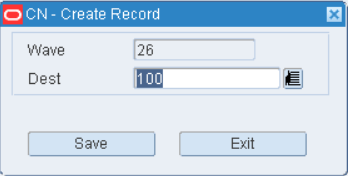
Add a Destination to a Wave
On the Wave Planning window, click Create Record. The Create Record window opens.
In the Dest field, enter the ID of the destination, or click the LOV button and select the destination.
Click Save to save the changes and close the Create Record window.
Exit the Wave Planning Window
Click Exit to close the window.
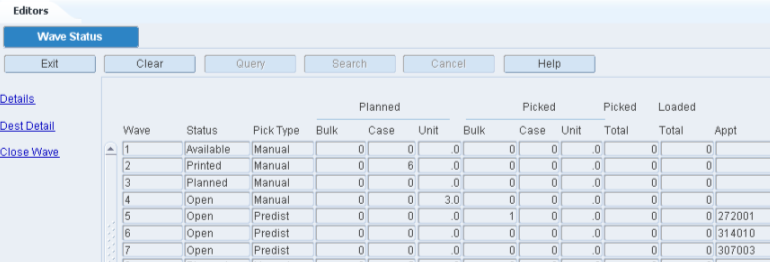
The Wave Status window allows you to monitor the progress of each pick wave.
The Wave Status window allows you to view the statuses of all waves. Depending on the type of wave, planned and picked quantities appear by bulk, case, and unit, the picked and loaded quantities are provided for each wave.
You can access the following windows in order to view additional details:
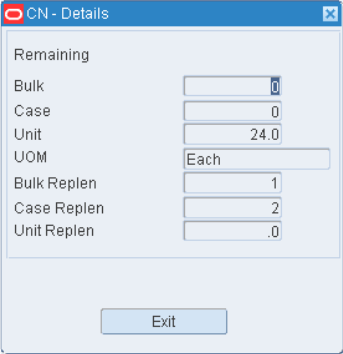
Remaining Pick Detail: Displays remaining pick and replenishment pick quantities by bulk, case, unit, and prime unit.
Wave Status by Destination: Displays the planned and picked quantities by bulk, case, unit, and prime unit for a selected destination. The picked and loaded quantities are also provided.
You can choose to close a wave whose status is Open, Picked, or Loaded. The following results occur depending on the status of the wave:
Open: The pick is not completed and all remaining picks are purged.
Picked: The pick is finished and the picked merchandise is available for loading into a trailer.
Loaded: The pick is finished and the picked merchandise is loaded in a trailer.
To check the wave status, navigate to Distribution Planning > Wave Status. The current waves appear in the Wave Status window.
View Remaining Picks for a Wave
On the Wave Status window, select the wave that you want to view in detail.
Click Details. The remaining picks appear for the selected wave appear in the Details window.
Click Exit to close the Details window.
View Wave Details by Destination
On the Wave Status window, select the wave that you want to view in detail.
Click Dest Detail. The details by destination for the selected wave appear in the Wave Status by Destination window.
Click Exit to close the Wave Status by Destination window.
Close a Wave
On the Wave Status window, select the wave that you want to close.
Click Close Wave.
|
Note: You can close a wave in the following statuses:
|
When prompted to confirm the closure, click Yes. The status of the wave changes to Available.
Exit the Wave Status Window
Click Exit to close the window.
The Wave Status by Destination window allows you to view how much of a wave has been picked and loaded by destination.
To view statuses by destination, navigate to Distribution Planning -> Wave Status by Destination. The Wave Status by Destination window opens.
|
Note: You can also access this window from the Wave Status window. |
Display Destination Details by Wave
If a wave is currently displayed, click Clear.
Click Query.
In the Wave Nbr field, enter a wave number, or click the LOV button and select the wave.
Click Search. The destination details for the selected wave appear.
On the Wave Status by Destination window, select the destination that you want to view in detail.
Click Details. The container details appear in the Wave Status by Destination Detail window.
ClickExit to close the Wave Status by Destination Detail window.
Exit the Wave Status by Destination Window
Click Exit to close the window.
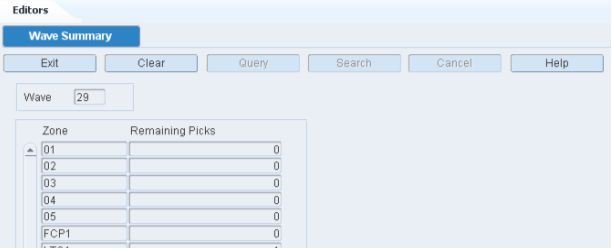
The Wave Summary window allows you to view the remaining picks for a given wave by zone. This information helps you to schedule labor resources more effectively.
To view remaining picks by wave, navigate to Distribution Planning -> Wave Summary. The Wave Summary window opens.
Display the Remaining Picks
If a wave is currently displayed, click Clear.
Click Query.
In the Wave field, enter the name of the wave number, or click the LOV button and select the wave number.
Click Search. The remaining picks for the selected wave are displayed by zone.
Exit the Wave Summary Window
Click Exit to close the window.