| Oracle® Retail Predictive Application Server Administration Guide for the Classic Client Release 14.1 E59120-01 |
|

 Previous |
 Next |
| Oracle® Retail Predictive Application Server Administration Guide for the Classic Client Release 14.1 E59120-01 |
|
Previous |
Next |
The RPAS ODBC/JDBC Driver provides a SQL interface to the Oracle RPAS embedded database (OREDB), which includes both domain data and workbook data. This driver presents OREDB as a relational database to ODBC and JDBC client applications. The RPAS ODBC/JDBC Driver enables ODBC 3.51 and JDBC 3.0 compatible applications to connect to OREDB. Connectivity has been verified with the following applications:
Oracle Business Intelligence Enterprise Edition
Interactive SQL (ISQL) Utility
JDeveloper
The RPAS ODBC/JDBC Driver enables system users to read measure data for stored measures in an RPAS domain.
In a global domain environment, connection to local domains is not supported. Access to local domain data is possible through queries in global domains.
The ODBC/JDBC Driver does not provide support for Forced Non-HBI (FNHBI) and non-materialized measures.
The ODBC/JDBC Driver reports only external position names in both dimension tables and fact tables. Internal position names are not reported.
Limited support is provided for conditional queries on measure data.
The driver is not intended to replace the exportData utility, which is used for high-speed data export to ASCII files.
|
Note: For information on installing the RPAS ODBC/JDBC Driver, see the Oracle Retail Predictive Application Server Installation Guide. |
The ODBC driver inherits the RPAS user privilege. Note that if a user is not allowed to view any measures in RPAS, the user cannot view any measures through the ODBC driver either.
On Windows, UNIX, and Linux platforms, configuring the system to connect the ODBC drivers and a domain environment consists of the following steps.
Install the ODBC server components. Refer to the RPAS Installation Guide.
Install the ODBC client components. Refer to the RPAS Installation Guide.
Start the RPAS ODBC Agent.
Configure the ODBC server components.
Configure the ODBC client components.
Create the ODBC data source name (DSN). This enables ODBC applications, such as OBIEE, to connect to the domain environments configured in the ODBC server and client configuration.
Start the RPAS ODBC Data Service.
Test the connection using Interactive SQL.
On UNIX and Linux platforms, upon completion of the ODBC server installation, a directory named odbcserver should be created under $RPAS_HOME. An RPAS ODBC Agent process should be started automatically. This Agent process works with the GUI ODBC Management Console installed on Windows PC to perform management and configuration tasks. The Windows version of RPAS ODBC Server must be installed on the Windows PC to make the ODBC Management Console available.
To define the ODBC Server configuration settings, do the following:
To add RPAS ODBC Manager in the Management Console:
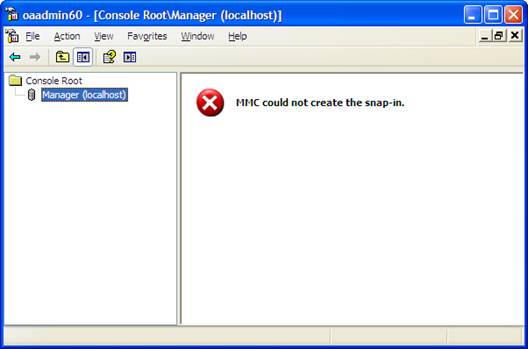
From the Start menu, select Oracle RPAS ODBC Server and then Management Console. The Oracle RPAS ODBC Management Console appears.
|
Note: When you start the Management Console for the first time, an error message appears indicating that the snap-in is not registered. |
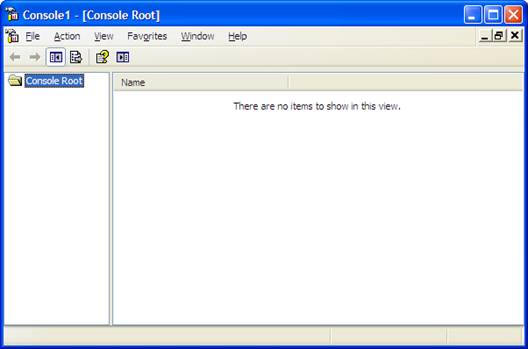
To create a new work space, select File and then New.
To facilitate connection to a remote host, the Management Console is installed on a Windows PC and the Agent service is installed on a remote server.
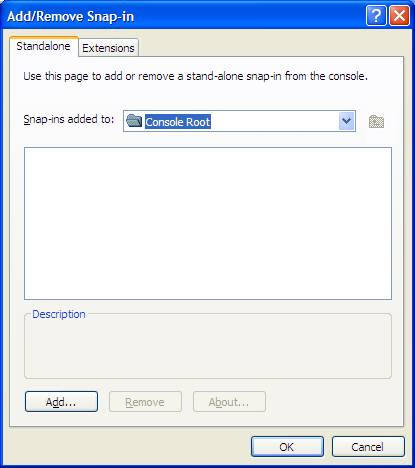
To add a new snap-in, select File and then Add/Remove Snap-in. This starts the wizard to add a new snap-in.
To add a new snap-in, click Add.
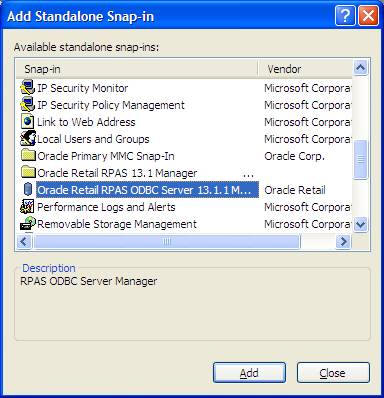
Select Oracle Retail RPAS ODBC Server Manager and click Add.
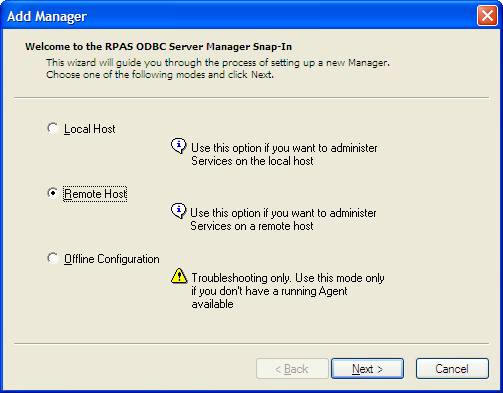
Select Local Host or Remote Host, depending on the location of the server you want to manage, and then click Next.
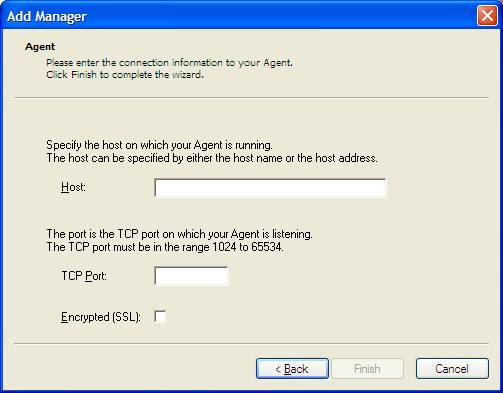
On the Add Manager window, enter the address of the server host machine and the TCP port number at which the RPAS ODBC Agent is listening.
If the Agent is not SSL enabled (which is the default), uncheck "Encrypted(SSL)". If the Agent is SSL enabled, check "Encrypted(SSL)".
Click Finish. You are returned to the previous window. You can click Close or OK to close the windows.
From the Management Console, use the ODBC Manager to perform the required configuration.
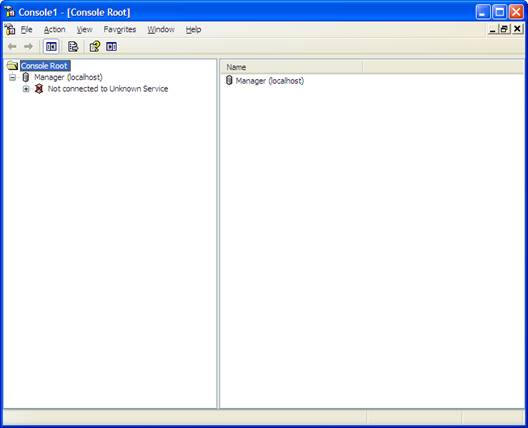
To configure for a remote host, click + to expand the ODBC Manager you just added.
To connect to the Agent service, click + in front of "not connected to Unknown Service". If the Logon to Service dialog box is displayed, log on using the user name and password of a user who can administer the service on the local or remote server.
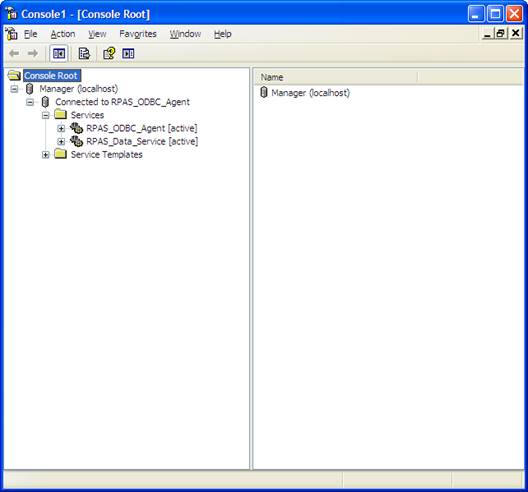
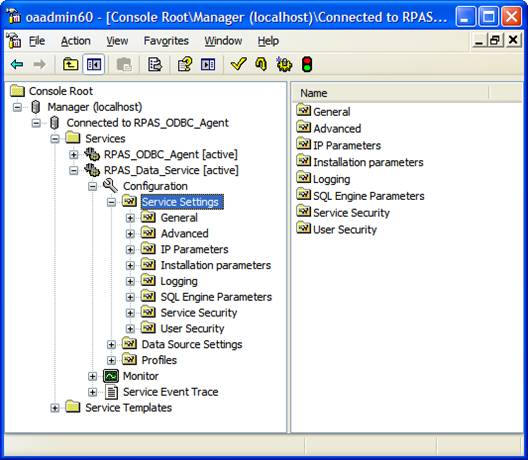
Expand Services by clicking +.
Set up the environment variables.
|
Note: This step only applies to RPAS_Data_Service running on a Windows platform. |
The PATH environment variable must be configured to include the following paths:
Path to the bin subdirectory of RPAS_Home
Path to the ODBC server binary
Path to the ODBC server IP binary
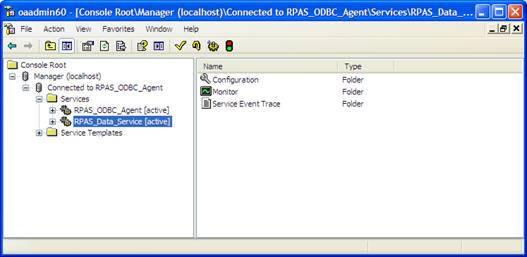
Navigate to the following screen. Figure 14-9 shows the exact screen you should see.
Right-click on the blank space of the right panel.
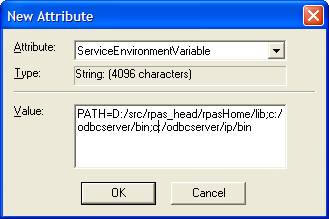
Select New/Attribute in the menu.
Select ServiceEnvironmentVariable from the list for Attribute. In the Value field, enter the following:
PATH={pathToRpasHomeLib};{pathToODBCServerBin};{pathToODBCServerIPBin}
In the sample shown in Figure 14-10, the following values are set:
- {pathToRpasHomeLib} is set to D:/src/rpas_head/rpasHome/lib
- {pathToODBCServerBin} is c:/odbcserver/bin
- {pathToODBCServerIPBin} is c:/odbcserver/ip/bin
Click OK.
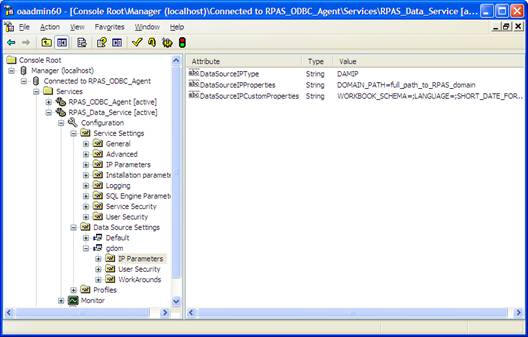
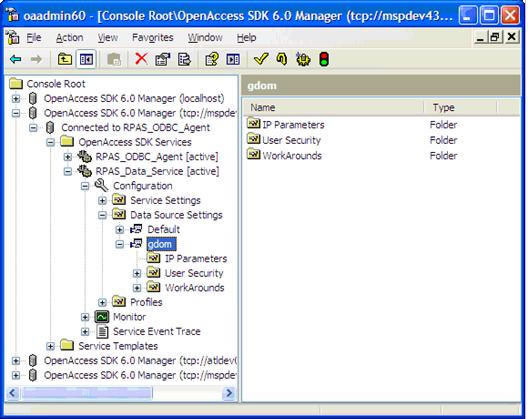
Expand Data Source Settings on the Console Manager window. You should see a pre-configured data source named gdom.
|
Note: When you create a new data source, make sure that most parameters of the new data source are identical to the parameters of the pre-configured data source gdom, except for DataSourceIPProperties and DataSourceIPCustomProperties. |
The DataSourceIPCustomProperties attribute contains pre-registered property names, which must not be modified.
Under gdom, select IP Parameters.
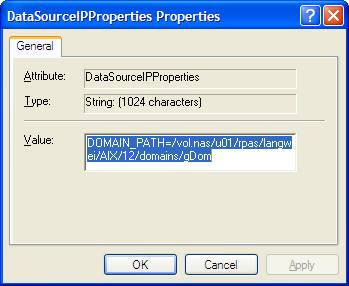
On the right panel of the window, double click DataSourceIPProperties attribute. The following window appears.
Make sure the Value field has the keyword "DOMAIN_PATH=" and the string after the "=" sign is the absolute path to the RPAS domain you want connect to on the server side.
The following is an example of the path used to connect to a domain on the local host: "DOMAIN_PATH=C:\RPAS\11\Test\ODBC\nt_testGlobalDomain"
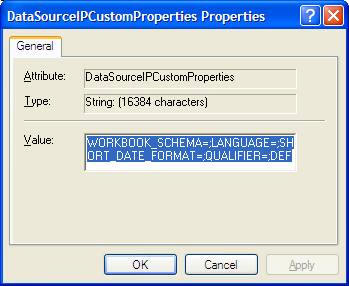
On the right panel of the window, double click the DataSourceIPCustomProperties attribute. The following window appears.
Copy the value from the DataSourceIPCustomProperties of the sample "gdom" data source to make sure all pre-registered properties are included.
To save the configuration, right click Services in the Console Manager window. In the menu, select All Tasks and then Save Configuration.
To save the snap-in configuration, select File and then Save As. Select <installdir>\admin\oaadmin60.msc for the file name. This overwrites the original file (which was basically empty).
Stop and start the RPAS Data Service.
Right-click RPAS_Data_Service. In the menu, click Stop RPAS_Data_Service or Start_RPAS_Data_Service. If you have made changes to any of the service attributes, you need to restart the Data Service.
The RPAS ODBC Data Service is now ready to accept connections.
To define the ODBC Client configuration settings, do the following:
From the Start menu, select "ODBC Administrator" under the "Oracle RPAS odbc driver" menu item.
|
Note: Once the RPAS ODBC Client is successfully installed, a sample DSN named SampleRPAS is automatically created and configured to connect to the data source gdom on the server side. To create a new DSN, see the following steps. |
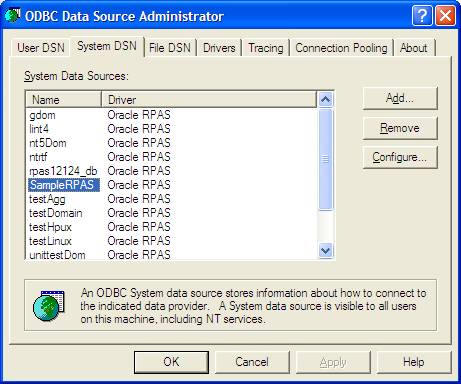
In the ODBC Data Source Administrator window, select Add to add a data source.
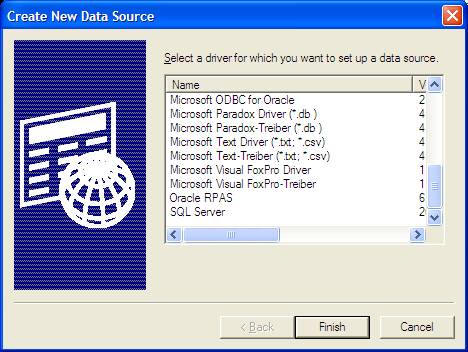
In the Create New Data source window, select Oracle RPAS.
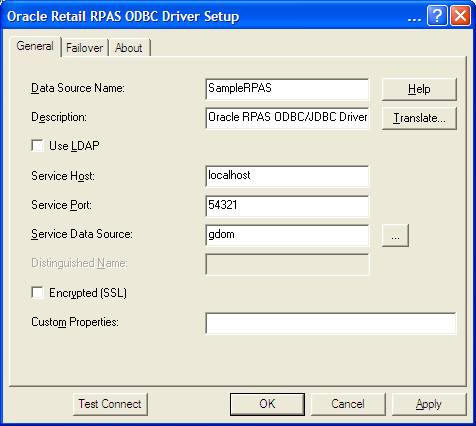
In the Oracle Retail RPAS ODBC Driver Setup window, enter the following information:
Name and description of the ODBC data source.
In the Service Host field, enter the name of the server. If connecting to a service running on a local host, enter localhost or the name of the local host server. If the Agent service is running on a remote server, enter the name of the remote host server.
In the Service Port field, enter the port number that the data service is listening on.
Note that this is the port number of the data service and not the Agent service port number.
In the Service Data Source field, enter the name of the service data source that has been configured for the data service. The default for this field is gdom.
If the data service is not SSL enabled, uncheck Encrypted(SSL). If the data service is SSL enabled, check Encrypted(SSL).
Enter custom properties, if needed. Custom properties are entered in the format of [name]=[value]. Multiple properties should be separated by a semicolon. For example: LANGUAGE=Japanese;WORKBOOK_SCHEMA=DOMAIN_T0
Table 14-1 lists the available custom properties (all optional):
Table 14-1 Available Custom Properties
| Property Name | Description |
|---|---|
|
LANGUAGE |
Name of the language you use. The RPAS ODBC/JDBC driver is multi-language enabled. If data is in any language other than English, the LANGUAGE property should be set to the name of that language. If multiple languages are used in the domain, set this property to the name of the language other than English. For example, if some position names are in English and some are in Japanese, then LANGUAGE should be set to Japanese. The default is English. |
|
WORKBOOK_SCHEMA |
Name of the workbook you wish to connect to. If not set, the driver connects to the domain. |
|
SHORT_DATE_FORMAT |
Valid short date format used in RPAS. |
|
DEFAULT_SCHEMA |
Default schema name if the table name in the query is not qualified. This property is set to DOMAIN by the default configuration. |
|
AGG_TABLE_NAMES |
This property can be set to a list of valid aggregate table names separated by commas. When this is set, the driver presents the tables specified in the system tables. When this property is not set, the valid aggregate tables can still be queried even though they do not exist in the system tables. |
|
NORMALIZE_DIM_TABLES |
Valid values are Yes and No. The default value is No. If set to Yes, the dimension tables only contain columns for this dimension and its immediate parent dimension. If set to No, the dimension tables contain columns for this dimension and all parent dimensions within the hierarchy. |
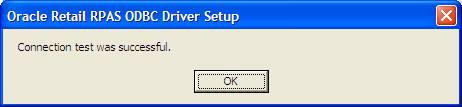
Click Test Connect. If the user security of the gdom Data source setting has been set to DBMSLogon, the Logon to Data Source dialog is displayed. Enter the data source user name and password configured for the data source.
If the connection is successful, the following dialog box is displayed.
Click OK.
The RPAS ODBC Agent and Data Services should have automatically started after successful completion of the server installation.
The RPAS ODBC Data Service should be stopped and restarted using the Management Console.
To stop a data service, right-click the service name and then click Stop in the menu.
Right-click RPAS_Data_Service and then click Start RPAS_Data_Service in the menu.
After the ODBC Server and ODBC Client have been configured, you can test the connection using Interactive SQL. The RPAS ODBC Server process must be running.
Select Start, All Programs, Oracle RPAS ODBC driver, and then Interactive SQL (ODBC). The Interactive SQL command window appears.
Enter 'connect <user name>*<password>@<dsn_name>' where <dsn_name> is the name of the connection defined in the ODBC Server and ODBC Client configuration. The following is an example.
'connect adm*adm@SampleRPAS'
If the configuration is defined correctly, no errors are displayed.
Configuring the UNIX system to connect the ODBC drivers and a domain environment consists of the following steps:
Install the ODBC Server components. Refer to the RPAS Installation Guide.
Install the ODBC Client components. Refer to the RPAS Installation Guide.
Configure the ODBC Server components.
Configure the ODBC Client components.
Start the RPAS Data Service if it is not already started.
Test the connection using Interactive SQL.
Both 32-bit and 64-bit ODBC Clients are available. They are delivered in directories named odbcclient32 and odbcclient64 respectively. The configuration steps are identical for the 32-bit and 64-bit ODBC Client.
|
Note: For the remainder of this chapter, the 32-bit and 64-bit ODBC Client are referred to as ODBC Client, and odbcclient32 and odbcclient64 are referred to as odbcclient. |
If it comes with RPAS, then odbcclient directory is under your $RPAS_HOME. If it comes separately, the installer determines its location.
Set up the environment for the ODBC Client.
If the ODBC client does not come with RPAS (meaning the odbcclient directory is not under $RPAS_HOME), edit the oaodbc.sh file (oaodbc64.sh for 64-bit Client) in odbcclient:
Make sure the following environment variables are set correctly:
- LIBPATH and OASDK_ODBC_HOME are set to the full path of the lib directory inside the odbcclient directory
- ODBCINI is set to the full path of the odbc.ini file (odbc64.ini for 64-bit Client), including the file name, inside the odbcclient directory
Source oaodbc.sh by running the following command in the odbcclient directory:
. ./oaodbc.sh
Create and configure the data sources in odbc.ini.
The odbc.ini file in the odbcclient directory has three sections: [ODBC], [ODBC Data Sources], and [SampleRpas], which is a section for the sample RPAS data source.
Edit the [ODBC] section: Set TraceDll to the full path to lib/odbctrac.so and InstallDir to the full path of the odbcclient directory.
Edit the [ODBC Data Sources] section: Add an entry for the new data source you are creating. The entry has the following format:
MyRPASDataSource= Oracle RPAS ODBC Driver
Create a new [MyRPASDataSource] section: The [SampleRPAS] section can be copied and modified. In the new [MyRPASDataSource] section:
- Set Driver to the full path of odbcclient/lib/ivoa22.so.
- Set Host to the name or IP address of the server.
- Set Port to the port number the RPAS_Data_Service listens at. This is not the port number used by the RPAS ODBC Agent.
- Set ServerDataSource to the name of the data source you created in the server configuration. For [SampleRPAS], this entry is set to "gdom", since that is the data source created on the server as an example. This is shown in the following figure.
After the ODBC Server and ODBC client have been configured, you can test the connection using Interactive SQL. The RPAS ODBC Data Service must be started.
In the odbcclient directory, source oaodbc.sh if you have not already done so.
Change to the tools directory and run the executable odbcisql. Then, at the ISQL prompt, enter 'connect <user Name>*<password>@<DataSourceName>' where <DataSourceName> is the name of the data source you defined in odbc.ini, as described in the previous section. The following is an example.
'connect adm*adm@MyRPASDataSource'
If the configuration is correctly defined, no errors are displayed.
This section describes how to install, set up, and use the RPAS JDBC driver on all UNIX, Linux, and Windows platforms.
The RPAS JDBC driver is delivered in a single (zipped) jdbcclient directory. The user has full control on the location of the jdbcclient directory. For installation guidelines, refer to the RPAS Installation Guide.
After the JDBC driver is installed on your system, you need to update the CLASSPATH environment variable. This variable ensures that the JDBC client can access the appropriate Java classes needed to connect to the database.
Open System in the Control Panel. The System Properties window appears.
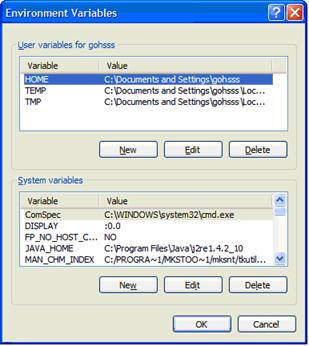
On the Advanced tab, click Environment Variables. The Environment Variables dialog appears.
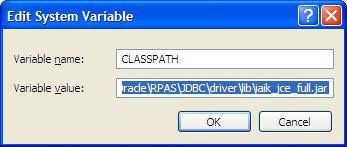
Select the CLASSPATH from the System variables list and click Edit. The Edit System Variable dialog box appears.
Add the current working directory ".",driver_home/driver/lib/ORjc.jar, driver_home/driver/ORssl14.jar, and driver_home/driver/ iaik_jce_full.jar to the CLASSPATH environment variable and click OK.
Note that driver_home is the location where the jdbcclient was installed. If your jdbcclient was installed in C:/jdbcclient, you see the following in your CLASSPATH:
.;C:/jdbcclient/driver/lib/ORjc.jar; C:/jdbcclient/driver/lib/ORssl14.jar; C:/jdbcclient/driver/lib/iaik_jce_full.jar
|
Note: Separate paths with semi-colons (;). |
After updating the environment variable, restart your PC.
After you have updated the environment variables and restarted your PC, you are ready to use the RPAS JDBC driver with any JDBC client.
On UNIX and Linux systems, use export (or set, depending what shell you use) to add the following to your CLASSPATH:
export CLASSPATH=.:jdbc_home/driver/lib/ORjc.jar: jdbc_home/driver/lib/ORssl14.jar: jdbc_home/driver/lib/iaik_jce_full.jar:$CLASSPATH
where jdbc_home is the full path of the directory where jdbcclient is installed. If you installed jdbcclient at /usr/products/oracle, then you should replace jdbc_home with /usr/products/oracle/jdbcclient.
The above export command can be added to your .profile.
Any JDBC client needs the following information to use a JDBC driver to connect to a database:
A driver class
A URL to the database specified in a form that the particular JDBC driver understands
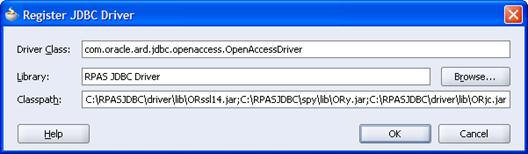
For the RPAS JDBC driver, this information is specified as follows:
Driver Class: com.oracle.ard.jdbc.openaccess.OpenAccessDriver
URL: "jdbc:RPAS://<host>:<port>;ServerDataSource=<DataSourceName>"
<host> is the name or IP address of the server, <port> is the port number the RPAS Data Service listens at, and <DataSourceName> is the name of data source you created for the RPAS Data Server (it is "gdom" in the default configuration).
Spy is a logging facility for the JDBC driver. To enable spy for the RPAS JDBC connection, do the following:
Add jdbc_home/spy/lib/ORy.jar to your CLASSPATH where jdbc_home is the installation directory of jdbcclient.
Set your driver class to com.oracle.ard.jdbcspy.SpyDriver.
Use the following URL:
"jdbc:spy:{jdbc:RPAS://<host>:<port>;ServerDataSource=<DataSourceName>};load=com.oracle.ard.jdbc.openaccess.OpenAccessDriver;[key=value];…"
<host> is the name or IP address of the server, <port> is the port number the RPAS Data Service listens at, and <DataSourceName> is the name of data source you created for the RPAS Data Server. (It is "gdom" in the default configuration.) The key and value pairs are the attributes of the Spy class.
Table 14-2 lists the available attributes:
Table 14-2 Attributes Available
| Key and Value | Description |
|---|---|
|
log=System.out |
Redirects logging to the Java output standard, System.out. |
|
log=(file)filename |
Redirects logging to the file specified by filename. For example, C:\temp\spy.log |
|
linelimit=numberofchars |
Specifies the maximum number of characters that Spy logs on one line. When set to no (default), there is no maximum limit on the number of characters. |
|
logLobs={yes | no} |
Specifies whether Spy logs activity on Blob or Clob. The initial default is no. |
|
logIS={yes | no | nosingleread} |
Specifies whether Spy logs activity on InputStreams. When logIS=nosingleread, logging on InputStream and Reader objects is active; however, logging of the single-byte read InputStream.read or single-character Reader.read is suppressed to prevent generating large log files that contain single-byte or single character read messages. When set to no (default), Spy does not log activity on InputStreams. |
|
logTName={yes | no} |
Specifies whether Spy logs the name of the current thread. When set to no (default), Spy does not log the name of the current thread. |
|
timestamp={yes | no} |
Specifies whether a timestamp should be included on each line of the Spy log. When set to no (default), Spy does not include a timestamp on each line. |
Oracle Retail suggests that you use the jdbcisql.bat (for Windows) or jdbcisql.sh (for UNIX and Linux) located in jdbcclient/isql to start jdbcisql. Edit jdbcisql.bat or jdbcisql.sh to make sure it uses the appropriate URL (the argument of the -u option):
java jdbcisql -d com.oracle.ard.jdbc.openaccess.OpenAccessDriver -u "jdbc:RPAS://<host>:<port>;ServerDataSource=gdom"
|
Note: The value of the ServerDataSource setting in the URL is case-sensitive on Windows and UNIX systems and has to match the "Data source setting" defined for the data service. |
When the application starts, enter the following to log in and make the connection (user name = adm; password = adm) as shown below.
Connect adm*adm@
To enable Spy for jdbcisql, use a command line similar to the following:
java jdbcisql -d com.oracle.ard.jdbcspy.SpyDriver -u "jdbc:spy:{jdbc:RPAS:// ://<host>:<port>;;ServerDataSource=gdom};load=com.oracle.ard.jdbc.openaccess.OpenAccessDriver;log=(file)C:\temp\spy.log;logIS=yes;logTName=yes;timestamp=yes"
Create an XML file with the following content:
<?xml version = '1.0'?>
<!DOCTYPE connections>
<connections>
   <connection>
      <URL>jdbc:RPAS://<host>:<port>;ServerDataSource=<DataSourceName></URL>
      <ConnectionName>MyConnection</ConnectionName>
      <user>adm</user>
      <ConnectionType>OTHER_JDBC</ConnectionType>
      <JdbcDriver>com.oracle.ard.jdbc.openaccess.OpenAccessDriver</JdbcDriver>
   </connection>
</connections>
The URL should correspond to the URL specification required by the RPAS JDBC Driver, as specified in the preceding sections.
ConnectionName can be anything you like. This field can be changed later using the client application.
Enter a user name for the connection. This field can also be changed later using the application.
Leave the remaining information as shown in the code sample above.
To set up the connection:
Save this XML file with any name you like.
In SQL Developer, using the Tools/Preferences/Database/Third Party Drivers, add the ORjc.jar, Orssl14.jar, and iaik_jce_full.jar files to the list of third party drivers used by SQL Developer. (SQL Developer does not look in the classpath for drivers.)
Go to the Connection Navigator and right-click on Connections. Select Import Connections.
Browse to the XML file. The dialog displays the list of connections you specified in the file. Choose your connection in the sample code, MyConnection.
Perform the following procedure to use Oracle JDeveloper with the JDBC driver:
Start JDeveloper.
From the JDeveloper left panel, select the Connections tab.
Right-click on Databases and select New Database Connection. The Create New Database Connection wizard appears.
On the first screen of the Create New Database Connection wizard, enter a connection name and choose Third Party JDBC driver for Connection Type.
On the second screen, enter the user name and password and then click Next.
On the third screen, perform the following:
Click New to add the driver.
Locate the library ORjc.jar, Orssl14.jar, and iaik_jce_full.jar files and their path. These jar files are available from the installation of the RPAS JDBC Client.
Enter the RPAS JDBC Driver connection URL, as specified at the beginning of this section.
In the Driver Class field, enter com.oracle.ard.jdbc.openaccess.OpenAccessDriver.
Follow the instructions to finish creating the connection.
You can instantiate oadriver in your application using one of following methods:
new oadriver();
Class.forName ("com.oracle.ard.jdbc.openaccess.OpenAccessDriver").newInstance();
Make sure driver_home/driver/lib/ORjc.jar, driver_home/driver/lib/Orssl14.jar, and driver_home/driver/lib/iaik_jce_full.jar are included in the CLASSPATH.
The Java code snippet below shows you how you can write a program that uses the driver.
Java Code Sample:
import java.sql.*;
public class RPASDriverTest {
 public RPASDriverTest() {}
 public static void main(String[] args)
 {
  try
  {
   if (args.length != 3)
   {
    System.out.println("Format:\n" +
    "java RPASDriverTest <Database> <UID> <PWD>\n");
    return;
   }
   Connection conn = null;
   Driver d = (Driver)Class.forName("com.oracle.ard.jdbc.openaccess.OpenAccessDriver").newInstance();
   String url = "jdbc:RPAS://";
   String database = args[0];
   String uid = args[1];
   String pwd = args[2];
   url += database;
   System.out.println("Trying to connect to url: " + url );
   conn = DriverManager.getConnection(url, uid, pwd);
   DatabaseMetaData dma = conn.getMetaData();
   System.out.println("\nConnected to " + dma.getURL());
   System.out.println("Driver " +
   dma.getDriverName());
   System.out.println("Version " +
   dma.getDriverVersion());
   System.out.println("");
   // sample query
   String query = "SELECT * FROM DIM_YEAR";
   Statement stmt = conn.createStatement();
   ResultSet rs = stmt.executeQuery(query);
   rs.close();
   stmt.close();
  }
  catch (SQLException ex)
  {
   System.out.println ("\n*** SQLException caught ***\n");
   while (ex != null) {
    System.out.println ("SQLState: " + ex.getSQLState ());
    System.out.println ("Message: " + ex.getMessage ());
    System.out.println ("Vendor: " +
    ex.getErrorCode ());
    ex = ex.getNextException ();
    System.out.println ("");
   }
  }
  catch (java.lang.Exception ex)
  {
   //Got some other type of exception. Dump it.
   ex.printStackTrace ();
  }
 }
}
After compilation, run the program as:
java RPASDriverTest.class "<host>:<port>;ServerDataSource=<DSN>" <uid> <pwd>
Where <host> is the IP of the server box where RPAS ODBC Server is running and where <port> is port number of the ODBC Server. <DSN> is the data source name that is created on the server. Note the double quotes must be included because of the semicolon.
This section provides the details of data query, including the limitations, metadata, and dimension tables.
Note the following limitations when performing data queries.
Workbook commit requests issued by RPAS users compete with real-time intra-day reports (ODBC queries) when accessing the domain data. Commit requests imply 'write' locks on certain measures in the domain. While such 'write' locks are in place, reporting tools cannot access the same data. In such situations both reporting and workbook users can experience latencies or, in more sever scenarios, they can encounter system feedback informing them that their last operation did not succeed and they need to re-execute their last request. The likelihood of such concurrency issues depends on a number of factors, such as hardware capabilities (CPU and IO capacity), reporting volume, reporting granularity, number of reporting users, number of workbook users, and the commit data volume. To minimize the chance of such concurrency issues, all workbook commits should leverage the commit ASAP framework. Additionally, RPAS allows reporting from workbooks that is less prone to concurrency issues that may be experienced while reporting from domains.
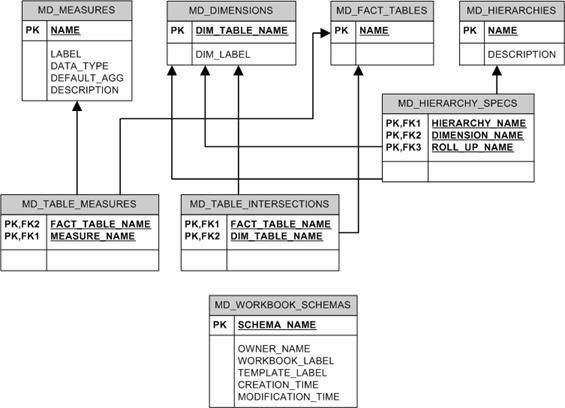
The following figure shows the metadata tables available in a domain or workbook. These tables can be used to examine the structure of the domain, such as:
Which measures and dimensions exist within the database
Which hierarchies exist and their rollup structure
Which fact tables are available
Which measures exist at the intersections that they represent
When connected to a domain, an additional table (MD_WORKBOOK_SCHEMAS) is available to list all accessible workbooks within the domain with their schema names.
|
Note: The MD_WORKBOOK_SCHEMAS table is not included in workbooks. |
The following figure shows an example of the structure of fact and dimension tables and the relationships between them. A fact table represents an intersection where one or more measures' data is stored. Each measure is represented by a column in the table. Additionally, each dimension on the intersection is represented by a column. A record in the fact table is uniquely identified by a unique combination of position names for the intersecting dimensions.
A dimension table represents a dimension. It includes a column to list all position names, their labels, and their rollup mapping to each dimension at higher levels in the hierarchy.
The fact and dimension tables have foreign key relationships between them to represent the intersection and maintain data integrity between the dimensions and the facts. Dimension tables have foreign key relationships with other dimension tables to represent the hierarchical relationships between them.
At connection time, all intersections at which any measure is stored at its base level are available as fact tables within the database. Additional aggregate level intersections may be made available in the database by specifying them in a custom connection property. These fact tables are a part of the set of database entities that are visible to reporting tools at connection time.
However, the RPAS ODBC/JDBC driver supports dynamic aggregate level fact tables that can be queried even though they are not available at connection time. These tables include all intersections that are logically above the base intersection fact tables and have at least one measure in them when manifested. If the measure existence condition is not met, the driver returns an error that the fact table could not be found.
These dynamic fact tables are queried in the same fashion as the tables that are available at connection time. The name of the fact table can be constructed by piecing together dimension names (not labels) that make up the intersection in the order in which they would exist within the domain. For example, if someone wants to query facts at the store/class/day level but the fact table is not available at connection time, they can construct the fact table name as: FACT_STR_CLSSDAY_. Note that dimension names have been concatenated in the same order as the intersection and have been prefixed with 'FACT_'. Also, note that a dimension name is assumed to be four characters long, and if the dimension name is less than four characters, it is padded with '_' characters to make it four characters long.
For information on limitations when performing queries, see the Limitations section.
Before the existence of the ODBC/JDBC driver, an RPAS user could only use RPAS workbooks to access measures. Consequently, the ODBC/JDBC driver emulates the RPAS workbook security model to manage access rights to RPAS measures. It allows users to view all measures that they could view using the templates to which they have access.
This means that when users connect to a domain, they can see all the measures that they could insert into a workbook. These include all measures that their templates have access rights to (managed through the use of the Workbook Template Measure Rights worksheet in the Security Administration workbook) and all measures to which the users have explicitly been given access rights using the Measure Rights worksheet in the Security Administration workbook. All other measures are not accessible to the users.
When users connect to a workbook, they can access all measures in the workbook, irrespective of how those measures were brought into the workbook and irrespective of whether access rights to some of those measures were removed after the workbook was created. Since those measures exist in the workbook that the users can access, those measures (their workbook copies) are accessible to the users.
This section describes some use cases of RPAS.
To explore the structure of a domain or a workbook, do the following:
Fetch the list of workbook schema names. In this example, the workbook is owned by 'USER01', built using the template 'TestTemplate', and labeled 'MyWorkbook'.
Select
     SCHEMA_NAME, CREATION_TIME, MODIFICATION_TIME
From
     MD_WORKBOOK_SCHEMAS
Where
     OWNER_NAME = 'USER01' and
     WORKBOOK_LABEL = 'MyWorkbook' and
     WORKBOOK_TEMPLATE = 'TestTemplate'
The SCHEMA_NAME obtained using this query can be directly used in the custom properties of the driver configuration to enable direct connection to a workbook instead of a domain.
List all measures in the domain or workbook (default schema).
Select
     *
From
     MD_MEASURES
List all measures in a specific schema (for example, 'DOMAIN_T0').
Select
     *
From
     DOMAIN_T0.MD_MEASURES
List all dimensions in the domain or workbook (default schema).
Select
     *
From
     MD_DIMENSIONS
List all fact tables in the domain or workbook (default schema).
Select
     *
From
     MD_FACT_TABLES
List all hierarchies in the domain or workbook (default schema).
Select
     *
From
     MD_HIERARCHIES
List all fact tables with the measures that are represented in those tables (default schema).
Select
     *
From
     MD_TABLE_MEASURES
List all fact tables with the dimension table names that intersect in the fact table (default schema).
Select
     *
From
     MD_TABLE_INTERSECTIONS
Use the following to see the structure of a particular hierarchy (for example: CLND). It lists the hierarchy with each of its dimensions and the roll up dimension name for each one of them (default schema).
Select
     *
From
     MD_HIERARCHY_SPECS
Where
     HIERARCHY_NAME = 'CLND'
To query fact data, do the following:
Query fact data for all measures at the STR-SKU-DAY intersection with the unique position names for these dimensions.
Select
     *
From
     FACT_STR_SKU_DAY_
Query fact data for specific measures at the STR-SKU-DAY intersection and list them with the position labels for each dimension.
Select
DS.POSITION_LABEL, DU.POSITION_LABEL, DD.POSITION_LABEL, R_EX_LBLOWINTR, R_EX_UBLOWINTR
From
FACT_STR_SKU_DAY_ F,
DIM_STR DS,
DIM_SKU DU,
DIM_DAY DD
Where
DS.POSITION_NAME = F.STR and
DU.POSITION_NAME = F.SKU and
DD.POSITION_NAME = F.DAY
Hint Join (FACT_STR_SKU_DAY_, DIM_STR, DIM_SKU, DIM_DAY);
|
Note: The optional Hint clause in the above SQL statement is not ANSI SQL standard, but the ODBC/JDBC Driver supports it. This Hint tells the driver to process the join tables in the specified order (fact table first, and then dimension tables). |
Complete the following steps to connect to a workbook:
Select Start, Settings, Control Panel, Administrative Tools, and then Data Sources (ODBC).
Select the System DSN tab. Select the appropriate DSN and click Configure.
In the Options frame, enter WORKBOOK_SCHEMA=<workbook schema name>. Replace '<workbook schema name>' with the workbook schema name for the workbook to which you want to connect. The workbook schema names can be obtained by first connecting to the domain and then examining the MD_WORKBOOK_SCHEMAS table to obtain the schema name for the appropriate workbook (may be identified by owner name, template, creation and last modification time). For example: 'WORKBOOK_SCHEMA=DOMAIN_T0' or 'WORKBOOK_SCHEMA=SD0_T0'
Click OK.
To request additional aggregate tables, do the following:
Select Start, Settings, Control Panel, Administrative Tools, and then Data Sources (ODBC).
Select the System DSN tab. Select the appropriate DSN and click Configure.
In the Options frame, enter AGG_TABLE_NAMES=<comma-separated list of any additional aggregate fact table names>.
By default, the database includes every fact table (a fact table represents an intersection) that one or more measures have as their base intersection. Any other fact tables can be specifically requested by adding a comma-separated list as the value for this custom property. For example, to see a fact table for the intersections 'DEPT' and 'DEPT_YEAR', use the following value of this custom property: 'AGG_TABLE_NAMES=FACT_DEPT, FACT_DEPT_YEAR'.
Click OK.
If entering more than one connection property (that is, both the WORKBOOK_SCHEMA and AGG_TABLE_NAMES properties),separate the property key value pairs by a semicolon. Using the examples above, the content of the custom properties input box should be as follows: WORKBOOK_SCHEMA=DOMAIN_T0;AGG_TABLE_NAMES= FACT_DEPT, FACT_DEPT_YEAR
This section lists some sample ODBC/JDBC client applications that can connect to the RPAS datastore through the RPAS ODBC/JDBC Driver. The examples in this section do not include all client applications that can connect to the RPAS ODBC/JDBC Driver.
|
Note: In a client/server configuration, the server (executable) must be started before a client can connect to it. |
This section outlines how to connect to the defined DSN using the OBIEE Administration Tool and how to import data from the DSN. For more information about OBIEE, refer to OBIEE documentation. The user must install and configure the ODBC client first on the OBIEE server host (refer to section ODBC Client Configuration for UNIX) and test the connection. The ODBC client and the OBIEE server must both be 32-bit or 64-bit. The administrator must source the oaodbc.sh or oaodbc64.sh script under the ODBC client home directory before starting or re-starting the OBIEE server.
The following example provides a sample of a configuration of the ODBC client for OBIEE. This example was developed for OBIEE on AIX, but the process is the same for other environments.
Open the $BIEE_HOME/setup/odbc.ini file, where $BIEE_HOME is the directory where OBIEE is installed.
Set the TraceDll to the odbctrac.so that comes with RPAS odbcclient. Set InstallDir to the RPAS odbcclient installation directory.
In the [ODBC Data Sources] section, insert an entry for RPAS domain.
Example:
rpas_domain=This is the name of the data source for RPAS.
The name here (rpas_domain) should be the same as the data source name configured in the RPAS ODBC Server.
Create a section in the file for the rpas_domain. The following example is subject to changes. Refer to the [SampleRPAS] section in odbc.ini or odbc64.ini under ODBC client home directory for all up-to-date settings.
Example:
[rpas_domain]
Driver= absolute_path_to_odbc_client/lib[64]/ivoa22.so
Description=Oracle Retail RPAS ODBC Driver
Host=<RPAS ODBC Server host>
Port=<odbc_data_service_port>
ServerDataSource=<data_source_name>
UseLDAP=0
DistinguishedName=
Encrypted=0
LoadBalancing=0
AlternateServers=
ConnectionRetryCount=0
ConnectionRetryDelay=3
CustomProperties=
Save your changes to the file.
To connect OBIEE to a predefined DSN for an RPAS Domain:
Make sure the following Windows services are running:
Oracle BI Java Host
Oracle BI Server
Start the OBIEE Administration Tool. Select Start, All Programs, Oracle Business Intelligence, and then Administration.
From the File menu, select open - online. A window appears to use for entering login credentials.
Enter the administrator's user name and password and then click open.
Three panels now appear in the Admin Tool window: Presentation, Business Model and Mapping, and Physical.
From File menu, select Import-From database. A window appears to select the connection type and RPAS user information.
In order to optimize the OBIEE queries issued to the RPAS ODBC driver, you must select the appropriate connection type when configuring OBIEE. Selecting the RPAS-specific connection type will cause OBIEE to generate physical queries that delegate data aggregations to RPAS. For more, see Oracle Fusion Middleware Integrator's Guide for Oracle Business Intelligence Enterprise Edition /11g Release 1 (11.1.1).
Once you select the connection type, the RPAS schemas and tables appear in a new window.
Select the objects you want to import and then click import. After the import is complete, click Close.
A new physical model is created and listed in the Physical panel of the Admin Tool window.
Expand the physical model. Double-click on connection to open "connection" properties. Make sure the Connection Type is set to ODBC 3.5. Click OK to exit.
In the Admin Tool window, click Save to save your physical model.
Now that you have a basic physical model, you can build the business model and presentation layer on top of it. For more information on the business model, presentation layer, and OBIEE Web interface, refer to the OBIEE documentation.
To connect using Microsoft Access, do the following:
Start Microsoft Access.
Create a new (or open an existing) Access file (.mdb file).
From the File menu, select Get External Data- Link Tables (or Import if you want to import the data from RPAS datastore to Access). A dialog box appears.
In the Files of type box, select ODBC Databases().
Click the Machine Data Source tab and then double-click the pre-configured ODBC data source from which you want to link.
At the logon prompt, enter your user ID and password and then click OK.
At this point, MS Access connects to the RPAS data source and displays the list of schemas and tables that you can import or link.
Click each table that you want to import or link and then click OK. If you are linking a table that does not have an index that uniquely identifies each record, then you will see a list of the fields in the linked table. Select a field, or a combination of fields, that uniquely identify each record and then click OK.
JDeveloper works best with a native JDBC driver, which is included in the RPAS ODBC/JDBC Driver package.
To connect using JDeveloper:
Start JDeveloper.
On the JDeveloper left panel, select the Connections tab.
Right-click on Databases and select New Database Connection.
On the first screen of the Create New Database Connection wizard, enter a connection name and select Third Party JDBC driver for Connection Type.
On the second screen, enter the user name and password and then click Next.
On the third screen, click New to add the driver. It opens up the following dialog. You need to find the jar files ORjc.jar, ORssl14.jar, iaik_jce_full.jar, and ORy.jar and their paths (they are made available from the installation of the JDBC Driver). Then, create a library group "RPAS JDBC Driver" with those four jar files.
In the Driver Class field, enter com.oracle.ard.jdbc.openaccess.OpenAccessDriver.
Then, enter in the URL field: jdbc:RPAS://{host_name}:{port_number};ServerDataSource={data_source_name}, where host_name is the host name or IP address of the ODBC server, port_number is the RPAS_Data_Service port number, and data_source_name is the Data Source Name that is configured on the ODBC server.
Follow the instructions to finish creating the connection.
After the connection is established, you can expand the Connection (and the nodes under the Connection) to browse the objects in the RPAS datastore. You can also open a SQL worksheet (by selecting SQL Worksheet from the Tools menu) to write or execute SQL statements.
This section describes how to make the connection from XML Publisher to RPAS using the JDBC driver. (XML only supports JDBC.)
Install and configure the JDBC client driver and ODBC/JDBC server. Start the server.
Copy the JDBC client jar files ORjc.jar, ORssl14.jar, iaik_jce_full.jar, and ORy.jar (from JDBC client installation) to D:\OraHome_1\oc4j\j2ee\home\applib, where D:\OraHome_1 is the root directory where XML Publisher was installed.
Start the XML Publisher server. (Select Start, All Programs, Oracle XML Publisher Server, OUIHome1, and then Oracle XML Publisher Enterprise Start.)
Start a Web browser and go to the URL: http://localhost:15101/xmlpserver/
This URL is only an example. Contact the XML Publisher administrator/installer for the actual URL. The actual URL is recorded in D:\OraHome_1\xmlpserver\setupinfo.txt file of the XML Publisher server machine.
Log in as admin/admin.
Select the Admin tab and then select JDBC Connection under Data Sources to create a JDBC connection.
Click Add Connection to create a new connection. Provide the following information:
Enter a display name for Data Source Name.
Enter jdbc:RPAS://{host_name}:{port_number};ServerDataSource={data_source_name} for the URL, where host_name is the host name or IP address of the ODBC server, port_number is the RPAS_Data_Service port number, and data_source_name is the Data Source Name that is configured on the ODBC server.
Enter adm for user name and password.
Enter "com.oracle.ard.jdbc.openaccess.OpenAccessDriver" for Database Driver Class.
Click Test Connection. The confirmation message: "connect established successfully" should appear.
Click Apply to save the connection.
ISQL is an interactive SQL tool that is provided by the ODBC/JDBC SDK.
To connect to the remote ODBC/JDBC server, use odbcisql.exe (with ODBC client installed) or jdbcisql.class (with JDBC client installed).
|
Note: Users are expected to know basic SQL in order to use ISQL. |
To connect to the ODBC/JDBC server using odbcisql, start odbcisql and then, at the SQL prompt, issue the connect command as follows:
connect john/doe@rpasDomain
where john/doe is a predefined administrator account in RPAS and rpasDomain is a pre-configured Data Source Name.
Issue the connect command for jdbcisql.class as follows:
connect john*doe@rpasDomain
After you are connected to the server, you can issue various SQL DML and DDL statements to inspect and modify the data in the RPAS datastore.
This section contains the following information:
Detailed descriptions of various functions supported by the RPAS ODBC Driver.
Descriptions of the SQL92 and SQL99 functionality that is not supported.
Use caution when applying functions to any dimension name or label columns, because the driver is not able to use the corresponding internal indexes to optimize row selection when functions are applied to those columns (which could be a significant performance hit).
It is suggested that users avoid applying functions to dimension name or label columns whenever possible.
Consider the following query:
Select * from fact_str_sku_day
where convert(day, SQL_DATE) = curdate();
Even though this query selects the data for only one day, the driver has to scan the entire fact table and then apply the convert function to every row of the table.
Working with OBIEE, the same can be achieved using a variable, which holds the converted string value of the current date (in the same format as the "day" column). The query then becomes:
Select * from fact_str_sku_day
Where day = @curDateString;
The driver only reads the rows that meet the condition.
Table 14-3 Numeric Functions
| Function | Description |
|---|---|
|
ABS(numeric_exp) |
Returns the absolute value of numeric_exp. For example: SELECT ABS(-1.0), ABS(0.0), ABS(1.0) FROM emp WHERE empno = 1; This returns three result columns with values 1, 0, and 1. |
|
ACOS(float_exp) |
Returns the arccosine of float_exp as an angle, expressed in radians. For example: SELECT ACOS(-1) FROM emp WHERE empno = 1; This returns 3.14159. |
|
ASIN(float_exp) |
Returns the arcsine of float_exp as an angle, expressed in radians. For example: SELECT ASIN(-1.0) FROM emp WHERE empno = 1; This returns -1.57079. |
|
ATAN(float_exp) |
Returns the arctangent of float_exp as an angle, expressed in radians. For example: SELECT ATAN(45.0) FROM emp WHERE empno = 1; This returns 1.54857. |
|
ATAN2(float_exp1, float_exp2) |
Returns the arctangent of the x and y coordinates, specified by float_exp1 and float_exp2, respectively, as an angle, expressed in radians. For example: SELECT ATAN2(35.175, 129.44) FROM emp WHERE empno = 1; This returns 0.2653399. |
|
CEILING(numeric_exp) |
Returns the smallest integer greater than or equal to numeric_exp. The return value is of the same data type as the input parameter. For example: SELECT CEILING(123.45), CEILING(-123.45), CEILING(0.0) FROM emp WHERE empno = 1; This returns 124, -123 and 0. |
|
COS(float_exp) |
Returns the cosine of float_exp, where float_exp is an angle expressed in radians. For example: SELECT COS(14.78) FROM emp WHERE empno = 1; This returns -0.59946542. |
|
COT(float_exp) |
Returns the cotangent of float_exp, where float_exp is an angle expressed in radians. For example: SELECT COT(124.78) FROM emp WHERE empno = 1; This returns -0.82045588. |
|
DEGREES(numeric_exp) |
Returns the number of degrees converted from numeric_exp radians. For example: SELECT DEGREES(3.143) FROM emp WHERE empno = 1; This returns 180.0806. |
|
EXP(float_exp) |
Returns the exponential value of float_exp. For example: SELECT EXP(378.615) FROM emp WHERE empno = 1; This returns 2.69404760606322E+164 |
|
FLOOR(numeric_exp) |
Returns the largest integer less than or equal to numeric_exp. The return value is of the same data type as the input parameter. For example: SELECT FLOOR(123.45), FLOOR(-123.45) FROM emp WHERE empno = 1; This returns 123 and -124. |
|
LOG(float_exp) |
Returns the natural logarithm of float_exp. For example: SELECT LOG(5.175643) FROM emp WHERE empno = 1; This returns 1.64396358. |
|
LOG10(float_exp) |
Returns the base 10 logarithm of float_exp. For example: SELECT LOG10(145.175643) FROM emp WHERE empno = 1; This returns 2.161893758. SELECT LOG10(0), LOG10(-1), LOG10(1) FROM emp WHERE empno = 1; This returns -1.#INF, -1.#IND and 0 |
|
MOD(integer_exp1, integer_exp2) |
Returns the remainder (modulus) of integer_exp1 divided by integer_exp2. For example: SELECT mod(empno, 2) FROM emp WHERE empno = 11; This returns 1. |
|
PI( ) |
Returns the constant value of pi as a floating-point value. For example: SELECT PI() FROM emp WHERE empno = 1; This returns 3.14159265358979. |
|
POWER(numeric_exp, integer_exp) |
Returns the value of numeric_exp to the power of integer_exp. For example: SELECT POWER(2, -5), POWER(2, 5) FROM emp WHERE empno = 1; This returns 0, 32. |
|
RADIANS(numeric_exp) |
Returns the number of radians converted from numeric_exp degrees. For example: SELECT RADIANS(45.0) FROM emp WHERE empno = 1; This returns 0.785398. |
|
RAND([integer_exp]) |
Returns a random floating-point value using integer_exp as the optional seed value. For example: SELECT RAND(0) FROM emp WHERE empno = 1; This returns 38. |
|
ROUND(numeric_exp, integer_exp) |
Returns numeric_exp rounded to integer_exp places right of the decimal point. If integer_exp is negative, numeric_exp is rounded to |integer_exp| places to the left of the decimal point. For example: SELECT ROUND(123.344, 2), ROUND(123.345, 2) FROM emp WHERE empno = 1; This returns 123.34 and 123.35. SELECT ROUND(748.58, -1), ROUND(748.58, -2), ROUND(748.58, 3), FROM emp WHERE empno = 1; This returns 750, 700 and 1000. |
|
SIGN(numeric_exp) |
Returns the positive (+1), zero (0), or negative (-1) sign of the given expression. For example: SELECT SIGN(empno) FROM emp WHERE empno = 11; This returns 1. SELECT SIGN(-1 * empno), SIGN(0) FROM emp WHERE empno = 1; This returns two result columns with values -1 and 0. |
|
SIN(float_exp) |
Returns the sine of float_exp, where float_exp is an angle expressed in radians. For example: SELECT SIN(1.570796) FROM emp WHERE empno = 11; This returns 0.999999. |
|
SQRT(float_exp) |
Returns the square root of float_exp. For example: SELECT SQRT(45.35) FROM emp WHERE empno = 11; This returns 6.7342. |
|
TAN(float_exp) |
Returns the tangent of float_exp, where float_exp is an angle expressed in radians. For example: SELECT TAN(0.785398) FROM emp WHERE empno = 11; This returns 0.999999. |
|
TRUNCATE(numeric_exp, integer_exp) |
Returns numeric_exp truncated to integer_exp places right of the decimal point. If integer_exp is negative, numeric_exp is truncated to |integer_exp| places to the left of the decimal point. |
|
NCHAR(code) |
Returns the Unicode character that has the specified code as a SQL_WCHAR value. The valued of code should be between 0 and 65535. Example: "SELECT NCHAR(945)" returns the character α. |
Table 14-4 String Functions
| Function | Description |
|---|---|
|
ASCII(string_exp) |
Returns the ASCII code value of the leftmost character of string_exp as an integer. For example: SELECT ASCII(ename) FROM emp WHERE ename = 'Adam'; This returns 65, which is the ASCII code of A. |
|
BIT_LENGTH(string_exp) |
Returns the length in bits of the string expression. For example: SELECT BIT_LENGTH(ename) FROM emp WHERE ename = 'John'; This returns 32, which is the number of bits. |
|
CHAR(code) |
Returns the character that has the ASCII code value specified by code. The value of code should be between 0 and 255; otherwise, the return value is data source-dependent. For example: SELECT CHAR(65) FROM emp; This returns A, which is the character for ASCII code A. |
|
CHAR_LENGTH(string_exp) CHARACTER_LENGTH(string_exp) |
Returns the length in characters of the string expression, if the string expression is of a character data type; otherwise, returns the length in bytes of the string expression (the smallest integer not less than the number of bits divided by 8). (This function is the same as the CHARACTER_LENGTH function.) For example: SELECT CHAR_LENGTH(ename) FROM emp where ename = 'John'; This returns 4. |
|
CONCAT(string_exp1, string_exp2) |
Returns a character string that is the result of concatenating string_exp2 to string_exp1. If either of string_exp1 or string_exp2 is NULL value, it returns NULL string. If either of string_exp1 or string_exp2 is wide character string, the return value is a wide character string. For example: SELECT CONCAT('Name is: ', ename) FROM emp WHERE ename = 'John'; This returns 'Name is: John' SELECT CONCAT(N'Name is: ', ename) FROM emp WHERE ename = N'John'; This returns wide character string N'Name is: John'. |
|
INSERT(string_exp1, start, length, string_exp2) |
Returns a character string where length characters have been deleted from string_exp1, beginning at start, and where string_exp2 has been inserted into string_exp, beginning at start. If string_exp1 is wide character string, the return value is a wide character string. Offsets (start and length) must be specified in number of characters. For example: SELECT INSERT(ename, 1, 0, 'Name is: ') FROM emp WHERE ename = 'John'; This returns 'Name is: John' SELECT INSERT(ename, 1, 0, N'Name is: ') FROM emp WHERE ename = N'John'; If ename is a column of wide character data type, this returns wide character string: N'Name is: John'. |
|
LCASE(string_exp) LOWER(string_exp) |
Returns a string equal to that in string_exp, with all uppercase characters converted to lowercase. For example: SELECT LCASE(ename) FROM emp WHERE ename is 'John'; This returns 'john'. |
|
LEFT(string_exp, count) |
Returns the leftmost count characters of string_exp. If string_exp is wide character string, the return value is a wide character string. Offset (count) must be specified in number of characters. For example: SELECT LEFT(ename, 2) FROM emp WHERE ename = 'John'; This returns 'jo'. SELECT LEFT(ename, 2) FROM emp WHERE ename = N'John'; If ename is a column of wide character data type, this returns wide character string N'jo'. |
|
LENGTH(string_exp) |
Returns the number of characters in string_exp, excluding trailing blanks. If string_exp is wide character string, the return value is a number of wide characters in string_exp. Trailing blanks are not checked in wide character implementation. For example: SELECT LENGTH('John '), LENGTH('John') FROM emp; This returns 4 for both result columns as trailing blanks are excluded. SELECT LENGTH(N'John '), LENGTH(N'John') FROM emp; This returns 7 for the first result column and 4 for the second result column. Trailing blanks are not checked in wide character implementation. |
|
LOCATE(string_exp1, string_exp2[, start]) |
Returns the starting position of the first occurrence of string_exp1 within string_exp2. The search for the first occurrence of string_exp1 begins with the first character position in string_exp2 unless the optional argument, start, is specified. If start is specified, the search begins with the character position indicated by the value of start. The first character position in string_exp2 is indicated by the value 1. If string_exp1 is not found within string_exp2, the value 0 is returned. If string_exp2 is a wide character string, returns the starting position of the first occurrence of string_exp1 within the wide character string string_exp2. Offset (start) must be specified in number of characters. If string _exp2 is a wide character exp, the result is computed by treating both arguments as wide character string. For example: SELECT LOCATE('h', 'John', 1) FROM emp; This returns 3 as 'h' is the found at the third position. SELECT LOCATE(N'h', N'John', 1) FROM emp; This returns 3 as N'h' is the found at the third position. |
|
LTRIM(string_exp) |
Returns the characters of string_exp, with leading blanks removed. For example: SELECT LTRIM(' ABC') FROM emp; This returns 'ABC'. |
|
OCTET_LENGTH(string_exp) |
Returns the length in bytes of the string expression. The result is the smallest integer not less than the number of bits divided by 8. For example: SELECT OCTET_LENGTH(ename) FROM emp WHERE ename = 'John'; This returns 4. |
|
POSITION(character_exp1 character_exp2) |
Returns the position of the first character expression in the second character expression. The result is an exact numeric with an implementation-defined precision and a scale of 0. If character_exp1 and character_exp2 are wide character strings, returns the position of the first wide character expression in the second wide character expression. If character_exp2 is a wide character string, the result is computed by treating both arguments as wide character strings. For example: SELECT POSITION('abc', '1234abc def') FROM emp; This returns 5. SELECT POSITION(N'abc', N'1234abc def') FROM emp; This returns 5. |
|
REPEAT(string_exp, count) |
Returns a character string composed of string_exp repeated count times. If string_exp is wide character string, the return value is a wide character string. For example: SELECT REPEAT(ename, 2) FROM emp WHERE ename = 'John'; This returns 'JohnJohn' SELECT REPEAT(ename, 2) FROM emp WHERE ename = N'John'; If ename is a column of wide character data type, this returns N'JohnJohn'. |
|
REPLACE(string_exp1, string_exp2, string_exp3) |
Search string_exp1 for occurrences of string_exp2, and replace with string_exp3. If string_exp1 is wide character string, the return value is a wide character string. For example: SELECT REPLACE(address, 'San Francisco', 'SFO') FROM emp where address = '100 Vanness, San Francisco'; This returns '100 Vanness, SFO'. SELECT REPLACE(address, N'San Francisco', N'SFO') FROM emp WHERE address = N'100 Vanness, San Francisco'; If address is a column of wide character data type, this returns N'100 Vanness, SFO'. |
|
RIGHT(string_exp, count) |
Returns the right-most count characters of string_exp. If string_exp is wide character string, the return value is a wide character string. Offset (count) must be specified in number of characters. For example: SELECT RIGHT(ename, 2) FROM emp WHERE ename = 'John'; This returns 'hn'. SELECT RIGHT(ename, 2) FROM emp WHERE ename = N'John'; If ename is a column of wide character data type, this returns N'hn'. |
|
RTRIM(string_exp) |
Returns the characters of string_exp with trailing blanks removed. For example: SELECT RTRIM('abc ') FROM emp; This returns 'abc'. |
|
SPACE(count) |
Returns a character string consisting of count spaces. For example: SELECT ename+space(5)+ename FROM emp WHERE ename = 'John'; This returns 'John John'. |
|
SUBSTRING(string_exp, start, length) SUBSTR(string_exp, length) |
Returns a character string that is derived from string_exp, beginning at the character position specified by start for length characters. If string_exp is wide character string, the return value is a wide character string. Offset (start and length) must be specified in number of characters. For example: SELECT SUBSTR(ename, 1, 3) FROM emp WHERE ename ='John'; This returns 'Joh' SELECT SUBSTR(ename, 1, 3) FROM emp WHERE ename = N'John'; If ename is a column of wide character data type, this returns N'Joh' |
|
UCASE(string_exp) UPPER(string_exp) |
Returns a string equal to that in string_exp, with all lowercase characters converted to uppercase. For example: SELECT UCASE(ename) FROM emp WHERE ename = 'John'; This returns 'JOHN'. |
|
UNICODE(string_exp) |
Returns the Unicode code of the first character of the string_exp as a SQL_INTEGER value. Example: "SELECT UNICODE('αβγ')" returns an integer value of 945. |
Table 14-5 Time and Date Functions
| Function | Description |
|---|---|
|
CURDATE() |
Returns the current date. For example: SELECT CURDATE() FROM emp; Returns the current date as: 2008-10-25 |
|
CURTIME() |
Returns the current local time. For example: SELECT CURTIME() FROM emp; Returns the current time as: 10:20:05 |
|
CURTIMESTAMP() |
Returns the current local date and local time as a timestamp value. For example: SELECT CURTIMESTAMP() FROM emp; Returns current date and time as: 2003-03-31 14:08:57 |
|
DATEADD( datepart , number ,date ) TIMESTAMPADD( datepart , number , date ) |
Returns a new date time value based on adding an interval to the specified date. The return date-time data type is same as the input date value. datepart: the parameter that specifies on which part of the date to return a new value. Both ODBC notation and SQL Server notation for datepart are supported. Datepart Abbreviations Year SQL_TSI_YEAR , year, yy, yyyy, quarter SQL_TSI_QUARTER, quarter, qq, q Month SQL_TSI_MONTH, month, mm, m dayofyear DAYOFYEAR, dy, y Day SQL_TSI_DAY, day, dd, d Week SQL_TSI_WEEK, week, wk, ww Hour SQL_TSI_HOUR, hour, hh minute SQL_TSI_MINUTE , minute, mi, n second SQL_TSI_SECOND, second, ss, s The current implementation does not support millisecond and fractional second specifications. number: the value used to increment the datepart. If value is not an integer, the fractional part of the value is discarded. For example, if you specify day for datepart and 1.75 for number, date is incremented by 1. date: an expression that returns a date or timestamp value or a character string in a date-time format. |
|
DATEDIFF( datepart , startdate , enddate ) TIMESTAMPDIFF( datepart , startdate , enddate ) |
Returns the number of date and time boundaries crossed between two specified dates. startdate is subtracted from enddate. If startdate is later than enddate, a negative value is returned. datepart: the parameter that specifies on which part of the date to calculate the difference. Both ODBC notation and SQLServer notation for datepart are supported. Datepart Abbreviations Year SQL_TSI_YEAR, year, yy, yyyy, quarter SQL_TSI_QUARTER, quarter, qq, q Month SQL_TSI_MONTH, month, mm, m dayofyear DAYOFYEAR, dy, y Day SQL_TSI_DAY, day, dd, d Week SQL_TSI_WEEK, week, wk, ww Hour SQL_TSI_HOUR, hour, hh minute SQL_TSI_MINUTE, minute, mi, n second SQL_TSI_SECOND, second, ss, s The current implementation does not support dayofyear, millisecond and factional second specifications. For example: SELECT DATEDIFF(year, hiredate, curdate()) FROM emp WHERE hiredate = '2000-10-01'; SELECT DATEDIFF(SQL_TSI_YEAR, hiredate, curdate()) FROM emp WHERE hiredate = '2000-10-01'; This returns 2 (assuming that the curdate() returns year 2002). |
|
DAYNAME(date_exp) |
Returns a character string containing the data source-specific name of the day (for example, Sunday through Saturday or Sun. through Sat. for a data source that uses English, or Sonntag through Samstag for a data source that uses German) for the day portion of date_exp. For example: SELECT DAYNAME('2002-01-01'), DAYNAME('2002-01-02') FROM emp; This returns 'Tuesday' and 'Wednesday'. |
|
DAYOFMONTH(date_exp) |
Returns the day of the month based on the month field in date_exp as an integer value in the range of 1-31. For example: SELECT DAYOFMONTH('2002-01-05') FROM emp; This returns 5. |
|
DAYOFWEEK(date_exp) |
Returns the day of the week based on the week field in date_exp as an integer value in the range of 1-7, where 1 represents Sunday. For example: SELECT DAYOFWEEK('2002-01-05') FROM emp; This returns 7. |
|
DAYOFYEAR(date_exp) |
Returns the day of the year based on the year field in date_exp as an integer value in the range of 1-366. For example: SELECT DAYOFYEAR('2002-01-05') FROM emp; This returns 5. |
|
HOUR(time_exp) |
Returns the hour based on the hour field in time_exp as an integer value in the range of 0-23. For example: SELECT HOUR('22:20:20') FROM emp; This returns 22. |
|
MINUTE(time_exp) |
Returns the minute based on the minute field in time_exp as an integer value in the range of 0-59. For example: SELECT MINUTE('22:21:20') FROM emp; This returns 21. |
|
MONTH(date_exp) |
Returns the month based on the month field in date_exp as an integer value in the range of 1-12. For example: SELECT MONTH('2002-01-05') FROM emp; This returns 1. |
|
MONTHNAME(date_exp) |
Returns a character string containing the data source-specific name of the month (for example, January through December or Jan. through Dec. for a data source that uses English, or January through Dezember for a data source that uses German) for the month portion of date_exp. For example: SELECT MONTHNAME('2002-01-05') FROM emp; This returns January. |
|
NOW( ) |
Returns current date and time as a timestamp value. For example: SELECT NOW() FROM emp; This returns the current date and time: 2002-10-25 10:20:05. |
|
QUARTER(date_exp) |
Returns the quarter in date_exp as an integer value in the range of 1-4, where 1 represents January 1 through March 31. For example: SELECT QUARTER('2002-01-05') FROM emp; This returns 1. |
|
SECOND(time_exp) |
Returns the second based on the second field in time_exp as an integer value in the range of 0-59. For example: SELECT SECOND('22:21:20') FROM emp; This returns 20. |
|
WEEK(date_exp) |
Returns the week of the year based on the week field in date_exp as an integer value in the range of 1-53. For example: SELECT WEEK('2002-01-05') FROM emp; This returns 1. |
|
YEAR(date_exp) |
Returns the year based on the year field in date_exp as an integer value. For example: SELECT YEAR('2002-01-01') FROM emp; This returns 2002. |
Table 14-6 System Functions
| Function | Description |
|---|---|
|
DATABASE( ) |
Returns the name of the database corresponding to the connection handle. (The name of the database is also available by calling SQLGetConnectOption with the SQL_CURRENT_QUALIFIER connection option.) |
|
USER( ) |
Returns the user name in the DBMS. (The user name is also available using SQLGetInfo by specifying the information type: SQL_USER_NAME.) This can be different than the login name. |
Aggregate functions return a single row based on groups of rows, rather than on single rows.
Table 14-7 Aggregate Functions
| Function | Description |
|---|---|
|
AVG([ALL | DISTINCT] expression) |
Returns the average of the values in a group. Null values are ignored. |
|
SUM([ALL | DISTINCT] expression) |
Returns the sum of all the values, or only the DISTINCT values, in the expression. SUM can be used with numeric columns only. Null values are ignored. |
|
COUNT({[ALL | DISTINCT] expression] | *}) |
Returns the number of items in a group. COUNT(*) returns the number of items in a group, including NULL values and duplicates. COUNT(ALL expression) evaluates expression for each row in a group and returns the number of non-null values. COUNT(DISTINCT expression) evaluates expression for each row in a group and returns the number of unique, non-null values. |
|
MAX([ALL | DISTINCT] expression) |
Returns the maximum value in the expression. |
|
MIN([ALL | DISTINCT] expression) |
Returns the minimum value in the expression. |
Aggregate functions can appear in SELECT lists and HAVING clauses. If you use the GROUP BY clause in a SELECT statement, OpenAccess SDK divides the rows of a queried table or view into groups. In a query containing a GROUP BY clause, all elements of the SELECT list must be expressions from the GROUP BY clause, expressions containing aggregate functions, or constants. OpenAccess SDK applies the aggregate functions in the SELECT list to each group of rows and returns a single result row for each group.
If you omit the GROUP BY clause, OpenAccess SDK applies aggregate functions in the SELECT list to all the rows in the queried table or view.
Many aggregate functions accept these options:
DISTINCT causes an aggregate function to consider only distinct values of the argument expression.
ALL causes an aggregate function to consider all values, including all duplicates.
For example:
SELECT max(sal), MIN(sal), AVG(sal) FROM emp;
SELECT deptno, MAX(sal), SUM(sal) FROM emp GROUP BY deptno;
SELECT deptno, COUNT(empno) FROM emp GROUP BY deptno;
DECODE
Syntax
DECODE (expr, [search, result]..., default)
Example
SELECT DECODE (deptno,10, 'ACCOUNTING',
               20, 'RESEARCH',
               30, 'SALES',
               40, 'OPERATION',
                    'NONE')
      FROM dept
To evaluate this expression, the OpenAccess SDK SQL engine compares expr to each search value one by one. If expr is equal to a search, the OpenAccess SDK SQL engine returns the corresponding result. If no match is found, the OpenAccess SDK SQL engine returns default, or if default is omitted, returns null. The return value is the same data type as the first result expression. The search, result, and default values can be derived from expressions.
The OpenAccess SDK SQL engine evaluates each search value only before comparing it to expr, rather than evaluating all search values before comparing any of them with expr. Consequently, OpenAccess SDK SQL engine never evaluates a search if a previous search is equal to expr.
The OpenAccess SDK SQL engine automatically converts expr and each search value to the datatype of the first search value before comparing. The OpenAccess SDK SQL engine automatically converts the return value to the same datatype as the first result. If the first result has the datatype CHAR or if the first result is null, then the OpenAccess SDK SQL engine converts the return value to the datatype of CHAR.
In a DECODE expression, the OpenAccess SDK SQL engine considers two nulls to be equivalent.
If expr is null, the OpenAccess SDK SQL engine returns the result of the first search that is also null. The maximum number of components in the DECODE expression, including expr, searches, results, and default is 255.
Examples:
SELECT DECODE(empno, 1, 'E1', 2, 'E2', 'DEFAULT') FROM emp;

# First Result expression is NULL. Result should be type
XO_TYPE_CHAR
SELECT DECODE(empno, 1, NULL, 2, 'E2', 'DEFAULT') FROM emp;

# Input expression is NULL, Result should match the result
of NULL search expr
SELECT DECODE(ename, 'Bob', 'My Bob', 'Mary', 'My Mary',
NULL, 'New Name', 'Default Name') FROM emp;

# no default value, so return NULL for non-match values
SELECT DECODE(empno, 1, 'E1', 2, 'E2') FROM emp;

# ERROR CHECKING
# Invalid number of arguments
# Invalid syntax used with scalar function:DECODE. Function
expects 3 arguments.
SELECT DECODE() FROM emp;
SELECT DECODE(empno, 1) FROM emp;

# Conversion errors
# decode() Error converting value of result expression to
XoType:<4>

SELECT DECODE(empno, 1, 10, 2, 20, 'abc') FROM emp;
IFNULL, ISNULL, NVL
These functions allow the NULL value to be replaced by a default value. OpenAccess SDK supports IFNULL as defined by ODBC, ISNULL as defined by SQL Server, and NVL as defined by Oracle.
Syntax
IFNULL (expr, default_val)
ISNULL (expr, default_val)
NVL (expr, default_val)
The OpenAccess SDK SQL engine evaluates the input expression and returns the expression value if it is non-NULL. If the expression value is NULL, default_val is returned. The return value is of the same data type as the input expression.
Example
SELECT ename, IFNULL (sal, 1000) FROM emp;
SELECT ename, ISNULL (sal, 1000) FROM emp;
SELECT ename, NVL (sal, 1000) FROM emp;

SELECT ename, IFNULL (hiredate, '2001-01-01') FROM emp;
CAST
Syntax
CAST (value_exp AS data_type)
Example
SELECT empno, CAST(empno AS VARCHAR) FROM emp
SELECT empno, CAST(empno AS SMALLINT) FROM emp
The function returns the value specified by value_exp converted to the specified data_type, where data_type is one of the following:
CHAR
NUMERIC
DECIMAL
INTEGER
SMALLINT
FLOAT
REAL
DOUBLE
DATE
TIME
TIMESTAMP
VARCHAR
LONGVARCHAR
BINARY
VARBINARY
LONGVARBINARY
TINYINT
BIT
WCHAR,
WVARCHAR
WLONGVARCHAR
Table 14-8 defines the precision, length, and scale keywords of the CAST function.
Table 14-8 CAST Function
| Keyword | Value |
|---|---|
|
CHAR |
255 |
|
BINARY |
255 |
|
BIT |
1 |
|
DATE |
6 |
|
DOUBLE |
8 |
|
FLOAT |
8 |
|
INTEGER |
4 |
|
LONGVARBINARY |
1000000 |
|
LONGVARCHAR |
1000000 |
|
NUMERIC |
34 |
|
SMALLINT |
2 |
|
REAL |
4 |
|
TIME |
6 |
|
TIMESTAMP |
16 |
|
TINYINT |
1 |
|
VARBINARY |
1024 |
|
VARCHAR |
1024 |
|
WLONGVARCHAR |
2000000 |
|
WVARCHAR |
512 |
|
WVARCHAR |
2048 |
|
CHAR, BINARY |
255 |
|
DATE |
10 |
|
DOUBLE |
15 |
|
FLOAT |
15 |
|
INTEGER |
10 |
|
LONGVARBINARY |
1000000 |
|
LONGVARCHAR |
1000000 |
|
NUMERIC |
32 |
|
REAL |
7 |
|
SMALLINT |
5 |
|
TIME |
6 |
|
TINYINT |
3 |
|
VARBINARY |
1024 |
|
VARCHAR |
1024 |
|
WCHAR |
255 |
|
WVARCHAR |
1024 |
|
WLONGVARCHAR |
1000000 |
|
NUMERIC |
5 |
|
All other types |
0 |
CONVERT
Syntax
CONVERT (value_exp, data_type)
Example
SELECT empno, CONVERT(empno, SQL_VARCHAR) FROM emp
SELECT empno, CONVERT(empno, SQL_SMALLINT) FROM emp
The function returns the value specified by value_exp converted to the specified data_type, where data_type is one of the following:
SQL_CHAR
SQL_NUMERIC
SQL_DECIMAL
SQL_INTEGER
SQL_SMALLINT
SQL_FLOAT
SQL_REAL
SQL_DOUBLE
SQL_DATE
SQL_TIME
SQL_TIMESTAMP
SQL_VARCHAR
SQL_LONGVARCHAR
SQL_BINARY
SQL_VARBINARY
SQL_LONGVARBINARY
SQL_TINYINT
SQL_BIT
SQL_WCHAR
SQL_WVARCHAR
SQL_WLONGVARCHAR
Table 14-9, Table 14-10, and Table 14-11 define the length, precision, and scale keywords of the CONVERT function.
Table 14-9 CONVERT Function-Length
| Keyword | Length |
|---|---|
|
SQL_CHAR |
256 |
|
SQL_BINARY |
256 |
|
SQL_BIT |
1 |
|
SQL_DATE |
6 |
|
SQL_DOUBLE |
8 |
|
SQL_FLOAT |
8 |
|
SQL_INTEGER |
4 |
|
SQL_LONGVARBINARY |
1000000 |
|
SQL_LONGVARCHAR |
1000000 |
|
SQL_NUMERIC |
34 |
|
SQL_SMALLINT |
2 |
|
SQL_REAL |
4 |
|
SQL_TIME |
6 |
|
TIMESTAMP |
16 |
|
TINYINT |
1 |
|
VARBINARY |
1024 |
|
VARCHAR |
1024 |
|
WLONGVARCHAR |
2000000 |
|
WVARCHAR |
512 |
|
WVARCHAR |
2048 |
Table 14-10 CONVERT Function-Precision
| Keyword | Precision |
|---|---|
|
SQL_BINARY |
255 |
|
SQL_BIT |
1 |
|
SQL_CHAR |
255 |
|
SQL_DATE |
10 |
|
SQL_DOUBLE |
15 |
|
SQL_FLOAT |
15 |
|
SQL_INTEGER |
10 |
|
SQL_LONGVARBINARY |
1000000 |
|
SQL_LONGVARCHAR |
1000000 |
|
SQL_NUMERIC |
32 |
|
SQL_REAL |
7 |
|
SQL_SMALLINT |
5 |
|
SQL_TIME |
8 |
|
SQL_TINYINT |
3 |
|
SQL_VARBINARY |
1024 |
|
SQL_VARCHAR |
1024 |
|
SQL_WCHAR |
255 |
|
SQL_WVARCHAR |
2048 |
|
SQL_WLONGVARCHAR |
1000000 |
The SQL engine of the RPAS ODBC Server implements a large portion of the entry level SQL as defined in the X3.135-1992, "Database Language SQL" specification and commercial databases like SQL Server and Oracle. It is compliant with the ODBC minimal grammar specification.
This section describes the unsupported features.
NOT IN should return FALSE if any member of the set is NULL. When evaluating the IN condition, the OpenAccess SDK SQL engine treats the comparison of any value with NULL as FALSE, so NOT IN will become TRUE.
SELECT * FROM emp WHERE job NOT IN
(SELECT job FROM emp WHERE job IS NULL)
This example should return no results if there is an emp record with a NULL value for Job.
The SQL engine of the RPAS ODBC Driver does not support the following:
Collate sequence and character set
DEFAULT clause for column values
Subqueries are not supported in a SELECT list.
Example:
SELECT
(SELECT a.empno FROM emp a WHERE a.deptno = b.deptno)
FROM
dept b
Special Values: The SQL engine does not support the use of special values (CURRENT_USER, SESSION_USER, CURRENT_TIMESTAMP) in value specification.
The SDK SQL engine does not support the following functions:
TRANSLATE
TRIM
|
Note: The OpenAccess SDK SQL engine supports LTRIM and RTRIM.) |
DIFFERENCE
SOUNDEX
The OpenAccess SDK SQL engine does not support the following Date and Time functions:
CURRENT_TIME[(time-precision)] - The SQL engine does not support time-precision argument.
CURRENT_TIMESTAMP[(time-precision)]
EXTRACT(extract-field FROMextract-source)
NULLIF
NULLIF is shorthand for a frequently used variation of CASE.
Syntax
NULLIF(value1, target_value)
is equivalent to
CASE
    WHEN value1 = = target_value THEN NULL
ELSE value1
END
Example:
.. WHERE sales_revenue / NULLIF(our_cost, -1) > 50
COALESCE
Coalesce is shorthand for a frequently used variation of CASE.
Syntax:
COALESCE (value1, value2, value3)
is equivalent to:
CASE
WHEN value1 IS NOT NULL THEN value1
WHEN value2 IS NOT NULL THEN value2
ELSE value3
END
Example:
SELECT name, job_title, COALESCE (salary, commission,
subsistence)
FROM job_assignments
A row value constructor is a parenthesized list of values.
Example:
The following expression:
WHERE c1=CA AND c2=CB AND c3=CC
can be written using row value constructor as:
WHERE (c1, c2, c3) = (CA, CB, CC)
The SQL engine does not support the following predicates.
OVERLAPS predicate: Determines whether two intervals of time overlap with one another.event-information OVERLAPS event-information
MATCH predicate
This section explains which Join operations are supported by the RPAS SQL engine, and which are not.
Supported Join Operators
The OpenAccess SDK SQL engine supports the following join operations:
Implicit JOIN. The WHERE clause explicitly specifies the join condition.
INNER JOIN. All joins that are not OUTER JOINS are considered in SQL terminology as INNER joins. The use of keyword INNER has no additional effects, but helps the statement to be completely self-documenting.
SELECT * FROM t1 INNER JOIN t2 ON t1.c1 = t2.c3 WHERE search-LEFT OUTER JOIN - This join preserves unmatched rows from the left table.
SELECT * FROM t1 LEFT OUTER JOIN t2 ON t1.c1 = t2.c3 WHERE search-condition
UNION and UNION ALL operators. UNION is used for combining two result tables that are union compatible.
SELECT c1, c2 FROM t1 UNION SELECT c3, c4 FROM t2
Unsupported Join Operators
The following join operations (syntax) are not supported in this release:
CROSS JOIN: Functionally similar to the implicit joins.
SELECT * FROM t1 CROSS JOIN t2
NATURAL JOIN: Also referred to as natural, equi-join selects rows from the tables that have same value for columns with the same name.
SELECT * FROM t1 NATURAL JOIN t2
Condition JOIN: Uses the keyword ON to specify the JOIN condition between tables. The scope of fields referred in the ON condition is restricted.
SELECT * FROM t1 JOIN t2 ON t1.c1 = t2.c3 WHERE search-condition
Column Name JOIN: Specifies a more restricted form of NATURAL join. NATURAL joins use all columns with the same names to manage the matching process. The column name JOIN specifies which column values should be matched.
SELECT * FROM t1 JOIN t2 USING (c1, c2)
RIGHT OUTER JOIN: Preserves unmatched rows from the right table.
SELECT * FROM t1 RIGHT OUTER JOIN t2 ON t1.c1 = t2.c3 WHERE search-condition
FULL OUTER JOIN: Preserves unmatched rows from both the left and right tables.
SELECT * FROM t1 FULL OUTER JOIN t2 ON t1.c1 = t2.c3 WHERE search-condition
UNION JOIN: Creates a new virtual table with the union of all columns from the source tables. The UNION join has no provision for column matching.