| Oracle® Retail Item Planning User Guide for the RPAS Fusion Client Release 14.1 E55315-01 |
|

 Previous |
 Next |
| Oracle® Retail Item Planning User Guide for the RPAS Fusion Client Release 14.1 E55315-01 |
|
Previous |
Next |
The Maintain Item and Store Attributes task allows you to map history and validate the results of mapping the history of a single item to a new item. This action provides a regular unit sales curve and quantity for reference when seeding and planning regular sales units.
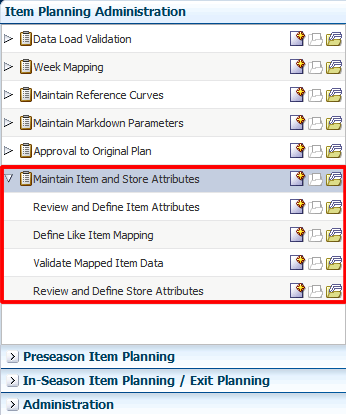
The Maintain Item and Store Attributes task contains four steps:
To build a Maintain Item and Store Attributes workbook:
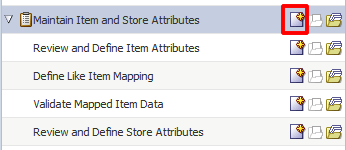
Click the New Workbook icon in the Maintain Item and Store Attributes task.
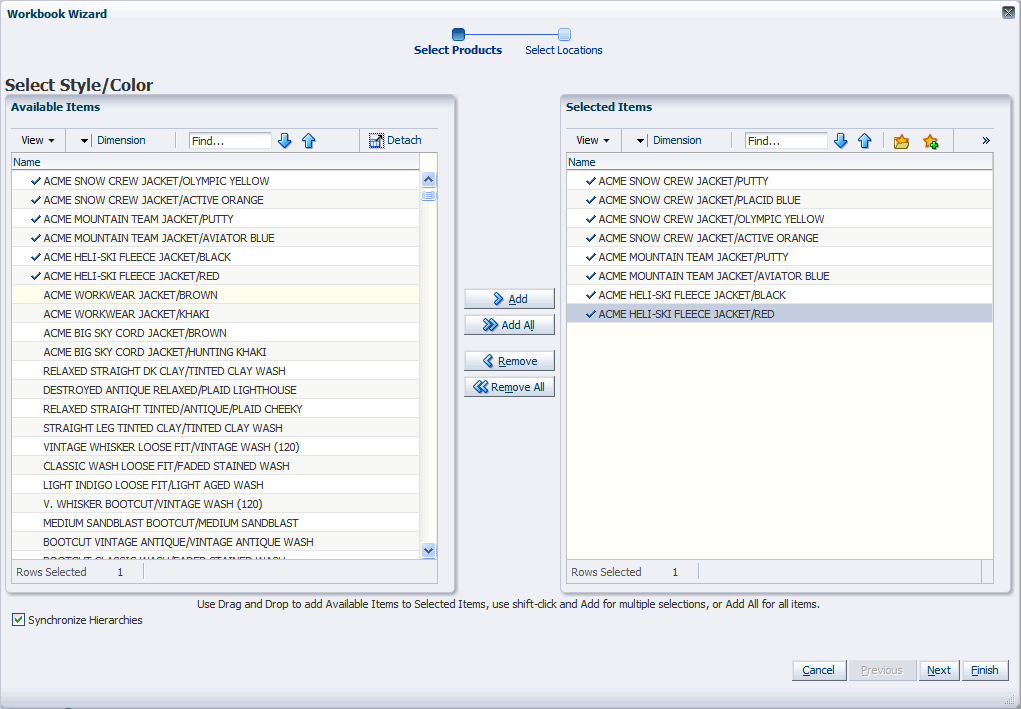
The Item and Store Maintenance wizard appears at the Select Style/Color step. Select the style/colors you want to map and click Next.
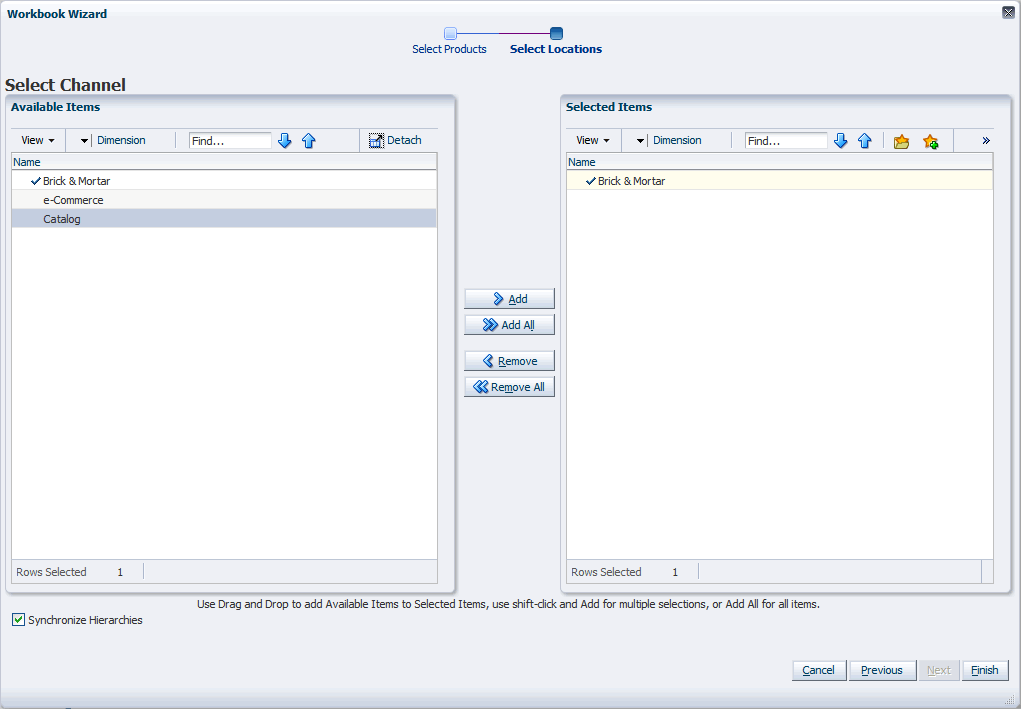
The Select Channel step appears. Select the channels you want to map and click Finish.
The workbook is built.
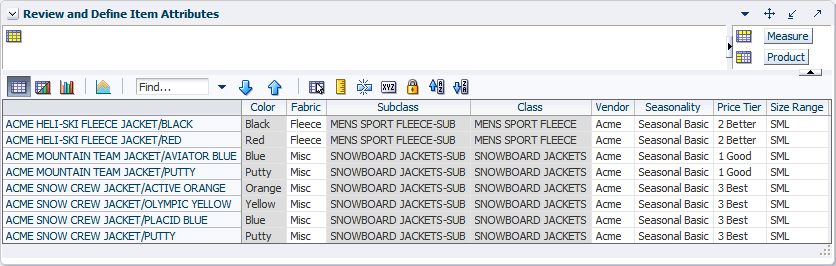
This step contains one view: Review and Define Item Attributes. Use this view to see the item attributes that were created in the Assortment Planning application. If you do not use Assortment Planning, use this view to enter item attributes and create placeholders for new items.
Table 5-1 describes the measures in this view.
Table 5-1 Review and Define Item Attributes View Measures
| Measure | Description |
|---|---|
|
Color |
Display attributes of the item. This is read-only. |
|
Fabric |
Describes the fabric of the item. This is a user-defined string. |
|
Subclass |
Display attributes of the item. This is read-only. |
|
Class |
Display attributes of the item. This is read-only. |
|
Vendor |
Defines the vendor. This is a user-defined string. |
|
Seasonality |
Defines the seasonality of the item. The available options are loaded through the batch process. |
|
Price Tier |
Defines the price tier of the item. The available options are loaded through the batch process. |
|
Size Range |
Defines the kind of size range used for the item. The available options are loaded through the batch process. |
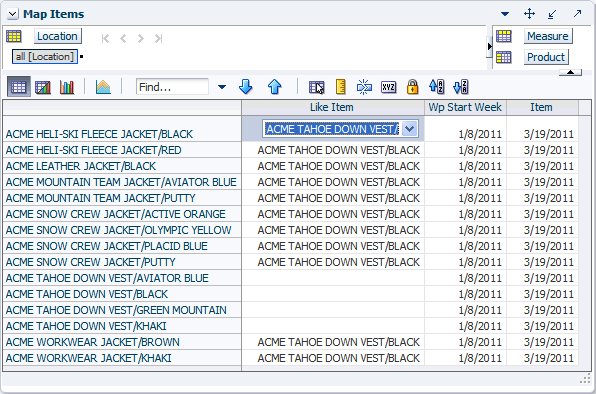
This step contains one view, Map Items. Use this view to map an item to a like item. This item uses the history of the like item. This is useful for new items that do not have sales history and are expected to have similar sales as the like item. After you have mapped the items, specify the start and end weeks for the mapped history. This selected date range is used for seeding the new item's history.
In order to map an item to a like item, you must build the workbook so that it contains both items.
To map items, perform the following steps:
Ensure that all[Location] is visible in the calendar dimension. Like item mapping applies to all channels; therefore, it can only be selected at the all location level.
In the Like Item measure, select the item whose history you want to use for the new item.
In the Wp Start Week measure, select the starting date for the mapped history.
In the Item Mapping End Week measure, select the ending date for the mapped history. Only the data within the date range that you have created is mapped to the new item.
When finished mapping items, select the Map Like Item button in the upper right corner.
Table 5-2 describes the measures in this view.
Table 5-2 Map Items View Measures
| Measure | Description |
|---|---|
|
Like Item |
Use this measure to select an item to use as the source to generate historical values for another item. |
|
Wp Start Week |
The working plan starting week. This is the first week of the like item history that should be assigned to the item. |
|
Item Mapping End Week |
The last week of mapping. This is the last week of the like item history that should be assigned to the item. |
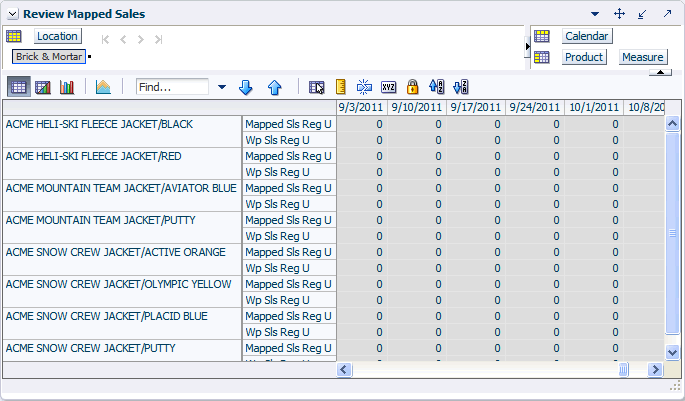
The Validate Mapping step contains a single view called Review Mapped Sales.
Use this view to review the items and item histories that you mapped in the Define Like Item Mapping Step.
Table 5-3 describes the measures in this view.
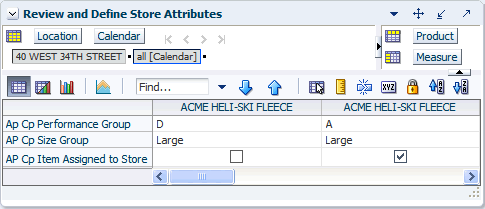
This step contains a single view: Review and Define Store Attributes. Use this view to view the performance groups and size groups that were assigned to the store in the Assortment Planning application.
In Assortment Planning, the assortment planner creates a performance group and a size group for each class and buying period. This is why the calendar and product dimensions are shown in this view instead of just location. Because buying periods are not taken into account for performance groups in Item Planning, item planners typically use the performance group information for all weeks in the buying period. However, because performance groups are created at the class level in Assortment Planning, you can view the stores across classes. This is useful because a store belongs to different clusters for different classes.
Table 5-4 describes the measures in this view.
Table 5-4 Review and Define Store Attributes Measures
| Measure | Description |
|---|---|
|
Ap Cp Performance Group |
The performance group that the store was assigned to in Assortment Planning. Assortment planners assign a performance level or grade to a store to denote how well that store sells a particular class of products. The form of measure used to denote performance is determined by the assortment planner. Typical performance group formats: A, B, C; 1, 2, 3, and so on. |
|
Ap Cp Size Group |
The size group that the store was assigned to in Assortment Planning. Size groups are based on the floor space of the store. The form of measure used to denote the store size is determined by the assortment planner. Typical size group formats: small, medium, large; S, M, L; 1, 2, 3, and so on. |
|
Ap Cp Item Assigned to Store |
Denotes whether the product (class, subclass, style/color) is assigned to the store. |