| Oracle® WebCenter Framework Developer's Guide 10g (10.1.3.2.0) Part Number B31074-05 |
|
|
View PDF |
| Oracle® WebCenter Framework Developer's Guide 10g (10.1.3.2.0) Part Number B31074-05 |
|
|
View PDF |
This chapter contains advice for working on Oracle WebCenter Suite projects using Oracle JDeveloper and CVS, the integrated source control system. Before reading this chapter, you should read the chapter in Oracle Application Development Framework Developer's Guide regarding team development with CVS.
Working with CVS on a WebCenter application is similar to any other development environment with a source control system. However, it is quite different from the in-place editing paradigm used in Oracle Application Server Portal (OracleAS Portal). You should carefully review the Oracle JDeveloper online help system and Oracle Application Development Framework Developer's Guide for more information about CVS.
Getting Started
If you do not already have your application files source controlled in CVS, then you must import them into CVS before you can get started. To import the application files into CVS quickly, do the following:
Open Oracle JDeveloper.
Select View, CVS Navigator to bring up the CVS Navigator.
Select your application in the Applications Navigator and under Versioning, select Import Module. If you already have a CVS connection, then you will be taken directly to the Import to CVS wizard. If you do not already have a CVS connection, then you will be prompted to create one as follows:
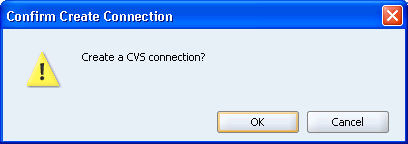
If the Confirm Create Connection dialog box (Figure 11-1) appears, then click OK.
Figure 11-1 Confirm Create Connection Dialog Box
If you are on the Welcome page of the wizard, then click Next to display the Connection page.
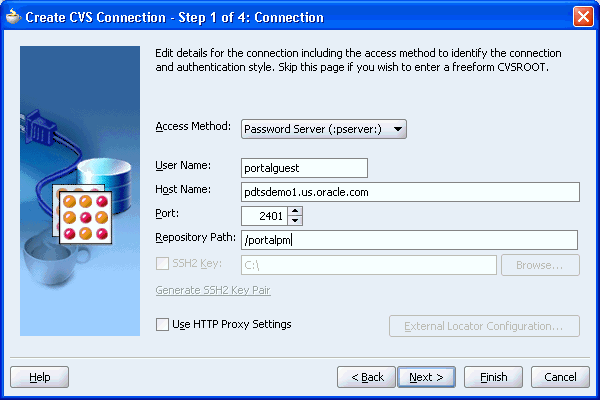
On the Connection page (Figure 11-2), enter your connection information for CVS.
Figure 11-2 Connection Page of Create CVS Connection Wizard
Click Next.
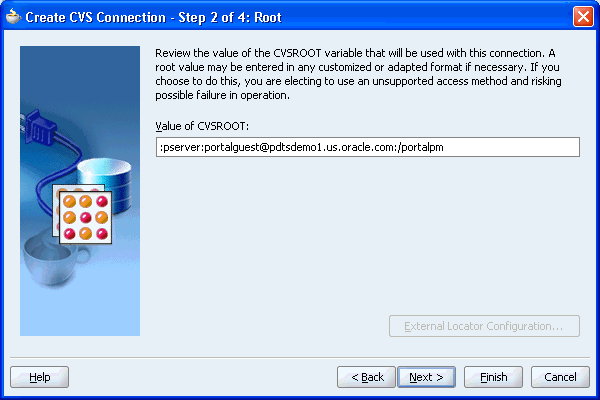
On the Root page (Figure 11-3), enter the Value of CVSROOT.
Figure 11-3 Root Page of Create CVS Connection Wizard
Click Next.
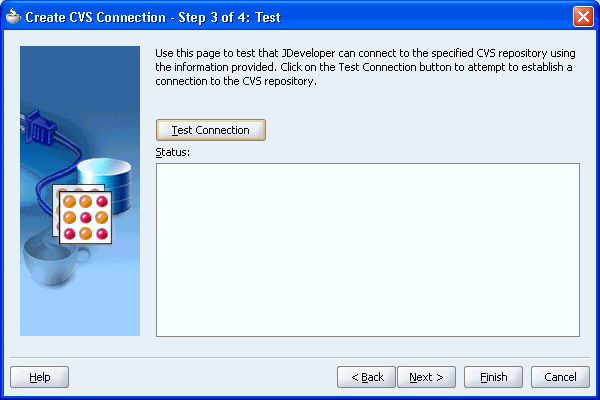
On the Test page (Figure 11-4), click Test Connection. The Log In to CVS dialog box is displayed, as shown in Figure 11-5.
Figure 11-4 Test Page of Create CVS Connection Wizard
Enter your password and click OK.
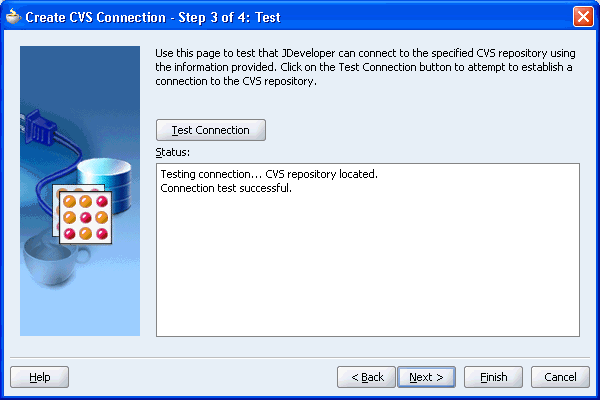
If the test is successful, then you should see something similar to Figure 11-6.
Figure 11-6 Successful Test Page of Create CVS Connection Wizard
Click Next.
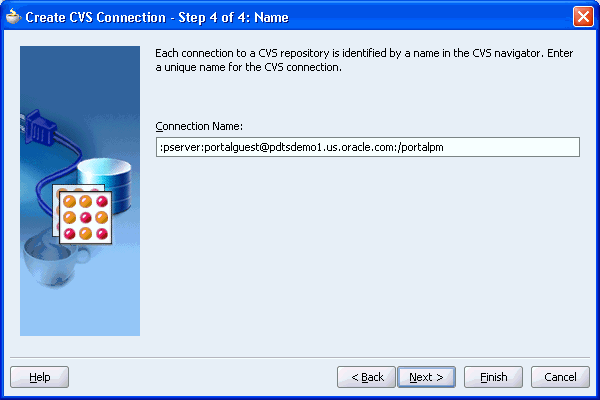
On the Name page, enter a value for Connection Name. The default name is the CVSROOT value, but you can change it to something more descriptive, as shown in Figure 11-7.
Figure 11-7 Name Page of the Create CVS Connection Wizard
Click Finish. The Import to CVS wizard is displayed.
Click Next on the Welcome page of the wizard to display the Module page.
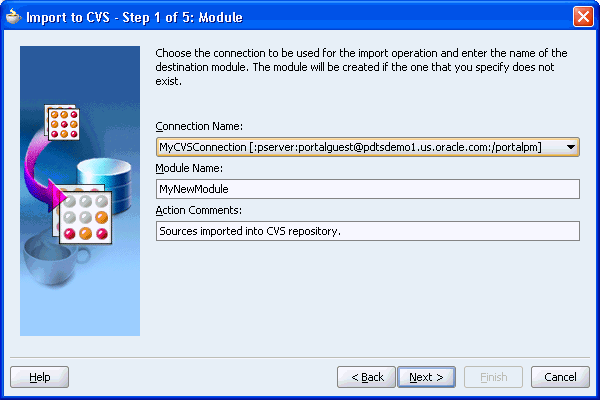
On the Module page, choose Connection Name from the list.
Enter a Module Name for the new module, as shown in Figure 11-8.
Figure 11-8 Module Page of Import to CVS Wizard
Click Next.
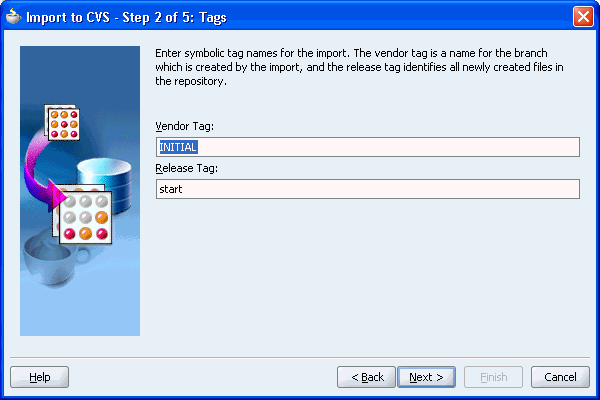
The Tags page specifies the tag names for the creation of the project. Leave the default values unchanged for the purposes of this example, as shown in Figure 11-9.
Figure 11-9 Tags Page of Import to CVS Wizard
Click Next.
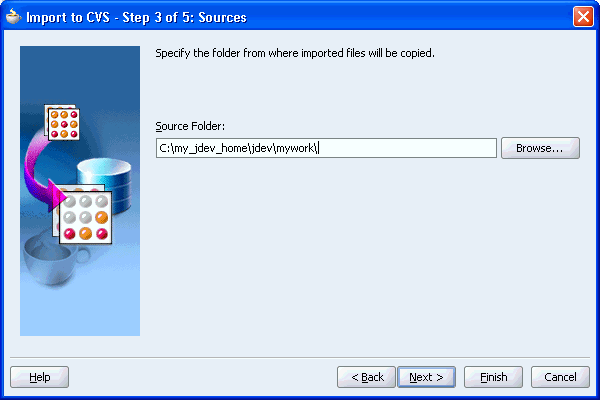
The Sources page specifies the location of the application. Leave the default value unchanged for the purposes of this example, as shown in Figure 11-10.
Figure 11-10 Sources Page of the Import to CVS Wizard
Click Next.
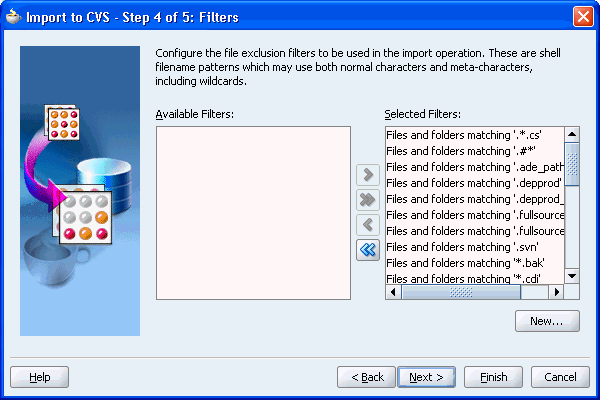
The Filters page specifies filters to exclude files from the import operation. Leave the default filters unchanged for the purposes of this example, as shown in Figure 11-11.
Figure 11-11 Filters Page of Import to CVS Wizard
Click Next.
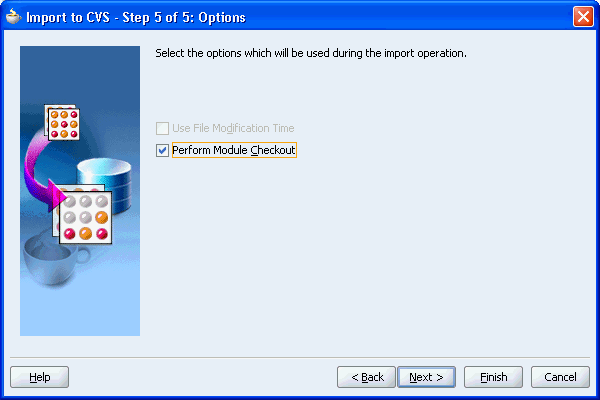
The Options page lets you specify whether you want to immediately check out the newly created module and begin versioning your project. Leave the default choice unchanged for the purposes of this example, as shown in Figure 11-12.
Figure 11-12 Options Page of Import to CVS Wizard
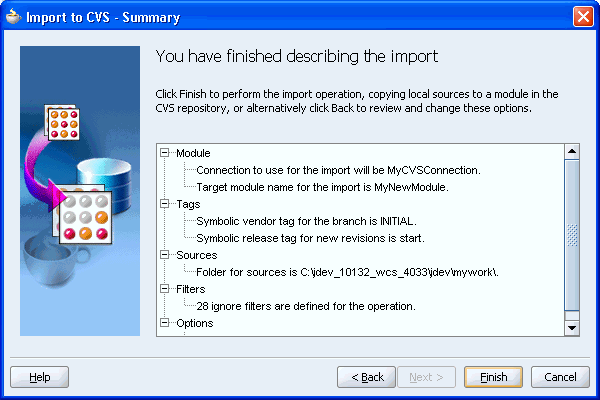
Click Next. A summary of your chosen settings for this import operation is displayed for your review, as shown in Figure 11-13.
Figure 11-13 Summary Page of Import to CVS Wizard
Click Finish to execute the import operation. Other members of the team will now be able to check out the newly created module and commit changes.
One of the most important aspects of working with any source control system is understanding which files particular actions will touch. Without this knowledge, you may inadvertently corrupt the source by checking in or out either too few or too many files given the actions you are performing on the project. The tips in this section aim to help you understand what files are needed for the main actions you will perform in building a WebCenter application.
The main objects with which you work in a WebCenter application are as follows:
Pages
Portlets
Producers
Data controls
Each of these are fairly complex objects, made up of several different metadata files. For information about page metadata files, see Oracle Application Development Framework Developer's Guide. For information about portlet and producer metadata files, see Appendix C, "Files for WebCenter Applications".
Table 11-1 lists the major developer actions and the files that are affected by these actions. You must take this information into account while managing your files in CVS.
Table 11-1 Files Affected by Developer Actions
| Action | Files Affected |
|---|---|
|
Registering a producer |
|
|
De-registering a producer |
The producer is gone from the application, but you may need to manually remove the metadata files from CVS. Everything else should be left alone in case they have other producers which rely on the |
|
Placing a portlet on a page |
|
|
Removing a portlet from a page |
Same files as placing a portlet on a page. |
It is good practice for the administrator of the project to implement any common developer requirements once and then checkin that version for all to use. By planning ahead and having the administrator take care of these common requirements up front, you can reduce redundancy and error.
For example, suppose two developers need to add Omniportlet on different pages of the application. If the project administrator has already registered the Omniportlet producer, then it is readily available for both of them to use. If not, then each developer will likely register the Omniportlet producer separately, leading to unnecessary duplication and confusion.
Another example would be the case of many developers needing content from the same Oracle Content Database repository. One person should setup and checkin the needed connection first. Other developers can then simply reuse the same data control
When working in a team environment, bear in mind the following considerations pertaining to producers:
When building an EAR file for your project, connections are loaded for the entire application rather than individual projects. For example, suppose you have an application with two projects, P1 and P2. P1 has 100 registered producers and P2 has no producers. When you build an EAR file for either project, all 100 of P1's producer connections are loaded into connections.xml. Note, though, that you can also edit connections.xml manually.
When you run the Predeployment tool to create a targeted EAR file, all of the connections in connections.xml must be accessible. Hence, in our example, the generation of a targeted EAR file for either project would fail if any of the 100 producer connections for P1 are unavailable for some reason. Given this behavior, you must carefully consider how you plan to subdivide your overall development effort into applications and projects.
While Oracle WebCenter Framework enables you to register two producers under the same name, it is generally better to avoid this situation. For example, if two developers working on the same application inadvertently register a producer with the same name, then it is usually best to change one of the producer's names to be unique. If you have two producers registered under the same name, then it becomes very difficult to distinguish between them when debugging errors or performing administrative tasks on the producers.
In some cases, you might have multiple developers building portlets and ultimately you want those portlets to be combined under a single producer. To achieve this goal, your developers must be conscious of some potential issues.
Portlet names and JSP paths could clash. Portlet developers should use prearranged class package names and JSP paths to avoid naming clashes when portlets are combined within one producer in one application.
When you create a JPS portlet in the Portlet Wizard, the directory for the portlet modes defaults to portletn\html\mode_name, where n is a number that increments for each portlet you create. To avoid directory and file name clashes, portlet developers should change the directory name on the Content Type and Portlet Modes page of the Portlet Wizard. Select the portlet mode and then change the directory name in the corresponding field to something unique.
When you combine the portlets into one producer, you must manually merge the portlet descriptor files, avoiding identifier clashes as you do so as follows:
JPS portlet identifiers in the portlet.xml and oracle-portlet.xml files are automatically generated starting from portlet1. When you manually merge multiple portlet descriptor files into one, you must change any portlet identifiers that clash with one another.
Similarly, the PDK-Java portlet identifiers in provider.xml are automatically generated starting from 1. When you manually merge multiple provider.xml files, you must change any portlet identifiers that clash with one another.
You must also manually merge any Web descriptor (web.xml) changes, for example, security role information.
For PDK-Java portlets, you might also need to manually merge .properties files.
Each time a developer updates the policy for a page or component (for example, an iterator or data control) using the Authorization Editor, the system-jazn-data.xml file in Oracle JDeveloper's embedded Oracle Containers for J2EE (OC4J) config directory (JDEV_HOME\system\oracle.j2ee.10.1.3.xx.xx\embedded-oc4j\config) is updated. At the same time, these changes are also propagated to the app-jazn-data.xml file, to enable the policies to be deployed with the application. As a result of this model, you should adhere to the following guidelines:
Policies are global, based on the secured object's name. Hence, development teams must use a global naming convention to ensure unique naming for objects in their components. If the object defined in a grant already exists, then the policies for that object are merged, which can lead to unexpected results.
If you made any manual changes to the system-jazn-data.xml file (such as using regular expressions or wildcards), then you must manually replicate these updates in the app-jazn-data.xml file prior to checking it into CVS. For more information about app-jazn-data.xml, see Section C.6.1, "app-jazn-data.xml".
To ensure that the system-jazn-data.xml file is always accurate and up-to-date, Oracle recommends that each developer runs the JAZN Migration tool with app-jazn-data.xml from CVS as the source and the system-jazn-data.xml file in JDEV_HOME\system\oracle.j2ee.10.1.3.xx.xx\embedded-oc4j\config as the destination.
To ensure that the system-jazn-data.xml files are always accurate and up-to-date, Oracle recommends that each developer perform the following steps whenever they take the latest application files from CVS.
Note:
Because theapp-jazn-data.xml does not appear in the Applications Navigator, it is often difficult to determine when it has changed. Hence, the safest guideline is to merge it into system-jazn-data.xml every time you bring down the latest files from CVS.As developers need to perform this procedure fairly frequently, it makes sense to develop a simple batch script that takes care of it. Example 11-1 shows a sample of such a batch script. Note that you must modify xx.xx in the EMBED_SYS_JAZN path for your environment.
Example 11-1 Sample MS Windows Batch Script for Updating system-jazn-data.xml File
@ECHO OFF
CLS
ECHO ================== Merging Policies ====================

SET JDEV_HOME=C:\jdev
SET APP_JAZN=%JDEV_HOME%\jdev\mywork\Application1\.adf\META-INF\app-jazn-data.xml
SET EMBED_SYS_JAZN=%JDEV_HOME%\jdev\system\oracle.j2ee.10.1.3.xx.xx\embedded-oc4j\
  config\system-jazn-data.xml
SET CLASSPATH=%JDEV_HOME%\j2ee\home\jazn.jar;%JDEV_HOME%\BC4J\lib\adfshare.jar

ECHO Java Home   : %JDEV_HOME%
ECHO Source File : %APP_JAZN%
ECHO Dest File   : %EMBED_SYS_JAZN%

ECHO .
ECHO Updating Oracle JDeveloper's embedded OC4J system-jazn-data.xml
java oracle.security.jazn.tools.JAZNMigrationTool -sr jazn.com -dr jazn.com
  -st xml -dt xml -sf %APP_JAZN% -df %EMBED_SYS_JAZN% -m all

ECHO =========================================================
Example 11-2 shows the output that you get when you run the batch script from Example 11-1.
Example 11-2 Sample Output from Batch Script
================== Merging Policies ====================
Java Home   : C:\JDev
Source File : C:\JDev\jdev\mywork\Application1\.adf\META-INF\app-jazn-data.xml
Dest File   : C:\JDev\jdev\system\oracle.j2ee.10.1.3.40.40\embedded-oc4j\config\
system-jazn-data.xml
.
Updating Oracle JDeveloper's embedded OC4J system-jazn-data.xml
=========================================================