13 Managing Oracle User Messaging Service
This chapter describes how to manage Oracle User Messaging Service.
This chapter includes the following topic:
13.1 Deploying Drivers
When you install Oracle UMS, pre-installed drivers are included (Email, XMPP, SMPP, and VoiceXML). Of these, only the Email driver is deployed to the WebLogic Server. To deploy the others, target that driver to the WebLogic Server (using WebLogic Administration Console, or you can target the drivers when creating or extending the domain using the Oracle Fusion Middleware Configuration Wizard).
The Worklist driver must be deployed to a SOA Server if you want to make use of the UMS integration with Worklist. Because this integration involves multiple JEE applications and a SOA composite, there is a special extension template you must use to enable this feature in one step. See Install the Worklist Driver for more information.
You can deploy additional drivers in a variety of ways using: WebLogic Server Administration Console, Oracle Enterprise Manager, WLST commands, and through the Oracle Fusion Middleware Configuration Wizard.
Note:
To deploy two or more driver instances of a particular driver EAR, you must use the custom deployment plan templates available at$ORACLE_HOME/communications/plans. See Using Oracle Enterprise Manager to Deploy Drivers for instructions on deploying drivers using Oracle Enterprise Manager.13.1.1 Using WebLogic Server Administration Console
Use WebLogic Server Administration Console to deploy drivers.
-
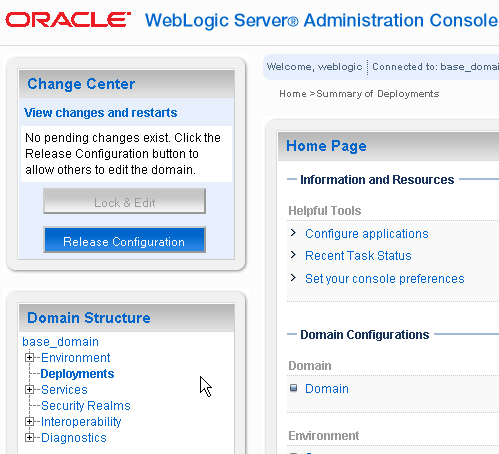
In the Domain Structure region of the console, click Deployments. The Home page for Deployments appears.
-
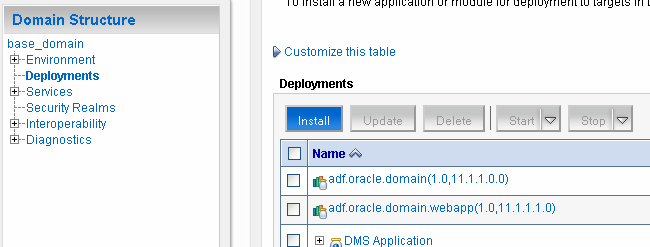
Under Deployments, click Install.
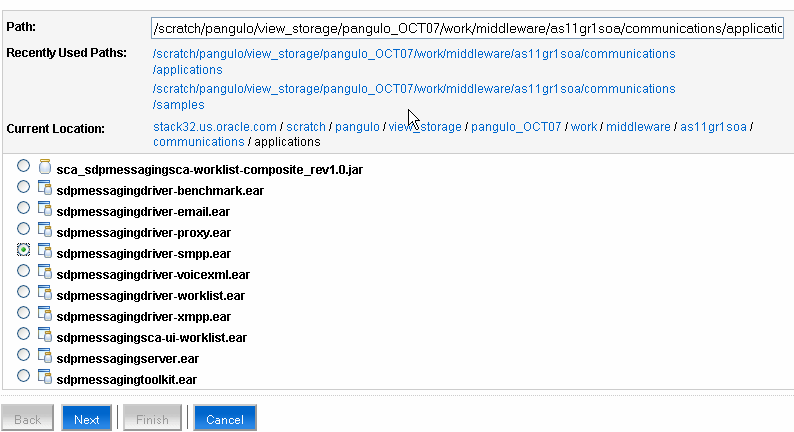
The Install Application Assistant appears. Use this page to locate the application you want to deploy.
-
Enter the path to your file.
Figure 13-3 Install Application Assistant
Description of "Figure 13-3 Install Application Assistant"
-
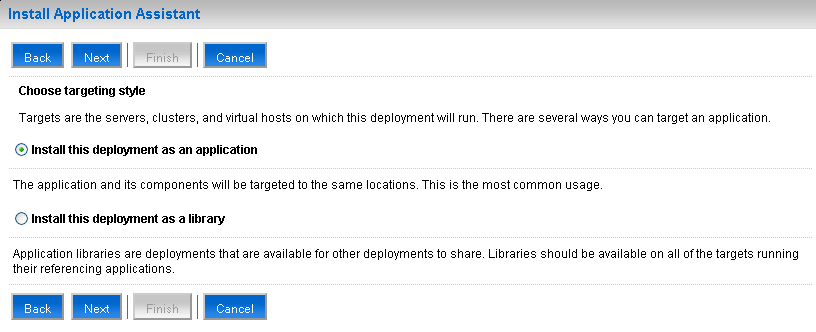
Click Next. You will be asked to choose the targeting style.
-
Use the Default (Install this deployment as an application). A Summary page appears.
-
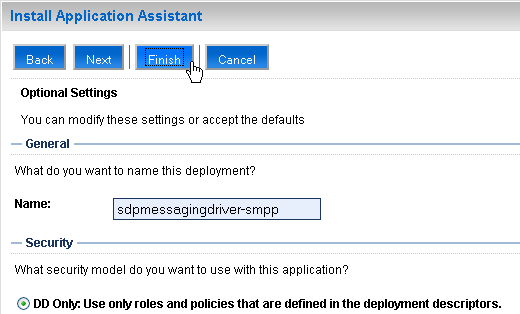
Accept the settings. You can change setting here, but it is recommended that you accept the settings as they are. Click Finish. A Confirmation page appears.
-
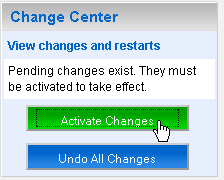
In order for your deployment to be complete, you must activate your changes, so click Activate Changes.
A final confirmation appears.
13.1.2 Using Oracle Enterprise Manager to Deploy Drivers
Follow these steps to deploy drivers using Oracle Enterprise Manager.
-
Retrieve a deployment template (for example:
ORACLE_HOME/communications/plans) -
Copy the plan to a location of your choice (to the same directory or any other directory).
-
Replace DriverDeploymentName with whichever name you want to use (ensure you replace all instances of the name).
Replace DriverShortName with any name you like.
-
Start Oracle Enterprise Manager.
-
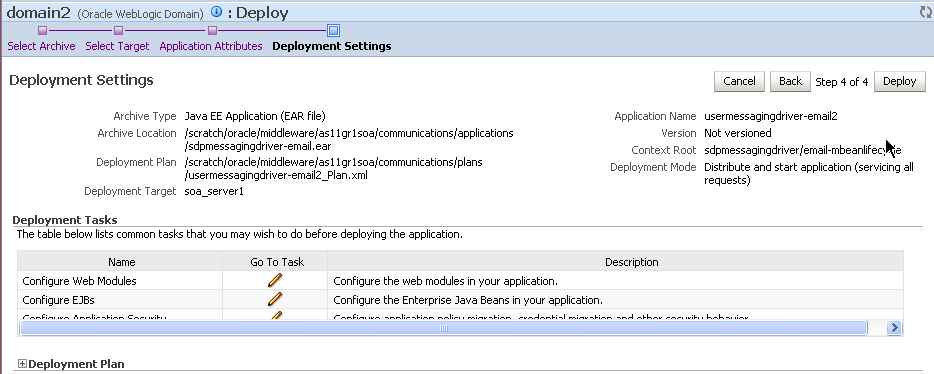
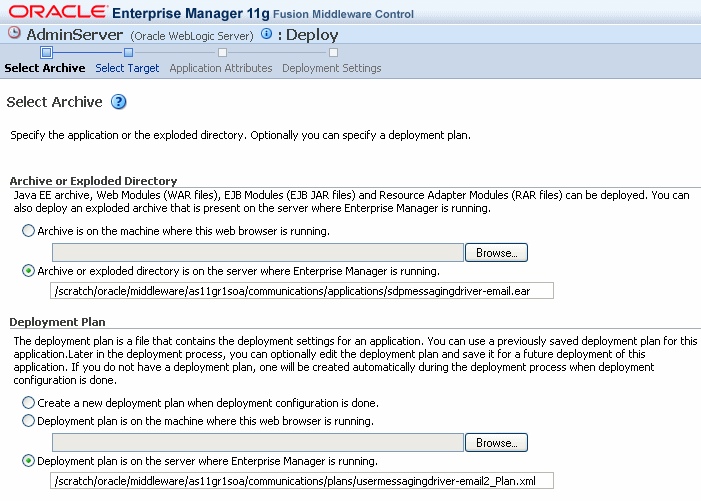
Enter the location of the .ear file (Figure 13-9).
-
Enter the location of the Deployment Plan (Figure 13-9).
Figure 13-9 Deploying UMS Drivers using Oracle Enterprise Manager
Description of "Figure 13-9 Deploying UMS Drivers using Oracle Enterprise Manager"
The Select Target screen appears.
-
Select the SOA target.
-
Enter an application name in the Application Attributes screen. The application name must exactly match the string used for DriverDeploymentName (in Step 3 above) which is provided in the Deployment Plan. If it does not, the deployment and activation will fail. The Deployment Setting screen appears.
-
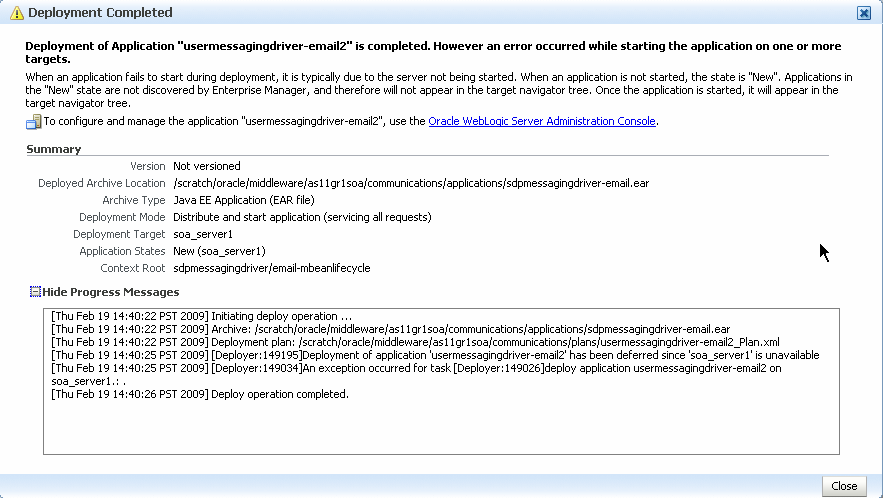
Click Deploy. The Deployment Completed screen appears.
-
To see the result (driver deployed), start the SOA Server.
13.1.3 Using WLST Commands
You can deploy drivers using the WLST command deployUserMessagingDriver.
13.1.3.1 deployUserMessagingDriver
Command Category: UMS
Use with WLST: Online
13.1.3.1.1 Description
deployUserMessagingDriver is used to deploy additional instances of user messaging drivers.Specify a base driver type (for example: email, xmpp, voicexml, and others) and a short name for the new driver deployment. The string usermessagingdriver- will be prepended to the specified application name. Any valid parameters for the deploy command can be specified, and will be passed through when the driver is deployed.
13.1.3.1.2 Syntax
deployUserMessagingDriver(baseDriver, appName, [targets], [stageMode], [options])
| Argument | Definition |
|---|---|
baseDriver |
Specifies the base messaging driver type.
Must be a known driver type, such as 'email', 'proxy', 'smpp', 'voicexml', or 'xmpp'. |
appName |
A short descriptive name for the new deployment. The specified value will be prepended with the string usermessagingdriver- |
targets
|
Optional. Additional arguments that are valid for the deploy command can be specified and will be passed through when the new driver is deployed. |
13.1.3.1.3 Examples
To deploy a second instance of an email driver with name myEmail.
wls:/base_domain/serverConfig> deployUserMessagingDriver(baseDriver='email', appName='myEmail')
To deploy a second instance of an email driver, specifying deployment targets.
wls:/base_domain/serverConfig> deployUserMessagingDriver(baseDriver='email', appName='email2', targets='server1,server2')
13.1.4 Using the Oracle Fusion Middleware Configuration Wizard
To install the SMPP, XMPP and VoiceXML drivers, extend the domain using the extension template available at $ORACLE_HOME/common/templates/applications/oracle.ums.drivers_template_11.1.1.jar.To extend a domain using Oracle Fusion Middleware Configuration Wizard:
-
Launch Oracle Fusion Middleware Configuration Wizard (
$ORACLE_HOME/common/bin/config.sh or %ORACLE_HOME%\common\bin\config.cmd). -
Select the Extend an existing WebLogic domain option.
-
Select the desired domain directory containing UMS.
-
Select the Extend my domain using an existing extension template option.
-
Click Browse, and navigate to
$ORACLE_HOME/common/templates/applications -
Select oracle.ums.drivers_template_11.1.1.jar
-
Complete the remaining steps of the Oracle Fusion Middleware Configuration Wizard, and remember to target the required drivers to the desired WebLogic servers and/or clusters.
-
Restart the appropriate WebLogic servers.
13.2 Undeploying and Unregistering Drivers
Since Messaging Drivers are standard JEE applications, they can be undeployed from the Oracle WebLogic Server using standard Oracle WebLogic tools such as the Admin Console or WLST.
However, since the UMS server keeps track of the messaging drivers that have been registered with it in a persistent store (database), this registration must be cleaned in a separate step using a runtime MBean exposed by the UMS server. The procedure to do this from Oracle Enterprise Manager is as follows:
-
Ensure the UMS server is available.
-
In Oracle Enterprise Manager, select any
usermessagingservertarget in the domain. -
From the target's menu, select System MBean Browser.
-
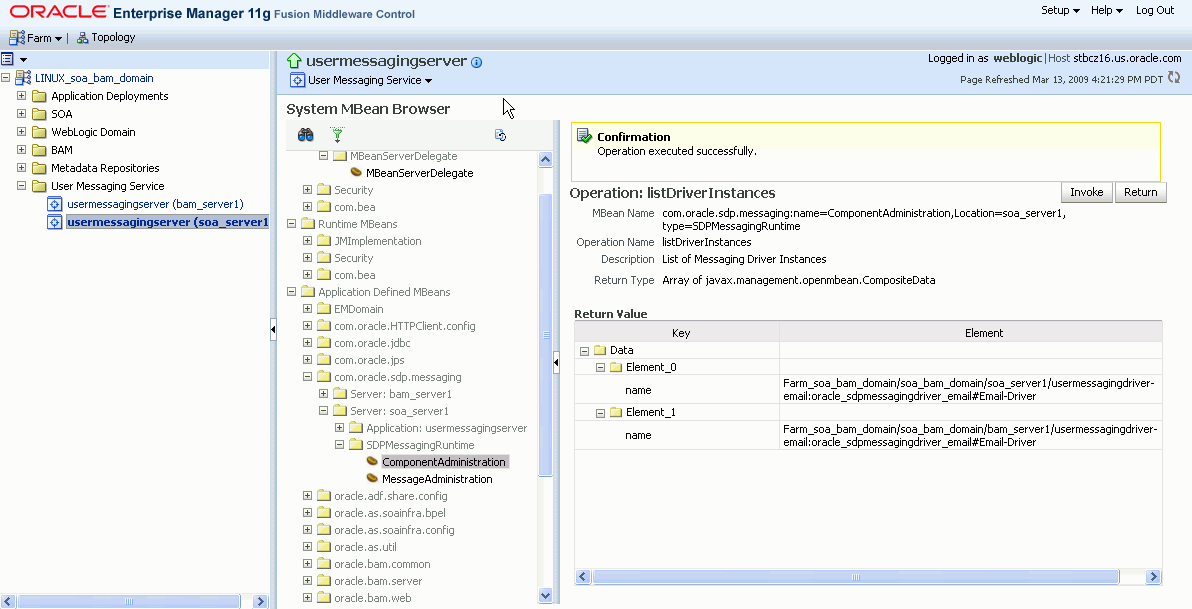
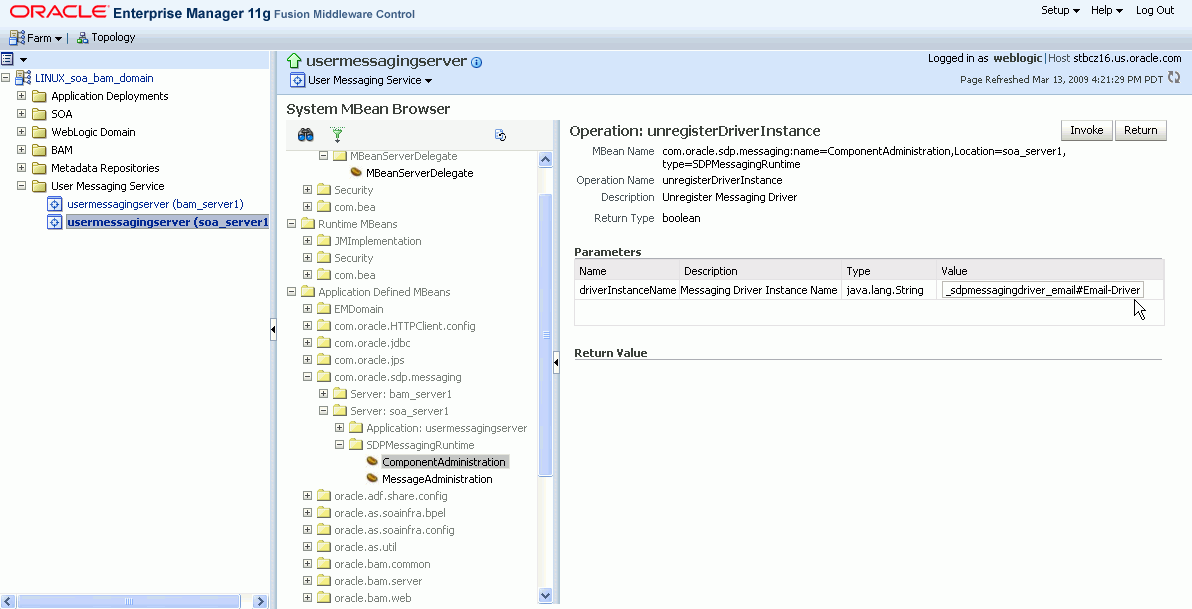
In System MBean Browser, locate the ComponentAdministration MBean of
usermessagingserver:Expand the folder com.oracle.sdp.messaging > Server (such as Server: soa_server1) > SDPMessagingRuntime > ComponentAdministration.
-
Invoke the operation listDriverInstances.
-
Click the Operations tab.
-
Click the operation listDriverInstances.
-
Click Invoke.
-
Identify and copy the name of the driver you want to unregister. (for example:
/Farm_soa_bam_domain/soa_bam_domain/soa_server1/usermessagingdriver-email:oracle_sdpmessagingdriver_email#Email-Driver)
-
-
Click Return.
-
Invoke the operation unregisterDriverInstance with the desired driver name.
-
Click the operation unregisterDriverInstance.
-
Paste the driver name in the Value field (for example:
/Farm_soa_bam_domain/soa_bam_domain/soa_server1/usermessagingdriver-email:oracle_sdpmessagingdriver_email#Email-Driver). -
Click Invoke.
Figure 13-14 Unregistering a Driver Instance
Description of "Figure 13-14 Unregistering a Driver Instance"
-
-
Check the confirmation dialog for success.
This completes the unregistration of the specified driver from the UMS server and it will no longer be used in future message delivery.
