| Oracle® Fusion Middleware Tutorial for Running and Building an Application with Oracle SOA Suite 11g Release 1 (11.1.1) Part Number E10275-02 |
|
|
View PDF |
| Oracle® Fusion Middleware Tutorial for Running and Building an Application with Oracle SOA Suite 11g Release 1 (11.1.1) Part Number E10275-02 |
|
|
View PDF |
This appendix complements Section 6.4, "Creating the Services and Routing Required for the Scope_FulfillOrder Scope." It contains the following tasks:
The DemoSupplierTopic topic defines a publish and subscribe destination type, which is used for asynchronous peer communications.
To create it through the Oracle WebLogic Server Administration Console.
Access the Oracle WebLogic Server Console from the following URL:
http://hostname:port/console
where is the hostname is the DNS name or IP address of the Administration Server for Oracle SOA Suite and port is the DNS name or IP address of the Administration Server and port is the address of the port on which the Administration Server is listening for requests (7001 by default).
When the login page appears, enter the user name and the password you used to start the Administration Server (you may have specified this user name and password during the installation process), or enter a user name that is granted a default global security role.
Click Log In.
In the Administration Console, from the navigation pane, expand Services > Messaging and select JMS Modules.
On the JMS Modules page, select SOAJMSModule.
On the Settings for SOAJMSModule page, in the Summary of Resources table, select New.
On the Create a New JMS System Module Resource page, select Topic and then Next.
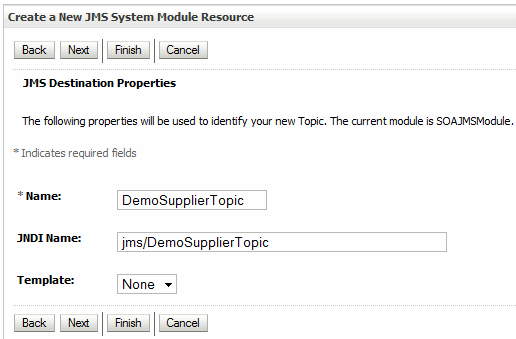
In the JMS Destination Properties section, enter the following details:
| Element | Value |
|---|---|
| Name | DemoSupplierTopic |
| JNDI Name | jms/DemoSupplierTopic |

Click Next.
From the Subdeployments list, select SOASubDeployment.
From the JMS Servers table, select SOAJMSServer, and then click Finish.
The Summary of Resources table now displays the topic DemoSupplierTopic.
To add the connection factory, which defines a set of connection configuration parameters to create connections for JMS clients:
On the Settings for SOAJMSModule page, in the Summary of Resources table, select New again.
On the Create a New JMS System Module Resource page, select Connection Factory and then Next.
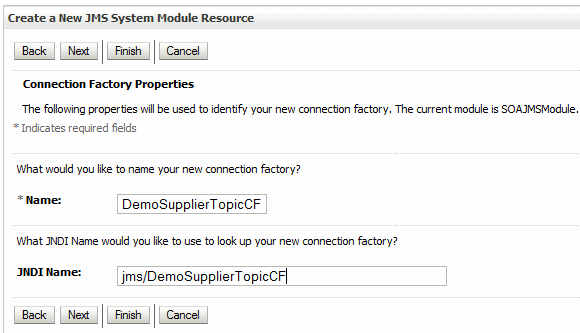
In the Connection Factory Properties section, enter the following details:
| Element | Value |
|---|---|
| Name | DemoSupplierTopicCF |
| JNDI Name | jms/DemoSupplierTopicCF |

Click Next.
Click Finish.
On the Settings for SOAJMSModule page, the Summary of Resources table now displays both the DemoSupplierTopic topic and the connection factory DemoSupplierTopicCF.

A connection pool is configured in the JMSAdapter application.
To add a connection pool:
The JMSAdapter application uses a deployment plan. Create a directory for deployment plan in the following directory:
(UNIX) MW_HOME/soa/JSMPlan
(Windows) MW_HOME\soa\JSMPlan
In the Administration Console, from the navigation pane, select Deployments.
On the Summary of Deployments page, from the Deployments table, select the JmsAdapter link.
On the Settings for JmsAdapter page, select the Configuration tab and then the Outbound Connection Pools sub-tab.
From the Outbound Connection Pool Configuration table, click New.
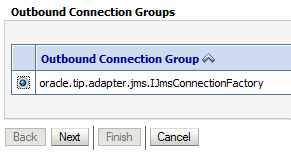
From the Outbound Connection Groups table, select oracle.tip.adapter.jms.IJmsConnectionFactory, and then click Next.

In the JNDI Name field, enter eis/Jms/TopicConnectionFactory.
Click Finish.
When prompted to select a deployment plan, perform the following steps:
In the Path field, select the path to the directory you created in Step 1 and enter Plan.xml after the path.
If there is a plan file selected with the option at the top of the page, the one you enter takes precedence.
Click OK.
Verify the plan name is set to Plan.xml in the JMSPlan directory.
Select the Configuration tab.
Expand the select oracle.tip.adapter.jms.IJmsConnectionFactory, and select eis/Jms/TopicConnectionFactory
For the following rows, select the Property Value cell on the far right, modify the value as specified, and then press Enter.
| Row | Property Value |
|---|---|
| ConnectionFactoryLocation | jms/DemoSupplierTopicCF |
| IsTopic | true |
| Username | The Oracle WebLogic Server administrator. For example:
|
| Password | The password of the Oracle WebLogic Server weblogic user. For example:
|
Click Save.
Redeploy the adapter:
From the navigation pane, select Deployments.
The Summary of Deployments page displays with the Deployments table.
Select the check box next to the JmsAdapter, and then click Update.
In the Update Application Assistant page, click Redeploy this application using the following deployment file.
Click Next.
Click Finish.