5 Keeping Yourself Informed
In this chapter you'll explore how to use your personal space, an area within WebCenter Spaces from which you conduct common business tasks that are regularly performed in any corporate setting. You'll see some ways to personalize your personal space, including how to keep a close watch on the group space you just created. You'll also make some changes to the business role page you created in the first chapter.
5.1 Step 1: Create a Favorite
To keep your finger on the pulse of the Tony Notebook Sales group space, you know you're going to be referring to the group space's Documents page pretty frequently, and most likely for the duration of this project. However, you don't spend all your time in the Tony Notebook Sales group space—you're in and out of different group spaces all day. To give you quick access to the Tony Notebook Sales Documents page no matter where you are within WebCenter Spaces, you decide to make the page a favorite. Favorites are an easy way to bookmark pages within WebCenter Spaces so you can return to them quickly.
-
Click Tony Notebook Sales to return to that group space, if you're not there already.
-
Click Documents to display that page.
-
At the top of your screen, click Favorites.
-
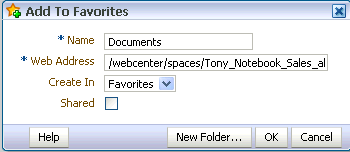
Select Add to Favorites.
Because Documents is the current page, that's the one that will be added. You can see that the URL for the page appears in the Web Address field.
-
In the Name field, type
Tony Notebook Documents.If you had many favorites, you could use the New Folder button to help you create an organization system in which to store them. We won't do that now, however.
-
Click OK.
Favorites are automatically scoped to your personal space. That is, although you selected Favorites from the WebCenter Spaces Banner area, you are the only one who will see the favorites you choose.
Let's verify that this is the case.
-
At the top of your screen, click Favorites.
There's the Tony Notebook Documents favorite. When you click this link, you're automatically taken to the Documents page within Tony Notebook Sales from wherever you happen to be within WebCenter Spaces.
5.2 Step 2: Checking Out Your Social Network
To keep you in close contact with your fellow employees, WebCenter Spaces offers several task flows through the People Connections service, a rich set of social networking tools for creating a personal profile and connecting with other users. Through the People Connections task flows, you can view user profiles, add and maintain personal connections, view application activities, view and post messages, and provide feedback to your connections.
Your People Connections task flows are available by clicking your user name in the Banner.
-
Click Monica in the Banner.
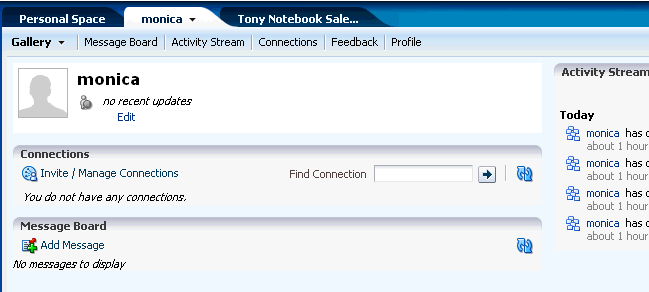
The People Connections tab reflects your user name:
We haven't personalize the Gallery yet, so it still looks very generic. The Gallery provides a bird's-eye view of some of the most frequently used areas of the People Connections service: a user-supplied photo, current status (where it currently says "no recent updates"), a list of people to whom you are connected, messages that you and your connected colleagues post to your board, and finally, an Activity Stream that provides one-liners about all your activity within this WebCenter Spaces instance. In other words, the Gallery brings together select pieces of information from Message Board, Connections, and so on.
Let's take a look at a Gallery that has been fully customized for a colleague of yours, Monty:
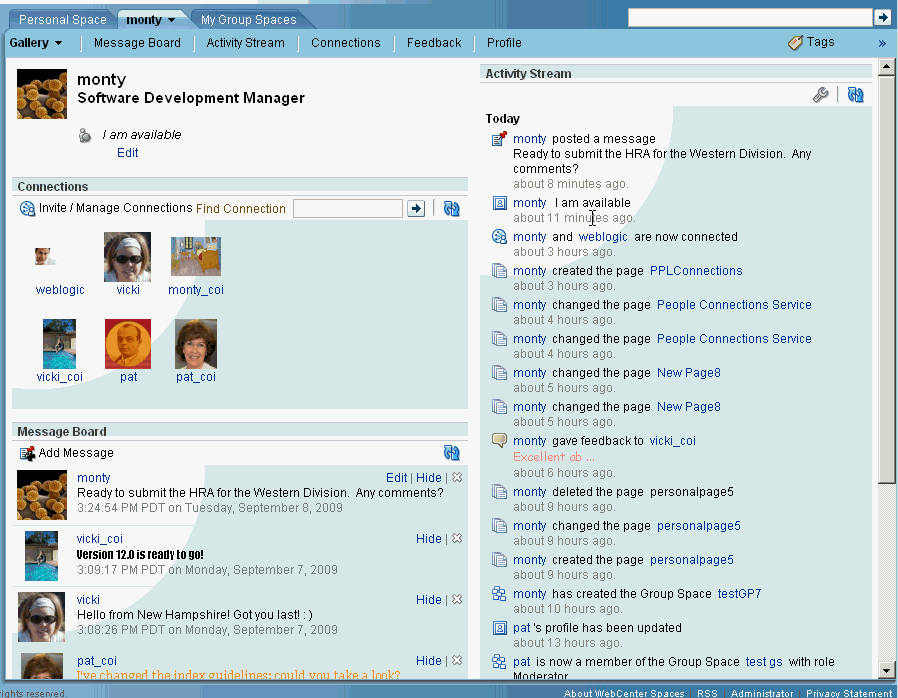
In the Connections task flow, you can see that Monty has invited six people to be his connections, all of whom have accepted. Depending on the level of access he has granted to his Connections, they can view and post Feedback, view and post messages to his Message Board, keep track of his activities, and access various levels of his Profile details. You can also see messages that Monty and others have posted in the Message Board, as well as a list of Monty's activity (and some of his contacts', like Pat) in Activity Stream. Depending on how you set things up, Activity Stream can reflect when you or a connection post feedback, upload a document, create a discussion forum, and so on.
Suppose Monty wanted to make you, Monica, a Connection. How would he go about it?
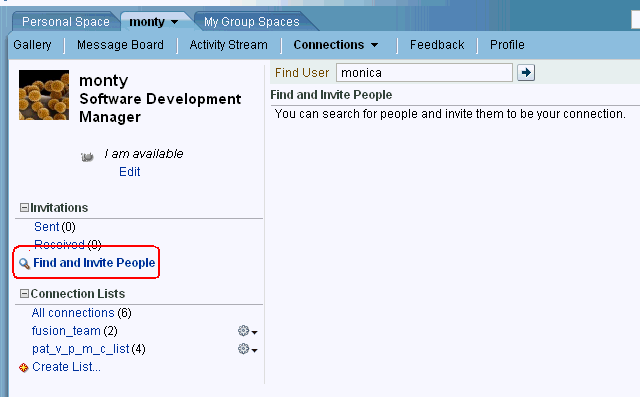
First, Monty would click the Connections page, then click Find and Invite People:
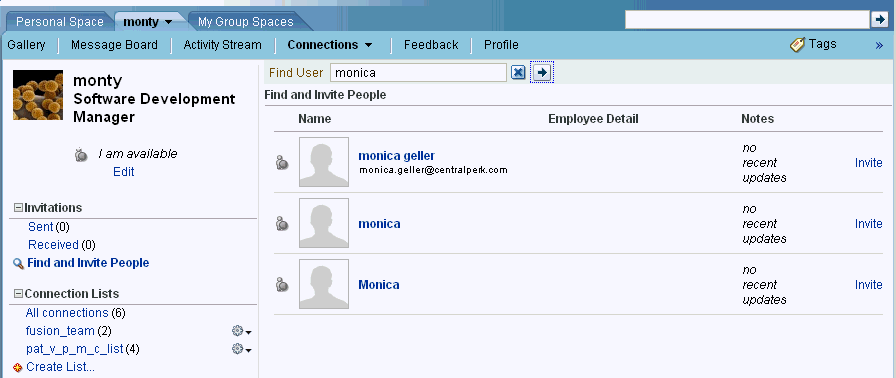
Next, Monty would type your name in the Find User field and click the Search arrow, resulting in a screen that looks something like this:
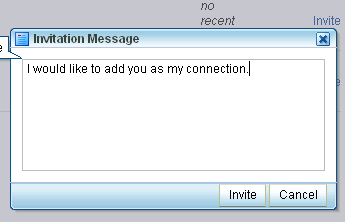
Next to the correct "Monica", Monty would click Invite and type something like:
When you (as Monica) visit your own Connections page, you'd see something like this:
You'd then be free to accept or reject Monty's invitation.
5.3 Step 3: Keep Track of Recent Activity
The problem with Tony Notebooks is a hot issue for Storefront, so you want to keep abreast of developments as they happen, without having to wait until the next status meeting, and without having to return to the group space to check the Recent Activity area on the Home page. To do that, you can drop the Recent Activity task flow onto a page within your personal space, which you access much more frequently.
-
Click Personal Space.
You don't currently have a page within your personal space on which it makes sense to place the Recent Activity task flow, so you decide to create one that you can use for all front burner issues.
-
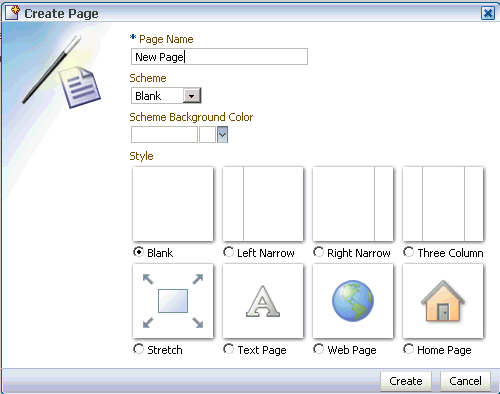
Click Page Actions->Create Page to display the Create Page dialog:
-
In the Page Name field, type
Hot Issues. -
From the Scheme drop-down, select Egg Shell.
Schemes determine the background design for a page. For example, notice how the thumbnail layouts now reflect the visual effect of a lighter color gradating into the darker blue, as dictated by the Egg Shell scheme. Although the thumbnail layouts appear in blue, that's just an example. You select the actual color you want to apply to the background design with the Scheme Background Color field.
-
For the purposes of this tutorial we don't need a scheme or a background color, so return the value in the Scheme field back to Blank.
-
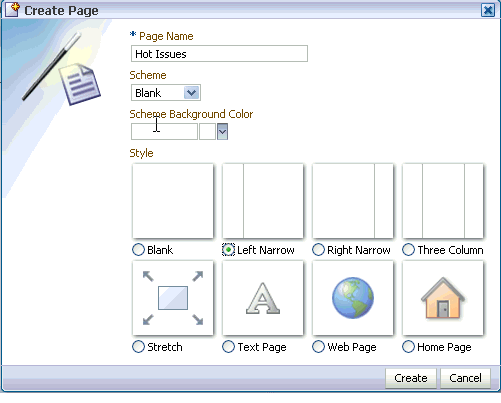
To select a layout for the page, click the radio button beneath the Left Narrow layout option:
The Left Narrow layout gives you space to add a navigation bar along the left-hand side of the page, if you wish. If you decide you want to change the layout later, you can do that through WebCenter Space's page editing feature, which we'll see a little later.
-
Click Create.
-
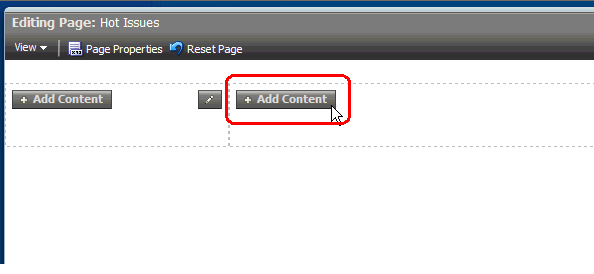
In the right-most region of the page, click Add Content:
-
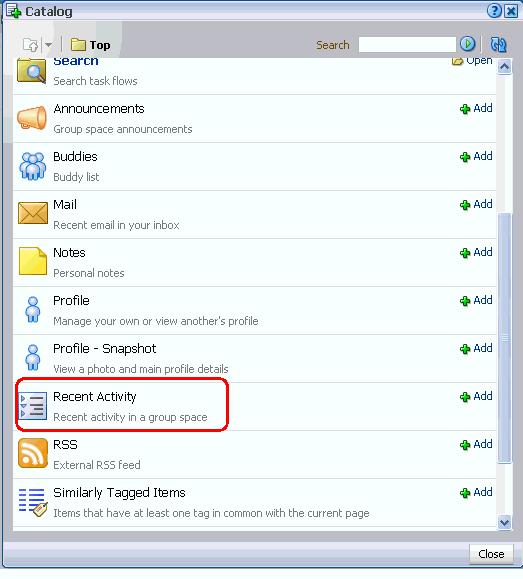
In the Catalog, scroll down until you see Recent Activity:
-
Click Add, the close the Catalog.
Now you need to rewire the task flow so that it points to Tony Notebook Sales.
-
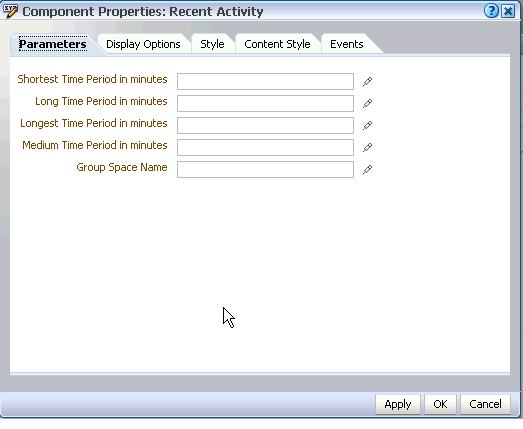
Click the Edit icon in the top right of the Recent Activity task flow.
Your screen should look something like this:
-
On the Parameters tab, click the Edit icon to the right of the Group Space Name field.
-
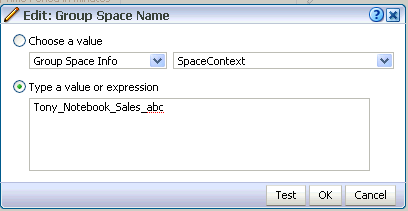
Click the radio button Type a value or expression, and type
Tony_Notebook_Sales_abcin the space provided:Notice that you must replace spaces with underscores, and that
abcshould be replaced with the initials you used when the group space was created. -
Click OK to return to the Component Properties dialog.
Now we want to choose a descriptive name for the task flow, so you'll know immediately what you're looking at when you view this page within your personal space. This name will appear in the task flow's header.
-
Click Display Options.
-
At the bottom of the tab, type
Tony Notebook Recent Activityin the Text field. -
Click OK.
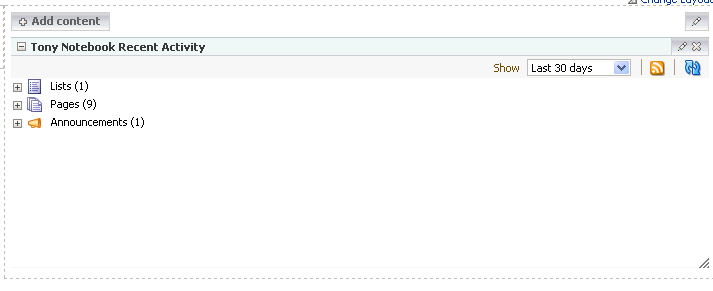
Looking at your page, you should see that the contents of the Recent Activity task flow has changed, presumably to reflect what's going on in the Tony Notebook Sales group space:
-
Click Save to save your changes, but you can leave the page in editing mode for now.
Everything that appears in this task flow from now on will reflect the activity that occurs within the Tony Notebook Sales group space.
5.4 Step 4: Add an RSS Feed
While you're making changes to your personal space, you may as well take care of a task you've been meaning to complete; that is, adding CNET's Most Recent Reviews RSS feed to one of your personal pages so you can see its content often. CNET is one of the most influential sites in the small electonics industry, so you'd like to keep abreast of what they have to say. For simplicity, you decide to place the feed on your recently created page, Hot Issues.
-
You should still be in edit mode for the Hot Issues page.
This time let's put the task flow in the left hand side of the page.
-
In the left region, click Add Content.
-
Scroll down until you see RSS; click Add, then close the Catalog.
The RSS Task Flow is added to the page. Now you have to point it to the source of CNET's Most Recent Reviews feed.
-
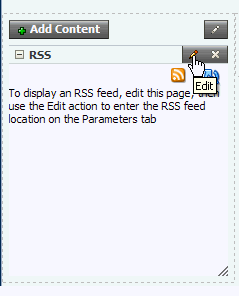
Click the Edit icon in the RSS task flow's header:
-
In the RSS Feed URL field, type
http://reviews.cnet.com/4924-5_7-0.xml?orderBy=-7rvDte&maxhits=25&dedup=1&tag=rb_content;rb_mtx -
Click Apply.
Now let's change the name of the task flow's header.
-
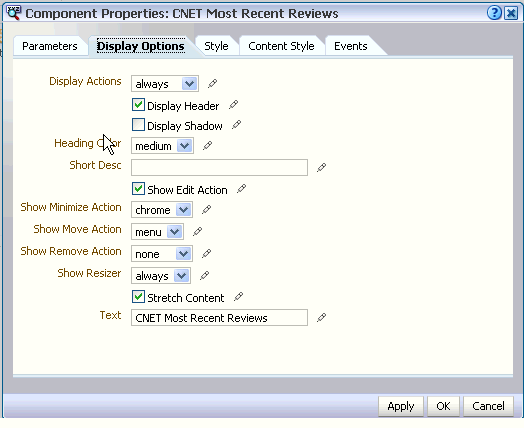
Click the Display Options tab.
-
In the Text field, type
CNET Most Recent Reviews -
Click OK to save your changes and close this dialog.
-
Take a moment to review your changes, then click Close to exit the editing session, saving your changes when prompted.
Each time CNET publishes a new review, you'll see it in this task flow on your Hot Issues page.
RSS feeds are an excellent way to keep up with what's happening as it happens, both inside and outside of your company. You may want to create a page called RSS in your personal space that contains feeds for all the subjects you care about.
You're in pretty good shape in terms of personalizing your personal space so that it's displaying all the content you want to see. Let's log out so you can log back on as Zeba, who has some tasks to complete for the Tony Notebook Sales group space. Click Logout in the banner.
