Signer Tool Locate
One of the most important advantages of UDDI version 3 is its support for digital signatures. Without signatures you cannot verify whether the publisher of a business entity is really who that publisher claims to be. But if the publisher has signed the UDDI structure, anyone can verify that the information is unmodified by any means (including by UDDI registry operators) and to confirm the publisher's identity.
The BEA AquaLogic Service Registry Signer tool simplifies signature manipulation. You can find this tool's script in the bin directory of your BEA AquaLogic Service Registry installation. The Signer is a graphical application that can be used to add, remove, and verify the signatures of UDDI structures you have published.
![[Note]](../images/note.gif) | Note |
|---|---|
If you are using IBM Java, you must install Bouncy Castle security provider. See Installation Guide. | |
Starting the Signer Locate
To start the Signer tool, first ensure that BEA AquaLogic Service Registry is running, then execute the following script from the bin subdirectory of your BEA AquaLogic Service Registry installation:
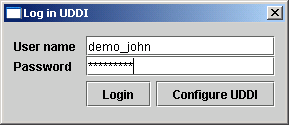
Windows: signer.bat UNIX: ./signer.sh When the tool starts, you must first authenticate yourself against the selected UDDI version 3 registry. Simply provide your user name and password. If your registry is not running on a local machine, you must configure its endpoints. This can be accomplished via the Configure UDDI button.
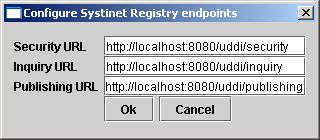
On the returned screen, set the endpoints of the Security, Inquiry, and Publishing Web services. For help, ask the administrator of your registry.
Once you have entered your user name and password, click the Login button. The Signer tool will attempt to authorize you at the selected registry. If authorization fails, you can correct your login information. Once it succeeds, the Login dialog disappears and the Signer tool asks BEA AquaLogic Service Registry for your registered information (businessEntities and tModels that you have published).
Main Screen Locate
In the Signer tool's interface, the left part of the main screen consists of a tree containing all your businessEntities and tModels. If you wish to add or remove a digital signature, select the structure to sign from this tree. The Signer will fetch it from the registry. When the structure is fetched, its XML representation is displayed in the right panel. The Sign button is unblocked. If the structure has been already signed, the Remove signatures button is unblocked as well.
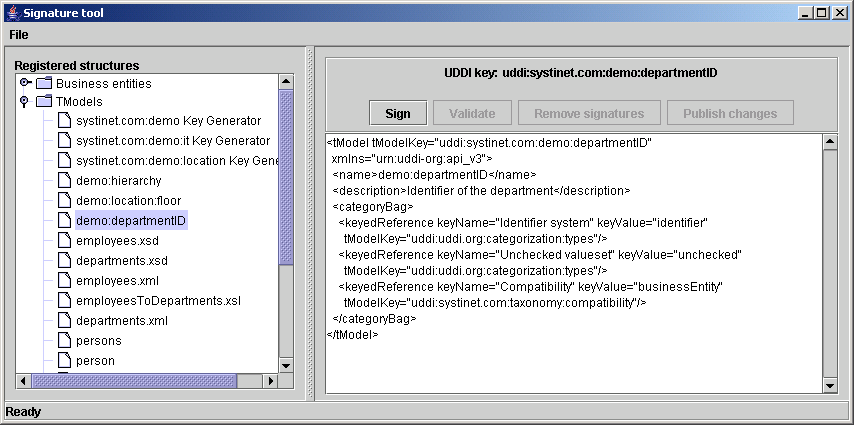
The status bar at the bottom of the application informs the user of current action progress and results.
Sign Locate
To sign a UDDI structure, you must set up the Java keystore. Use JDK tool keytool to generate the keystore. Please, see your JDK documentation for more information how to use keytool. The Signer tool has been tested with keystores in JKS and PKCS12 formats.
| Note |
|---|---|
To generate the certificate issue the following command keytool -genkey -keyalg RSA -storetype JKS -alias demo_john -keystore test_certificate.jks Example of the dialog:
 Enter keystore password:  changeit
What is your first and last name?
  [Unknown]:  John Johnson
What is the name of your organizational unit?
  [Unknown]:  UDDI
What is the name of your organization?
  [Unknown]:  Myorg
What is the name of your City or Locality?
  [Unknown]:  San Diego
What is the name of your State or Province?
  [Unknown]:  California
What is the two-letter country code for this unit?
  [Unknown]:  CA
Is CN=John Johnson, OU=UDDI, O=Myorg, L=San Diego, ST=California, C=CA correct?
  [no]:  yes
Enter key password for <demo_john>
        (RETURN if same as keystore password):
| |
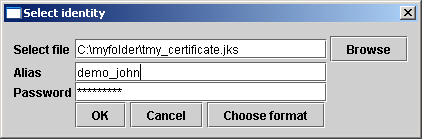
To sign a UDDI structure, you must set the Java keystore file, alias, and password as follows:
Click on the Sign button. This returns the Select identity dialog.
In the box labeled Select identity, type the path to the file with your Java keystore.
In the box labeled Alias, type the alias located in the identity.
In the box labeled Password, type the password used to encrypt the private key.
![[Important]](../images/important.gif)
Important If you enter the wrong value for the alias or the password, the tool will not be able to open the identity.
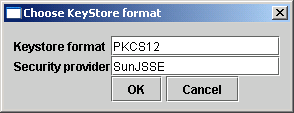
If the keystore is in the Sun JKS format, you do not have to click on Choose format button. You can leave default values there. If the keystore is not in the Sun JKS format, you can specify the format by clicking the Choose format button. In the returned dialog window, set the keystore format and its provider. For example, to use the PKCS12 format, set the format to PKCS12 and the provider to SunJSSE.
When the signing operation succeeds, the selected UDDI structure will have a digital signature and its XML representation will be updated. For security reasons, the signing process takes place on your computer so as not to risk compromise to your private key.
Finally the Publish changes and Remove signatures buttons are enabled.
Validation Locate
The Validate button is used to perform validity check of UDDI structures that contain XML digital signatures. The result of this operation is displayed in the status bar.
Remove Signatures Locate
The Remove signatures button is used to remove all digital signatures from the selected UDDI structure. When this operation is complete, the XML representation of the UDDI structure is updated. If the Publish changes button had been disabled, it is enabled.
Publish Changes Locate
If you have signed the selected UDDI structure or removed digital signatures from it, you can select the Publish changes button to publish the changes to the registry. Its invocation uses standard UDDI publishing methods (save_tModel, etc.) to update this UDDI structure on the registry. The private key is not used during this operation.
Signer Configuration Locate
The Signer tool automatically remembers the actual configuration such as registry endpoints or keystore location and format. The config file is saved in the user's home directory with the name signer.conf. You can change the location (and filename) by using the signer script's -c option. If you do not want this feature, use -n. The list of valid options can be obtained with -h option.