[Top] [Previous] [Next] [End of Book]

Chapter 2 . Installing BEA Connect OSI TP

This chapter contains information for installing and uninstalling the BEA Connect OSI TP product.


Pre-Installation Considerations

Connect OSI TP runs on UNIXWARE, HP, SUN, and Windows NT platforms. Complete the following tasks prior to installing Connect OSI TP:

Configuring the Environment to Install Connect OSI TP

Before installing BEA Connect OSI TP, you must configure the environment properly. Ensure that BEA TUXEDO 6.4 and Unisys OSI-TP Version 2.0.8 stack software are configured properly.


Upgrading BEA Connect OSI TP

If you are upgrading from a previous release of the BEA Connect OSI TP product, you must shut down all Domain administrative and gateway servers within an application domain, particularly the following:

BEA Connect OSI TP is a full replacement for previous releases. To upgrade, you will need to reinstall the product.


Installing BEA Connect OSI TP

Connect OSI TP will run on Unix-based platforms (UNIXWARE, HP, and SUN) and Windows NT. Refer to the appropriate platform sections that follow for installation instructions.

Installing on Unix-based Platforms

The following steps will install Connect OSI TP on a Unix-based platform.

  1. Log on as root to install Connect OSI TP.

    Listing 2-1 Log On as Root
    $ su -
    Password:

  2. Mount the CD-ROM. The following example will mount the CD-ROM drive on a UNIXWARE system.

    Listing 2-2 Mount the CD-ROM Drive
    # ls -l /dev/cdrom
    total 0
    brw-rw-rw- 1 root sys 22, 0 Sep 16 10:55 c1b0t0l0
    # mount -r -F cdfs /dev/cdrom/c1b0t0l0 /mnt
    # cd /mnt
    # ls
    install.sh uw winnt

  3. Run the installation script by typing the following command.

    Listing 2-3 Run the Installation Script
    # sh ./install.sh

  4. The installation script will prompt you for responses. In the sample installation that follows, responses are in bold.

    Listing 2-4 Sample UNIXWARE Installation
    01) uw/uw21          

    Install which platform's binaries? [01-1, q to quit, l for list]: 01

    ** You have chosen to install from uw/uw21 **

    BEA Connect OSI TP Release 1.3 for TUXEDO System Release 6.4

    This directory contains the BEA Connect OSI TP SDK for
    UnixWare 2.1 on Intel i386.
    Please refer to the product documentation for release notes and
    further information.


    Is this correct? [y,n,q]: y

    To terminate the installation at any time
    press the interrupt key,
    typically <del>, <break>, or <ctrl+c>.

    The following packages are available:

    1 tuxositp BEA Connect OSI TP

    Select the package(s) you wish to install (or 'all' to install
    all packages) (default: all) [?,??,q]: all

    BEA Connect OSI TP
    (i386) Release 6.4
    Copyright (c) 1998 BEA Systems, Inc.
    Portions of this software (c) 1995 Novell, Inc.
    All Rights Reserved. Distributed under license by BEA Systems, Inc.
    TUXEDO (r) is a registered trademark of Novell, Inc. in the
    United States and other countries.

    Checking UnixWare version...
    ...finished

    The following installation options are available:

    1 both Install the complete TUXEDO System - client and server
    2 client Install the client only

    Select an option (default: both) [?,??,q]: 1

    Directory where TUXEDO files are to be installed [?,q]: /usr/tuxedo

    Determining if sufficient space is available ...
    6931 blocks are required
    2982512 blocks are available to /usr/tux64conn

    Using /usr/tux64conn as the TUXEDO base directory

    Unloading /mnt/uw/uw21/tuxositp/ws.z ...
    bin/GWOSITP
    lib/libgwo.a
    lib/libgwo.so.60
    lib/libtasn1.a
    lib/libtasn1.so.60
    locale/C/LIBGWO.text
    locale/C/LIBGWO_CAT
    6960 blocks
    ... finished

    Changing file permissions...
    ...done

    Installation of BEA Connect OSI TP was successful

    Please don't forget to fill out and send in your registration card
    #
  5. Unmount the CD-ROM by typing a command similar to the following.

    Listing 2-5 Unmount the CD-ROM
    # cd /
    # umount /mnt
    # exit
    $ exit

  6. Use a text editor to add the following line of text to the udataobj/DMTYPE file. If a line beginning with OSITP exists, then delete it and replace it with the following new line of text.

    Listing 2-6 Edit udataobj/DMTYPE File
    OSITP:-lgwo:-ltasn1 -lnwi -lnws -lnwi -lxaptp::

Installing on a Windows NT Platform

The following steps will install Connect OSI TP on a Windows NT system.

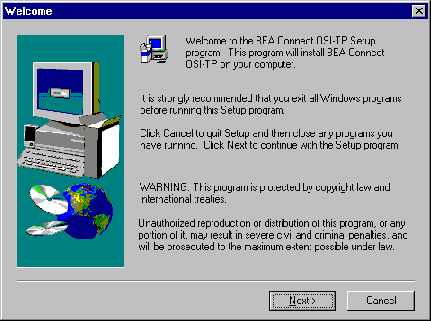
  1. Insert the product CD-ROM and click on the Run option from the Start menu. The Run window displays. Click on the Browse button to select the CD-ROM drive. Change directories to the winnt directory and select the Setup.exe program. Click OK to run the executable and begin the installation. The following Welcome screen displays. Click Next to continue with the installation.

    Figure 2-1 Welcome Screen

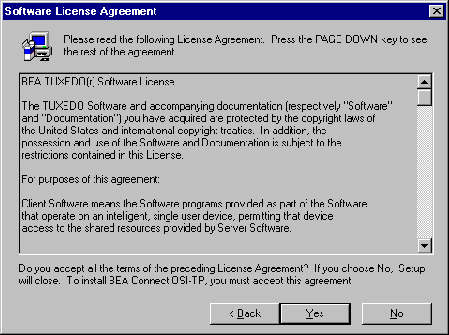
  2. The BEA Software License Agreement displays. Click Yes to accept the terms of the agreement and continue with the product installation. Click No to exit the installation process.

    Figure 2-2 BEA Software License Agreement

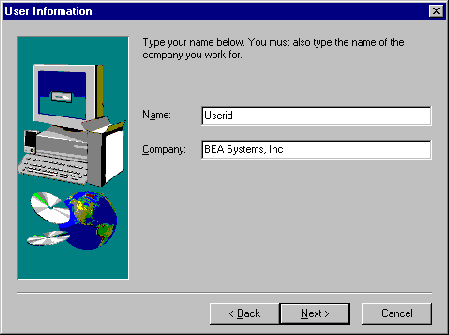
  3. The User Information screen displays after the License Agreement. Enter the name of the BEA TUXEDO System Administrator in the Name field. Enter the name of your company in the Company field. Click Next to continue with the installation.

    Figure 2-3 User Information

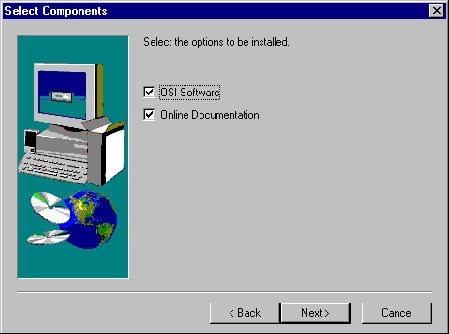
  4. The Select Components screen displays after the User Information screen. Click the check box to the left of the OSI Software option to install the Connect OSI TP product. Click the check box to the left of the Online Documentation option to load the Connect OSI TP online documentation. Click Next to continue with the installation.

    Figure 2-4 Component Selection

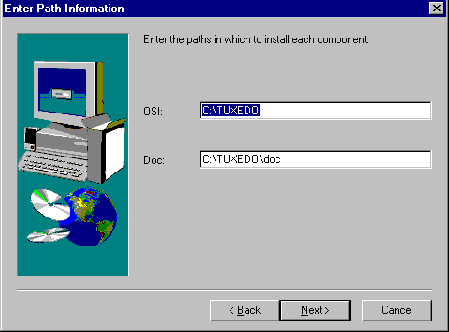
  5. The Enter Path Information screen displays next. Enter the directory path where you want to install the BEA Connect OSI TP product in the OSI field. Enter the directory path for the BEA Connect OSI TP online documentation in the Doc field. Click Next to continue with the installation.

    Figure 2-5 Path Definition

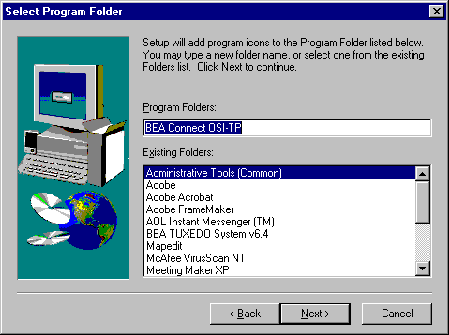
  6. The Select Program Folder screen displays next prompting you to name a folder for the Connect OSI TP files. Enter a folder name in the Program Folders field or select a name from the Existing Folders list. Program icons for Connect OSI TP will be added in the designated folder. Click Next to continue with the installation.

    Figure 2-6 Folder Selection

  7. A progress bar displays showing the status of the installation.

  8. The Setup Complete screen displays notifying you that the BEA Connect OSI TP product is installed on your system. Click Finish to complete the Setup process.

  9. Use a text editor such as Microsoft NotePad to add the following line to the udataobj/DMTYPE file. If a line beginning with OSITP exists in the file, then delete it and replace it with the following new text.

    Listing 2-7 Edit udataobj/DMTYPE File
    OSITP;%TUXDIR%\lib\libgwo.lib;%TUXDIR%\lib\libtasn1.lib;%TUXDIR%\ lib\libnwi.lib %TUXDIR%\lib\libnws.lib %TUXDIR%\lib\libnwi.lib;;


Distribution Libraries and Executables

The BEA Connect OSI TP CD-ROM contains the following libraries and executable programs. After installing the Connect OSI TP software, verify that these libraries and programs are installed on your system.

HP-UX 10.20

Verify that the following files are installed by BEA Connect OSI TP:

Directory Files

/bin

GWOSITP

/lib

libgwo.a
libgwo.sl
libtasn1.a
libtasn1.sl

/locale/C

LIBGWO.text
LIBGWO_CAT

SUN Solaris 2.5.1

Verify that the following files are installed by BEA Connect OSI TP:

Directory Files

/bin

GWOSITP

/lib

libgwo.a
libgwo.so
libtasn1.a
libtasn1.so

/locale/C

LIBGWO.text
LIBGWO_CAT

UNIXWARE 2.1

Verify that the following files are installed by BEA Connect OSI TP:

Directory Files

/bin

GWOSITP

/lib

libgwo.a
libgwo.so
libtasn1.a
libtasn1.so

/locale/C

LIBGWO.text
LIBGWO_CAT

Windows NT 4.0

Verify that the following files are installed by BEA Connect OSI TP:

Directory Files

/bin

gwositp.exe

/lib

libgwo.dll
libgwo.lib
libtasn1.dll
libtasn1.lib
libgwo.text
libgwo_cat


Uninstalling Connect OSI TP on Windows NT

The following steps will uninstall the BEA Connect OSI TP product on a Windows NT system.

  1. Access the Control Panel window from the Start>Settings>Control Panel menu option.

  2. Double click on the Add/Remove Programs option from the Control Panel listings to access the Add/Remove Programs Properties window.

  3. In the Add/Remove Programs Properties window, select BEA Connect OSI TP from the program list and click on the Add/Remove button.

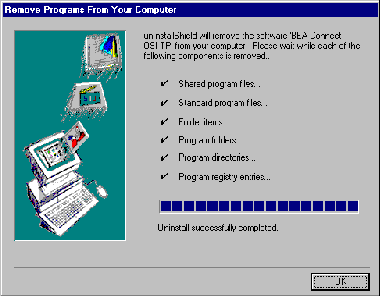
  4. The uninstall process for BEA Connect OSI TP will begin. The Remove Programs From Your Computer screen displays. Click OK to complete the uninstall process.

    Figure 2-7 Removing Programs From Your Computer


[Top] [Previous] [Next] [End of Book]