If you want to distribute your custom control to a wide audience (e.g., if you are an ISV developing controls for your customers) or if you want to customize your control more extensively, you can package a control within a plug-in. This method allows:
This topic describes how to package a control into a plug-in. This method creates an Eclipse plug-in and basic knowledge of Eclipse plug-ins and their creation would be useful before attempting this process.
Note that this method wraps a control JAR in a plug-in. For distribution within your own company, you may simply want to share the control JAR file directly, without the additional work of creating a plug-in.
This method consists of the following steps:
Follow the steps outlined in Exporting Controls into JARs.
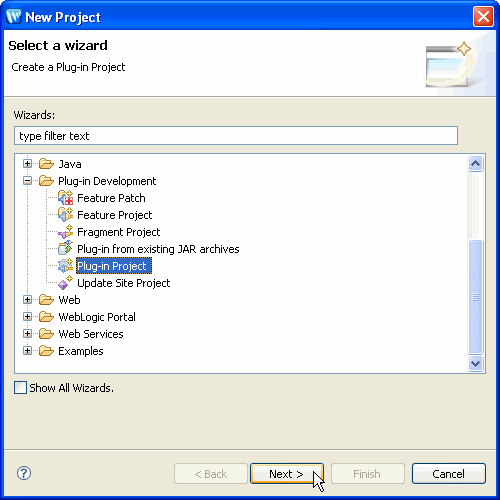
Click Next to proceed.
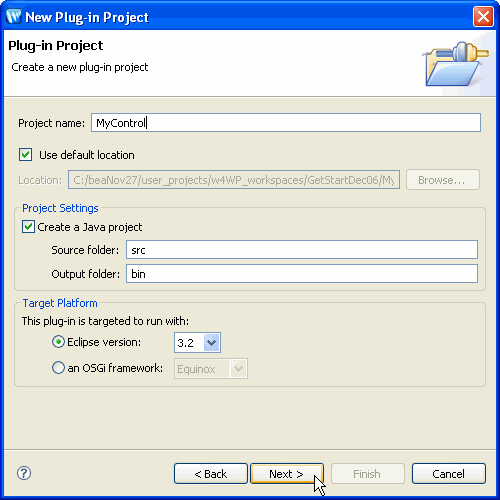
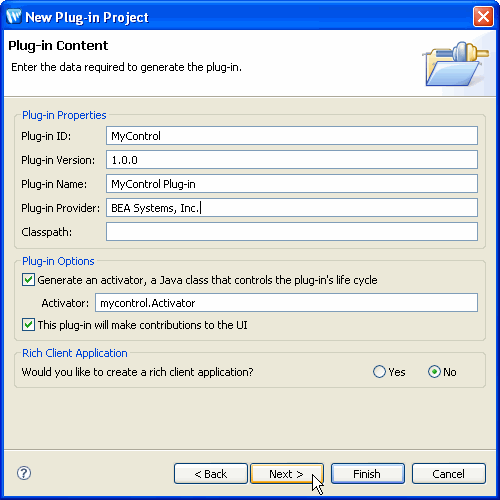
From the next screen, fill in the Plug-in Provider field and click Finish to create the project.
Click Yes to change to Plug-in Development perspective.
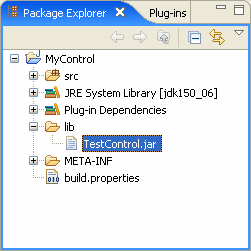
Create a folder named lib in the root of your plug-in project (not under the src folder). Copy the control JAR (created in the previous step) into the lib directory.
If the manifest editor window is not visible, double click on the MANIFEST.MF file to open it. From the editor, click on the Dependencies tab or click on the Dependencies link in the Plug-in Content section. From the Required Plug-ins section, click on the Add button and select the following plug-ins:
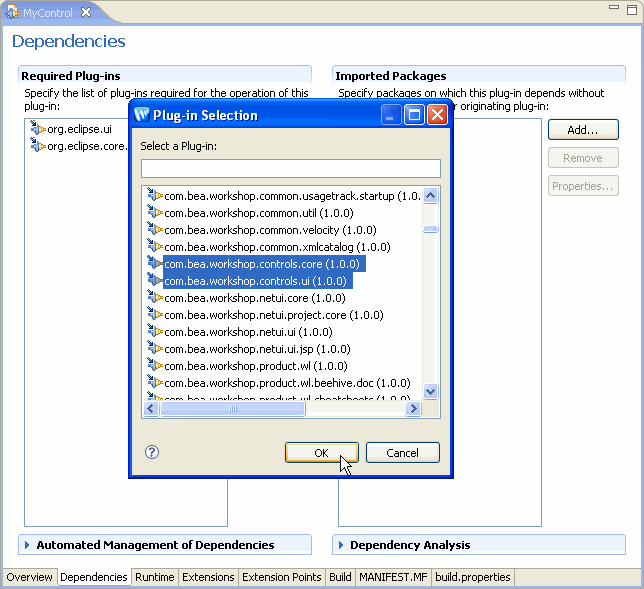
Click OK to add the dependencies. Click File > Save All to save the dependencies in the MANIFEST.MF file.
Click on the Extensions tab. Click Add and choose
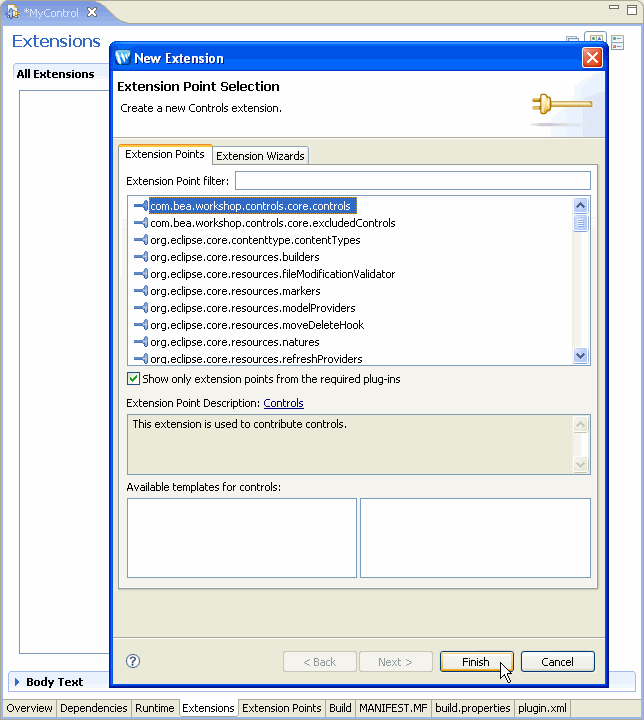
Click Finish to add the extension. Click File > Save All to save the change.
Note that a new file: plugin.xml has been added to the project. That file now contains the extension information:
<?xml version="1.0" encoding="UTF-8"?>
<?eclipse version="3.2"?>
<plugin>
   <extension
         point="com.bea.workshop.controls.core.controls">
   </extension>
</plugin>
The com.bea.workshop.controls.core.controls extension point requires a nested <control> tag with at least the id, class, isControlExtension, and isExtensible attributes specified. For example:
<?xml version="1.0" encoding="UTF-8"?>
<?eclipse version="3.0"?>
<plugin>
  <extension point="com.bea.workshop.controls.Controls">
    <control
        id="com.mycompany.example.MyExampleControlId"
        class="com.mycompany.example.control.MyExampleControl"
        isControlExtension="false"
        isExtensible="false"  />
  </extension>
</plugin>
The <control> tag has the following attributes:
|
||||||||||||||||||||||||||||||||||||||||||||||||||
The following is an example of a <control> tag using more attributes:
<extension point="com.bea.workshop.controls.core.controls">
      <control

            class="com.mycompany.controls.MyControl"
            id="MyControl12"

            groupName="My Company"
            groupPriority="10"
            includeInPalette="true"
            insertionDelegateClass="com.mycompany.workshop.MyInsertionDelegate"
            isControlExtension="false"
            isExtensible="false"
            label="Sample Control"
            palettePriority="10"
            priority="10"
      />
</extension>
The insertionDelegateClass attribute of the <control> tag indicates the insertion delegate and triggers the delegate when the control is inserted into a file. You can use this for many purposes, but if it's not already in the project (e.g., as a facet or a library module), you would typically use this to copy the control JAR to the user's project, as described below.
When you ship the control in a plug-in, the JAR file is located in the plug-in, NOT in the control user's project. To copy the JAR from the plug-in to the project that is using the control, you must insert code similar to the following into your insertion delegate. This will copy the control JAR to the user's project when your insertion delegate is called.
To create an insertion delegate, create a package in the src folder and create a file for the class of the insertion delegate.
Sample insertion delegate code is listed below. You will need to update the package and class name, of course.
package org.example.controls.workshop;

import java.io.File;


import org.eclipse.core.runtime.IStatus;
import org.eclipse.core.runtime.Status;
import org.eclipse.jdt.core.IJavaElement;
import org.eclipse.jface.dialogs.ErrorDialog;
import org.eclipse.swt.widgets.Display;

import com.bea.workshop.controls.core.model.IControlInsertionDelegateContext;
import com.bea.workshop.controls.ui.actions.DefaultControlInsertionDelegate;

public class SampleInsertionDelegate extends DefaultControlInsertionDelegate {

	@Override
	public IJavaElement insertControl(IControlInsertionDelegateContext ctxt) {
		try {
			File file = getFileFromPlugin(Activator.getDefault(), "/lib/TestControl.jar");
			copyJarIfNecessary(ctxt, file, file.getName());
			return super.insertControl(ctxt);
		} catch (Exception e) {
			String message = "Error inserting control";
			error(message,e);
		}
		return null;
	}

	private void error(String message, Exception e) {
		ErrorDialog.openError(Display.getCurrent().getActiveShell(),
								"Control Insert Error",
								message + " - " + e.getMessage(),
				new Status(IStatus.ERROR,Activator.PLUGIN_ID,1,"Control Insert Error",e));
	}

}
The sample above covers the "insert your control into the project" case. To also do a custom wizard that collects parameters and inserts additional annotations, you can update the code to look like this:
public IJavaElement insertControl(IControlInsertionDelegateContext ctxt) {
  try {
	//Launch and complete your wizard here, collecting parameters as necessary
	// then proceed to the next steps to copy the file and use the parameters entered
	// as annotation values

	File file = getFileFromPlugin(Activator.getDefault(), "/lib/TestControl.jar");
	copyJarIfNecessary(ctxt, file, file.getName());

	HashMap<String, String> attrs = new HashMap<String, String>();
	attrs.put("attr", "aValue");

	return super.insertControl(ctxt,"org.example.controls.SampleControl.SamplePropertySet",attrs);
  } catch (Exception e) {
	String message = "Error inserting control";
	error(message,e);
  }
  return null;
}
The previous example is a convenience API if you have a single additional annotation to add. If you have multiple annotations to add, you could do something like this with a list of AnnotationInfo objects:
public IJavaElement insertControl(IControlInsertionDelegateContext ctxt) {
  try {
	//Launch and complete your wizard here, collecting parameters as necessary
	// then proceed to the next steps to copy the file and use the parameters entered
	// as annotation values

	File file = getFileFromPlugin(Activator.getDefault(), "/lib/TestControl.jar");
	copyJarIfNecessary(ctxt, file, file.getName());

	List infos = new ArrayList();
	HashMap<String, String> attrs1 = new HashMap<String, String>();
	attrs1.put("attr", "aValue");
	AnnotationInfo info1 = new AnnotationInfo(
			"org.example.controls.SampleControl.SamplePropertySet",attrs1);
	infos.add(info1);

	HashMap<String, String> attrs2 = new HashMap<String, String>();
	attrs2.put("anotherAttribute", "aValue");
	AnnotationInfo info2 = new AnnotationInfo(
			"org.example.controls.SampleControl.SamplePropertySet",attrs2);
	infos.add(info2);

	return super.insertControl(ctxt,infos);
  } catch (Exception e) {
	String message = "Error inserting control";
	Activator.getDefault().logError(message, e);
	error(message,e);
  }
  return null;
}
For more information on the APIs provided by the DefaultControlInsertionDelegate, see the Javadoc.
Be sure that the plug-in includes the lib directly by clicking on the Build tab. Click on the lib folder under the Binary Build section to make sure that it is building correctly.
To run your plug-in, use the Run As > Eclipse Application command to test that your plug-in works correctly.
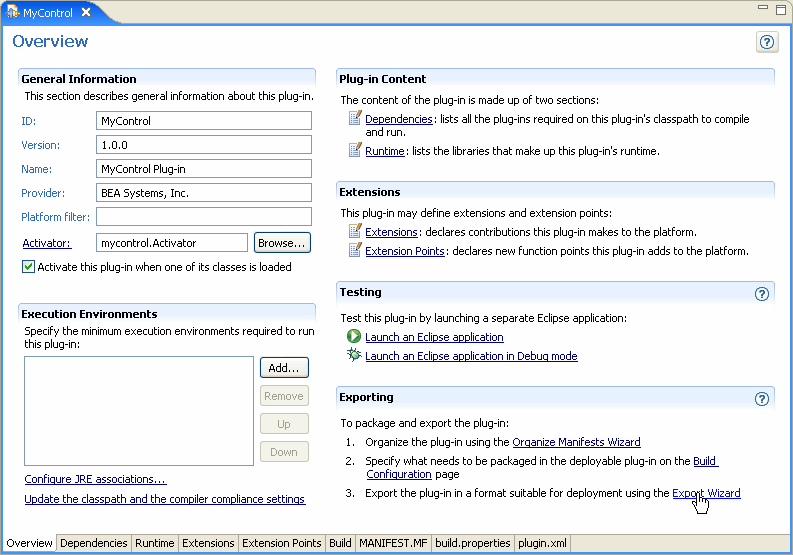
Click on the Overview tab. Click Export Wizard to create the plug-in JAR which will include the control JAR, the insertion delegate and any other required files. If this view is not available, you can open it by right clicking on META-INF/MANIFEST.MF and choosing Open.
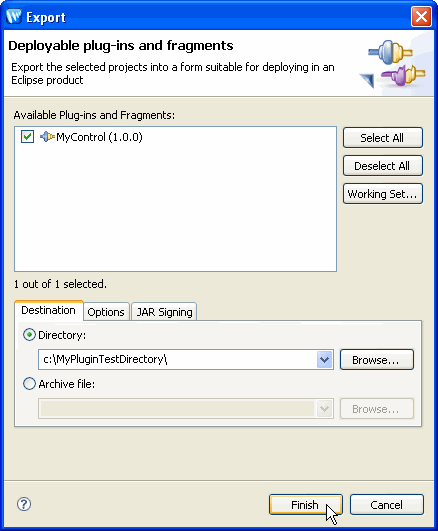
From the export dialog, be sure to set the directory where the plug-in file will be created. Note that by default, the Include source code option is disabled so that the control's source code will not be available to plug-in users. Specify a destination directory for the plug-in and click Finish to create the control plug-in file.
You can then distribute the resulting plug-in file to other developers, like any other Eclipse plug-in.