In this step, you will import an existing set of projects that contains the initial components of your application.
The tasks in this step are:
To Start Workshop and Create the Tutorial Workspace
If you haven't started Workshop for WebLogic yet, use these steps to do so
...on Microsoft Windows
If you are using a Windows operating system, follow these instructions.
If you are using a Linux operating system, follow these instructions.
When prompted for the name of your workspace, click the Browse button and create a new (empty) workspace for this tutorial.
To Import the Tutorial Projects into Your Workspace
Workshop for WebLogic keeps track internally of the project structure within a workspace. Simply copying folders into the workspace directory does not cause them to appear as projects inside Workshop for WebLogic. The tutorial projects are stored in a ZIP archive file. There is no need to unzip the files, the IDE will import the ZIP file directly.
To import these projects and their files:
BEA_HOME/workshop_10.0/ workshop4WP/eclipse/plugins/com.bea.workshop.product.wl.samples_1.0.0/tutorials/resources/AdvancedWSTutorial/AdvancedWSTutorial.zip
To Review the Contents of Your Workspace
The import process brought two applications into your workspace:
The LoanApprovalEAR application contains the project LoanApp. That project contains controls to provide loan approvals. Inside of the LoanApp project, there are two controls (inside LoanApp/src/controls/):boolean
getLoanApproval(int ssn, float amount) which returns true if the
loan is approved. Note that LoanApprovalControl has two files:
an interface file that defines the class methods and an implementation file
for the actual code. Inspect the code for these controls by double clicking on their names in the src folder of the LoanApp project. The source will appear in the editor window.
Note the simple logic used for loan approval: if the person (identified by SSN) does not have a loan in the database, return true (approval) and store the SSN and loan amount. If the person already has a loan, return false (decline).
You cannot test the code for the control yet because there is no web service or page flow that instantiates and invokes it.
The CreditScoreEAR application contains the single project CreditScoreWS. Open the web service at CreditScoreWS/src/services/CreditScoreService.java by double-clicking on the Java file.
When you open a web service in Workshop for WebLogic, it is displayed in Design View by default. Design View gives a graphical view of a web service. The Design View for the web service CreditScoreService.java shows that it has a single method called getCreditScore.
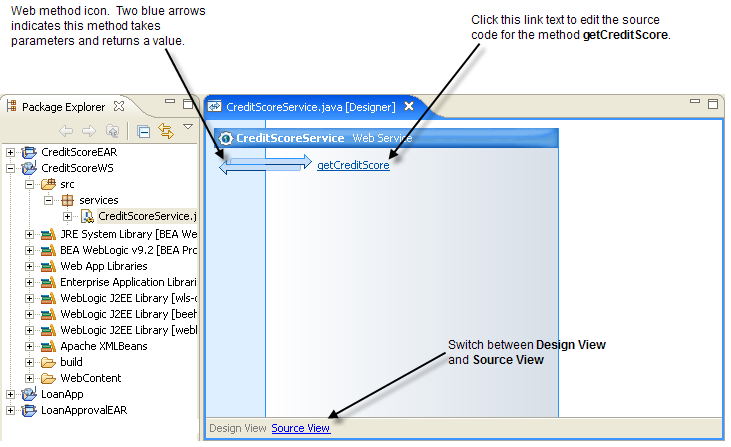
Click the link text Source View at the bottom of Design View
to view the source code for the web service.
The getCreditScore method checks credit ratings for the individual, based on their Social Security Number (SSN), the most common identification number used in the United States. The SSN is a 9-digit number. The credit scoring system used in this example assigns a 3-digit valuation to individuals where higher values are better (for example, 700 is a good credit rating and 500 is not as good).
Click Next.
In the Run On Server dialog, in the Domain home dropdown, select the default samples domain (BEA_HOME/wlserver_10.0/samples/domains/workshop).
Click Finish. Wait for the server to start and the application to deploy.
A window will open displaying the Test Client, a special
application that allows you to interact with your web service.
You can enter values into the ssn parameter field and click on the getCreditScore button to send a value to the web service and get a response. For example, entering the value 123456789 returns a credit score of 500 as shown below.
Click one of the following arrows to navigate through the tutorial:
|
|