In this step you'll create the source code for your entity bean. As described in the WebLogic Server topic, How Do Applications Use EJBs?, an entity bean represents a set of persistent data. In the case of this application, the data is stored in a database. An entity bean representing database data will typically represent a single row in the database.
You can also think of entity beans as representing things your application interacts with. In this case, the thing is a visit.
In this section, you will:
To Create VisitBean Source Files
Here, you'll create the package and source file to contain the code for your entity bean.
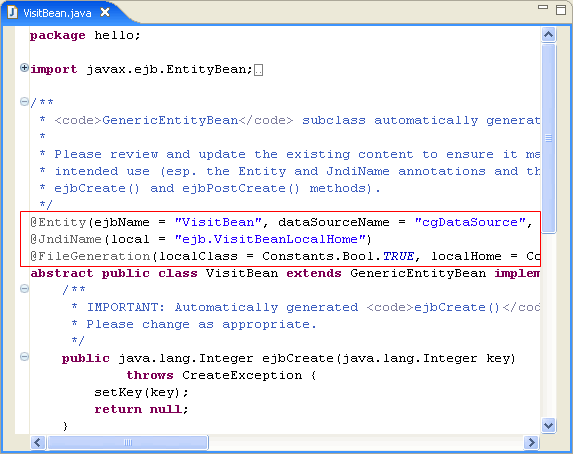
In the generated source code, you'll see a few annotations — code that begins with an @ sign.

These annotations are used at compile time by the WebLogic Server EJBGen tool to generate Remote and Home classes, as well as the deployment descriptor for the entity bean. All of the generated files are needed for developing entity beans, but the annotations you'll add remove the need for you to create the files yourself — you only need to create one.
Note: For general information about the classes and interfaces that make up Enterprise JavaBeans, see EJB Anatomy and Environment in the WebLogic Server documentation on eDocs. For other WebLogic-specific information, see Create EJB Classes and Interfaces, also on eDocs.
Throughout the code in Workshop, you can use annotations as an efficient way to automate these and other development tasks. There are many annotations and attributes that can be applied to an entity bean class such as VisitBean. To see all of the applicable annotations place the cursor within the class declaration VisitBean and select the Properties view.
The annotations listed here apply to the class, but most are set to their default values. When you edit annotations or attributes to non-default values, the annotations and attributes are written into the source code. You can scroll through the Properties view to find the annotations whose attributes have been set to default values. They're shown in bold, as shown in the preceding illustration.
The annotations with default values include:
|
||||||||||||
|
||||||||||||||
|
||||||
Note: If you're experienced with EJBGen annotations in platform versions prior to 9.0, you will notice that the syntax has changed. As of version 9.0, EJBGen uses Java 5 annotations based on JSR 175, and supported in JDK version 1.5.
The annotations provided here are a starting place for your development work. You'll need to edit some of the values so that they are useful for your specific EJB. You can edit annotation values directly in source code or in the Properties view. Procedures in this tutorial will usually use the Properties view so that you can become acquainted with it, but these topics will also show the updated annotation code.
Notice that Properties view displays values for only this selected annotation.
This change is in preparation for the method changes you will make below. The updated annotation code should appear something like this:
@Entity(ejbName = "VisitBean", dataSourceName = "cgDataSource", tableName = "EJB_Visits", primKeyClass = "java.lang.String")
To Define CMP Fields for Entity Data
Now you'll add code that defines two container-managed persistence (CMP) fields. CMP fields are "virtual" fields represented by columns in a data source, rather than variable definitions in this class. Using the accessors you'll add, VisitBean will get its data from the cgDataSource you specified above in the dataSourceName attribute. The annotations specify the details of the entity bean's correspondence to the data source row.
	/**
	 * IMPORTANT: Automatically generated primary key field getter method.
	 * Please change name and class as appropriate.
	 */
	@CmpField(column = "key", primkeyField = Constants.Bool.TRUE)
	@LocalMethod()
	public abstract java.lang.String getKey();

	/**
	 * IMPORTANT: Automatically generated primary key field setter method.
	 * Please change name and class as appropriate.
	 */
	@LocalMethod()
	public abstract void setKey(java.lang.String key);
    @CmpField(column = "visitorName", primkeyField = Constants.Bool.TRUE)
    @LocalMethod()
    public abstract java.lang.String getVisitorName();

    @LocalMethod()
    public abstract void setVisitorName(java.lang.String visitorName);

    @CmpField(column = "visitNumber")
    @LocalMethod()
    public abstract int getVisitNumber();

    @LocalMethod()
    public abstract void setVisitNumber(int number);
Note: If you're copying and pasting code into your source window, you can format it in Workshop by right-clicking and selecting Source > Format.
This code includes the following annotations:
|
||||||||
To Add ejbCreate and ejbPostCreate Methods
Now you'll add ejbCreate and ejbPostCreate methods. EJBs live out their life in a container, which is a server feature that creates entity beans and manages their relationship with the data source with which they're associated .
The EJB container will use these new methods to create new VisitBean entity beans. It will call the ejbCreate method before writing the bean's state to the database. After this method has finished executing, a new database record based on the CMP fields will have been created. The container calls the ejbPostCreate method after the bean has been written to the database and its data has been assigned to an EJB object.
public String ejbCreate(String visitorName)
        throws CreateException{
    setVisitorName(visitorName);
    setVisitNumber(1);
    return null;
}
This method will be called to create a new VisitBean. When it's called the visitor name and visit number will be added to the database that stores values for the VisitBean.
public void ejbPostCreate(String visitorName){}
You've written all the code you'll need for your entity bean. In the next step, you'll create a session bean that will keep track of visits.