In this step, we will create server configurations and deploy and run the JSF
application.
5.1. Add Context Listener and update application configuration
Our application uses the DataStoreBean class
which is available in application scope. You have been provided a Servlet Context
Listener called ContextListener which registers
an instance of DataStoreBean to ServletContext
at application start up.
5.1.1. Import the ContextListener class
Create a new package called listeners and copy the file ContextListener.java
from the folder workshop-JSF-tutorial/web/Resources folder
to the listeners package.
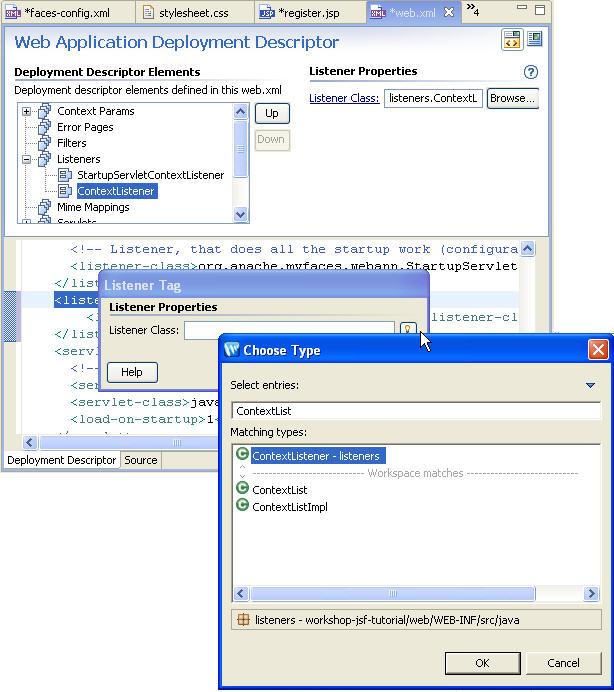
5.1.2. Add context listener to web.xml file
Open the web.xml file.
In the Web Application Deployment
Descriptor Design Editor right-click the Listeners node
and select New Listener. Choose the listener type ContextListener as
shown below:
This will add a listener element for the ContextListener
class.
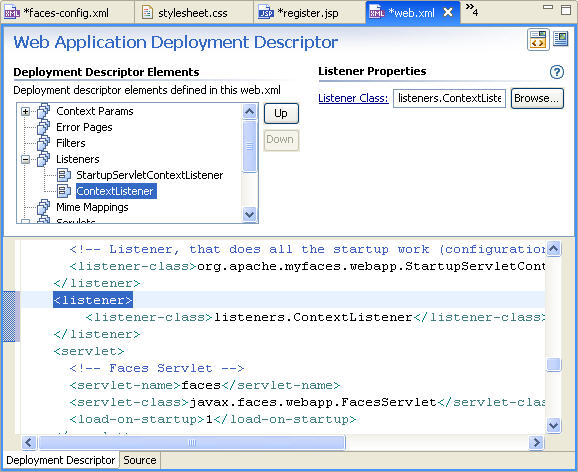
Save the web.xml file and review the web application configuration
elements.
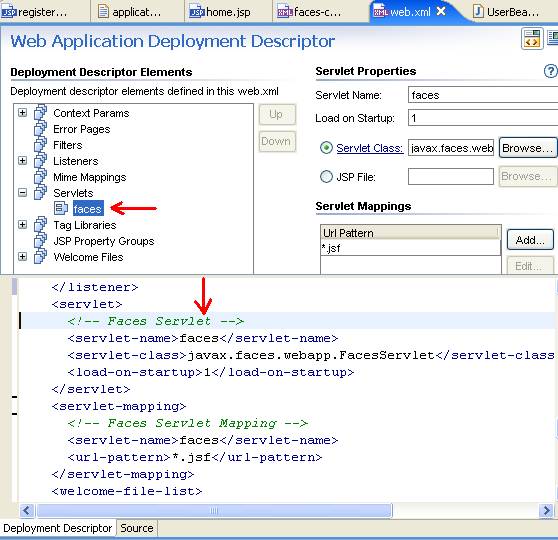
The servlet javax.faces.webapp.FacesServlet
is configured to receive HTTP requests with URL-pattern .jsf
The web.xml file includes tag library mappings to
support JSP tag libraries.
5.2. Create Server Configurations
Before you can run this sample application, you
must have a server installed.
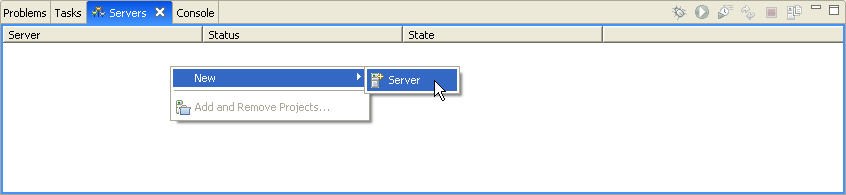
Click on the Servers tab.
Right click on the Servers tab and choose New >
Server.
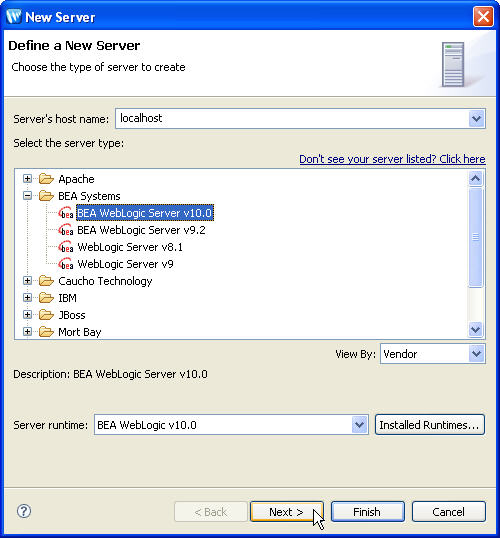
Choose the type of server that you have installed. (The screen shot below
shows BEA WebLogic Server as an example.) Click
Next.
In the New Server dialog, in the Domain home dropdown
list, select <BEA_HOME>\wlserver_10.0\samples\domains\workshop_10.1.
Click Next.
Select the project name in the left pane and click Add to
move it to the right pane. Click Finish.
The new server is displayed in the Servers view.
5.4. Run the application
In the Server View, right-click BEA
WebLogic Server and select Start.
Open the internal web browser by selecting Window
> Open View > General > Internal Web Browser.
In the web browser address bar, enter the URL http://localhost:7001/pages/register.jsf.
In the User ID field enter "ricky". Leave the Password field
blank. Note that if you try to submit the data without filling in the Password
field, you will get an error response.
Attempt ot register with a User ID that is less
than 4 characters in length. Note that you will get an error response.
On successful registration, the user will be forwarded to the home.jsp
page.
Click one of the following arrows to navigate through the tutorial: