Step 4. Managing Persistent Entities with the JPA Persistence Entity Editor
Time to complete this step: 30 minutes
Workshop allows you to view, create, and manage JPA
entity relationships. The Entities Editor provides a centralized
view of all entity relationships, allows you to modify entity properties,
and navigate between the object model, mapping associations, and database
schema layers.
The tasks you will complete in this step are:
To View an Entity Relationship Diagram using
the Entities Editor (Optional)
The Entities Editor displays relationship
diagrams for entities defined in the project.
- In the AppXplorer view, expand workshop-jpa-tutorial
> web (Web App Root) > JPA
Configuration.
Workshop provides a list of entities under the Entities branch
based on the entities defined in the Persistence configurations file.
- Double-click on workshop-jpa-tutorial
> web > JPA Configuration >
Entities Editor to access all entities and their properties.
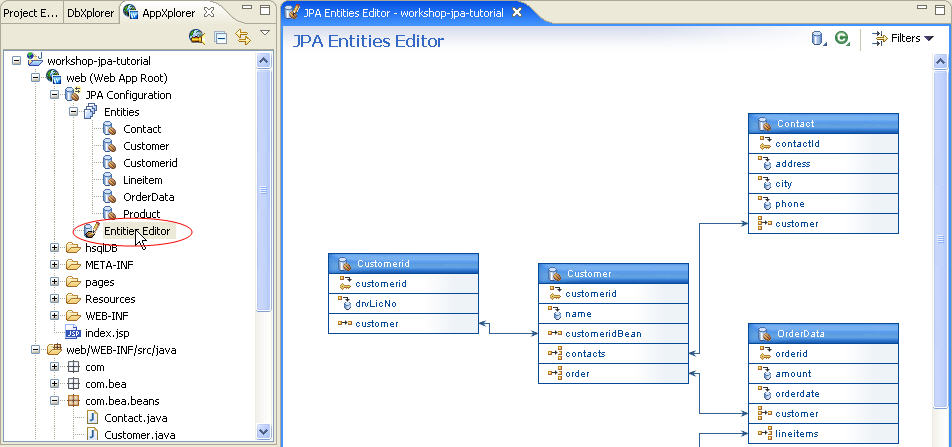
The JPA Persistence Entities Editor displays all entity
relationships defined in the web application. Each box displays a specific
entity, its properties, and an icon denoting the nature of the relationship.
-
Right-click on the Entities Editor and select
any action to perform from the pop-up menu. You can change your view of the entity relationship diagram by right-clicking and selecting operations such as Zoom In, Zoom Out, and Auto Arrangement.
- The JPA Persistence Entities Editor displays property
types for an entity with tool tip popups.
To view a tool tip, hover your cursor over the respective entity.
The JPA Entities Editor also allows you to filter
relationships between entities. This feature helps you simplify your view of the diagram when it is large and complex.
- Click Filters and unselect the options Many
to One and One to Many to filter which entity relationships are noted in the diagram.
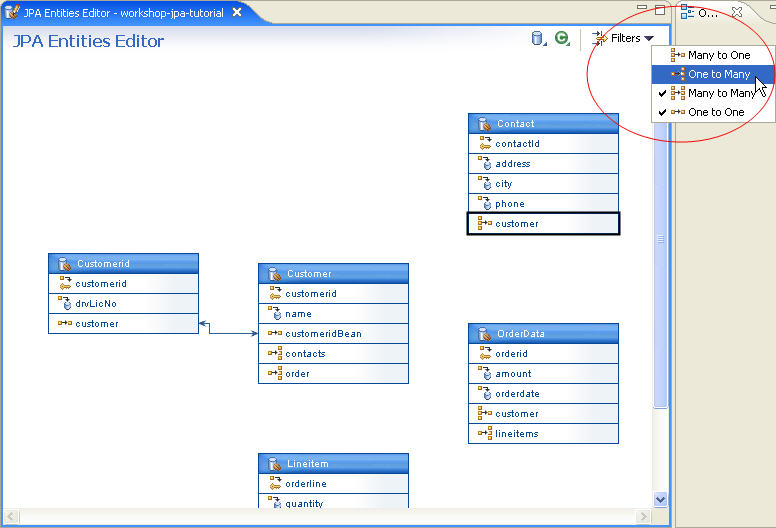
- Reset both filters.
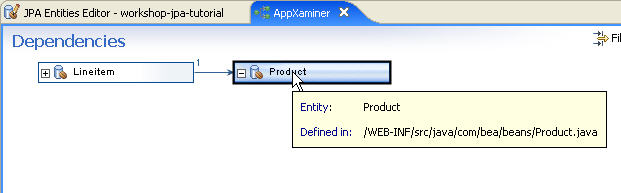
To View Entity Dependencies with the AppXaminer
(Optional)
The AppXaminer allows you to easily view dependencies between entities.
- Right-click
the Product entity and select Show AppXRay Dependencies to view the AppXaminer.
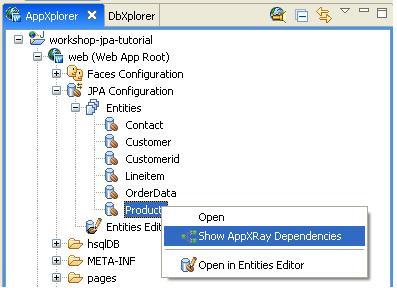
- The AppXaminer View displays the dependency diagram.
To View the Properties of JPA Persistent Entities using the Smart Editor
Using the Smart Editor in Properties view,
you can easily edit entity properties.
- Select the Contact entity in the JPA Entities Editor.
- Click the Properties view to view the Smart Editor.
The Smart Editor displays
the properties for the Contact entity.
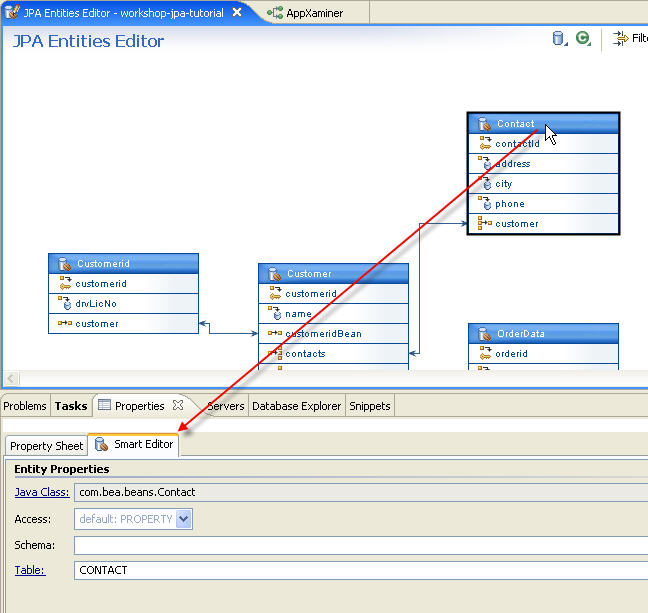
- With the Smart Editor, you can edit the associated Java Bean class,
strategy for persistence, and the database access information for the selected entity. To edit any
information, either enter text in the text box or click on the
 icon to view a list of possible options.
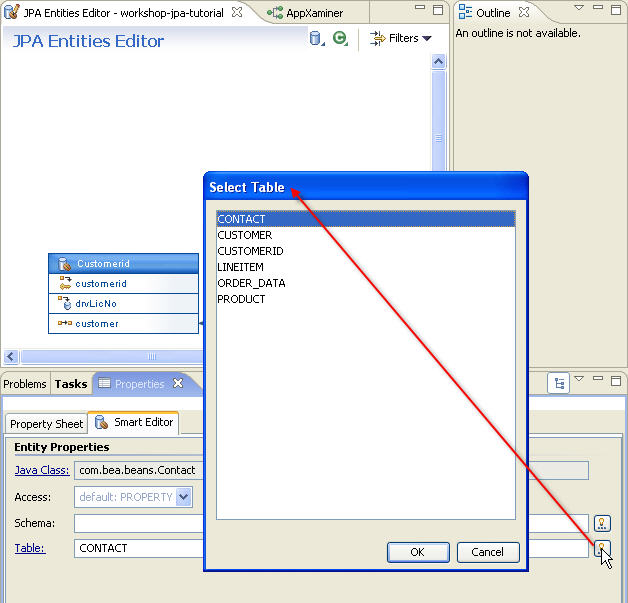
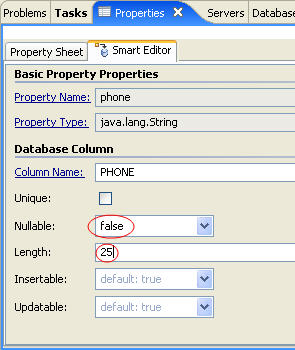
- In JPA Persistence Entities Editor select the phone
property of the Contact entity. The Smart
Editor
displays properties of the phone property. Observe the properties.
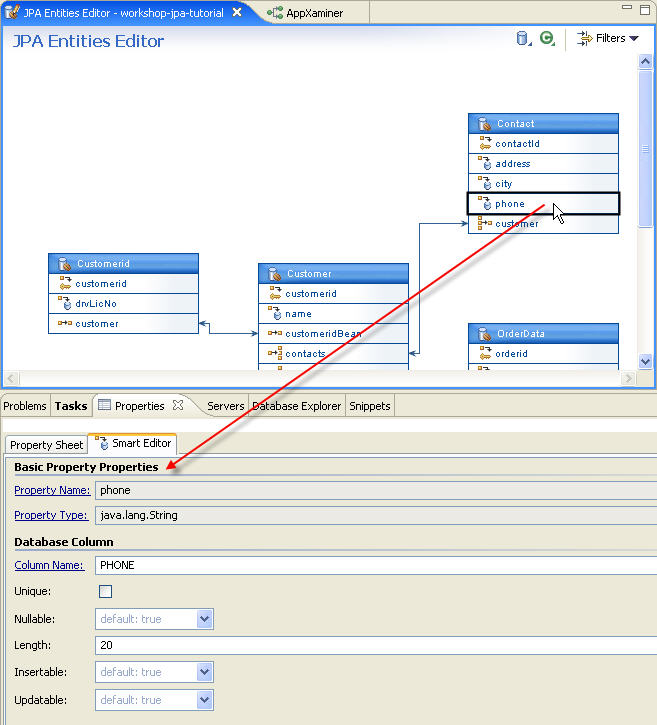
- Use the Smart Editor to modify the Length of phone property.
For example:
- Set Nullable to false
- Update the Length value from 20 to 25
- Press CTRL+S to save the changes.
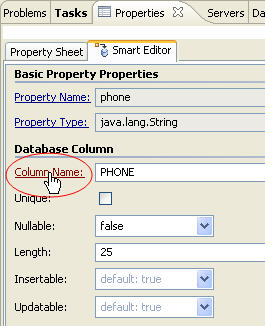
- Click the Column Name of a property under Database Column
in the Smart Editor to display the respective
column in the database diagram in DbXaminer.
- Return to the JPA Entities Editor view from the DbXaminer view.
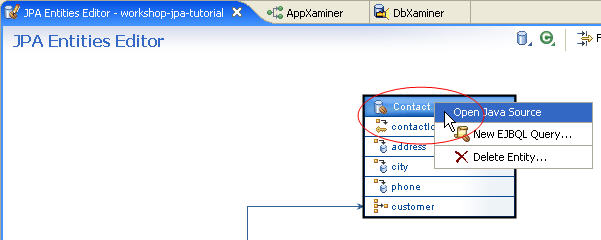
- Within the JPA Entities Editor, right-click the entity Contact to view its source code or delete the entity. You can also double-click the entity to view its source code.
To Manage JPA Entity Mappings (Optional)
The following describes how the annotations are translated into what
the Smart Editor displays. When the Smart Editor displays an underlined
label, you can click the label to view the corresponding Java source code or
item in the DbXplorer.
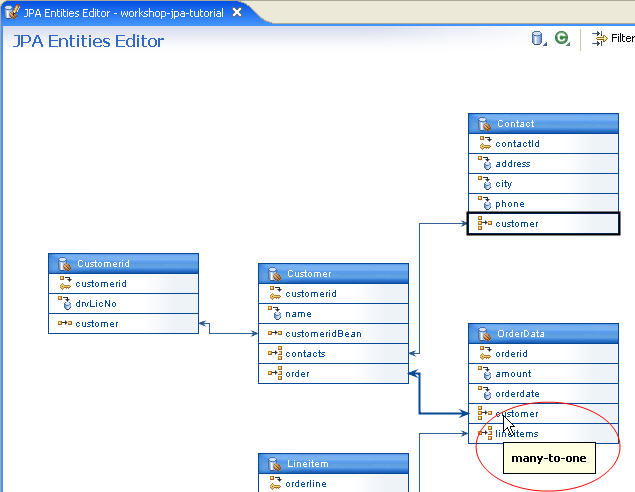
- In the JPA Entities Editor, review the many-to-one association between OrderData
and Customer.
Select the customer property
in the OrderData entity to view its properties in the Smart Editor.
Within the Smart Editor, examine the Join Properties.
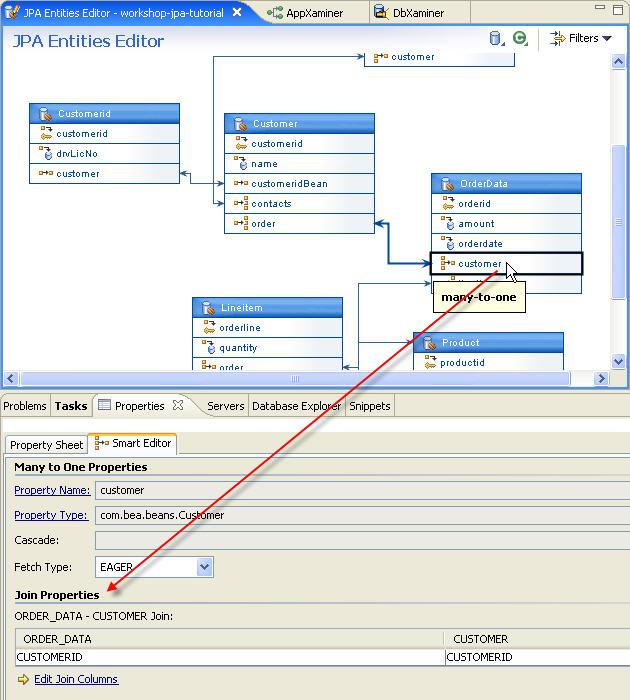
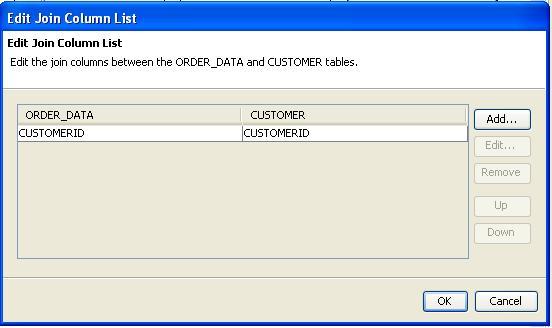
- Under the Join Properties section in the Smart Editor, click Edit Join Columns to edit the mapping
association.
Click Cancel.
- Next, locate the one-to-many association
between OrderData and Lineitems.
Click on
the
lineitems property in the OrderData entity
and view Target Entity and Mapped By properties in
the
Smart Editor.
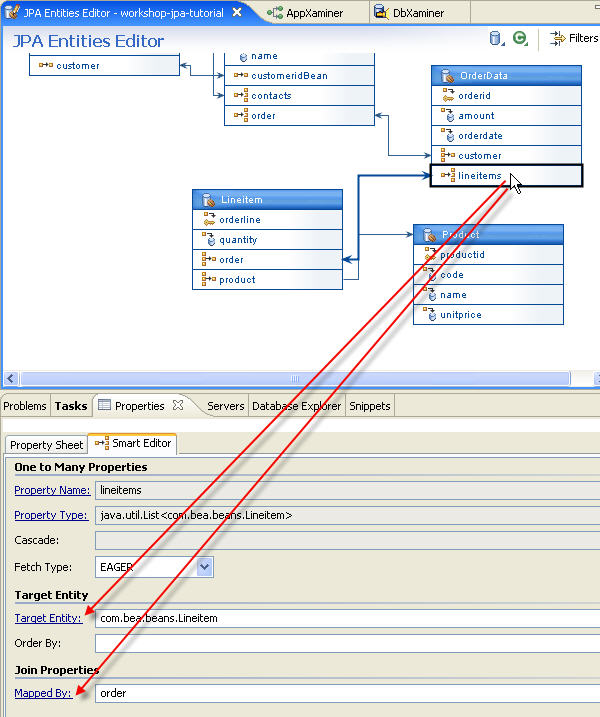
- Clicking Target Entity will take you to the class for
the related entity type Lineitem.
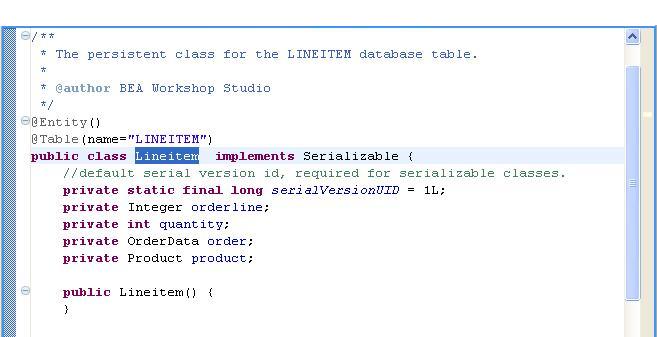
- Close the LineItem.java file.
- Clicking Mapped By under the Join Properties will
take you to the many-to-one association to OrderData
in the Lineitem source code .
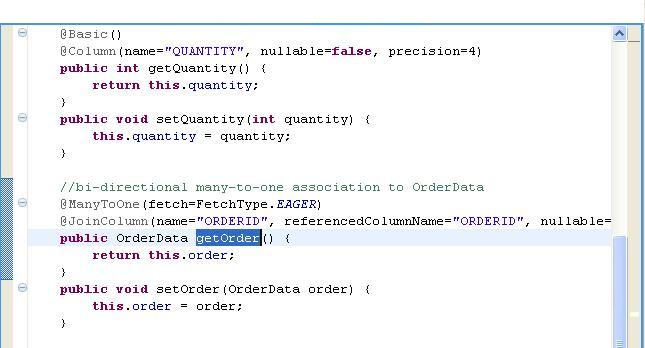
- Close the LineItem.java file.
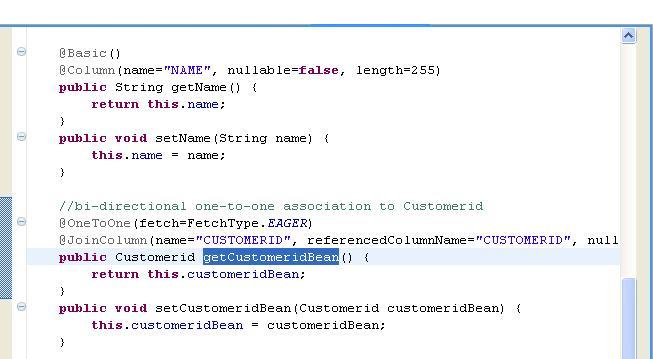
- In the JPA Entities Editor, view the source of the one-to-one association
between Customer and CustomerId by
double-clicking either customer or customeridBean.
- View the one-to-one association between Customer and CustomerId
in the Source editor.
Click one of the following arrows to navigate through the tutorial:
Still need help? Post a question on the Workshop
newsgroup.