Click Next.
Click Finish.
In this step you will create two projects: an EAR project and a Web Application project. These are the basic building blocks required for designing and testing a new Workshop web application.
An EAR project contains and configures resources of other components that are part of it, components such as web applications, EJBs, databases, etc. An EAR project has two main roles: (1) It is a composite project made up of other projects, such as web projects, EJB projects, and others. (2) It is a resource project containing library modules and JARs which other projects utilize.
The web application project you create belongs to the EAR project.
The tasks in this step are:
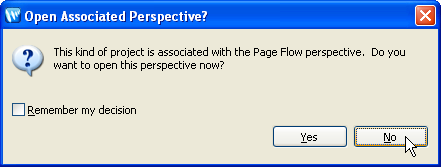
If you haven't started Workshop yet, follow these steps: Start Workshop.
If you would like to execute the tutorial in a separate workspace follow these steps: Create a New Workspace.
Note: If you already have a workspace open, this will restart Workshop. Before beginning, you might want to launch help in standalone mode to avoid an interruption the restart could cause, then locate this topic in the new browser. See Using Help in a Standalone Mode for more information
In this step you will add a WebLogic Server domain for use with Workshop. This server domain contains runtime libraries required by the application and the application will be deployed to this server.
In this step you will add three projects and a server configuration for WebLogic Server.
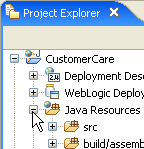
 When
your web application is first created, it is displayed in the Project
Explorer
view by default. The Project Explorer view shows a logical view of your workspace
and its resources.
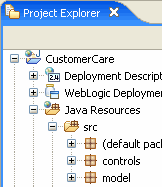
When
your web application is first created, it is displayed in the Project
Explorer
view by default. The Project Explorer view shows a logical view of your workspace
and its resources.
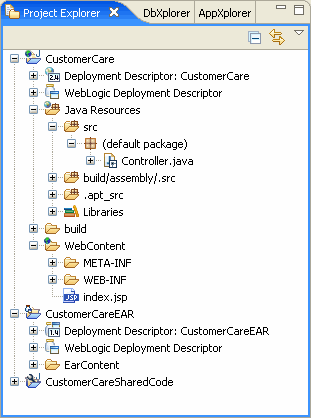
There are now three projects in your workspace: the web project CustomerCare, the EAR project CustomerCareEAR and the utility project CustomerCareSharedCode. These projects appear as sibling projects, since they are on the same level of the directory tree. But when they are compiled and deployed, the EAR project CustomerCareEAR is really a container project for the web project CustomerCare.
The CustomerCare Web Project
The CustomerCareEAR EAR Project
The CustomerCareSharedCode Project is designed to contain code used by multiple projects in the application, such as controls.
In this step you will import control files into your web project, control files that provide access to a customer database. An alternative design would locate these controls in a utility project (File > New > Project > J2EE > Utilty Project), which would make the controls available to all projects in the EAR. But for the sake of simplicity and expediency we have placed the controls directly in the web project.
Watch Out! Don't open the webService folder by mistake!
Click one of the following arrows to navigate through the tutorial:
|
|
|