In this step, you will use the JSP editor to add content to the JSP file that you created in the previous step.
The tasks in this step are:
Depending on the project facets that you have installed, you will see additional
tag libraries.
Add a Table to the JSP
To add a table to the JSP:
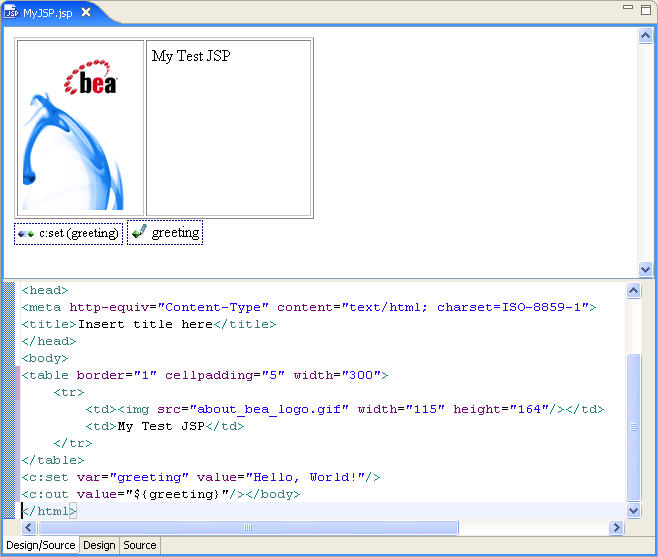
- The JSP you created in the last step displays in the editor as
shown below.
The page displays in Design/Source view (note the tab at
the bottom of the editor) which is a split-pane view showing the JSP
source at the bottom and the graphic design above.
The Workshop JSP editor is a synchronized editor,
so you can alter the page from the Design view or the Source view and
the two views will stay in sync.
- Let's begin by adding a table to the page. To do this, from the Design Palette view (the HTML section), drag the Table element
to the Design view.
- You will be prompted to specify the table properties:
For this example, set 1 row and 2 columns. Click OK to
proceed.
- The Design view updates to show the table. Note that the Source view
has also been updated.
Also note that you can edit the table directly in the Design view. For example,
right-click one of the table cells and select Table > Insert Column to
add a third column.
Insert Graphics and Text
The next step of the tutorial is to add a graphic and some text to the table. To do this:
- From the Design Palette view (the HTML section), drag the Image element to the left cell of the table.
- You will be prompted to specify the image:
For this example, we will use the graphic file that we copied above: WebContent/about_bea_logo.gif. Click on the  icon beside the Source field.
- From the Choose File dialog, choose the file and click OK.
Click OK on the Image Tag dialog to close it.
- The editor updates to show the image:
- Next let's add the text My Test JSP to the table. To
do this, you can either click on the table cell in the Design view,
or click after the <td> tag in the Source view.
Enter the text.
Add a JSP Variable
So far, we have added only HTML tags to our JSP. Next we will add JSP tags.
To add a JSP tag:
- From the JSTL Core section of the Design Palette drag
the Set tag into the Source view and drop it directly
after the </table> tag.
- In
the Set Tag dialog,
in the Var Name field, enter greeting.
In
the Value field, enter Hello, World!
Click OK.
- Locate the Data section of the Design Palette and expand the Page Variables node.
- Drag the greeting node
into the Source view and drop it directly after the <c:set var="greeting" value="Hello,
World!"/> tag.
- Save the JSP file.
Other Features to Explore
Some of the other features that you may want to try include:
- Experiment with synchronized editing, where you edit in the Source view
and the Design view updates automatically. You can use HTML or JSP tags.
- Create a JSP include by dragging the Include tag onto
the Design view. Included JSP fragments will be rendered automatically
in Design view and can be debugged. Anything in the included file such
as variables or tag definitions are recognized
by AppXRay and validated for use in any other page.
- Apply a CSS stylesheet to your JSP by dragging the CSS tag
onto Design view or by using the Smart Editor (in the
Properties view) to specify style classes.
- You can drag tags onto either the Design or Source views. Note that if
you drag to the Source view, you must position the cursor in advance on
the Source view, at the destination point for the tag.
- In Design view, try dragging an element from one location to another.
- In the Source view, the IDE does code completion for any HTML tag, JSP
tag or scriptlet. Activate code completion by pressing Ctrl+Space.
- Hold down the Ctrl key and hover over elements in a
JSP. Notice
that certain resource becomes underlined. For example, references
to other JSPs, tag libraries, images, etc. will become underlined. Clicking
on an underlined element will navigate to that element.