If you have a pure HTML page (for example, a mockup created by a web designer), you may need to convert it to use JSP (JSF) tags. The Workshop group of products provide a conversion wizard which migrates an HTML page to JSF. The conversion wizard converts the <form> tag to use JSF managed beans. HTML tags are simply copied into the output file.
The input file is either an HTML or JSP file that has at least one HTML <form> tag.
Starting the Conversion Wizard
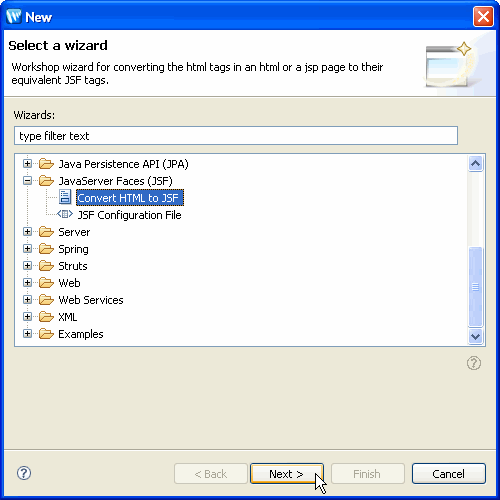
To convert an HTML page, choose File > New > Other from the submenus. Expand Java Server Faces (JSF), choose Convert HTML to JSF and click Next to continue.
Specifying the File Locations
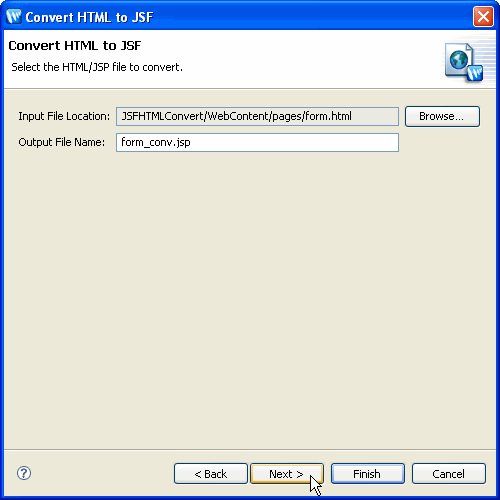
From the next dialog, you must specify the file names for the input and output (converted) file.
Input File Location is the path of the file to be converted, starting from the project name. In the sample screen shot below, the project name is JSFHTMLConvert and the file form.html is located in the WebContent/pages subfolder. If you initiated the conversion wizard by right clicking on the file to convert, this field will be filled in for you. Alternately, you can click Browse to locate the file to be converted.
Output File Name is the name of the new file that will be generated by the conversion process. The new file will be located in the same folder as the original file.
Click Next to continue.
Specifying the Conversion Options
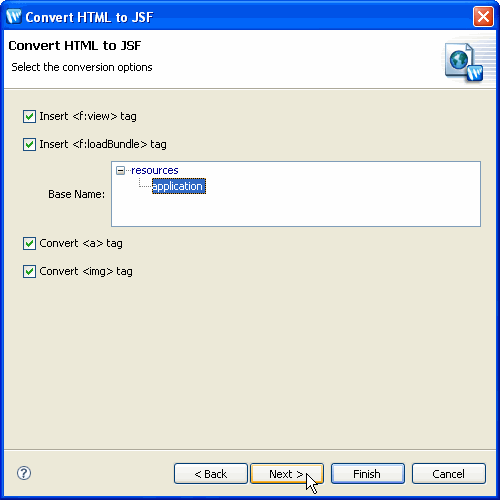
The next screen allows you to set several conversion options:
- Insert <f:view> tag - Specifies that a <f:view> tag will be added to the output file.
- Insert <f:loadBundle> tag - Allows you to specify the path to the resource bundle. The Base Name box allows you to choose one of the available bundles.
- Convert <a> tag - Convert the <a> tag to the JSF <h:outputLink> tag. If this option is left unchecked, the <a> tags will simply be copied to the output file.
- Convert <img> tag - Convert the <a> tag to the JSF <h:graphicImage> tag. If this option is left unchecked, the <img> tags will simply be copied to the output file.
When you have chosen your options, click Next to proceed.
Converting HTML Forms
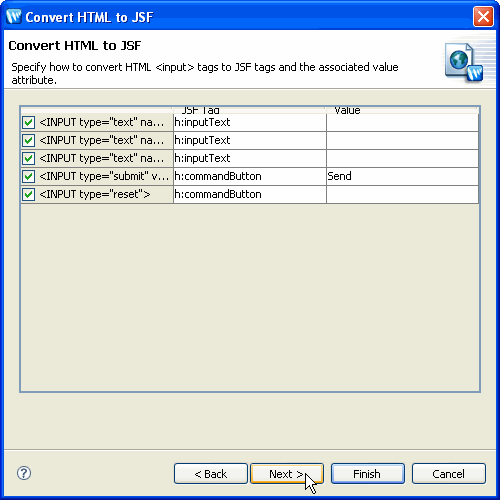
For each <form> tag in the input HTML file, you can specify the managed bean for each data collection <input> tag in the form and the JSF tag and values for each <input> tag.
The next two screens will be repeated for each <form> tag in the input.
Specifying the Bean Associated with the <form> Tag
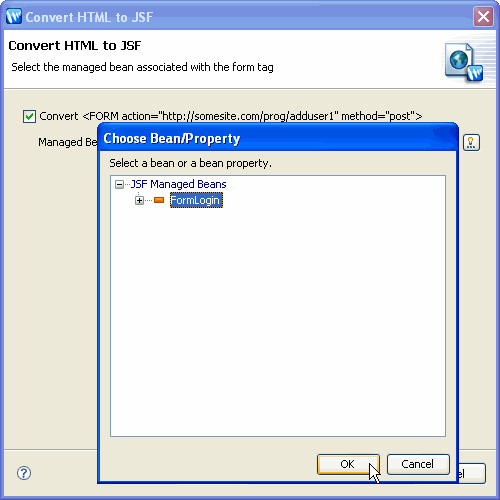
The next screen allows you to specify the managed bean to be specified when the <form> tag is converted. click on the ![]() icon to open the Choose Bean dialog, select the bean and click OK to continue. Click Next to continue.
icon to open the Choose Bean dialog, select the bean and click OK to continue. Click Next to continue.
Specifying <form> Tags to Convert
The next screen allows you to associate each data collection field in your HTML <form>. The left column shows all of the <input> tags found in the current <form>. You can specify the JSF tag in the second column and use the third column's pulldowns to specify the value for each <input> tag.
Completing the Conversion
When all of the <form> tags have been converted, click Finish to complete the conversion and create the output file.
