Step 2: Add a Web Service to the Project
In this section, you will add a simple web service to the project you created in Step 1 by first creating a Java package and then inserting the web service into the package.
- In the Project Explorer, expand ServicesWeb > Java Resources , right-click the src folder, then select New > Package.
- In the New Java Package dialog, in the Name box, enter services and click Finish.
Notice that a package named services is now displayed under the ServicesWeb/src directory in the Project Explorer. Physically, services is a directory. - Right-click the services package.
- Click New > WebLogic Web Service.
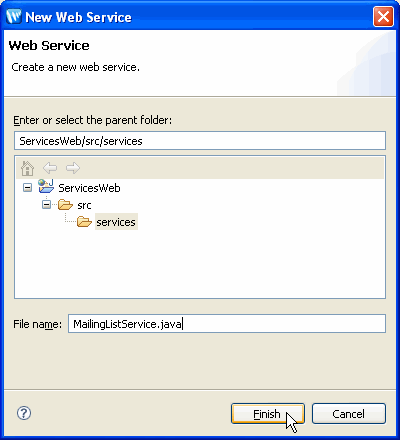
- In the New Web Service dialog, in the File name box, enter MailingListService.java, then click Finish.
The preceding steps created the new Java file MailingListService.java in the services folder. You should now see MailingListService.java in Design View.
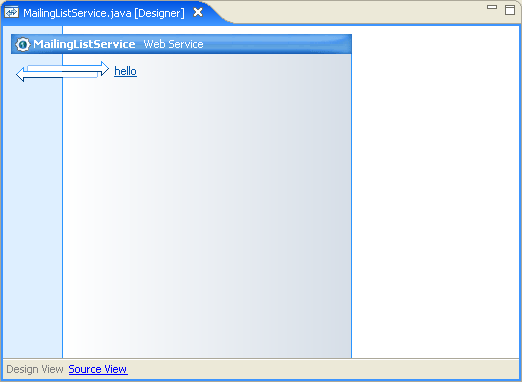
Design View gives a graphical representation of your web service, its methods, and any controls it contains. The web service MailingListService.java has one method, named hello, and no controls. The hello method is created by default with each new web service.
To see the underlying source code for the web service, click the Source View link at the bottom of Design View. The source code for the web service appears as follows:
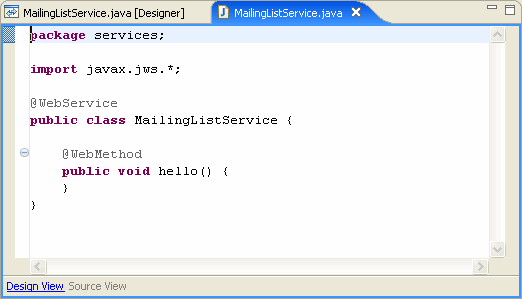
Note the use Java 5 annotations in the source code. For example, the @WebService
annotation specifies that the MailistListService class implements a web service. Java 5
annotations are used to set properties on the web service class and its methods.