Adding Visitor Tools to Portals

You can add functionality to your portal desktops that lets visitors modify their desktops, books, and pages. In order to use these Visitor Tools, visitors must be logged in to a desktop that is running in streaming mode. See See Single File vs. Streamed Rendering.

Visitors access the visitor tools by clicking a text link or an icon in the desktop menu bar, as shown in the following illustration.

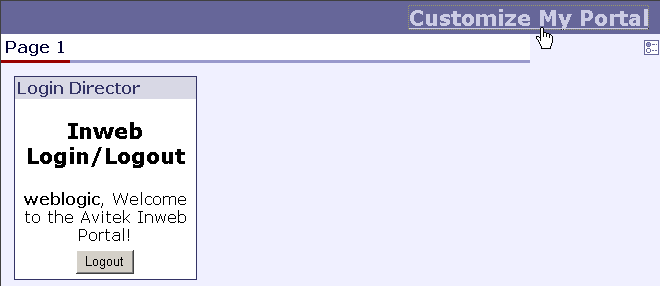
In this example, visitors can click on either the Customize My Portal link or the icon below it to access the Visitor Tools. The Customize My Portal link is supplied by the JSP used in the shell (described later in this topic), and the Edit icon is inserted by the menu skeleton JSP. Notice that the visitor must be logged in to access the Visitor Tools.

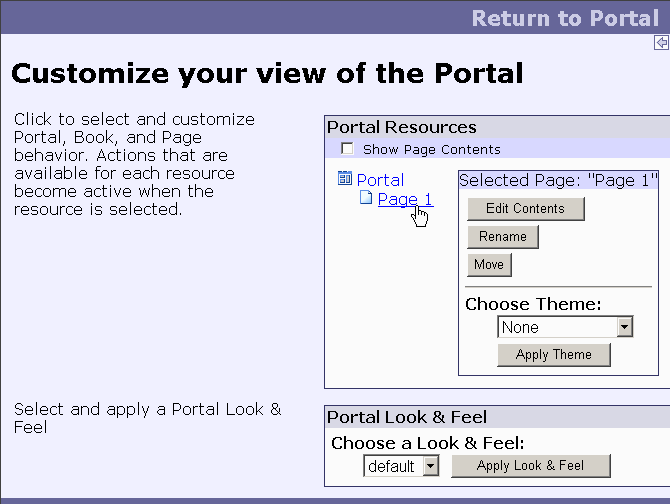
The following figure shows the Visitor Tools.

To add the Visitor Tools to Your Portals

The following procedure for adding Visitor Tools assumes you are adding them to a custom portal application (not the portalApp sample). If your application an/or project is not portal-enabled, install portal in both. See Creating a Portal Application and Portal Web Project.

  1. Set up some form of authentication for your portal desktop. See Login Portlet, Login Director, or Implementing Authentication for information on adding authentication to your desktops.
  2. In WebLogic Workshop create a new portal file.
  3. In the Portal Designer, select the Main Page Book.
  4. In the Property Editor window, set either of the following combinations of property values:

    Navigation: Single Level Menu or Multi Level Menu
    Editable: Edit in Menu

    or

    Navigation: No Navigation
    Editable: Edit in Titlebar
  5. In the Mode Properties that appear, click the ellipsis icon [...] in the Content URI field, select <project>/visitorTools/visitorTools.portion, and click Open.
  6. Set the Visible property to false.
  7. In the Portal Designer, select the Desktop.
  8. In the Property Editor window, set the Shell to "Visitor Tools Shell."

    Now you must create a streaming desktop using the .portal file as a template to use the Visitor Tools.
  9. If the server is not running, start it. Choose Tools --> WebLogic Server --> Start WebLogic Server.
  10. When the server is running, choose Portal --> Portal Administration to start the WebLogic Administration Portal.
  11. Log in to the WebLogic Administration Portal (the default username and password is weblogic/weblogic).
  12. Create a new desktop using your .portal file as a template. See Create a New Portal and Create a Desktop in the WebLogic Administration Portal online help posted on e-docs.
  13. Select the new desktop in the Portal Resources tree, and go to the Desktop Properties page. At the bottom of the page, click View Desktop.
  14. When the desktop appears, log in and access the Visitor Tools.

You will notice that you can access the Visitor Tools by clicking the Customize My Portal link or the Edit icon. You do not have to use both ways to access the Visitor Tools.

The main page book in your .portal file can be used as the main page book when creating a desktop in the WebLogic Administration Portal to enable Visitor Tools. This will provide the desktop with Visitor Tools.

Note: You can also use the default New Blank Desktop template in the WebLogic Administration Portal to create a desktop that has Visitor Tools enabled.


Related Topics

Creating Shells