Building a Remote Portlet
Remote, or "proxy," portlets present content collected from WSRP-compliant
producers. Remote portlets route requests from users to the appropriate Producers
which, in turn process the request and send results back to the consumer. Consumers
then aggregate the results coming from various producers and send the final
result back to the user, who can view and use those results in remote portlets.
Consumers have the ability to keep traffic separated and maintain all interactions
private to that specific user during the interaction.
This procedure describes how to:
Before You Begin
Before you begin this procedure, you must have already created a domain, a
portal application, and a portal project. If you haven't, please do so by using
the procedures outlined in:
Creating the Portlet
To create a remote portlet, use this procedure:
- With WebLogic Workshop running, right-click the application that hosts the
portal for which you are creating the portlet and right-click the portal application
(alternately, select that application and select File>New>Portlet).
- Select New > Portlet.
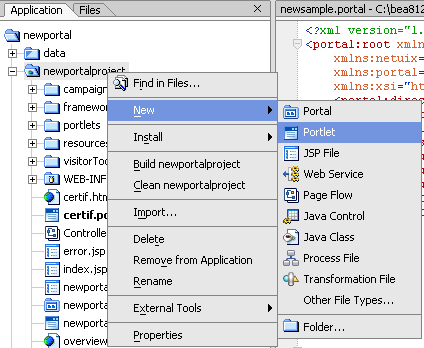
(Alternately, open the File menu and select New
> Portlet)
The New File window appears.
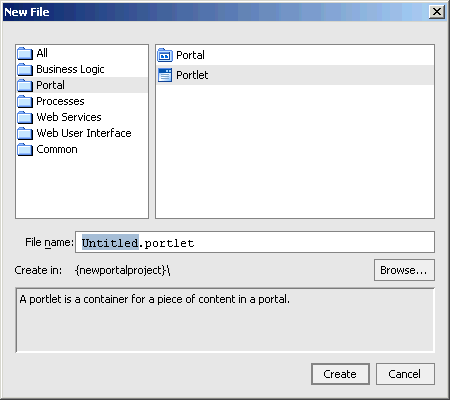
- On New File, do the following:
- In File name, replace "Untitled" with the
name of the portlet (do not change the file extension, .portlet).

- If the portal project displayed in Create in: is not
the project inwhich you want to create the portlet, click Browse
to display the Select dialog box and select the desired project (optional)
- Click Create.
The Portlet Wizard appears.
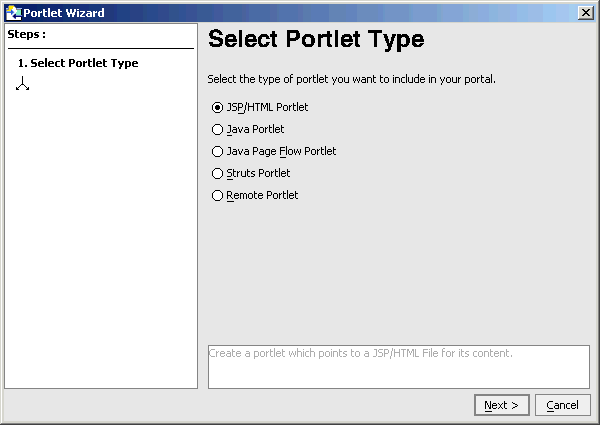
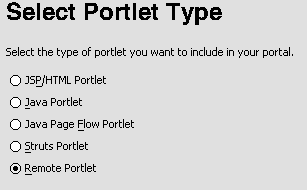
- Under Select Portlet Type, select Remote Portlet
and click Next.
The Portlet Wizard's Find Producer window appears:
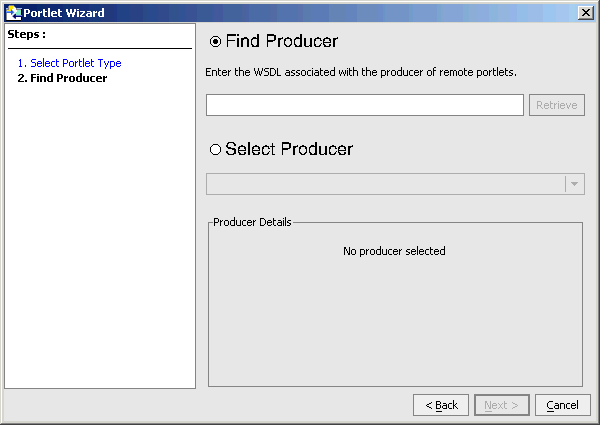
On this window, you can either specify the WSDL for the producer you want
to use or select one from the drop-down list.
- Do one of the following:
- Type the WSDL of the producer of the remote portlet you want to use and
click Retrieve; for example:

OR
- Click Select Producer, open the drop-down list of producers
handles, and select a producer from that list.
The Find Producer window refreshes, this time displaying details on the
producer you selected:
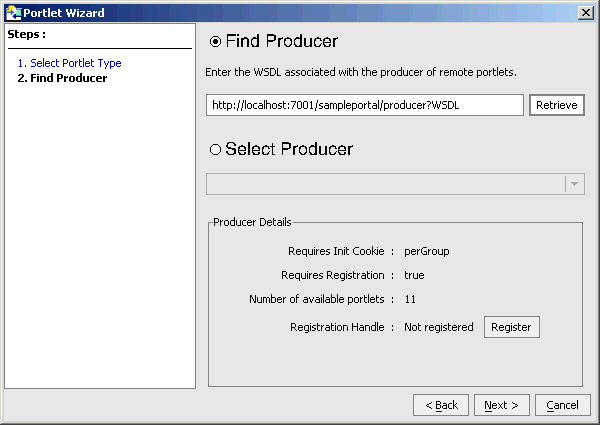
NOTE: In this example, the server is running, thus the
ability to use localhost:7001 for the producer. Your needs might differ.
- Click Register and do the following:
NOTE: If registration is not required (Requires
Registration: False) proceed to step 7.
- Click Register.
The Register window appears:
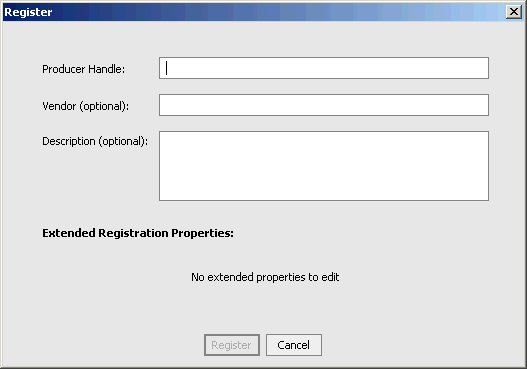
- In Producer Handle, type a name with which you want
to identify the producer (on subsequent uses, this name will appear in the
Select Producer drop-down list, making it easy to use them
again). This value must be unique for each producer
added to a remote project.
- Entering the Producer Handle will activate the Registration
button.
- Optionally, you can enter the name of the Vendor and
a Description of the resource.
- Depending upon the producer you selected, you might also see a list of
Extended Registration Properties. These properties are set by the producer
and some might require you to provide an accepted value before registration
can be completed. Contact the producer for details if you are required to
provide any extended properties.
- Click Register
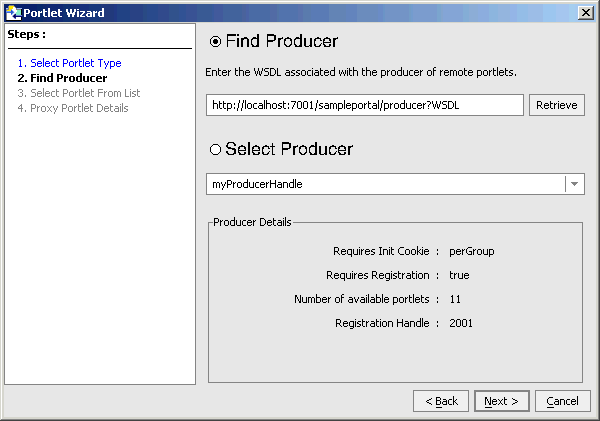
The Find Producer window reappears with the producer handle displayed
in the Select Producer field.
- Click Next
The Select Portlet from List window appears:
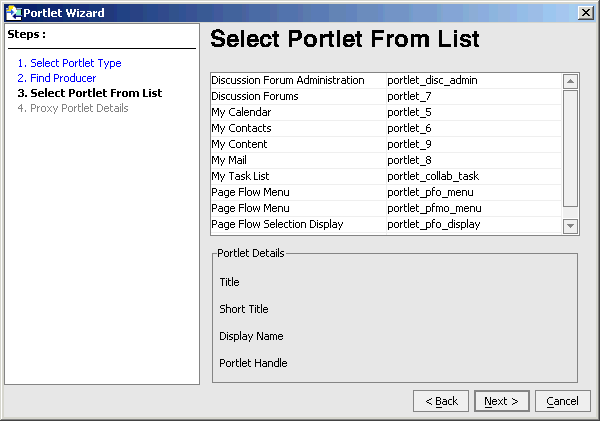
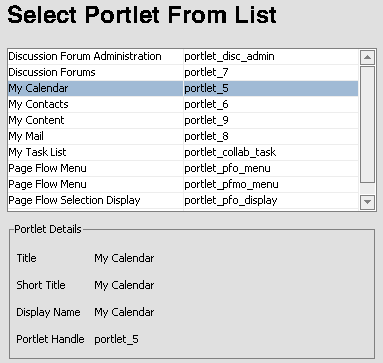
- Select the portlet you want to use. Note that when selected, details about
that portlet appear in the Portlet Details panel:
- Click Next.
The Proxy Portlet Details window appears:
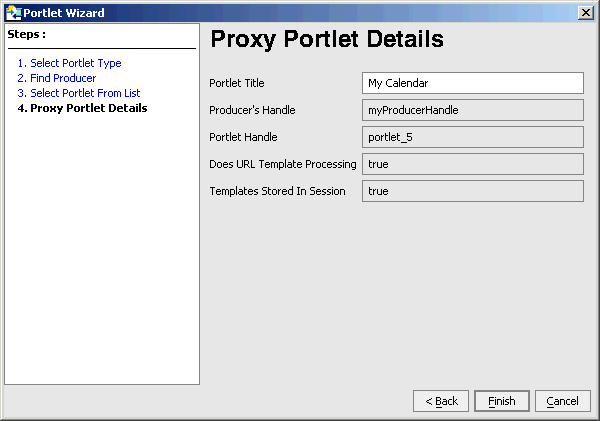
- The window displays pertinent information about the portlet. If you want,
you can change the name in Portlet Title to something more
meaninful to your portal application; for example:

The name will appear in the title bar of the portlet when it is rendered
in the parent portal.
- Click Finish.
- The portlet will be created and appear as a placeholder in the IDE:
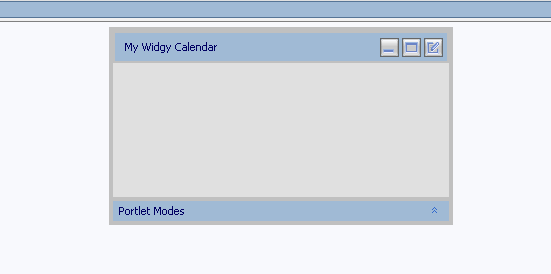
Note the new portlet name in the title bar.
Adding the Portlet to a Portal
To add the remote portlet to a portal, do the following:
- In WebLogic Workshop, open the portal to which you want to add the portlet.
- Select the remote portlet from the list of portlets in the data palatte
and drag it onto the portal workspace.
- Save the portal.
For more information on adding a portlet to a portal, please refer to Adding
a Portlet to a Portal.
Viewing the Portlet
To test the new remote portlet, do the following:
- Add the remote portlet to a portal by dragging it into the portal workspace.
- Start WebLogic Server.
- In Workshop, open the Portal menu and select Open
Current Portal.
The portal will render in your browser and show the new remote portlet.
Related Topics
Enabling/Disabling a Portlet for Remote Consumption
Setting the Timeout on a Remote Portlet
Customizing a Remote Portlet


![]()


![]()
