In this step, we will import some readymade web components like DAO classes, JSPs and servlets, create server
configurations, deploy and run the Hibernate web application.
11.1. Import / edit web components (JSP and DAOs etc.)
Create the following java packages:
com.bea.dao
com.bea.util
Copy all the classes from the Workshop-Hibernate-Tutorial/web/Resources/dao-classes folder to com.bea.dao package. Classes under this package manages object persistence using Hibernate.
Similarly, the MessageFactory class from the Workshop-Hibernate-Tutorial/web/Resources/util folder to com.bea.util package.
Copy all the JSPs from the Workshop-Hibernate-Tutorial/web/Resources/JSPs folder to Workshop-Hibernate-Tutorial/web/pages folder.
Copy the Workshop-Hibernate-Tutorial/web/Resources/stylesheet.css file to the web
folder.
Copy the Workshop-Hibernate-Tutorial/web/Resources/application.properties file and overwrite to application.properties file under the web/WEB-INF/src/java/resources folder.
Create a new class CustomerManagedBean under the com.bea.beans package. Add property customer of type com.bea.beans.Customer to CustomerManagedBean class and corresponding getter / setter methods.
We will also add few action methods to com.bea.beans.CustomerManagedBean.java. The methods are responsible to add the customer to the data store, retrieve orders of specific customer.
In CustomerManagedBean class, copy methods from Workshop-Hibernate-Tutorial/web/Resources/BackingBean_Customer_Methods.txt file.
You need to define Managed Beans and Navigation Rules in faces-config.xml file.
The web/Resources folder contains faces-config.xml file with Managed Bean configurations and Navigation Rules for the web application. Copy (and overwrite) web/Resources/faces-config.xml to web/WEB-INF/config folder.
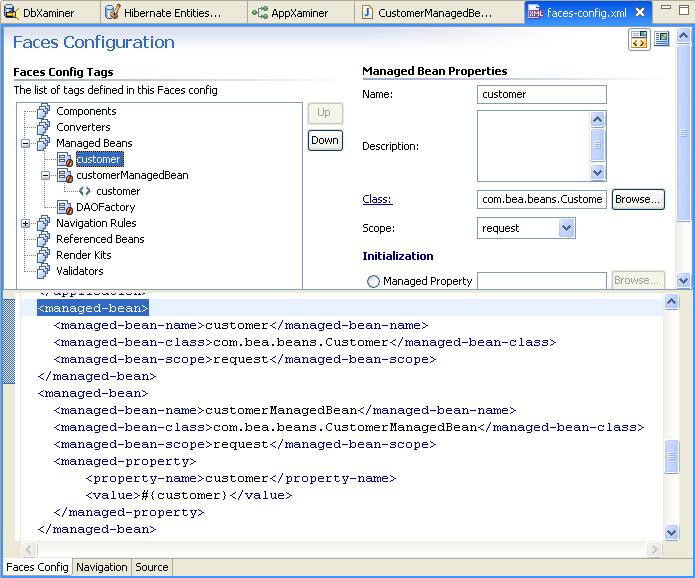
Open the web/WEB-INF/config/faces-config.xml file and review the Faces configurations. It defines Customer and CustomerManagedBean as managed beans in request scope. Also, defines DAOFactory as managed bean in application scope.
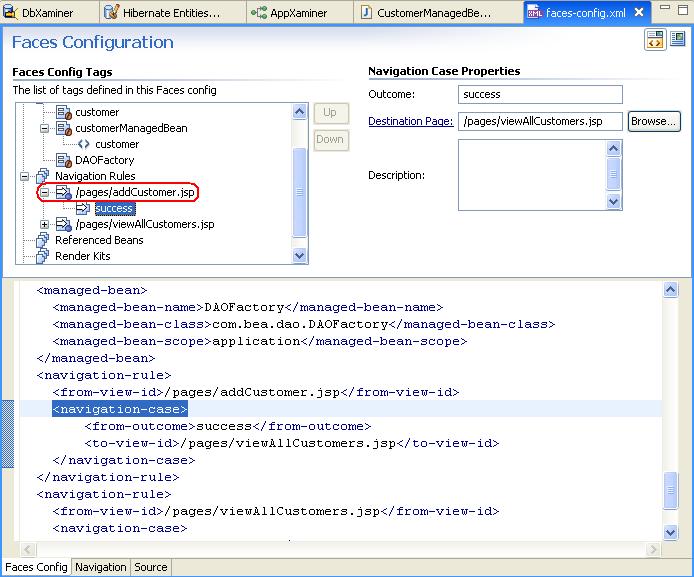
It defines Navigation Rules for addCustomer.jsp and viewAllCustomers.jsp.
The navigation case for addCustomer.jsp specifies /pages/viewAllCustomers.jsp as destination page while the outcome is success.
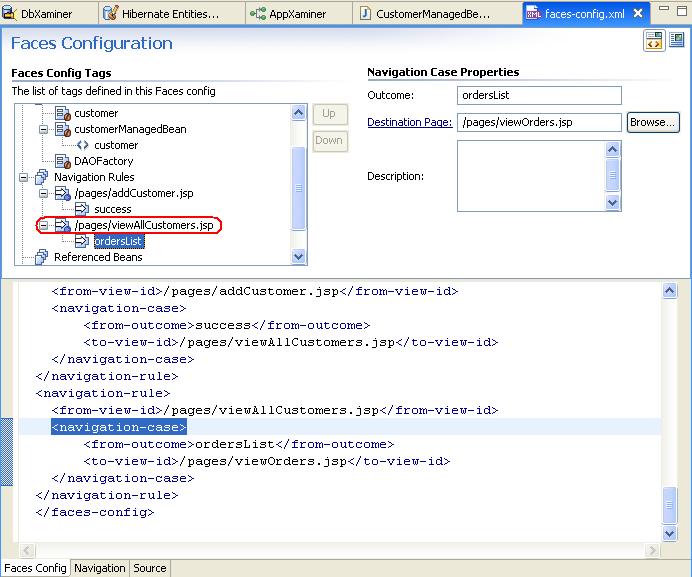
Similarly, it defines the navigation case for viewAllCustomers.jsp describing /pages/viewOrders.jsp as destination page while the outcome is orderList.
Save the faces-config.xml file.
11.3. Create Server Configurations
Workshop has the ability to run and debug applications on most of the popular web containers that are in use today. Before you can run this sample application, you must have a server installed.
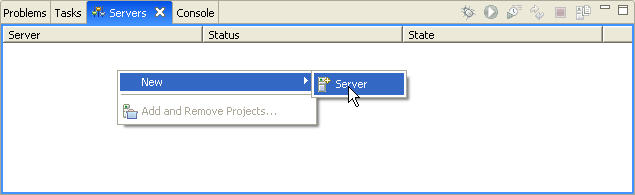
Click on the Servers tab. If the Servers view tab is not displayed, click Window > Open Perspective > Workshop to display it (or click Window > Show Views > Other then expand Server, click on Servers and click OK).
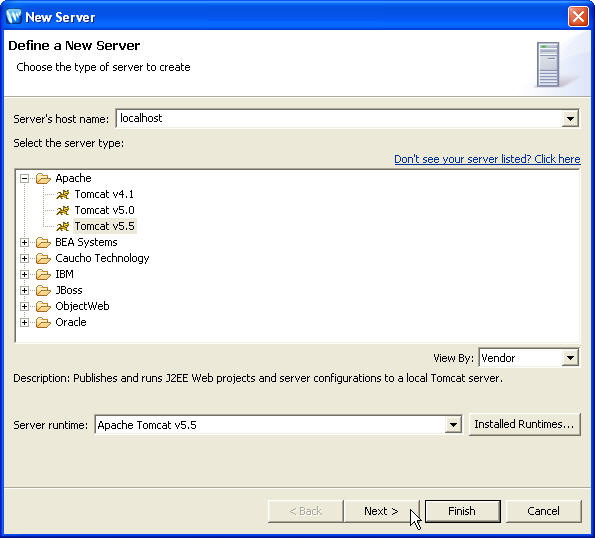
Right click on the Servers tab and choose New > Server.
Choose the type of server that you have installed. Click Next.
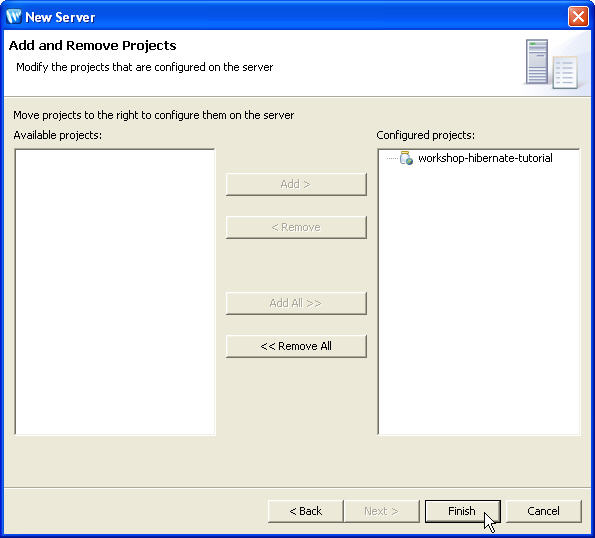
Select the project name in the left pane and click Add to move it to the right pane. Click Finish.
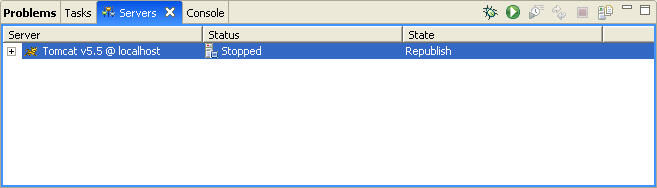
The new server is displayed in the Servers view.
11.4. Deploy the Hibernate web application
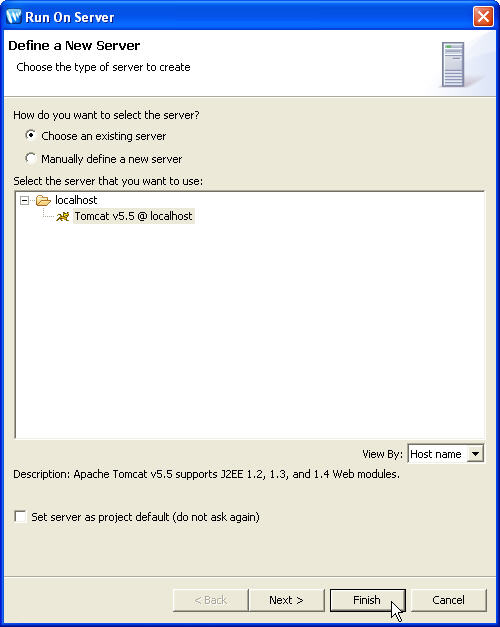
To run the application, right click on the project name in the Package Explorer and choose Run As > Run on Server from the submenu.
Click Finish.
Once the server starts successfully, the test browser pane opens. Enter the address http://localhost:8080/pages/addCustomer.jsf in the address line of the test browser pane. The Console view displays the server output. Once the Tomcat server starts completely, the addCustomer.jsf page is called in browser.
If any deployment specific errors found then resolve it and ensure successful deployment of the application.
11.5. Run the application
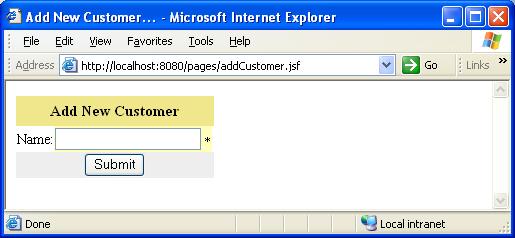
Once the addCustomer JSF page loads, you will see the screen below.
To add a new customer, enter name Bob and click Submit.
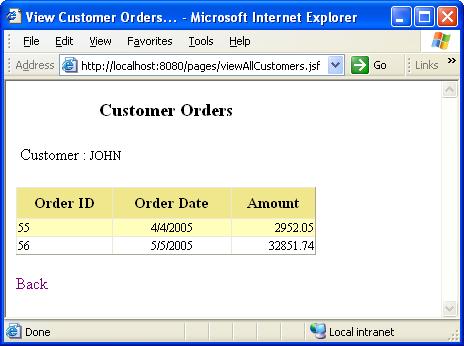
The application calls addCustomer( ) action method of Customer managed bean and forwards the request to viewAllCustomers.jsp, if customer is added successfully. The viewAllCustomers.jsp gets customers list using <h:dataTable> component and displays it shown below:
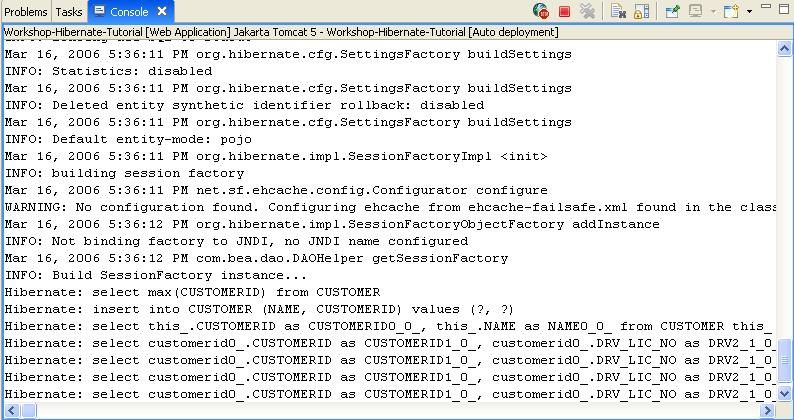
You can also observe the debugging messages at the Console view in Workshop Studio. Note: we have enabled the hibernate.show_sql property to display SQL statements.
Click View Orders button for the customer name JOHN to get the list of order(s) placed by JOHN.
Click Back to browse the previous page and get list of orders placed by other customers.
Once you are done, stop the Tomcat Server.
Click one of the following arrows to navigate through the tutorial: