2 Using JDeveloper with Coherence
This chapter describes how to set up JDeveloper to build and run Coherence-based Java applications.
2.1 Configuring Oracle JDeveloper for Coherence
To start up and configure JDeveloper for use with Coherence:
-
Open a terminal window and verify that the
PATHenvironment variable is set to include\oracle\product\jdk160_05\bin. If thePATHenvironment variable does not includejdk160_05\bindirectory, then set the variable as follows:-
Set the
JAVA_HOMEenvironment variable to the base of the JDK installation.set JAVA_HOME=\oracle\product\jdk160_05
-
Include
%JAVA_HOME%\binin the PATH environment variable.set PATH=%JAVA_HOME%\bin;%PATH%
-
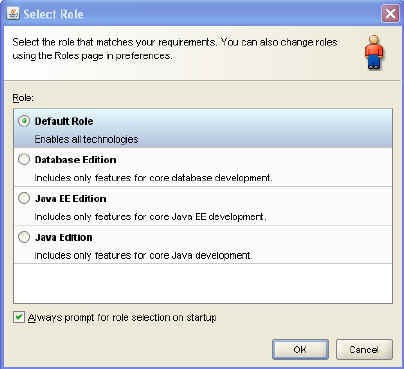
Start JDeveloper. If you get a message asking you to select a role, select Default Role. If you get a message asking whether you want to migrate from previous versions of JDeveloper, select No. Close any window that displays the Tip of the Day."
-
-
After JDeveloper starts up, click New Application to create an application.
An application is a way of grouping projects or source code. This new application will hold the Coherence projects.
-
In the dialog box, change the application name to Coherence, the directory to
\home\oracle\labs, and the application package prefix tocom.oracle.coherence.handson. Click OK, and then click Cancel when prompted to create a new project.Figure 2-2 Creating an Application in JDeveloper
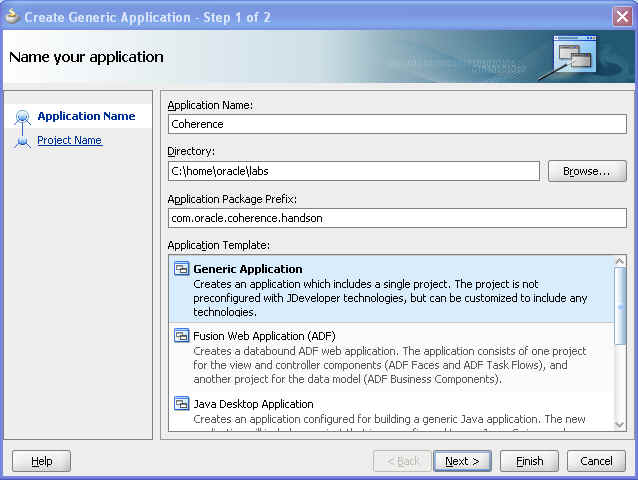
Description of "Figure 2-2 Creating an Application in JDeveloper"
-
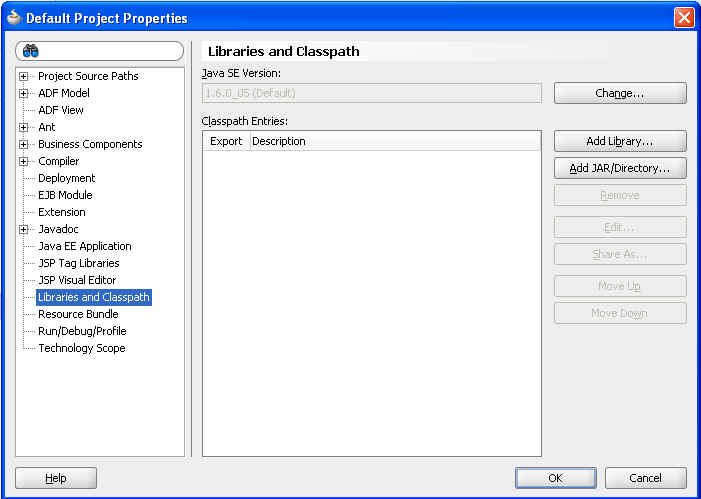
Add the Coherence JAR files to the default project properties. From the Tools menu, select Default Project Properties. The Default Properties dialog box opens.
-
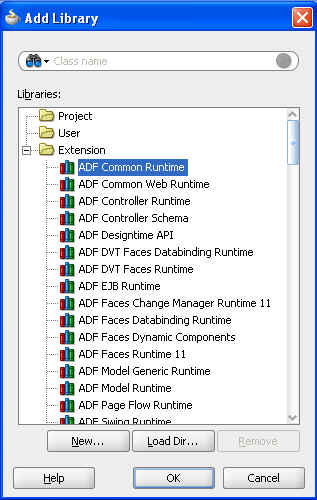
Click Libraries and Classpath, and click the Add Library button. The Add Library dialog box opens.
-
In the Add Library dialog box, click New.
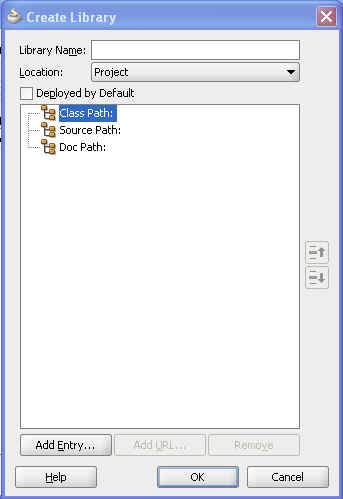
The Create Library dialog box opens.
-
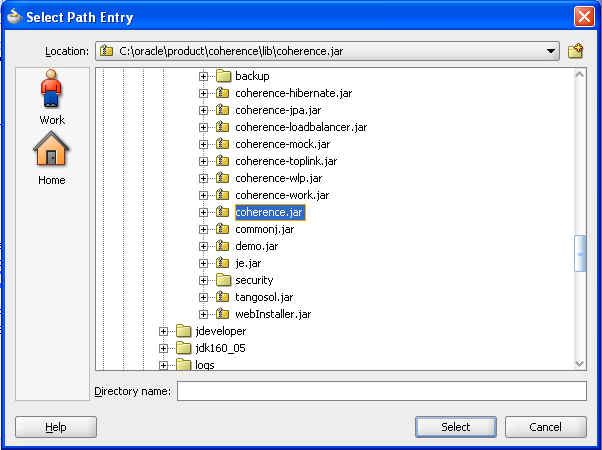
Click Add Entry to open the Select Path Entry dialog box.
Find and expand the
coherence\libdirectory, which is under the\oracle\productdirectory. -
Highlight and select the
coherence.jarfile add it to the Classpath. Then, click OK to return to the Create Library dialog box. -
In the Create Library dialog box, change the name in the Library Name field to Coherence. The contents of the dialog box should look like this:
Figure 2-7 Create Library Dialog Box with the Coherence Jar on the Classpath
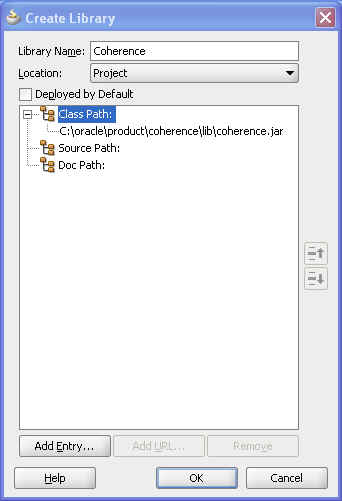
Description of "Figure 2-7 Create Library Dialog Box with the Coherence Jar on the Classpath "
-
Click OK in the Create Library, Add Library, and Default Project Properties dialog boxes to return to the JDeveloper IDE. Oracle JDeveloper is now set up with the correct Coherence libraries.
2.2 Accessing the Data Grid from Java
In this exercise, you develop a simple, Java console-based application to access, update, and remove simple types of information from a Coherence clustered cache. You also get familiar with using the Coherence Java APIs. In this practice, using JDeveloper, you perform the following:
-
Create a new project
-
Create a new
NamedCache -
Put information into the cache and then retrieve it
-
Retrieve information about the cache
All Coherence caches are named, have a lifetime scoped by the cluster instance in which they exist, and implement the com.tangosol.net.NamedCache interface. The NamedCache interface is an extension of java.util.Map and holds data and resources that are shared among the cluster members. Each NamedCache holds data as key/value pairs. Keys and values can be both simple and complex object types. The NamedCache interface provides extensions to the Map interface, such as locking and synchronization, storage integration, queries, event aggregations, and transactions. The cache topology (or implementation) can be swapped or changed without code changes. Table 2-1 describes some of the more commonly used methods within the NamedCache interface:
Table 2-1 Methods in the NamedCache Interface
| Method Name | Description |
|---|---|
|
|
Removes all entries from the |
|
|
Returns |
|
|
Returns |
|
|
Gets the entry from |
|
|
Puts an object in |
|
|
Removes the mapping for this |
|
|
Returns a set of key/value pairs |
|
|
Gets all values back as a collection |
|
|
Returns the |
The com.tangosol.net.CacheFactory class is typically used to obtain an instance of a NamedCache. Table 2-2 describes some of the more commonly used methods in the CacheFactory class.
Table 2-2 Methods in the CacheFactory Class
| Method Name | Description |
|---|---|
|
|
Obtains a cluster object running Coherence services |
|
|
Shuts down all clustered services |
|
|
Returns an instance of a cache. Either joins an existing cache in the cluster or creates the cache if this is the first member. |
For a full list of methods, in the NamedCache interface and the CacheFactory class, see the Javadoc in \oracle\product\coherence\doc.
To create an application to access, update, and remove simple types of information from a Coherence clustered cache:
-
Create a new project in JDeveloper.
-
Choose File > New... in the JDeveloper IDE. This will open the New Gallery.
Choose General > Projects in the Categories section of the New Gallery dialog box and Generic Project in the Items section. Click OK.
Figure 2-8 Choosing Projects in the New Gallery
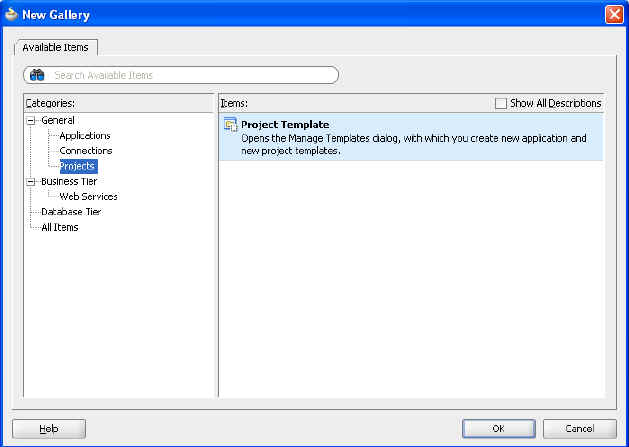
Description of "Figure 2-8 Choosing Projects in the New Gallery"
-
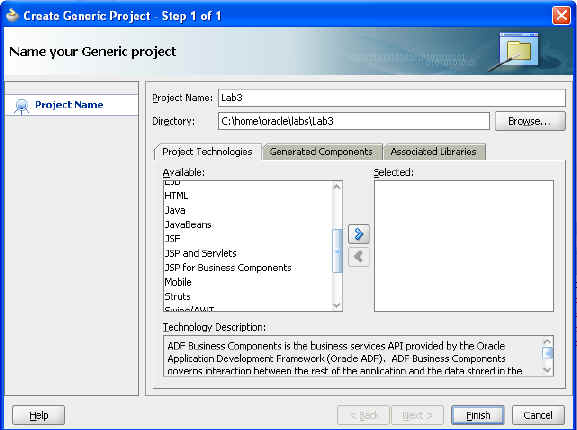
In the Create Generic Project dialog box, name the project
Lab3. Ensure that directory isC:\home\oracle\labs\Lab3. Click Finish.
-
-
Create your first Coherence Java program.
-
Right-click the
Lab3project entry and select New. -
Select the General category and select Java Class. Click OK.
-
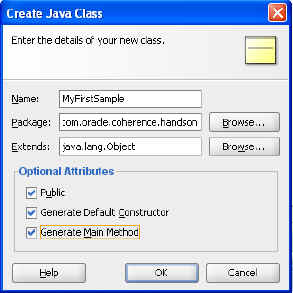
Enter
MyFirstSampleas the class name and select the Generate Main Method check box. The dialog box should appear as follows. Click OK. -
Right-click the
Lab3project and choose Project Properties. Select Libraries and Classpath in the Project Properties dialog box. You should see the Coherence library that you defined earlier included here by default. Click Cancel to dismiss the dialog box. -
In the editor for
MyFirstSample, you must import the following components into your Java class:import com.tangosol.net.CacheFactory; import com.tangosol.net.NamedCache;
-
Write the code to create a
NamedCache, put in a value, and then verify the value that you put in. Save the file after you finish coding. Example 2-1 illustrates a sample program.Example 2-1 Creating a NamedCache; Inserting and Verifying Values
package com.oracle.coherence.handson; import com.tangosol.net.CacheFactory; import com.tangosol.net.NamedCache; public class MyFirstSample { public MyFirstSample() { } public static void main(String[] args) { // ensure we are in a cluser CacheFactory.ensureCluster(); // create or get a named cache called mycache NamedCache myCache = CacheFactory.getCache("mycache"); // put key, value pair into the cache. myCache.put("Name","Tim Middleton"); System.out.println("Value in cache is " + myCache.get("Name")); } } -
Run the program in JDeveloper: right-click the
MyFirstSample.javaclass in the editor and choose Run. -
You should see messages similar to the following:
Figure 2-11 Output of Program to Create a NamedCache and to Store and Retrieve Values
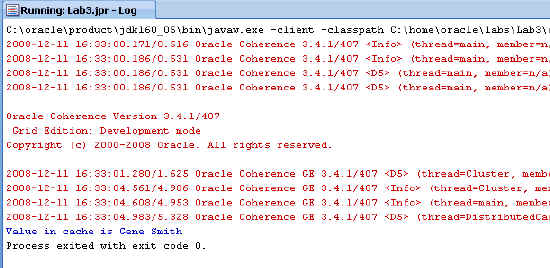
Description of "Figure 2-11 Output of Program to Create a NamedCache and to Store and Retrieve Values"
-
-
Now create another Java class only to get the value from your cache, rather than doing a put, and then a get. Name this Java class
MyFirstSampleReader. Example 2-2 illustrates a sample program.Example 2-2 Getting a Value from the Cache
package com.oracle.coherence.handson;

import com.tangosol.net.CacheFactory;
import com.tangosol.net.NamedCache;

public class MyFirstSampleReader {

    public MyFirstSampleReader() {
    }

    public static void main(String[] args) {
        // ensure we are in a cluser
        CacheFactory.ensureCluster();

        // create or get a named cache called mycache
        NamedCache myCache = CacheFactory.getCache("mycache");

        System.out.println("Value in cache is " + myCache.get("Name"));
    }
}
Run the
MyFirstSampleReaderclass. Figure 2-12 illustrates the output from the program. Note that a null value returned. When theMyFirstSampleclass runs, it is storage-enabled by default unless otherwise specified. So, it creates aNamedCachewhen it starts, puts the value in, and when the class completes, theNamedCachedisappears.Figure 2-12 Output from the Sample Reader Program
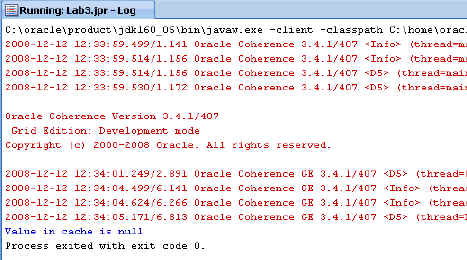
Description of "Figure 2-12 Output from the Sample Reader Program"
-
Start up the
cache-server.cmdthat you used in "Testing a Coherence Installation", runMyFirstSampleto put the value in theNamedCache, and then runMyFirstSampleReaderto read the value from the cache. Note the output illustrated in Figure 2-13: the "Gene Smith" value stored byMyFirstSampleis returned byMyFirstSampleReader. By default, unless specified otherwise, all processes start up as storage-enabled. This means that the process can store data as part of the cluster.Figure 2-13 Output from the Sample Reader Program with a Running Cache Server
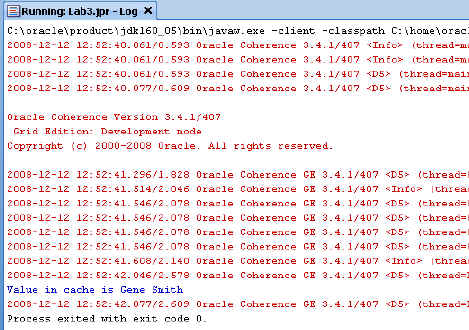
Description of "Figure 2-13 Output from the Sample Reader Program with a Running Cache Server"
This should not be the case for a process that joins the cluster only to perform an operation, such as putting in a value and then leaving, like
MyFirstSample. You must modify the process so that it will not be storage-enabled.This is done using the following Java command-line parameter.
-Dtangosol.coherence.distributed.localstorage
The value
-Dtangosol.coherence.distributed.localstorage=truespecifies that the process is storage-enabled. Setting the parameter tofalsespecifies that the process is not storage-enabled.-
Right-click the
Lab3project and select Project Properties. -
Choose Run/Debug/Profile and click Edit.
-
Ensure the Virtual Machine field is set to server.
-
Enter the following value in the Java Options field:
-Dtangosol.coherence.distributed.localstorage=false -Dtangosol.coherence.log.level=3
The screen should look similar to the illustration in Figure 2-14.
Figure 2-14 Editing Run Configuration Properties
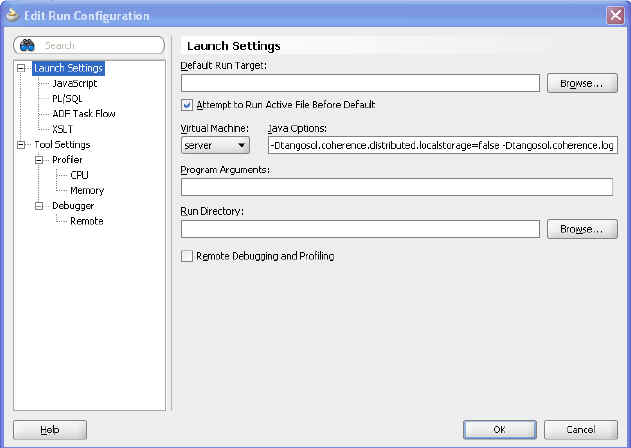
Description of "Figure 2-14 Editing Run Configuration Properties"
-
Click OK, and then OK in the Project Properties dialog box save.
-
-
Shut down any running cache servers and rerun your
MyFirstSampleclass. What happens? You receive a message similar to the one in Figure 2-15 indicating that storage is not enabled on the cluster, because you have set this member to be storage-disabled.Figure 2-15 Output from JDeveloper if Storage is Disabled

Description of "Figure 2-15 Output from JDeveloper if Storage is Disabled"
-
Start the cache server again and retest. You should now see that the data is persisted between running the two Java examples.
2.3 Creating Your First Coherence-Based Java Application
In this practice you develop a simple Java console-based application to access update, and remove simple types of information from a Coherence clustered cache.
This practice assumes you have completed "Testing a Coherence Installation". Make sure you have a cache server and a Coherence console up and running.
Unlike client/server applications, in which client applications typically "connect" and "disconnect" from a server application, Coherence-based clustered applications simply "ensure" they are in a cluster, after which they may use the services of the cluster. Coherence-based applications typically do not "connect" to a cluster of applications; they become part of the cluster.
To change the level of logging produced by Coherence, use the following JVM parameter where level is a number between 0 and 9:
-Dtangosol.coherence.log.level=level
The default is 5. A value of 0 means no logging. A value of 9 means extremely verbose. A value of 3 is often useful enough for most application development.
To create a Java console-based application to access update, and remove simple types of information from a Coherence clustered cache:
-
In the Coherence Java documentation (Javadoc) that is shipped in the
\oracle\product\coherence\docdirectory, investigate the methods in theCacheFactoryclass. -
Develop a simple Java console application (Java class) called
YourFirstCoherenceApplicationthat uses theCacheFactoryclass to join a cluster (using theensureClustermethod), and then leave the cluster (using theshutdownmethod). -
Using the Javadoc, investigate the methods that are available in the
NamedCacheinterface. -
Extend your application to use the
CacheFactorymethodgetCacheto acquire aNamedCachefor the cache calledmycache(the same cache name used in the exercise: "Testing a Coherence Installation"). -
With the
NamedCacheinstance, use the "get" method to retrieve the value for the key "message" (the same key used in the exercise: "Testing a Coherence Installation"). -
Output the value to the standard out using the
System.out.println(….)method.Example 2-3 illustrates a sample Coherence-based Java application:
Example 2-3 Sample Coherence-Based Java Application
package com.oracle.coherence.handson; import com.tangosol.net.CacheFactory; import com.tangosol.net.NamedCache; public class YourFirstCoherenceApplication { public YourFirstCoherenceApplication() { } public static void main(String[] args) { CacheFactory.ensureCluster(); NamedCache myCache = CacheFactory.getCache("mycache"); String message = (String)myCache.get("message"); System.out.println(message); CacheFactory.shutdown(); YourFirstCoherenceApplication yourfirstcoherenceapplication = new YourFirstCoherenceApplication(); } } -
Ensure that you have the Coherence cache server and console up and running. In the console, connect to the
mycachecache. For example:Map(?): cache mycache
-
Execute
YourFirstCoherenceApplicationfrom the JDeveloper IDE and view the result.Figure 2-16 illustrates the output from
YourFirstCoherenceApplication. The output indicates that there is no data in the cache for themessagekey.Figure 2-16 Output from Coherence-Based Java Application—No Value for the Key

Description of "Figure 2-16 Output from Coherence-Based Java Application—No Value for the Key"
-
Using the running Coherence shell, change the key "
message." For example, enterMap <mycache>: put message "hello"
Rerun
YourFirstCoherenceApplicationfrom the JDeveloper IDE to see the changed values. Figure 2-17 illustrates that cache now holds the valuehellofor the keymessage.Figure 2-17 Output from Coherence-Based Java Application—A Data Value for the Key

Description of "Figure 2-17 Output from Coherence-Based Java Application—A Data Value for the Key"
-
Rerun
YourFirstCoherenceApplicationwith the following JVM parameter. Notice that the output is the same as the previous run.-Dtangosol.coherence.distributed.localstorage=false
-
Shut down your cache server and Coherence shell instances. Restart the cache server and then rerun
YourFirstCoherenceApplication(with the preceding JVM parameter set). Note the output is nownull. -
If you change the value of the
messagekey in your application (using theputmethod), is the new value available through the Coherence shell?-
For example, comment out the
getmethod and add theputmethod.//String message = (String)myCache.get("message"); String message = (String)myCache.put("message", "bye"); -
Run
YourFirstCoherenceApplication. -
Run the get command in the Coherence console.
Map (mycache): get message
You should see
byeas the output.
-
-
Try setting the following JVM parameter and rerunning
YourFirstCoherenceApplication. Note that it causes the application to return a null value since local storage is not enabled.-Dtangosol.coherence.distributed.localstorage=false
