8 Creating, Editing, and Deleting Pages
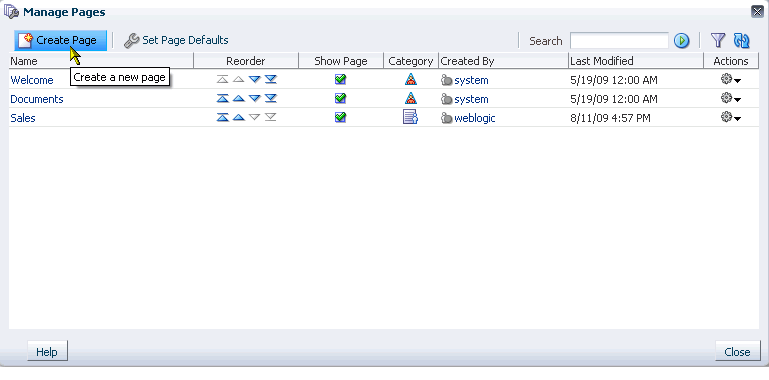
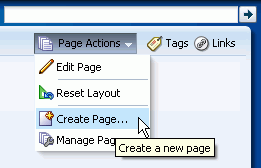
WebCenter Spaces puts within easy reach every resource necessary for building, managing, revising, and removing pages, with multiple options for performing these tasks to suit your working style. For example, you can create pages through the WebCenter Spaces Manage Pages dialog (Figure 8-1) and through the Create Page command on the Page Actions menu (Figure 8-2).
This chapter provides information about creating pages, editing pages, switching page styles and schemes, working with page layout components, initiating page-related actions from page tabs, and deleting pages. It contains the following sections:
See Also:
For information about creating pages through the WebCenter Spaces Manage Pages dialog, see Chapter 7, "Managing Pages."For introductory information to pages and the page editor (Oracle Composer), see Chapter 6, "Understanding the Page Service and Oracle Composer."
This chapter is intended for users who want to create and edit pages, revise page layouts, and delete pages. By default, every authenticated user can perform the actions described in this chapter in their own personal spaces. Note, however, that your application administrator may alter such default access privileges.
Sufficient access privileges must be assigned—through the grant of privileges or the assignment of a role—to create or edit pages in group spaces and custom WebCenter applications.
Much of the information in this chapter also applies to custom WebCenter applications, though it is written with WebCenter Spaces users in mind. (For information about the Page service in custom WebCenter applications, see the chapter "Enabling the Runtime Creation and Management of Pages" in Oracle Fusion Middleware Developer's Guide for Oracle WebCenter.)
Your application administrator has the authority to expose or hide a particular service's task flows. Tasks discussed in this chapter are not available to you if the associated task flow is hidden.
See Also:
For information about WebCenter Spaces seeded user roles, see the "Default Policy Store Permissions" section in the Oracle Fusion Middleware Administrator's Guide for Oracle WebCenter.8.1 Creating Pages
In WebCenter Spaces, you can find the Create Page command in the following places:
-
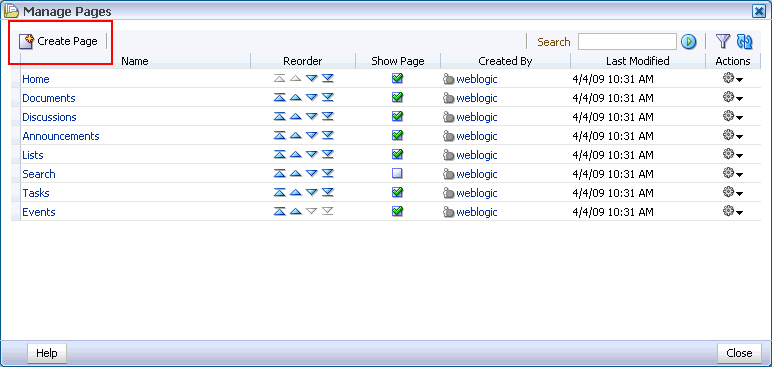
The Manage Pages dialog (Figure 8-3)
See Section 7.6, "Creating a Page Through the Manage Pages Dialog."
-
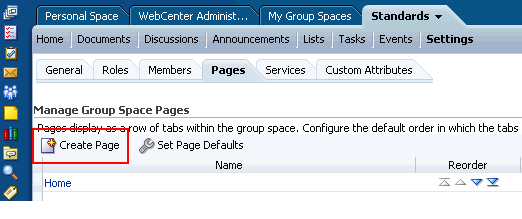
The Pages subtab under the Settings tab in a group space (Figure 8-4)
For more information about the Pages subtab, see Section 13.5, "Managing Group Space Pages."
-
The Page Actions menu (Figure 8-5)
To create a page:
-
Log in, and go to the location in the application where you want to create a page.
-
From the Page Actions menu, select the Create Page command to open the Create Page dialog (Figure 8-6).
Figure 8-6 The Create Page Dialog in a WebCenter Spaces Application
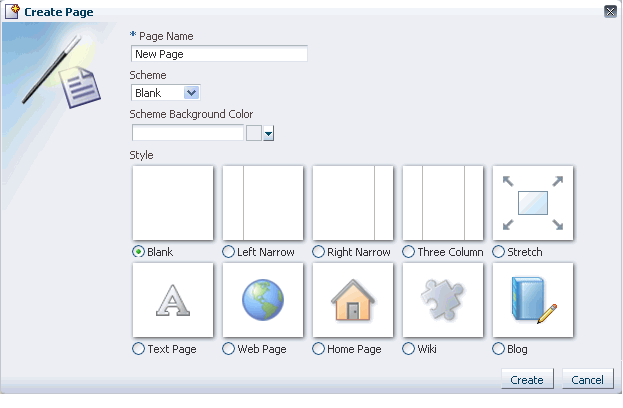
Description of "Figure 8-6 The Create Page Dialog in a WebCenter Spaces Application"
Note:
If you are creating a page in a personal space, and you set page defaults to create the page and bypass the Create Page dialog, then, after this step, the new page is created and opened in Oracle Composer.See Also:
For information about Oracle Composer, see Section 6.2, "Introducing Oracle Composer." -
In the Page Name field, enter a display name for the new page.
The name you enter here appears on the page's tab and in the Manage Pages dialog. A value is required for this field, as indicated by the asterisk (*) shown in front of the field label.
-
Optionally, select a page design scheme from the Scheme menu.
The Scheme menu provides a selection of background images for the new page. For illustrations of these, see Table 7-1, "Seeded Page Schemes".
Select Custom to provide your own custom background image. When Custom is selected, a Scheme Background Image field opens in the Create Page dialog.
Enter the path to the image.
-
Optionally, pick a page background color from the Scheme Background Color dropdown list.
-
Select a page style to define the page structure.
See Table 7-2 for illustrations and descriptions of out-of-the-box page styles.
-
Click the Create button.
The new page opens in Oracle Composer, the WebCenter page editor, ready for adding content (Figure 8-7).
Figure 8-7 A Page Viewed Through Oracle Composer
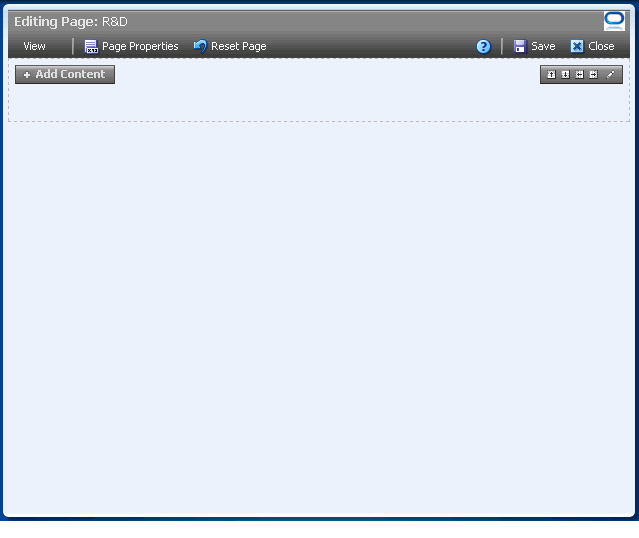
Description of "Figure 8-7 A Page Viewed Through Oracle Composer"
For information about adding content, see Chapter 10, "Working with Page Content." For information about Oracle Composer, see Section 6.2, "Introducing Oracle Composer." For information about working with the page layout, look, and feel, see Section 8.4, "Working with Page Layouts, Styles, and Schemes."
8.2 Editing Pages
Edit a page to customize its content or to add or delete content. In edit mode, you can also reset a page to remove all changes made to it since it was first created. This section describes how to enter and exit page edit mode and how to reset a page to its pristine state. It contains the following subsections:
Note:
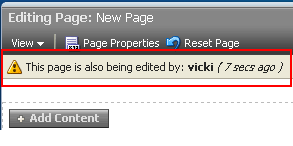
If you view a page at the same time that another user is editing the page, you may not immediately see the results of those edits in your session. To reliably see any changes, view the page after the other user has saved.If you edit a page while another user is editing the same page, a concurrency warning appears toward the top of the page.
See Also:
For more information, see Section 8.2.1, "Entering and Exiting Page Edit Mode."8.2.1 Entering and Exiting Page Edit Mode
In WebCenter Spaces, entering page edit mode—that is, opening Oracle Composer—involves selecting the Edit Page command from the menu on a page tab (for more information about Oracle Composer, see Section 2.6, "Initiating Actions from Tabs") or from the Page Actions menu.
Exiting, just as easy, involves clicking a Close button.
Because users access WebCenter Spaces from the Web, multiple users may attempt to edit the same page at the same time. In such cases, a concurrency warning appears in Oracle Composer that alerts each user to the others (Figure 8-8).
Note:
Time duration is added to the concurrency message only when the first or a subsequent concurrent user has made (but not yet saved) a page customization.WebCenter applications do not support single-user concurrency. That is, one user cannot log in to the same WebCenter application at the same time to create multiple, simultaneous sessions.
The final state of the page is determined by the last user to save.
This section describes how to open Oracle Composer through the WebCenter Spaces Page Actions menu.
To enter and exit Oracle Composer:
-
Log in, and go to the page you want to edit.
-
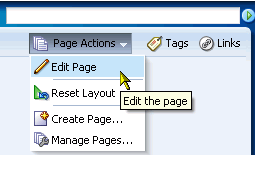
From the Page Actions menu, select Edit Page to open Oracle Composer (Figure 8-9).
The page opens in Oracle Composer (Figure 8-10).
Figure 8-10 A Page Viewed Through Oracle Composer

Description of "Figure 8-10 A Page Viewed Through Oracle Composer"
Tip:
If the Edit Page command is not available on the Page Actions menu or the Page Actions menu does not appear, it is likely that you do not have sufficient page access privileges. If this is the case, ask your application administrator for the privilege to edit pages.For more information, see Section 2.8, "Contacting Your Application Administrator."
-
Edit the page.
See Also:
-
For information about the page editor, Oracle Composer, see Section 6.2, "Introducing Oracle Composer."
-
For information about adding content to a page, see Chapter 10, "Working with Page Content."
-
For information about page styles and schemes, see Section 8.4.2, "Changing the Page Scheme and Scheme Background Color."
-
For information about page layouts, see Chapter 9, "Working with Page Layout Components."
-
-
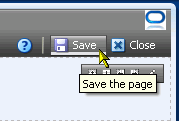
Click the Save button to save your changes and remain in Oracle Composer (Figure 8-11).
-
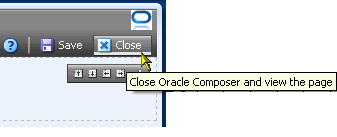
Optionally, click the Close button to exit Oracle Composer (Figure 8-12).
8.2.2 Removing All Edits, Personalizations, and Customizations from a Page
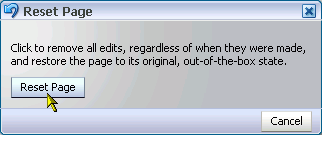
Oracle Composer includes a control for resetting a page to the state it was in when it was first created. The Reset Page button removes all edits, regardless of when they were made, and restores the page to its original, newly-created state. This is particularly valuable for maintaining pages that users have linked to. Resetting a page enables you to take the page back to its original state without disrupting such connections.
See Also:
The Page Actions menu provides the Reset Layout command for removing just the personalizations you have made to a page. For more information, see Section 4.3, "Removing Your Page Personalizations."If multiple users are editing a page, and one of them clicks the Reset Page button, the changes made by the other users may nonetheless be saved to the reset page. The result depends on the order in which users save their changes. The final state of the page is determined by the last user to save. For more information, see Section 6.2.1, "Accessing Oracle Composer."
To reset a page:
-
Log in, and go to the page you want to reset.
-
From the Page Actions menu, select Edit Page to open Oracle Composer (Figure 8-13).
Tip:
If the Edit Page command is not available on the Page Actions menu or the Page Actions menu does not appear, it is likely that you do not have sufficient page access privileges. If this is the case, ask your application administrator for the privilege to edit pages. See Section 2.8, "Contacting Your Application Administrator." -
Click the Reset Page button at the top of Oracle Composer (Figure 8-14).
-
In the resulting Reset Page dialog, click the Reset Page button (Figure 8-15).
All changes made to the page since it was created are removed.
-
Click the Save button at the top of the page.
The page refreshes, now restored to its pristine, out-of-the-box state.
8.3 Setting Page Access
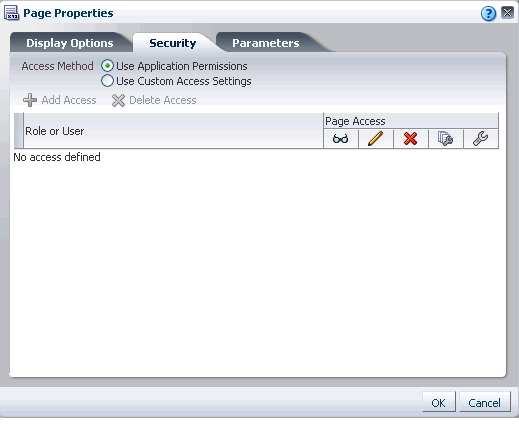
Page properties include a Security tab with controls for specifying who can do what to the current page (Figure 8-16).
In WebCenter Spaces, the options that appear on the Security tab vary according to whether you are accessing it from a group space page or from a personal space page.
Group space security provides the additional option of inheriting page access permission settings from the application.
Page access setting through the Page Properties dialog equals page access setting though the Manage Pages dialog, which is discussed in Section 7.7, "Setting and Revoking Page Access Permissions." This section describes how to locate page access settings through page properties, and then directs you to the section in the Manage Pages chapter where page access setting is discussed.
Note:
Page access permissions set through the Page Properties dialog in Oracle Composer are committed immediately. Closing Oracle Composer without saving does not discard such changes.Page access permissions set through the Manage Pages dialog take effect after you click OK.
To access the Security tab in the Page Properties dialog:
-
Go to the page you want to secure, and open it in Oracle Composer.
-
Click the Page Properties button (Figure 8-17).
-
In the resulting Page Properties dialog, click the Security tab to bring it forward (Figure 8-18).
For information about using the page access controls that display on the Security tab, See Section 7.7, "Setting and Revoking Page Access Permissions."
Note:
When you encounter errors in page edit mode, you can recover by closing your browser and then reopening it and relogging in to the application instance.8.4 Working with Page Layouts, Styles, and Schemes
Creating the perfect page is a process that may happen over a period of days. You may select a page style or scheme and think better of it later on. With WebCenter Spaces, this presents no problem. It is an easy task to move from one page style or scheme to another. Additionally, you can enhance the style and scheme you selected using the layout components available through the Oracle Composer Catalog.
This section provides information about working with page styles, schemes, and layout components. It contains the following subsections:
-
Section 8.4.1, "What You Should Know About Page Layouts, Styles, and Schemes"
-
Section 8.4.2, "Changing the Page Scheme and Scheme Background Color"
See Also:
Advanced users can extend WebCenter Spaces to include custom page layouts, styling, and branding. For more information, see the white papers, "Extending WebCenter Spaces (11.1.1.2.0)," and "Customizing Page Skins at Runtime in WebCenter Spaces (11.1.1.2.0)," on the Oracle Technology Network:http://www.oracle.com/technology/products/webcenter/white_papers.html.8.4.1 What You Should Know About Page Layouts, Styles, and Schemes
Page styles and schemes provide both a default page structure (that is, the page layout) that describes the areas where you can place content and a background color and image that contribute to a page look and feel. Page layout components provide objects for enhancing the usefulness and appearance of a given page. These include an in-place HTML text editor, images, layout boxes, hyperlinks, and so on.
You can select a page style, scheme, and scheme background color when you create a page. Such selections are available in the Create Page dialog (Figure 8-19).
Some page styles come prepopulated with a selection of useful task flows. Others include properties that suggest a particular use for the page. For example, the Web Page page style includes a configurable property for specifying a URL. You can use this feature to expose external Web content within your WebCenter application.
In many cases, you can switch styles and schemes when you revise a page. You can also start with a blank page and create you own, unique layout, look, and feel.
WebCenter Spaces provides a default selection of schemes and scheme background colors, which you can use to create an instant look and feel. Additionally, you can select a custom scheme, which enables you to provide your own background image.
See Also:
For illustrations and descriptions of seeded page schemes and styles, see Table 7-1, "Seeded Page Schemes" and Table 7-2, "Seeded Page Styles".After you create a page, you can enhance its original style and scheme with page layout components. For more information, see Chapter 9, "Working with Page Layout Components."
8.4.2 Changing the Page Scheme and Scheme Background Color
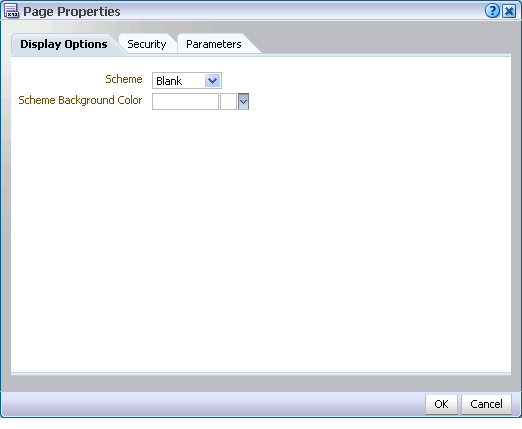
For any page on which you have sufficient permissions, you can change the scheme that was specified when the page was created. The Oracle Composer Page Properties dialog includes a Display Options tab, where properties related to the page scheme and scheme background color appear (Figure 8-20).
In WebCenter Spaces, a scheme defines the background image for a given page. Choose from preseeded background images, or select Custom, and provide your own custom image. Scheme background color provides a base color that covers the full width and length of the page.
This section describes how to change a page's background color and image.
To change a page background color and image in a WebCenter Spaces application:
-
Log in, and go to the page where you want to change page schemes.
-
Select Edit Page from the Page Actions menu (Figure 8-21).
The page opens in Oracle Composer.
-
In Oracle Composer, click the Page Properties button (Figure 8-22).
-
If necessary, in the Page Properties dialog click the Display Options tab to bring it forward (Figure 8-23).
From the Scheme pick list, select a page scheme.
For a list and illustrations of out-of-the-box page schemes in WebCenter Spaces, see Table 7-1, "Seeded Page Schemes".
-
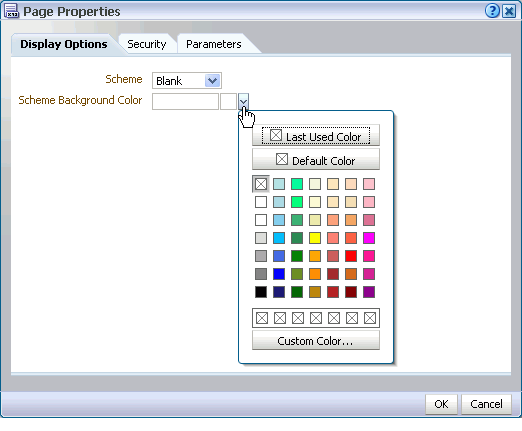
Select a page background color from the Scheme Background Color pick list (Figure 8-24).
-
Click OK to apply your changes and close the dialog.
-
In Oracle Composer, click the Save button to save your changes (Figure 8-25)
The page refreshes, displaying the new background color and image.
-
Click the Close button to exit Oracle Composer (Figure 8-26).
8.4.3 Changing Everyone's Page Layout
Many of the page styles presented in the Create Page dialog can be switched to a different page style at application runtime. Other page styles expose external content, notably the Web Page page style, and consequently do not support mid-stream layout changes.
See Also:
Table 7-2, "Seeded Page Styles" illustrates WebCenter default page layouts and indicates which can be switched to a different layout.Depending on how your application is configured, you may be able to switch page layouts in page view mode and in page edit mode. Switching a page layout in page view mode is a personalization that affects only your view of a page (for more information, see Section 4.2.2, "Changing Your Page Layout"). Switching page layout in page edit mode is a customization. This section describes how to switch a page layout in page edit mode. It includes the following subsections:
-
Section 8.4.3.1, "Switching Everyone's Page Layout Using Change Layout"
-
Section 8.4.3.2, "Switching Everyone's Page Layout Using Add Box Icons"
See Also:
For information about personalization and customization, see Section 10.2, "Customizing and Personalizing Page Content."Note:
When you encounter errors in page edit mode, you can recover by closing your browser and then reopening it and relogging in to the application instance.8.4.3.1 Switching Everyone's Page Layout Using Change Layout
To switch from one page layout to another:
-
Log in, and go to the page where you want to revise a page layout.
-
From the Page Actions menu, select Edit Page to open Oracle Composer (Figure 8-27).
Tip:
If the Edit Page command is not available on the Page Actions menu or the Page Actions menu does not appear, it is likely that you do not have sufficient page access privileges. If this is the case, ask your application administrator for the privilege to edit pages. See Section 2.8, "Contacting Your Application Administrator." -
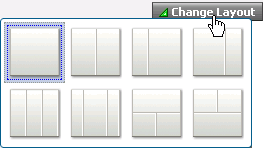
Scroll to the top-right of the page area, and click the Change Layout link.
The layout picker opens (Figure 8-28).
-
Click a layout to apply it to the currently displayed page.
The page refreshes instantly, now arranged according to the selected layout.
-
In Oracle Composer, click Save and then Close.
See Also:
For information about changing a page layout in only your view of a page, see Section 4.2.2, "Changing Your Page Layout."For information about making the Change Layout link available in page view mode, see Section 9.3.9.3, "Working with Change Layout/Layout Customizable Properties."
8.4.3.2 Switching Everyone's Page Layout Using Add Box Icons
You can add additional content regions to a page by splitting existing layout Boxes. This section describes how.
To split a Box:
-
Log in, and go to the page where you want to revise a page layout.
-
From the Page Actions menu, select Edit Page to open Oracle Composer (Figure 8-29).
Tip:
If the Edit Page command is not available on the Page Actions menu or the Page Actions menu does not appear, it is likely that you do not have sufficient page access privileges. If this is the case, ask your application administrator for the privilege to edit pages. See Section 2.8, "Contacting Your Application Administrator." -
Go to the layout Box you want to split, and click the Add Box icon that splits the Box in the manner you prefer (Figure 8-30).
Choose from:
-
Add Box Above
-
Add Box Below
-
Add Box Left
-
Add Box Right
-
-
In Oracle Composer, click Save and then Close.
See Also:
For more information, see Section 9.1.1, "The Box Layout Component."8.5 Using Pretty URLs for WebCenter Spaces Pages
A concise URL that shields users from the complexity of the real web address can be much more presentable and somewhat less daunting to users interested in navigating to your page. You can shield your users from complex application page URLs with pretty URLs.
Pretty URLs are much shorter versions of the URL you might copy from your browser address bar. With pretty URLs, you can navigate to pages directly, without having to know the internal URL. Additionally, pretty URLs enable you to send simpler, shorter URLs to your colleagues.
Table 8-1 lists and describes the syntax for the pretty URLs you can formulate for easy access to public and non-public pages.
Table 8-1 Syntax of Pretty URLs
| Use Case | Pretty URL Syntax |
|---|---|
|
Take user to the home page of his or her personal space |
|
|
Take user to the personal page he or she last accessed |
|
|
Take user to a specific page in a personal space |
|
|
Take user to the specified group space, where the last-accessed page is displayed |
|
|
Take user to the first page of a group space |
|
|
Take user to a specific page in a group space |
|
Note:
In Table 8-1, wherever the variableGroupSpaceName is indicated, use the group space name in lieu of the group space display name. The group space name is the value entered for Group Space Name on the General tab of a group space Settings page. The group space display name appears on the group space top-level tab.
For example, when you create a group space with the name My Space, the URL to this group space ends with My_Space.
Wherever the variable escapedPageDisplayName is indicated, use an escaped version of the page display name.
For example, when you create a page with the name My Page, the URL to this page ends with My+Page.
In addition to providing pretty URLs, you can also pass parameter values through your application URLs. For one thing, this enables you to steer different users to the same page, which in turn provides tailor-made information depending on the URL you provided. For more information, see Section 11.5, "Passing Parameter Values Through the Page URL."
8.6 Deleting Pages
You have two options for deleting WebCenter Spaces pages:
-
Select the Delete Page command on the page tab menu (for more information, see Section 2.6, "Initiating Actions from Tabs").
-
Select the Delete Page command on the Actions menu in the Manage Pages dialog (for more information, see Section 7.10, "Deleting a Page Through the Manage Pages Dialog").
For information about deleting a group space, see Section 14.7, "Deleting a Group Space." You cannot delete a personal space. Personal spaces are removed automatically when a user is removed from the identity store that provides users to your WebCenter Spaces application.
