Object-Relational Mappings: Generating Spring Artifacts
This document describes the following:
1. Generating Spring Artifacts
You can use OEPE to automatically generate Spring configuration and beans from persistence mappings.OEPE supports Spring IDE 2.0 and Spring Framework 2.5.
To generate Spring artifacts, such as the DAO interface and its implementation, the service interface and its implementation, and configuration files, you have to perform the following steps:
To configure your project for Spring, follow this procedure:
- Either add the Spring facet when you create a project, or add the facet to an existing project by right-clicking your project in the Project Explorer and selecting Properties from the drop-down menu. This will open the Properties dialog, as Figure 1 shows.
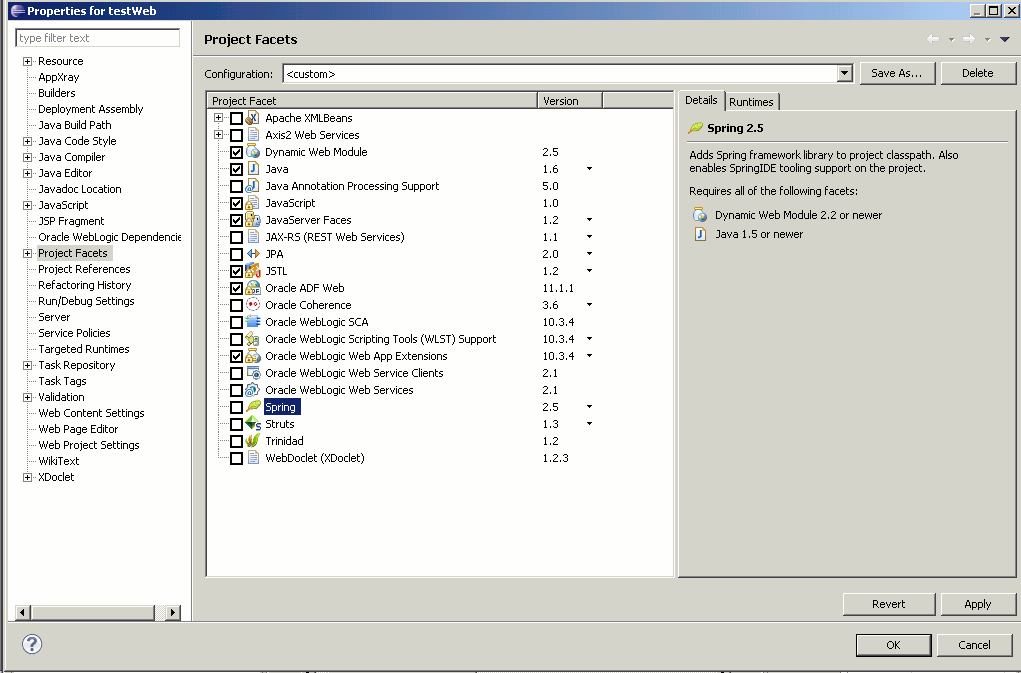
Figure 1. Project Properties Dialog
Note that the Spring facet is available to Web projects, EJB projects and utility projects. Adding the Spring facet to an EJB project requires special attention. - In the Properties dialog, select Project Facets on the left panel, and then select Spring from the Project Facet list.
To configure your project to use Spring Framework 2.5 Runtime library, select the Spring Framework 2.5 facet, and then click Further configuration required... link. This will open the Modify Faceted Project > Spring dialog, as Figure 2 shows. Notice that the example in Figure 2 demonstrates how to create a project using Spring 2.5.6 runtime bundled with Spring IDE.
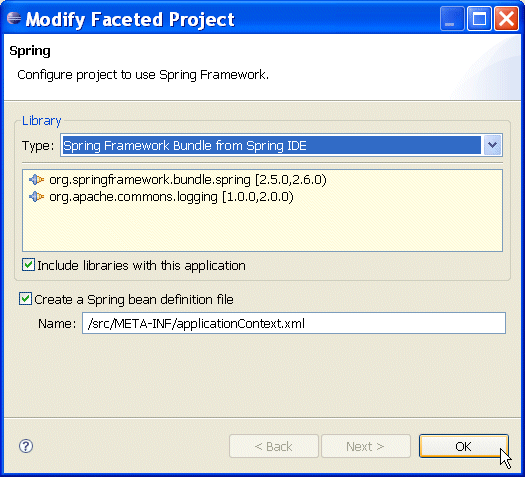
Figure 2. Modify Faceted Project - Spring Dialog
Accept the default selections and click OK.
If you select either the Spring Framework 2.0 or 2.5 facet on the Properties dialog, and you wish to either use your own Spring runtime installation or download a copy of Spring libraries hosted by Oracle or SpringSource, select User Library in the Library Type field of the Modify Faceted Project > Spring dialog, as Figure 3 shows.
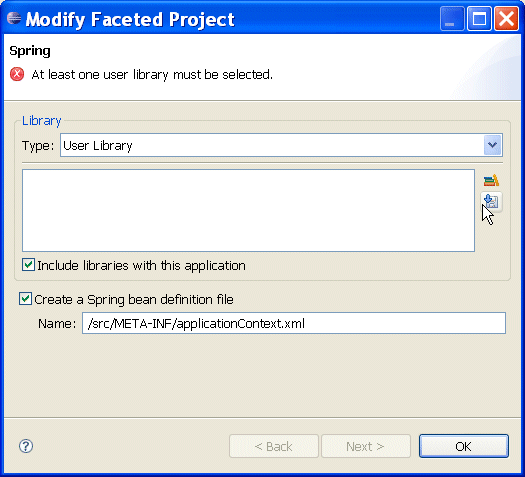
Figure 3. Modify Spring Facet Dialog
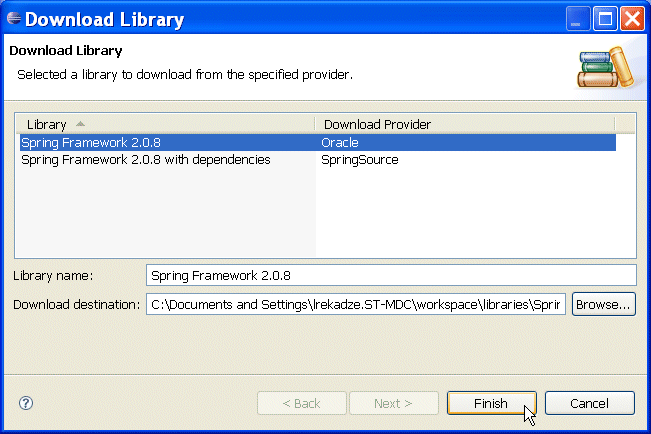
You can also click the Manage User Library icon to select a Java User Library pointing a proper local Spring runtime installation. - Click Download Library icon to indicate your intention to obtain Spring libraries. This will open the Download Library dialog, as Figure 4 shows.
- To use this dialog to download the Spring libraries, make appropriate selections, and then click Finish to trigger the download.
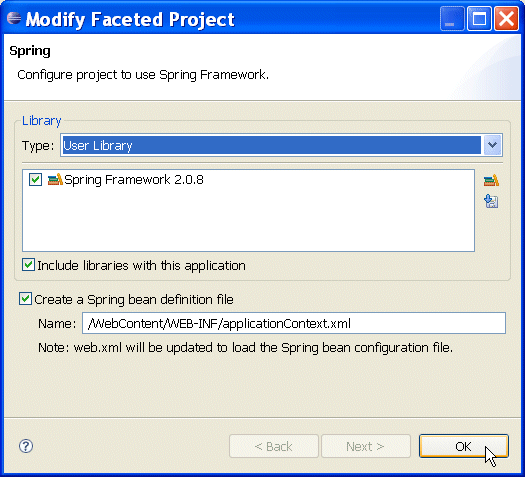
Figure 5 shows Modify Faceted Project > Spring dialog after the Spring library has been downloaded.
- Optionally, you may click Manage libraries icon to open the Preferences > User Libraries dialog to fine-tune your Spring library configuration. Note that by default, the entire library represented by the
spring.jarfile is included. - Click OK on the Modify Faceted Project > Spring Facet dialog.
- By clicking Apply > OK on the Properties dialog, you will complete the configuration of the Spring Framework library for your project, as Figure 6 shows.
Note that if you added the Spring facet to a Web project, the project's
web.xml file will be updated to include the context listener for loading the Spring context at the Web application's start time, as the following example shows:

Also note that if you are creating Spring service beans and bean configurations for an EJB project, you should keep in mind that, unlike a Web project, there is no standard way to automatically load Spring bean configuration. In this case, a common practice is to define a Web project to help initialize the application context. Consider the following project set-up:
[EAR project]
[EJB with Spring facet]
[Web project with Spring]
It is assumed that the EJB project includes the Spring service beans and bean configuration under the META-INF/bean.xml file.
In the Web project, find the default WEB-INF/applicationContext.xml file
created during the addition of the Spring facet, and add a factory bean looking for other bean configurations in the classpath, as follows:
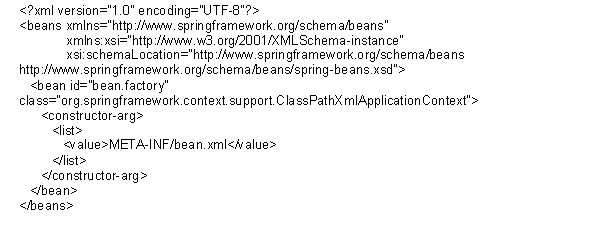
With this setting, the client code (such as a servlet, for example) in the JSP can access the Spring beans residing in the EJB project. Consider the following code sample from a JSF Web application:
To generate the Spring files and update the configuration, follow this procedure:
- To initiate the Spring artifact generation, right-click on the project name in the Project Explorer, and select New > Generate Spring ORM Classes from the drop-down menu. This will open the New Spring ORM Classes > Spring Services Definition wizard page, as Figure 7 shows.
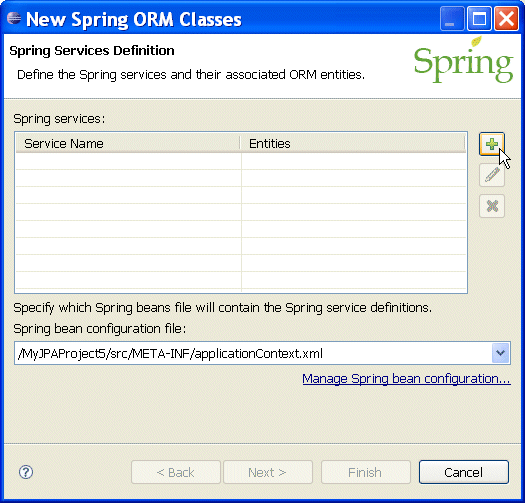
Figure 7. New Spring ORM Classes Wizard Page
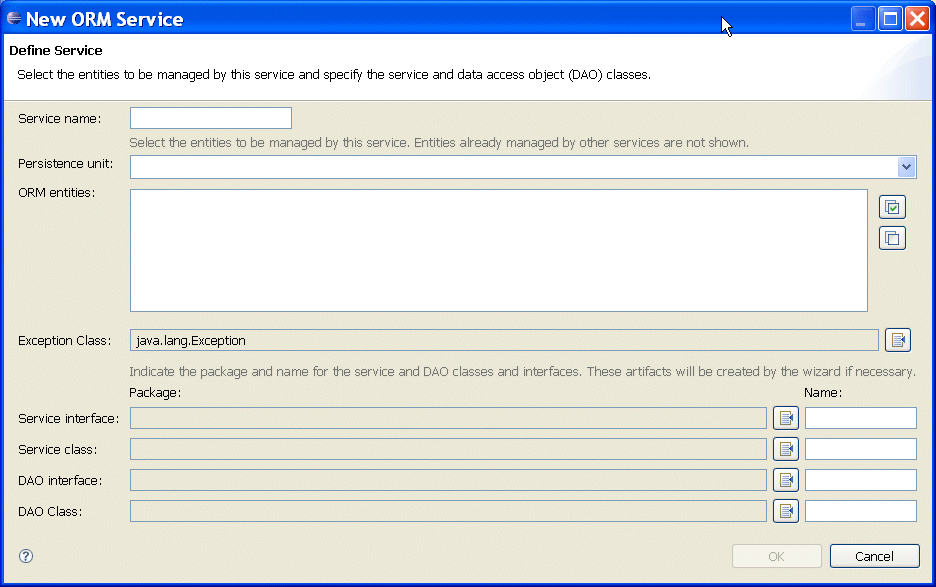
Notice that the Spring bean configuration file field has been filled in when you added the Spring facet to your project. If you wish to use another file, click Manage Spring bean configuration... link, and then make your selection. - Click Add icon on the New Spring ORM Classes > Spring Services Definition dialog. This will open the New ORM Service dialog, as Figure 8 shows.
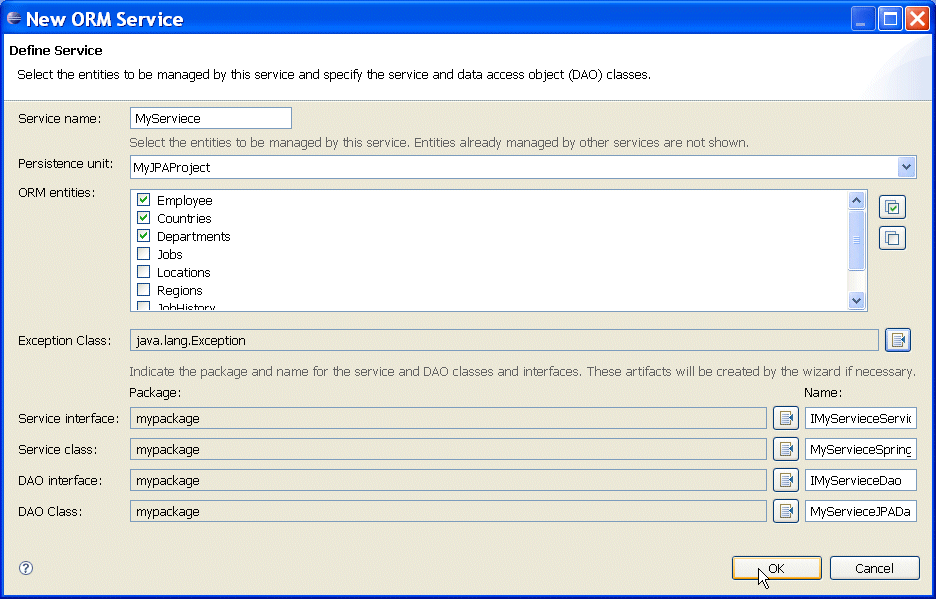
- On the New ORM Service dialog, provide the following information:
- Enter the service name.
- Specify your project in the Persistence unit field. Note that you can select the persistence unit only when the service is created for the first time. Once created, you can add or remove entities from the existing persistence unit, but cannot switch to another persistence unit. To access another persistence unit, you create a new Spring Bean configuration and add a new service to it.
- Select one or more entities from the ORM entities list.
- Specify the exception that will be thrown by the service methods.
- Provide the package information for the service and DAO classes and interfaces.
- Specify the name for the service and DAO classes and interfaces (you may want to accept default values).
- Click OK to continue.
- Verify that the New Spring ORM Classes > Spring Services Definition dialog correctly displays the service name and the entities that you selected in the previous step, and then click Next. This will open the New Spring ORM Classes > Implementation Strategy wizard page, as Figure 10 shows.

Figure 10. New Spring ORM Classes - Implementation Strategy Wizard Page - Select the implementation strategy for your Spring ORM service and DAO classes, and then click Finish.
The Spring classes are generated in the package that you specified. The bean classes contain methods for standard create, read, update, and delete operations.
Note that only the DAO implementation class is dependent on a specific framework. This lets you change ORM frameworks quickly, without rewriting client code.
