7 Working in Your Personal Space
It's one thing to see Zeba make a page available to Monica and send her an email, but if you see how Monica responds to them you'll have a better idea of the kind of interaction that WebCenter Spaces makes possible. That's why we're going to log back in as Monica in this chapter. We'll also see Monica use her personal space to complete some additional commonly performed business tasks.
7.1 Step 1: Log On
To log on as Monica:
-
Click the Login link in the Banner area.
-
Enter the user ID
Monica. -
Enter the password
welcome1. -
Click OK.
7.2 Step 2: Create a Personal Note
On the drive into work this morning, you were thinking about the meeting you're going to have with your boss, Bill, later in the week, and reviewing in your mind some key points you want to relate to him regarding an upcoming sales deal. To make sure you don't forget the points you want to make, you decide to quickly create a personal note. Personal notes allow you to jot down snippets of text that are for your eyes only: memory jogs for upcoming meetings, personal items such as grocery lists, a phone number you don't have time to add to your address book—anything that doesn't require lengthy prose to be useful.
-
If your Sidebar is expanded, you should already see your Notes pane. If it is not, click the Personal notes icon:
-
Click the Create a new note icon.
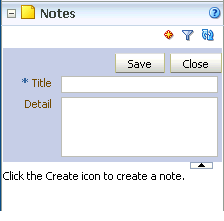
Your Notes pane should look like this:
-
In the Title field, type
Notes for Meeting w/Bill. -
In the Text field, type the points you want to make:
Deal with ZapIt has hit a snagDave Smith to fly out to ZapIt HQ next weekMay need Bill to participate in con call -
Click Save.
Beneath the text fields, you should now see "Notes for Meeting w/Bill". To display the details of a note, just click the note title. The details appear in the Notes pane.
-
Click Close.
If you create a lot of notes, managing them can be somewhat challenging. The Filter Notes icon is provided as a means for you to locate a particular note by its title. We won't try this here, but you may want to experiment with it another time.
7.3 Step 3: Read an Email
Now it's time to take a look at the mail that has accumulated since last night. You don't have to go outside WebCenter Spaces to access your email; your Sidebar conveniently contains a window into your personal account.
-
In the Sidebar, click the expand node beside the Mail pane (or, if the Sidebar is minimized, click the Personal mail inbox icon).
-
If you are prompted to do so, enter your user ID and password. (You can get this information from your WebCenter administrator.)
-
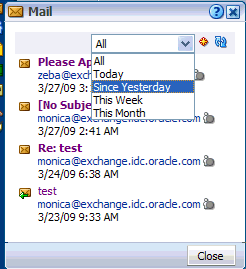
You want to be sure you are looking at just the mail from last night, so select Since Yesterday from the drop-down (Figure 7-3):
Now you won't be distracted by older emails awaiting your reply.
-
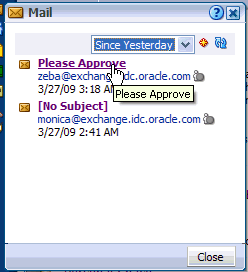
You see you have an email from Zeba, so you click the subject line to open it:
You've read Zeba's email and learned that she's made a page called Sales Problem available to you, which means you must make it visible within your own personal space. In the meantime, close this email so you can respond to it later.
7.4 Step 4: View a Shared Page
As we saw in the last chapter, the Manage Pages dialog helps you keep track of which pages are displayed, the order in which they are displayed, and so on. Because you know that Zeba gave you permission to see the Sales Problem page, you need to go to Manage Pages to make it visible.
-
In your personal space, click Page Actions->Manage Pages.
-
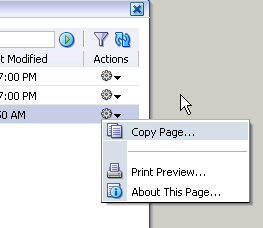
In the Sales Problem row, click the arrow in the Actions column to see what permissions Zeba has granted to you:
The number of actions here is fairly limited, so it looks like you have view access only. If Zeba had granted you edit privileges, you'd see the Edit Page action, and if you had manage privileges on the page you'd see things like Set Page Access, Delete Page, and so on.
Let's display the page now.
-
In the Show Page column, click the check box on the Sales Problem row.
-
Click Close.
The page now appears alongside the other pages within your personal space.
Note: In the real world, Zeba would have most likely provided the URL for the page (which is listed in the About This Page pop-up), so you could just click it or enter it in your browser's Address field to display the page. However, now you know what to do when you want to see a shared page and don't have the page's direct URL.
Looking at the data on Zeba's page, you see that she's hit upon the source of the problem with Tony Notebook Sales. It turns out that Tony Notebooks, as well as most of the other notebook brands, have been offering a six month warranty—until recently. All other competitors recently raised their warranties to two years, but Tony Notebooks still offers the low warranty period of six months. Tony Notebooks will be contacted later today and advised that this discrepancy is negatively impacting their sales.


