While performing ad-hoc analysis using Transactional Business Intelligence, it is important that filters are applied on common dimensions such as Time, Ledger, Business Unit, and so on to filter the data to retrieve the appropriate data set.
Filters must be applied on the Time dimension for calendars that are applicable to the data being analyzed. For Time dimensions that expose multiple calendars, filters must be applied on the calendar name to get the right data.
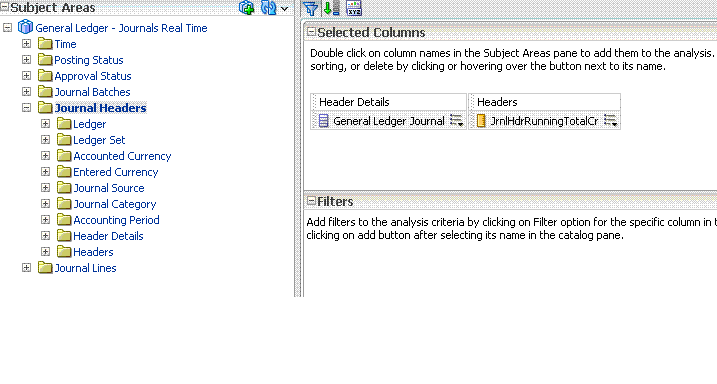
For example, if an ad-hoc query must be created to view the unposted journals in a given period, the Journal Header Name is selected, along with measures such as Header Running total credit or debit along with the Posting Status Dimension. Then you apply filters on Posting Status as Unposted and also on the Fiscal Period and calendar of Fiscal Calendar Time Dimension.
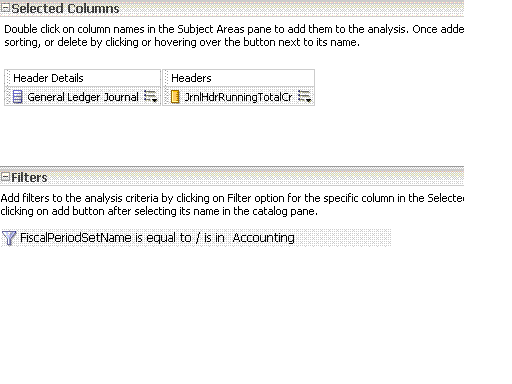
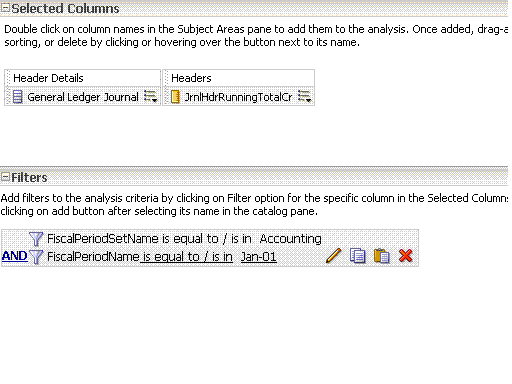
In the following figure, Journal Header name (General Ledger Journal) and Header Running Total Credit (JrnlHdrRunningTotalCR) is selected.
After selecting the required attributes, you must follow these steps to filter on Time.
 To filter on Time:
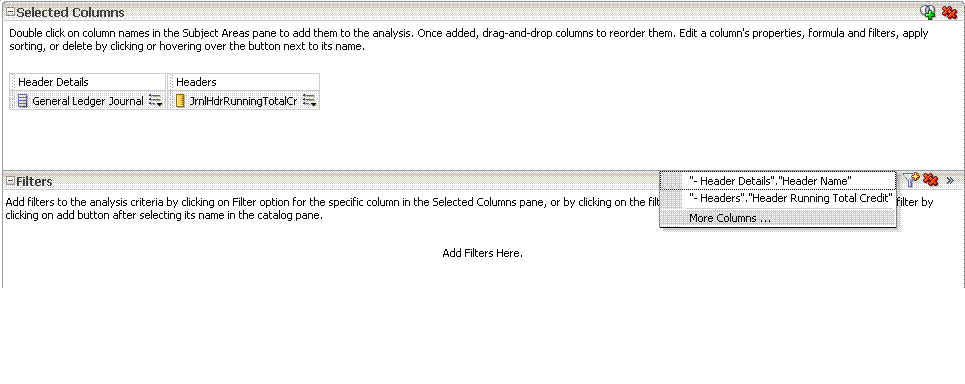
In the Filters section, select + and select more columns to display the subject area contents in a Select column.
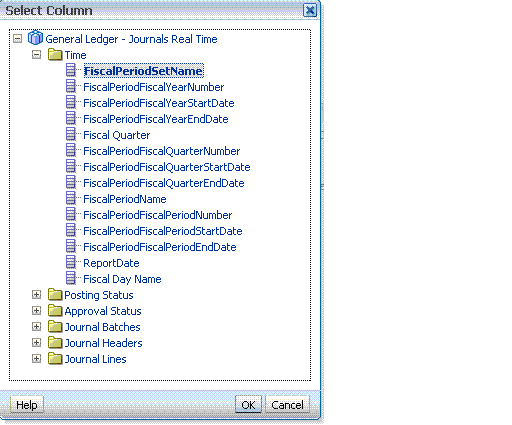
Select Fiscal Calendar Name from the Time folder and select OK.
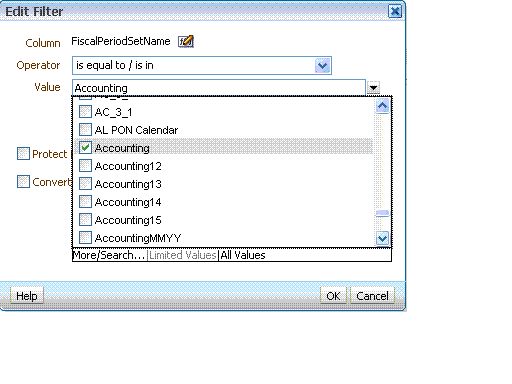
Make a selection in Fiscal Calendars, and then click OK.
This adds a filter to the analysis:
Similarly, add another filter on the Fiscal Period Name. This filter gets added with the AND clause:
Select Save Filters to use the filter in future analyses. For more details on how to create and use filters, see the Oracle Fusion Middleware Oracle Business Intelligence documentation.
Note: | Similar to the preceding example, when Fixed Assets Calendar, Projects Calendar, or Incentive Compensation Calendar is used for analysis, you must always apply a filter on the calendar name. |