10 Setting Up Parts and Labor Planning
This chapter contains the following topics:
-
Section 10.3, "Understanding Supply and Demand Inclusion Rules"
-
Section 10.7, "Setting Up Work Centers and Work Center Rates"
|
Note: Before you can use maintenance planning features in JD Edwards EnterpriseOne Plant and Equipment Management, you need to set up information that the system uses to process material plans and labor plans. For example, you must set up information to determine how the system commits inventory to a branch and how the system calculates the availability of parts and labor resources. |
10.1 Understanding General Planning Information
Before the system can generate material and labor plans and create planning messages, you must define general planning information for each branch or plant in the organization. General planning information determines how the system commits inventory to the branch or plant, which work days to include when you generate a material or capacity plan, how the system processes changes to standard parts lists, and so on.
10.1.1 Work Day Calendar Setup
You must set up work day calendars for each maintenance branch or plant. You use the calendar to specify which days are work days, holidays, and so on. You need to set up a work day calendar for every month for which you want to generate parts and labor plans. The system uses work day calendar information to plan and schedule labor resources, based on the workdays that you specify. You should set up calendars six months to a year at a time.
When you initially set up a work day calendar, the system automatically specifies all week days as work days, and all Saturdays and Sundays as nonwork days. You can accept these values or change the days to suit the business needs.
|
Note: Shift codes are not applicable to maintenance planning. |
10.2 Understanding UDCs for Resource Planning
Before you can use the labor planning features in JD Edwards EnterpriseOne Plant and Equipment Management, you must set up these UDCs:
-
CRP display
-
Message types
The system uses these codes to calculate and display labor availability when you generate a labor plan. The system also uses these codes to determine which action messages appear when it detects a conflict between the availability of labor resources and demand for labor resources.
10.2.1 CRP Display (33/MM)
You must set up the CRP Display table (33/MM) with the codes that you want to appear on Capacity Load. The system provides several predefined codes, such as:
-
10: Released Load
-
40: Load Versus Capacity
-
80: Available Capacity
-
90: Accumulated Available Capacity
You can use these codes or modify them to meet the specific calculation or display purposes.
10.2.2 Message Types (33/MT)
You use message type codes (33/MT) to define the action messages that you want to appear when the system notifies you of load and capacity conflicts. For example, you can define messages that indicate an over-capacity condition, an under-capacity condition, and so on.
10.3 Understanding Supply and Demand Inclusion Rules
To balance the parts inventory with the demand for parts that is created by maintenance work orders, you must set up supply and demand inclusion rules. You use supply and demand inclusion rules to specify the documents that create a supply for parts, such as purchase requests, and the documents that create a demand for parts, such as PM work orders, corrective work orders, and so on. In addition, you specify the statuses at which the various documents create supplies or demands.
This table provides information about programs that use supply and demand inclusion rules:
| Program | Usage |
|---|---|
| Materials Requirements Planning (MRP) | You can set up and apply different versions of the supply and demand inclusion rules, depending on the type of material plan that you run. For example, you can set up one version of the rules to apply to a long-range material plan and another version to apply to a short-range material plan. |
| Capacity Requirements Planning (CRP) | You can set up and apply different versions of the supply and demand inclusion rules, depending on the type of capacity plan you run. For example, you can set up one version of the rules to apply to a long-range capacity plan and another version to apply to a short-range capacity plan. |
| Supply/Demand Inquiry | Based on the version of the supply and demand inclusion rules you select, all of the documents that create a supply or demand for a particular part appear on Supply/Demand Inquiry. You can then access documents and make revisions to balance the supply with the demand. |
| Resource Assignments | You can set up and apply different versions of the supply and demand inclusion rules, depending on the work order and operation status. You can use the rules to display or exclude resource assignments from the availability and detail inquiries. For example, you can exclude the work order completed status since those assignments are no longer current. |
In JD Edwards EnterpriseOne Plant and Equipment Management, these document types create a supply for parts:
-
Purchase requests
-
Purchase orders
-
Blanket purchase orders
In JD Edwards EnterpriseOne Plant and Equipment Management, these document types create a demand for parts:
-
System-generated maintenance work orders, such as PM work orders.
-
Corrective maintenance work orders.
After you set up supply and demand inclusion rules, you can use the information that the system provides to balance the supply and demand for parts. For example, if demand is greater than supply at a given point, you can expedite purchase orders or postpone work orders.
When you review a version of the supply and demand inclusion rules, the system displays all of the document types and related statuses that are available. You select the document types and document statuses that you want to include in the version. Document types for which inclusion rules currently apply appear in a contrasting color. For review purposes, you can specify that the system only display document types for which inclusion rules currently apply.
Set processing options to include the work order document types that you have defined.
10.4 Setting Up Manufacturing Constants
You must define material and resource planning values for each branch or plant. For example, you can specify rules that govern how the system commits and routes inventory. You can also specify that the system should log changes to standard parts lists if you need to track the changes. You can also define the number of hours per day that each branch or plant operates. The system uses this information to determine the maximum workload for each work center in a branch or plant.
|
Note: JD Edwards EnterpriseOne Plant and Equipment Management shares planning constants with other manufacturing systems. If you use manufacturing systems, you should set up separate constants for maintenance branch/plants and manufacturing branch/plants. |
10.4.1 Forms Used to Set Up the Manufacturing Constants
| Form Name | FormID | Navigation | Usage |
|---|---|---|---|
| Work with Manufacturing Constants | W3009A | Planning Setup (G1346), Manufacturing Constants | Review and select manufacturing constants records. |
| Manufacturing Constants Revision | W3009B | Click Add on the Work with Manufacturing Constants form. | Set up manufacturing constants. |
10.4.2 Setting Up Manufacturing Constants
Access the Manufacturing Constants Revision form.
Figure 10-1 Manufacturing Constants Revision form
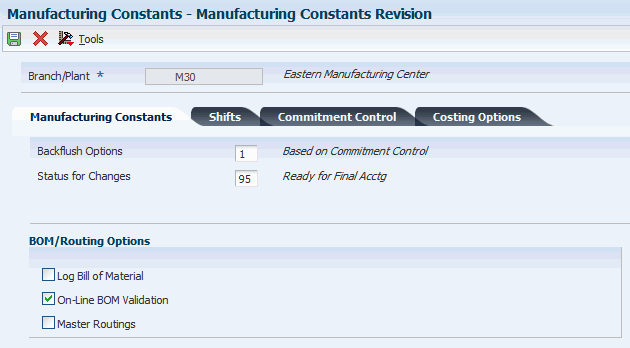
Description of ''Figure 10-1 Manufacturing Constants Revision form''
- Log Bill of Material
-
Enter a code that determines whether changes to the bill of material are recorded in the Bill of Material Change File table (F3011).
When you log bill of material changes, the system saves the old bill of material and the new, changed bill of material. To record changes to the bill of material, select the Log Bill of Material option in the BOM/Routing Options group box.
- On-Line BOM Validation (online bill of material validation)
-
Enter an option that determines whether the system performs an online component or parent validation and low-level code assignment when you revise a bill of material.
You should validate items online unless the bills of material are extremely large. If you select not to validate items online, you must validate the items in batch. Run the Integrity Analysis program (P30601) after updates to the bill of material and before you run the Item Cost Component - Frozen Update program (R30835) or perform a DRP/MPS/MRP generation (R3482).
To specify that the system validates items online, select the On-Line BOM Validation option in the BOM/Routing Options group box. If you do not select the On-Line BOM Validation option, the system does not validate items online.
10.4.2.1 Commitment Control
Select the Commitment Control tab.
The inventory commitment controls on this tab affect material planning and commitments on the work order parts list. Commitment Control options specify whether commitments cross branch plant boundaries. Hard/Soft Commit options specify when hard or soft commitment occurs.
- Commitment Control
-
Select an option to specify how the system commits inventory to a work order and the inventory location to which commitments are made. The system activates this field only when you create hard commitments.
Options are:
-
Primary Location. Make commitments to the primary location in the branch/plant where the work order originates.
-
Split-Cross Branch Boundaries. Split the parts list and commitments to fill any component shortages. The system can cross branch boundaries to fill requirements. In this case, the system uses the next alphabetical branch/plant listed in the table that occurs after the branch/plant on the work order header.
For example, for the branch/plants CAL, CHI, CLE, and HOU: If the system starts committing inventory at branch/plant CHI, it accesses CLE as the next branch/plant. If inventory is low in all locations, the system makes the remaining commitments to the primary location of the branch/plant on the work order header.
-
Split-Do Not Cross Branch Boundaries. This option is similar to Split-Cross Branch Boundaries, but the system cannot cross branch boundaries.
Note:
When you set the Commitment Method field in the Item Branch/Plant table to 2 or 3 (lot number or expiration date control), you must use the Split-Do Not Cross Branch Boundaries option. -
- Hard/Soft Commit
-
Select an option to specify how the JD Edwards EnterpriseOne Shop Floor Management system commits inventory. Options are:
-
Hard commitment at creation of parts list. The system performs a hard commitment at the creation of the parts list. The hard commitment remains in effect until inventory is relieved.
-
Soft commitment, then changed to hard commitment when printing. The system performs a soft commitment at the creation of the parts list. The system then changes the commitment to a hard commitment during the pick list print process (P13415) for the work order. The hard commitment remains in effect until inventory is relieved.
-
Soft commitment at creation of parts list. The system performs a soft commitment at creation of the parts list. The soft commitment remains in effect until inventory is relieved.
When you set the Commitment Method field in the Branch/Plant Constants form to 2 or 3, you must use either hard commitment at creation of parts list, or soft commitment then hard commitment when printing, because a hard commitment must be performed.
If you want to identify substitute items when a shortage occurs, you must select the hard commitment at creation of parts list option.
When you select either Soft, Hard when printing, or Soft at creation of Parts List, any line item in the parts list may be hard-committed prior to printing or relieving the inventory.
-
10.5 Setting Up UDCs for Parts Planning
This section provides an overview of UDCs for parts planning and describes how to:
-
Set up quantity types.
-
Set up the MRP calculation display codes.
10.5.1 Understanding Setting Up UDCs for Parts Planning
Before you can generate and review a parts plan, you must set up information that the system uses to process the plan. For example, you must set up a table of user-defined quantity types that the system uses to calculate and display the supply and demand of parts. You must also specify the action messages that you want to appear when the system detects a conflict between the availability and the demand for a part.
In addition, you can set up different versions of the supply and demand inclusion rules to accommodate different types of parts plans that you want to generate. For example, you can generate a long-range parts plan and a short-range parts plan. You use supply and demand inclusion rules to specify the document types that you want the system to include when it processes each plan.
Before you can use the parts planning features, you must set up these UDCs:
-
Quantity Type (34/QT)
-
MRP calculation display (34/MM)
-
MRP action messages (34/MT)
The system uses these codes to calculate and display the availability of parts. The system also uses these codes to determine which action messages to display when it detects a conflict between the availability and the demand for a part.
10.5.1.1 Quantity Types Codes
Quantity types are values in UDC 34/QT that represent the availability of parts. JD Edwards EnterpriseOne CAM provides several predefined codes, including:
-
+ Beginning available (unadjusted)
-
+ Beginning available
-
+ Purchase orders
-
- Lot Expired
-
- Firm work orders
-
= Ending available (unadjusted)
The system uses codes that have unadjusted values to calculate part availability with the assumption that any outstanding action messages are not be implemented by the responsible planner. The system uses all of the other codes to calculate the availability of parts with the assumption that the planner implements planning messages.
|
Important: The table for quantity types is shared with other manufacturing systems. Under no circumstances should you delete this table. Values within this table have special meaning to the system, but you can change the description fields. You should leave this table unaltered. |
10.5.1.2 MRP Calculation Display Codes
You must set up the MRP Calculation Display table (34/MM) with the quantity type codes that you want the system to consider when it calculates the availability of a part. You can revise the codes in this table to meet the specific calculation or display purposes.
For example, you can set up a table to specify that the system:
-
Use the beginning available quantity for a part.
-
Add quantities from existing purchasing orders.
-
Subtract quantities from maintenance work orders.
-
Provide the ending available amount
You can use processing options for the User-Defined Codes program (P0004A) to specify which version of the MRP calculation display table that the system uses. The maintenance material planning version of the MRP calculation display table appears unless you specify otherwise.
10.5.1.3 MRP Action Message Codes
You must define the action messages that you want to appear when the system notifies you of parts planning conflicts. For example, depending on the severity of a parts shortage, you can direct the system to provide messages to place an order for a part, expedite an existing order, increase the quantity of an existing order, and so on.
The system stores MRP action message codes in UDC 34/MT. You can change the description of the codes to meet the business needs.
10.5.2 Forms Used to Set Up Parts Planning Codes
| Form Name | FormID | Navigation | Usage |
|---|---|---|---|
| Work With User-Defined Codes | W0004AA | Planning Setup (G1346), Quantity Types | Set up quantity types. |
| Work With User-Defined Codes | W0004AA | Planning Setup (G1346), MRP Calculation Display | Set up MRP calculation display codes. |
| Work With User-Defined Codes | W0004AA | Planning Setup (G1346), MPS/MRP Action Messages | Set up MRP action message codes. |
10.5.3 Setting Up Quantity Types
Access the Work With User-Defined Codes form for UDC 34/QT.
10.5.4 Setting Up the MRP Calculation Display Codes
Access the Work With User-Defined Codes form for UDC 34/MM.
Figure 10-2 Work With User-Defined Codes form
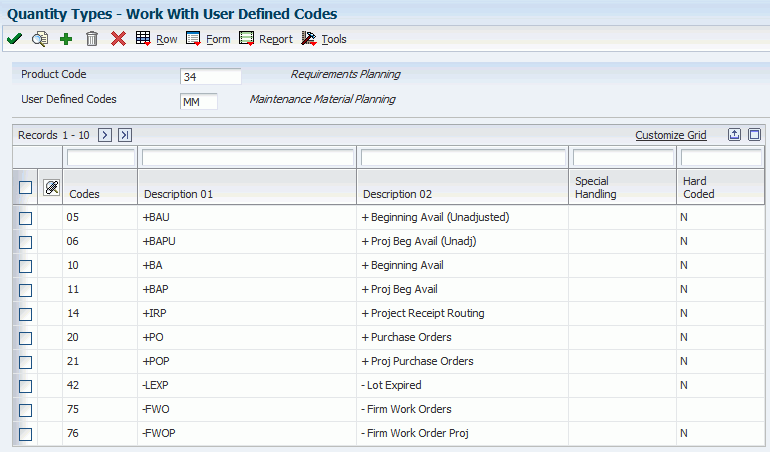
Description of ''Figure 10-2 Work With User-Defined Codes form''
10.6 Setting Up Resource Planning
This section provides overviews of resource planning and resource units.
10.6.1 Understanding Resource Planning
Before you can generate and review a labor plan, you must set up information that the system uses to process the plan. For example, you must set up the work centers that are responsible for maintenance and specify the number of employees in each maintenance work center. You must also set up additional UDCs, such as the codes that the system uses to calculate the availability of labor resources.
In addition, you can set up different versions of the supply and demand inclusion rules to accommodate different types of labor plans that you want to generate. For example, you can generate a long-range labor plan and a short-range labor plan. You use supply and demand inclusion rules to specify the document types that you want the system to include when it processes each plan.
10.6.2 Understanding Resource Units
You must set up resource units to enable the system to calculate labor demands and labor costs for maintenance tasks. The system calculates resource units by multiplying the work hours per day by the number of employees in a work center. In JD Edwards EnterpriseOne Plant and Equipment Management, a work center usually represents the employees who perform maintenance work, although it can also represent a department or a machine. You must set up the work centers before the system can calculate resource units and labor costs.
In addition, you must establish standard labor rates. The system uses standard labor rates to calculate rate information on work order labor routings and on the work order Estimate to Actual Variance program.
10.7 Setting Up Work Centers and Work Center Rates
This section provides an overview of work centers and work center rates, lists a prerequisite, and discusses how to:
-
Set up work centers.
-
Set up work center rates.
10.7.1 Understanding Work Centers and Work Center Rates
You must provide the system with these types of information about each of the maintenance work centers:
-
Basic information, such as work center names, crew sizes, job processing time, and so on.
-
Grouping information, so that you can combine similar work centers for planning and reporting.
-
Labor rate information.
The work centers and labor rate information is required when entering labor detail steps on a work order, so it is required even if you are not planning to use the JD Edwards EnterpriseOne Capacity Planning applications.
10.7.2 Prerequisite
Before you complete the tasks in this section set up work day calendars for each branch or plant.
10.7.3 Forms Used to Set Up Work Centers and Work Center Rates
| Form Name | FormID | Navigation | Usage |
|---|---|---|---|
| Work With Work Centers | W3006F | Planning Setup (G1346), Work Center Revision | Review and select work center records. |
| Work Center Master Revisions | W3006A | Click Add on the Work With Work Centers form. | Set up work centers. |
| Work With Work Center Rates | W3006B | Select Rates from the Form menu on the Work Center Master Revisions form. | Review and select the work center rate records. |
| Work Center Rate Revisions | W3006C | Click Add on the Work With Work Center Rates form. | Set up work center rates. |
10.7.4 Setting Up Work Centers
Access the Work Center Master Revisions form.
Figure 10-3 Work Center Master Revisions form
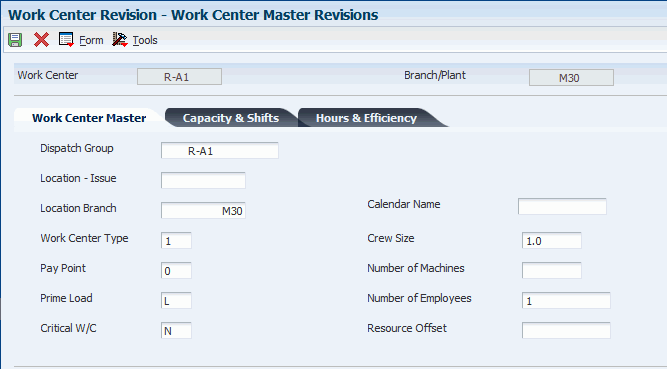
Description of ''Figure 10-3 Work Center Master Revisions form''
- Dispatch Group
-
Enter a category code used to group work centers within an overall business unit.
For example, you can use this code to group similar machines operating out of several work centers that report to one business unit.
- Critical W/C (critical work center)
-
Enter a value from UDC 30/CR (Critical Work Center) that indicates whether the work center is critical or not critical when the system calculates capacity. Values are:
N: Not a critical work center.
1: A critical work center in calculating RRP only.
2: A critical work center in calculating RCCP and CRP.
3: A critical work center in calculating RRP, RCCP, and CRP. The system also displays Type 3 work centers when you select Type 1 or Type 2 in this field.
4: Not a capacity work center. The system does not include this work center in capacity planning.
10.7.5 Setting Up Work Center Rates
Access the Work Center Rate Revisions form.
Figure 10-4 Work Center Rate Revisions form
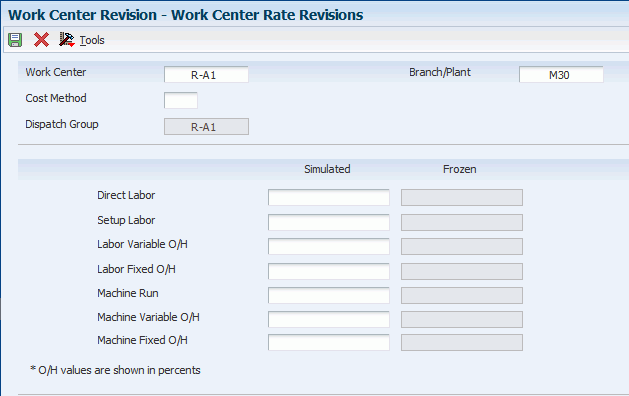
Description of ''Figure 10-4 Work Center Rate Revisions form''
- Cost Method
-
Enter a value from UDC 40/CM (Cost Method) that specifies the basis for calculating item costs.
Cost Method 07 - Standard Cost is used to specify the estimated unit cost for the work center resources.
Cost methods 01 through 19 are reserved and are not available for you to use.
- Direct Labor
-
Specify a rate, in cost per person per hour, that the system uses with the Run Labor hours of the associated routing to calculate the standard run labor cost.
The estimated cost is entered in the Direct Labor simulated field, and needs to be updated to the Frozen cost using the Item Cost-Frozen Update batch (R30835) program.
10.8 Calculating Available Resource Units
This section provides an overview of the Work Center Resource Units Generation program and discusses how to:
-
Run the Work Center Resource Units Generation program.
-
Set processing options for the Work Center Resource Units Generation program (R3007G).
Note:
Calculating the available resource units is only required if you are planning to use the JD Edwards EnterpriseOne Capacity Requirements Planning programs to view the capacity load based on a PM forecast projection.
10.8.1 Understanding the Work Center Resource Units Generation Program
After you set up work centers and whenever you revise work center information, you must run the Work Center Resource Units Refresh program to calculate available resource units. You specify a time period and a branch or plant for which you want the system to calculate resource units. The system uses the Prime Load Code field on the Work Center Master Revisions form to determine how to calculate the resource units that a work center is capable of generating over a particular period of time. To calculate resource units for maintenance work centers, you typically use a prime load code of L for labor hours.
When you use a prime load code of L, the system calculates resource units using this information:
-
Number of employees from Resource Revisions.
-
Work hours per day from General Planning Constants.
10.8.2 Running the Work Center Resource Units Generation Program
Select Planning Setup (G1346), Work Center Resource Units Generation.
10.8.3 Setting Processing Options for the Work Center Resource Units Generation Program (R3007G)
Processing options enable you to specify the default processing for programs and reports.
10.8.3.1 Defaults
Although processing options are set up during implementation, you can change processing options each time you run a program.
- 1. From Date
-
Specify the beginning date that the system uses to generate resource units.
Enter the beginning date or select a date from the calendar. The system generates resource units and refreshes them for the month in which the from date falls. For example, if the from date is January 10 and the through date is January 15 the system generates resource units for January. The system requires that you enter values for this processing option before you can run the generation.
- 2. Thru Date
-
Specify the ending date that the system uses to generate resource units.
Enter the ending date or select a date from the calendar. Resource units are generated, refreshed, or both, for the entire month. For example, if the from date is January 10 and the through date is January 15 the system generates resource units for January. The system requires that you to enter values for this processing option before you can run the generation.
- 3. Branch/Plant
-
Specify the branch/plant updated by the system in the Work Center Resource Units table when you generate resource units.
Enter the branch/plant or select a branch/plant from the Business Unit Master Search form. This processing option is required before you can run the generation.
10.8.3.2 Process
- 1. Shift Code,2. Shift 2 Code,3. Shift 3 Code,4. Shift 4 Code,5. Shift 5 Code, and 6. Shift 6 Code
-
Enter a value from UDC 06/SH (Shift Codes) that identifies the type of shift. For example, day, night, or graveyard.
These processing options specify the shift codes to be included in the resource unit generation. You can enter up to six different shift codes. Enter the code or select it from the Select User-Define Code form.
Blank: The system processes all valid shifts for the requested branch/plant.