10 New Features
11g Release 1 (11.1.1.4.0) provides new features for the Oracle Application Adapter for SAP R/3, which are described in this chapter. This chapter contains the following sections:
Exception Filter
This section describes how to configure exception filter functionality for the Oracle Application Adapter for SAP R/3 and includes a sample testing scenario. This section contains the following topics:
The exception filter is supported only for outbound processes that use J2CA configurations. This feature is not supported for BSE configurations and inbound processes that use J2CA configurations.
The exception filter uses the com.ibi.afjca.oracle.SAPExceptionFilter class to filter the generated exceptions. This class filters the exceptions and categorizes them into the following categories:
-
PCRetriableResourceException
-
PCResourceException
The following exceptions are represented in the fault policies file:
-
PCRetriableResourceException - A remote fault.
-
PCResourceException - A binding fault.
Note:
Thecom.ibi.afjca.oracle.AdapterExceptionFilter class can also be used to filter the generated exceptions.Prerequisites
This section lists the prerequisites for the exception filter.
-
Oracle PS3 SOA Suite must be installed.
-
Oracle JDeveloper for PS3 must be installed with the updated SOA composite editor.
-
Oracle Application Adapter for SAP R/3 for 11g Release 1 (11.1.1.4.0) must be installed.
For more information, see the Oracle Fusion Middleware Application Adapters Installation Guide for Oracle WebLogic Server.
Configuring the Exception Filter
Exception filter configuration consists of the following steps:
-
Generate a WSDL file.
For more information, see "Generating a WSDL File".
-
Create a BPEL outbound process with exception filter functionality.
For more information, see "Creating a BPEL Outbound Process With Exception Filter Functionality".
-
Create fault policies and fault binding files.
For more information, see "Creating Fault Policies and Fault Binding Files".
-
Deploy and test the BPEL outbound process with exception filter functionality.
For more information, see "Deploying and Testing the BPEL Outbound Process With Exception Filter Functionality".
Generating a WSDL File
To generate a WSDL file:
-
Open Application Explorer and create a J2CA configuration.
For more information, see "Creating a Configuration for J2CA".
-
Create a target for the SAP R/3 adapter and then connect to the target.
For more information, see "Establishing a Connection (Target) for SAP R/3".
-
Generate a WSDL for the appropriate object (for example, the GetDetail BAPI for the CompanyCode business object).
For more information, see "Generating WSDL (J2CA Configurations Only)".
Creating a BPEL Outbound Process With Exception Filter Functionality
To create a BPEL outbound process with exception filter functionality:
-
Open JDeveloper and create a new SOA application.
For more information, see "Creating an Empty Composite for SOA".
-
Create a new SOA project (for example, SAP_Exception_Filter).
-
Create a third party adapter service component.
For more information, see "Configuring a Third Party Adapter Service Component".
Once the third party adapter service component is created, the WSDL file (with corresponding schemas and JCA file) is imported to the JDeveloper project.
For more information, see "Defining a BPEL Outbound Process".
-
Modify the imported JCA file.
-
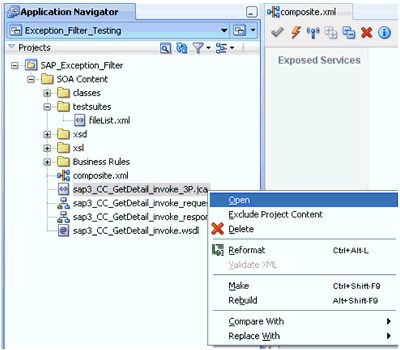
Right-click the imported JCA file and select Open from the menu, as shown in Figure 10-1.
-
In the
<interaction-spec>element, add theExceptionFilterproperty. For example:<interaction-spec className="com.ibi.afjca.cci.IWAFInteractionSpec"><property name="FunctionName" value="PROCESS"/><property name="ExceptionFilter" value="com.ibi.afjca.oracle.SAPExceptionFilter"/></interaction-spec> -
Save the modified JCA file.
-
-
Once the third party adapter service component is created and the JCA file is modified, continue with the remainder of the BPEL process creation.
For more information, see "Defining a BPEL Outbound Process".
Creating Fault Policies and Fault Binding Files
To create fault policies and fault binding files:
-
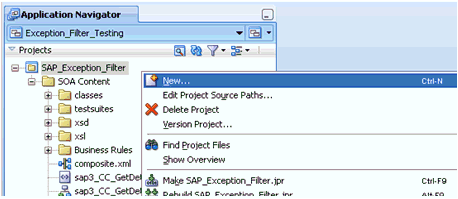
Right-click the created SOA project (for example, SAP_Exception_Filter) and select New from the menu, as shown in Figure 10-2.
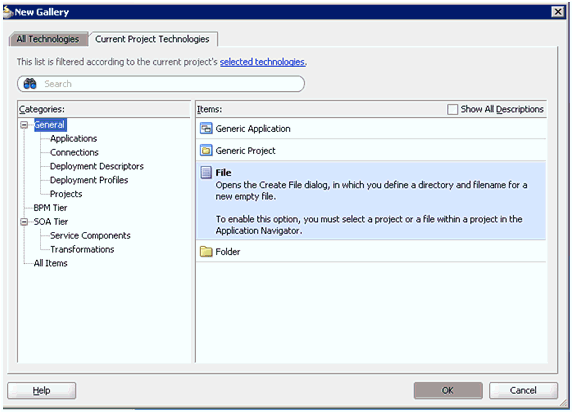
The New Gallery dialog is displayed, as shown in Figure 10-3.
-
Select File and click OK.
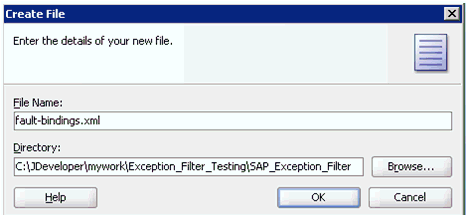
The Create File dialog is displayed, as shown in Figure 10-4.
-
In the File Name field, type fault-bindings.xml and click OK.
-
Add the appropriate fault binding functions in the fault-bindings.xml file.
To view a sample fault-bindings.xml file, see "Sample Fault-Bindings.xml File".
Note:
The parameter in the<name>element is the name of the created BPEL process. -
Save the fault-bindings.xml file.
-
Repeat steps 1 to 5 for the fault-policies.xml file, but ensure to add the appropriate fault policies functions.
To view a sample fault-policies.xml file, see "Sample Fault-Policies.xml File".
Note:
The parameter ID in the<fault policy>element is obtained from the fault-bindings.xml file, which can be found in the<Component>element of the fault-bindings.xml file. This ID can have any name as long as it is identical in the fault-policies.xml and fault-bindings.xml files.Tip:
The fault-bindings.xml and fault-policies.xml files can also be created externally and manually copied to the JDeveloper project.
Sample Fault-Bindings.xml File
<?xml version="1.0" encoding="UTF-8" ?><faultPolicyBindings version="2.0.1" xmlns="http://schemas.oracle.com/bpel/faultpolicy" xmlns:xsi="http://www.w3.org/2001/XMLSchema-instance"><component faultPolicy="bpelFaultHandling"><name>BPELProcess1</name></component></faultPolicyBindings>
Sample Fault-Policies.xml File
<?xml version="1.0" encoding="UTF-8"?><faultPolicies xmlns="http://schemas.oracle.com/bpel/faultpolicy"> <faultPolicy version="2.0.1" id="bpelFaultHandling" xmlns:env="http://schemas.xmlsoap.org/soap/envelope/" xmlns:xs="http://www.w3.org/2001/XMLSchema" xmlns="http://schemas.oracle.com/bpel/faultpolicy" xmlns:xsi="http://www.w3.org/2001/XMLSchema-instance"> <Conditions> <faultName xmlns:bpelx="http://schemas.oracle.com/bpel/extension" name="bpelx:remoteFault"> <condition> <action ref="ora-retry-3"/> </condition> </faultName> <faultName xmlns:bpelx="http://schemas.oracle.com/bpel/extension" name="bpelx:bindingFault"> <condition> <action ref="ora-retry-5"/> </condition> </faultName> </Conditions> <Actions> <Action id="ora-retry-3"> <retry> <retryCount>3</retryCount> <retryInterval>2</retryInterval> <retryFailureAction ref="ora-terminate"/> <exponentialBackoff/> </retry> </Action> <Action id="ora-retry-5"> <retry> <retryCount>5</retryCount> <retryInterval>2</retryInterval> <retryFailureAction ref="ora-terminate"/> <exponentialBackoff/> </retry> </Action> <Action id="ora-terminate"> <abort/> </Action> </Actions> </faultPolicy> </faultPolicies>
Deploying and Testing the BPEL Outbound Process With Exception Filter Functionality
To deploy and test the BPEL outbound process with exception filter functionality:
-
Deploy the created BPEL outbound process.
For more information, see "Deploying the BPEL Outbound Process".
-
Simulate a communication error by disconnecting the system (where the servers are running) from the network.
-
Invoke the deployed BPEL outbound process with a valid input.
For more information, see "Invoking the Input XML Document in the Oracle Enterprise Manager Console".
-
Select the process ID.
You can observe the BPEL outbound process being retried or aborted based on the configuration of the fault-policies.xml file.
Credential Mapping for Oracle SOA Suite (BPEL, Mediator, or BPM)
This section describes how to configure credential mapping functionality for the Oracle Application Adapter for SAP R/3 in a configuration that uses Oracle SOA Suite (BPEL, Mediator, or BPM). A sample testing scenario is also included. This section contains the following topics:
Credential mapping is supported only for outbound processes that use J2CA configurations. This feature is not supported for BSE configurations and inbound processes that use J2CA configurations.
Note:
The J2CA connector is common to all four application adapters (SAP R/3, PeopleSoft, Siebel, and J.D. Edwards OneWorld). If credential mapping is required, then ensure that only one application adapter is used in a particular instance. For example, in one adapter instance only the SAP R/3 application adapter can be used. Credential mapping cannot be configured at the individual adapter level. If you require the use of credential mapping for two adapters, then both adapters must be running in two independent adapter instances.To pass user credentials to the iWay J2CA resource adapter, create a credential map from the Oracle WebLogic Server user credentials to the EIS user credentials (SAP R/3 adapter). Then associate a credential policy with a BPEL, Mediator, or BPM Web service and invoke the Web service using Oracle WebLogic Server user credentials. These credentials are mapped to the EIS user credentials and then passed to the iWay J2CA container, which uses them to connect with the EIS adapter (SAP R/3).
Prerequisites
This section lists the prerequisites for credential mapping.
-
Oracle PS3 SOA Suite with an extended BPM domain must be installed.
-
Oracle JDeveloper for PS3 must be installed with the updated SOA/BPM composite editor.
-
Oracle Application Adapter for SAP R/3 for 11g Release 1 (11.1.1.4.0) must be installed.
For more information, see the Oracle Fusion Middleware Application Adapters Installation Guide for Oracle WebLogic Server.
Configuring Credential Mapping
Configuring credential mapping consists of the following steps:
-
Deploy the adapter.
For more information, see Chapter 5, "Oracle WebLogic Server Deployment and Integration".
-
Associate Oracle WebLogic Server credentials with EIS credentials.
For more information, see "Associating Oracle WebLogic Server Credentials With EIS Credentials".
-
Generate a WSDL file.
For more information, see "Generating a WSDL File".
-
Create an outbound process.
For more information, see "Creating an Outbound Process".
-
Attach a security policy to an outbound process.
For more information, see "Attaching a Security Policy to an Outbound Process Using the Oracle Enterprise Manager Console".
Associating Oracle WebLogic Server Credentials With EIS Credentials
To associate Oracle WebLogic Server credentials with EIS credentials:
-
Log in to the Oracle WebLogic Server Administration Console.
-
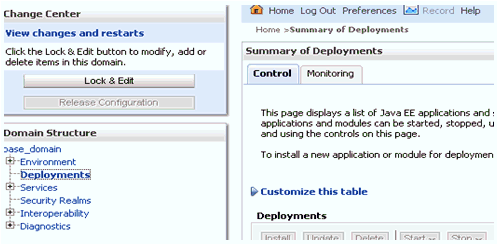
In the Domain Structure section in the left pane, click Deployments, as shown in Figure 10-5.
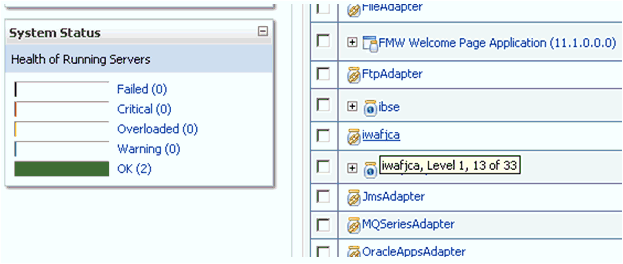
The Deployments page is displayed, as shown in Figure 10-6.
-
Click the iwafjca resource adapter.
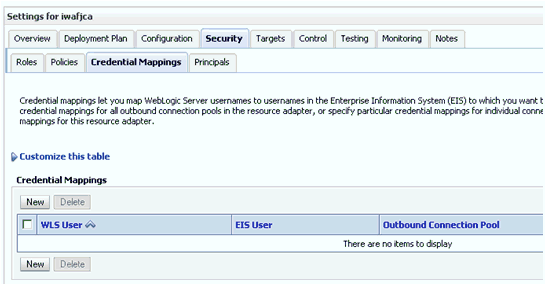
The Settings for iwafjca page is displayed, as shown in Figure 10-7.
-
Click the Credential Mappings tab under the Security tab, and then click New.
The Create a New Security Credential Mapping page is displayed, as shown in Figure 10-8.
Figure 10-8 Create a New Security Credential Mapping Page
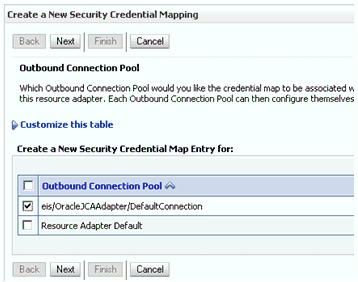
Description of "Figure 10-8 Create a New Security Credential Mapping Page"
-
Select the outbound connection pool.
For example:
eis/OracleJCAAdapter/DefaultConnection
-
Click Next.
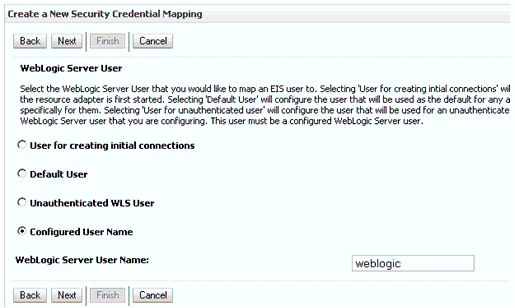
The WebLogic Server User page is displayed, as shown in Figure 10-9.
-
Select Configured User Name, enter a valid Oracle WebLogic Server user name, and then click Next.
The EIS User Name and Password page is displayed, as shown in Figure 10-10.
Figure 10-10 EIS User Name and Password Page
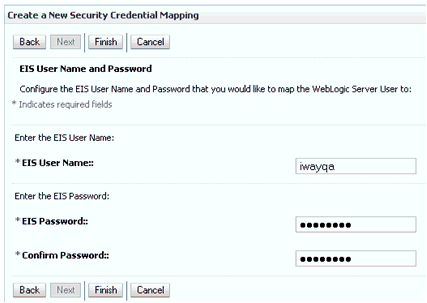
Description of "Figure 10-10 EIS User Name and Password Page"
-
Enter the user name and password for the EIS and click Finish.
The credentials for an Oracle WebLogic Server user are now mapped with an EIS user (SAP R/3). The mapping is invoked automatically before invoking the J2CA service.
Generating a WSDL File
To generate a WSDL file:
-
Open Application Explorer and create a J2CA configuration.
For more information, see "Creating a Configuration for J2CA".
-
Create a target for the SAP R/3 adapter and then connect to the target.
For more information, see "Establishing a Connection (Target) for SAP R/3".
-
Generate a WSDL for the appropriate object (for example, the GetDetail BAPI for the CompanyCode business object).
For more information, see "Generating WSDL (J2CA Configurations Only)".
Creating an Outbound Process
This section describes how to configure an outbound process. For demonstration purposes, specific references to the BPEL outbound process are made. However, the same steps apply to Mediator and BPM outbound processes.
For more information about creating a Mediator outbound process, see Chapter 7, "Integration With Mediator Service Components in the Oracle SOA Suite".
For more information about creating a BPM outbound process, see Chapter 8, "Integration With BPM Service Components in the Oracle SOA Suite".
To create a BPEL outbound process:
-
Open JDeveloper and create a new SOA application.
For more information, see "Creating an Empty Composite for SOA".
-
Create a new SOA project (for example, Credential_Mappings).
-
Deploy the BPEL outbound process.
For more information, see "Deploying the BPEL Outbound Process".
Attaching a Security Policy to an Outbound Process Using the Oracle Enterprise Manager Console
To attach a security policy to an outbound process using the Oracle Enterprise Manager console:
-
Log in to the Oracle Enterprise Manager console and navigate to the deployed composite.
-
Click the Policies tab.
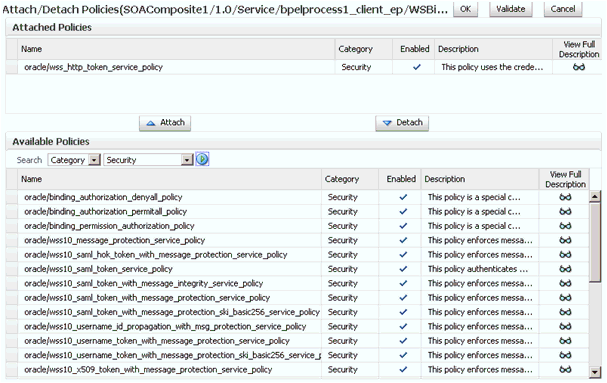
From the Attach To/Detach From list, select the BPEL, Mediator, or BPM outbound process.
BPEL or Mediator outbound processes have
_clientappended to the process name. BPM outbound processes use theProcess.servicenaming convention.The Attached Policies page is displayed, as shown in Figure 10-12.
-
Select the Security category and click Search.
-
Scroll through the list and select oracle/wss_http_token_service_policy.
-
Click Attach and then OK.
The selected policy is now displayed in the Policies tab.
-
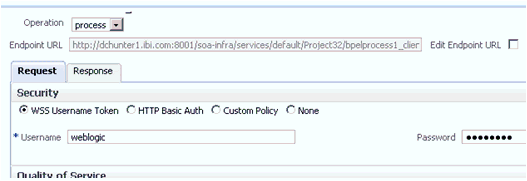
Click the Test tab and select WSS Username Token in the Security section of the Request tab. Enter a valid Oracle WebLogic Server user name and password, as shown in Figure 10-13
-
Invoke the deployed BPEL outbound process with a valid input.
For more information, see "Invoking the Input XML Document in the Oracle Enterprise Manager Console".
-
Check the J2CA log files and locate the encrypted password, which shows that the user credentials have been passed to the EIS through Oracle WebLogic Server.
For example:
FINEST IWAFManagedConnectionFactory com.ibi.afjca.Util getPasswordCredential(78) InLoop: User-iwayqa:Password-ENCR(3109311731831131382333215315332323192322731773172)FINEST IWAFManagedConnectionFactory com.ibi.afjca.Util getPasswordCredential(90) Use the system PasswordCredential: User-iwayqa:Password-ENCR(3109311731831131382333215315332323192322731773172)
Credential Mapping for Oracle Service Bus (OSB)
This section describes how to configure credential mapping functionality for the Oracle Application Adapter for SAP R/3 in a configuration that uses Oracle Service Bus (OSB). A sample testing scenario is also included. This section contains the following topics:
Credential mapping is supported only for outbound processes that use J2CA configurations. This feature is not supported for BSE configurations and inbound processes that use J2CA configurations.
Note:
The J2CA connector is common to all four application adapters (SAP R/3, PeopleSoft, Siebel, and J.D. Edwards OneWorld). If credential mapping is required, then ensure that only one application adapter is used in a particular instance. For example, in one adapter instance only the SAP R/3 application adapter can be used. Credential mapping cannot be configured at the individual adapter level. If you require the use of credential mapping for two adapters, then both adapters must be running in two independent adapter instances.To pass user credentials to the iWay J2CA resource adapter, create a credential map from the Oracle WebLogic Server user credentials to the EIS user credentials (SAP R/3 adapter). Then associate a credential policy with a Web service and invoke the Web service using Oracle WebLogic Server user credentials. These credentials are mapped to the EIS user credentials and then passed to the iWay J2CA container, which uses them to connect with the EIS adapter (SAP R/3).
Prerequisites
This section lists the prerequisites for credential mapping.
-
Oracle Service Bus (OSB) for PS3 must be installed.
-
Oracle Application Adapter for SAP R/3 for 11g Release 1 (11.1.1.4.0) must be installed.
For more information, see the Oracle Fusion Middleware Application Adapters Installation Guide for Oracle WebLogic Server.
Configuring Credential Mapping
Configuring credential mapping consists of the following steps:
-
Deploy the adapter.
For more information, see Chapter 5, "Oracle WebLogic Server Deployment and Integration".
-
Associate Oracle WebLogic Server credentials with EIS credentials.
For more information, see "Associating Oracle WebLogic Server Credentials With EIS Credentials".
-
Generate a WSDL file.
For more information, see "Generating a WSDL File".
-
Create an Oracle Service Bus (OSB) outbound process.
For more information, see "Creating an Oracle Service Bus (OSB) Outbound Process".
Associating Oracle WebLogic Server Credentials With EIS Credentials
To associate Oracle WebLogic Server credentials with EIS credentials:
-
Log in to the Oracle WebLogic Server Administration Console.
-
In the Domain Structure section in the left pane, click Deployments, as shown in Figure 10-14.
The Deployments page is displayed, as shown in Figure 10-15.
-
Click the iwafjca resource adapter.
The Settings for iwafjca page is displayed, as shown in Figure 10-16.
-
Click the Credential Mappings tab under the Security tab, and then click New.
The Create a New Security Credential Mapping page is displayed, as shown in Figure 10-17.
Figure 10-17 Create a New Security Credential Mapping Page

Description of "Figure 10-17 Create a New Security Credential Mapping Page"
-
Select the outbound connection pool.
For example:
eis/OracleJCAAdapter/DefaultConnection
-
Click Next.
The WebLogic Server User page is displayed, as shown in Figure 10-18.
-
Select Configured User Name, enter a valid Oracle WebLogic Server user name, and then click Next.
The EIS User Name and Password page is displayed, as shown in Figure 10-19.
Figure 10-19 EIS User Name and Password Page

Description of "Figure 10-19 EIS User Name and Password Page"
-
Enter the user name and password for the EIS and click Finish.
The credentials for an Oracle WebLogic Server user are now mapped with an EIS user (SAP R/3). The mapping is invoked automatically before invoking the J2CA service.
Generating a WSDL File
To generate a WSDL file:
-
Set the class path for Application Explorer to integrate with Oracle Service Bus (OSB).
For more information, see "Setting the Class Path for Application Explorer to Integrate With Oracle Service Bus".
-
Open Application Explorer and create a J2CA configuration.
For more information, see "Creating a Configuration for J2CA".
-
Create a target for the SAP R/3 adapter and then connect to the target.
For more information, see "Establishing a Connection (Target) for SAP R/3".
-
Publish a WSDL to OSB for the appropriate object (for example, the GetDetail BAPI for the CompanyCode business object).
For more information, see "Publishing a WSDL From Application Explorer to Oracle Service Bus".
Creating an Oracle Service Bus (OSB) Outbound Process
To create an Oracle Service Bus (OSB) outbound process with credential mapping functionality:
-
Start Oracle Service Bus and create project folders.
For more information, see "Starting Oracle Service Bus and Creating Project Folders".
-
Configure a File type Business Service.
For more information, see "Configuring a File Type Business Service".
-
Configure a Business Service.
For more information, see "Configuring a WSDL-based Business Service".
-
Configure a Proxy Service.
For more information, see "Configuring a Proxy Service".
-
Configure a Pipeline.
For more information, see "Configuring a Pipeline".
-
Configure a Service account by selecting the created folder in the left pane.
In the right pane, select Service Account from the Create Resource list, as shown in Figure 10-20.
Figure 10-20 Select Service Account Option
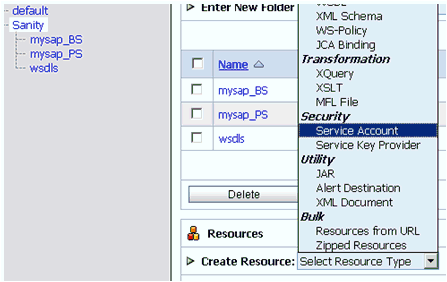
Description of "Figure 10-20 Select Service Account Option"
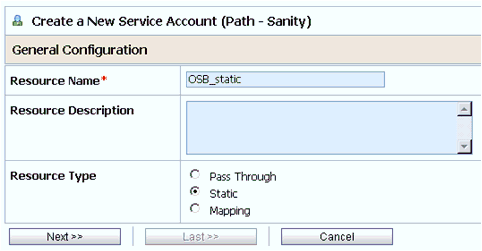
The Create a New Service Account page is displayed, as shown in Figure 10-21.
-
Provide a name for the resource and select Static as the resource type.
-
Click Next.
The Static User Configuration page is displayed, as shown in Figure 10-22.
Figure 10-22 Static User Configuration Page
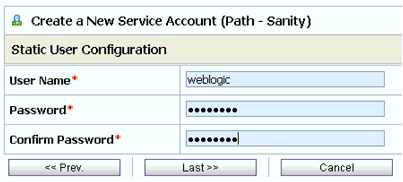
Description of "Figure 10-22 Static User Configuration Page"
-
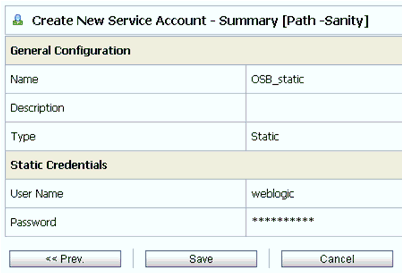
Provide a valid user name and password for Oracle WebLogic Server, and then click Last.
The Summary page is displayed, as shown in Figure 10-23.
-
Review the information and click Save.
-
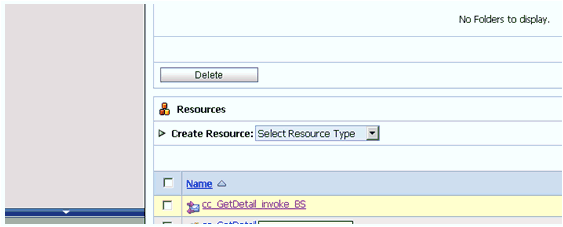
In the left pane, select the Business Service that was created while publishing the WSDL, as shown in Figure 10-24.
For more information, see "Configuring a WSDL-based Business Service".
-
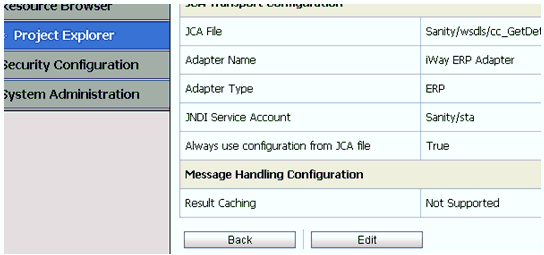
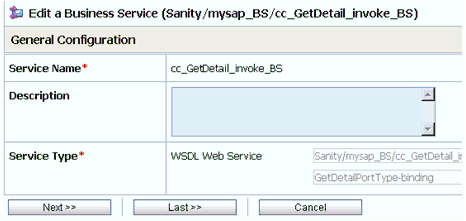
Click Edit to edit the process, as shown in Figure 10-25.
The General Configuration page is displayed, as shown in Figure 10-26.
-
Click Next.
The Transport Configuration page is displayed, as shown in Figure 10-27.
Figure 10-27 Transport Configuration Page
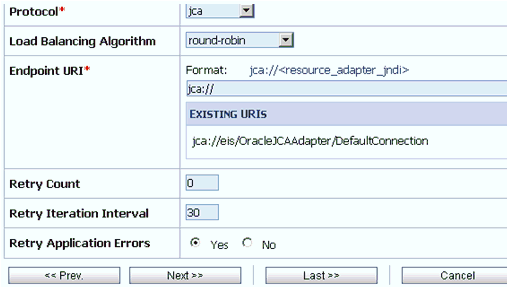
Description of "Figure 10-27 Transport Configuration Page"
-
Click Next.
The JCA Transport Configuration page is displayed, as shown in Figure 10-28.
Figure 10-28 JCA Transport Configuration Page
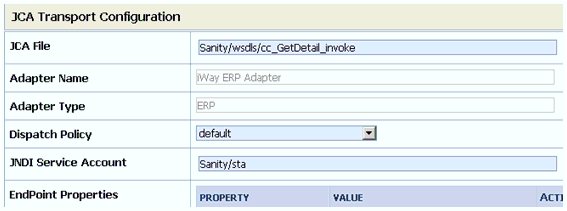
Description of "Figure 10-28 JCA Transport Configuration Page"
-
Browse the JNDI service account that was created and click Last.
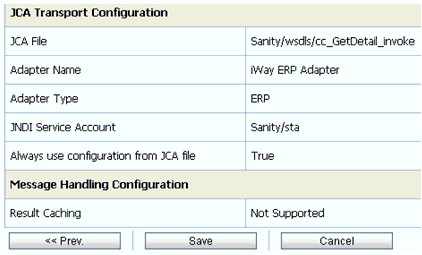
The Summary page is displayed, as shown in Figure 10-29.
-
Review the information and click Save.
-
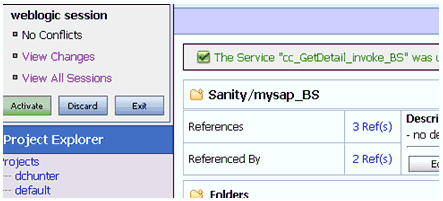
Check if the success message is displayed and click Activate in the Change Center, as shown in Figure 10-30.
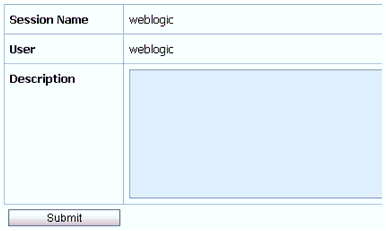
The Activate Session page is displayed, as shown in Figure 10-31.
-
Click Submit.
-
Copy and paste a valid input XML file in the input folder you configured and check to see that the output is received in the configured output location.
-
Check the J2CA log files and locate the encrypted password, which shows that the user credentials have been passed to the EIS through Oracle WebLogic Server.
For example:
FINEST IWAFManagedConnectionFactory com.ibi.afjca.Util getPasswordCredential(78) InLoop: User-iwayqa:Password-ENCR(3189321331831132502333215312132323192322731773156)Tue FINEST IWAFManagedConnectionFactory com.ibi.afjca.Util getPasswordCredential(90) Use the system PasswordCredential: User-iwayqa:Password-ENCR(3189321331831132502333215312132323192322731773156)
