Setting up drivers on Linux.
FreeTDS
FreeTDS version 0.92 or greater is required. Many distributions ship older versions of FreeTDS, so it may need to be installed separately. Additionally, the FreeTDS version provided by distributions may also be compiled for the wrong ODBC library (usually to unixODBC instead of iODBC, which MySQL Workbench uses). Because of that, you will probably need to build this library yourself.
A script is provided to compile FreeTDS using the options
required for MySQL Workbench. You can find it at
/usr/share/mysql-workbench/extras/build_freetds.sh
on Linux or
MySQLWorkbench.app/Contents/SharedSupport/build_freetds.sh
on macOS. To use it, follow these steps:
When compiling FreeTDS for use with iODBC (the default with
the official binaries), it must be compiled with the
--enable-odbc-wide command line. Failing
to do so will result in crashes and other unpredictable
errors. The provided build_freetds.sh
script does this for you.
For compiling, make sure you have the iODBC headers installed. For Linux, the name depends on your system's package manager but common names are
libiodbc-devel(RPM based systems) orlibiodbc2-dev(Debian based systems). For macOS, the headers come with the system and no additional action is required for this step.NoteIf you are using Oracle Enterprise Linux, RedHat, CentOS, and similar, you must have the EPEL repository set up in yum for it to find the
libiodbc-develpackage. For additional information about this step, see Installing Oracle Enterprise Linux and Similar.mkdir ~/freetdsto create a directory - within the users home directory.Copy the
build_freetds.shscript to~/freetdsGet the latest FreeTDS sources from ftp://ftp.freetds.org/pub/freetds/ and place the
.tar.gzsource file into the~/freetdsdirectory. Make sure to get FreeTDS version 0.92 or newer.cd ~/freetdsExecute
build_freetds.shAfter compilation is done, install it using
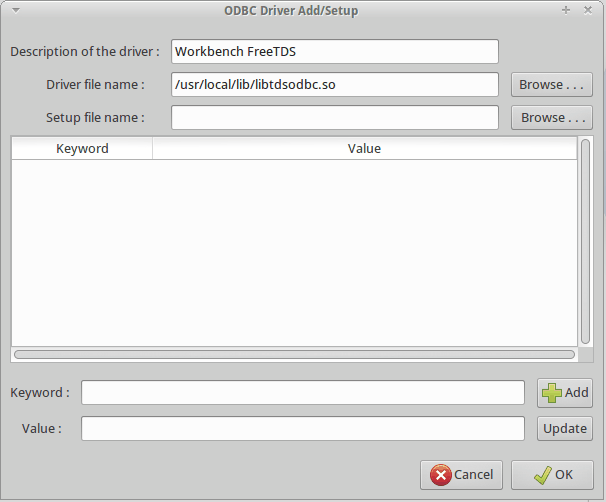
make
              install
from the path given by the script.Install the driver using ODBC Administrator so that the ODBC subsystem recognizes it. Open ODBC Administrator from the migration tab in MySQL Workbench (see the figure that follows).
The name of the driver file is
libtdsodbc.soand it is located in/usr/libor/usr/local/lib. For example, under the ODBC Drivers tab click and fill out the description (name) and path to the driver file (see the figure that follows). Remember the name you define here as it will be needed later on. Save the driver.NoteOnly the driver file name is required, while the setup file name can remain undefined.
Close the ODBC Administrator and click . For information about making a Microsoft SQL Server connection using the MySQL Workbench migration wizard, see Section 10.5.3.2, “Linux”.