Customizing Demantra Web Pages
This chapter describes how to customize the Demantra Web pages.
This chapter covers the following topics:
- Logging onto the Collaborator Workbench Administrator
- Configuring Menus in Collaborator Workbench
- Running Oracle Executables from Collaborator Menus
- Configuring the Panes
- Specifying Content Pane Security
- Replacing Default Demantra Graphics
- Customizing the Collaborator Workbench Login Page
- Configuring Links in Collaborator Workbench
Logging onto the Collaborator Workbench Administrator
You use the Collaborator Workbench Administrator to control access to menu items.
To log onto the Collaborator Workbench Administrator
-
Open the administration login page:
http://server name/virtual directory/portal/adminLogin.jsp
For example:
http://frodo/demantra/portal/adminLogin.jsp
-
Enter the user name and password and click Log on.
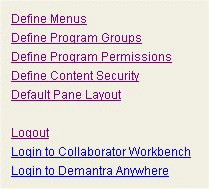
Demantra displays the Administration page, which includes the following choices:
See also
"Customizing Demantra Web Pages"
Configuring Menus in Collaborator Workbench
You can configure the Planning Applications and Tools and Applications menus, which are in the tool bar at the top of the Collaborator Workbench page.
To configure Collaborator Workbench menus
-
Log into the Collaborator Workbench Administrator. See "Logging onto the Collaborator Workbench Administrator".
-
Click Define Menus.
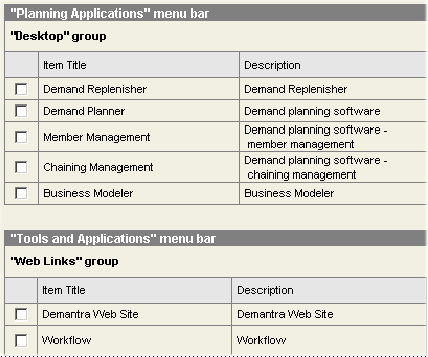
The system displays a page showing the current contents of Planning Applications and Tools and Applications menus:
To add a menu item
-
Within either the Planning Applications or Tools and Applications section, click the Add button.
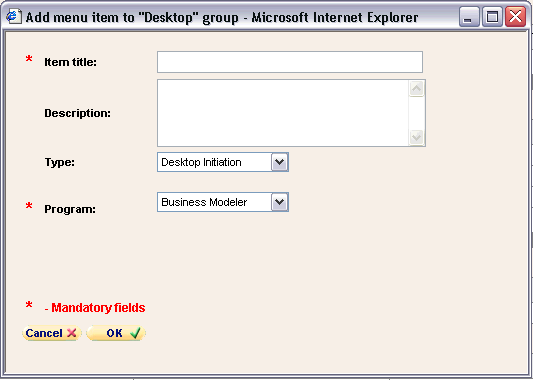
A page appears prompting you for information about the item to add.
-
In the Item Title field, specify the title of the menu item as it should appear in the menu.
-
For Type, choose one of the following options:
-
Complete the rest of the fields as follows:
-
Click OK to close the popup page and save your changes.
To edit a menu item
-
Check the check box next to the menu item.
-
Click the Edit button.
A page appears prompting you for information about the item to change.
-
Complete the fields as in "To add a menu item".
-
Click OK to close the popup page and save your changes.
To delete a menu item
-
Check the check box next to the menu item.
-
Click the Delete button.
A warning message appears.
-
Click OK to confirm the deletion.
To change the order of the items in a menu
-
In the section corresponding to that menu, click the Order button.
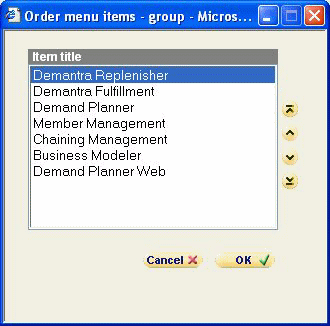
The system displays a popup page where you can change the order of the items.
-
Select an item and click an arrow button to move the item up or down in the list.
-
When you are done, click OK.
See also
"Running Oracle Executables from Collaborator Menus"
Running Oracle Executables from Collaborator Menus
When you configure the Planning Applications and Tools and Applications menus, you typically add menu items that launch Demantra executables.
This section lists the basic syntax needed in common situations.
For information on how to add menu items to Collaborator Workbench, see "Configuring Menus in Collaborator Workbench."
Configuring the Panes
To specify your pane configuration
-
Log into the Collaborator Workbench Administrator. See "Logging onto the Collaborator Workbench Administrator".
Oracle Demantra displays the Administration page, which includes the following choices:

-
Click Default Pane Layout.
The Personalize - Modules page appears. This page contains two lists: one for items that can be displayed in the wide pane and one for items that can be displayed in the narrow pane.
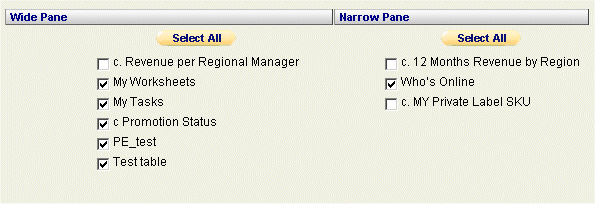
These lists include the following:
-
My Tasks and My Worksheets, which can be displayed only in the wide pane
-
Who's Online, which can be displayed only in the narrow pane
-
Worksheets that have been defined as content and to which you have access. When a worksheet is defined as content, it is defined as belonging to the wide pane or the narrow pane.
-
-
In each list, use the check boxes to select or deselect the modules that you want to see.
-
Click Next.
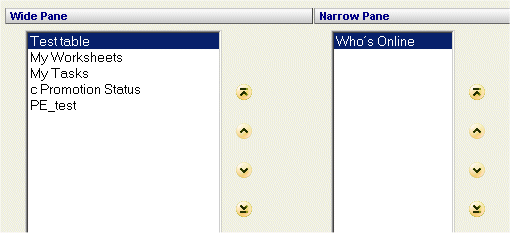
The Personalize - Order page appears. Like the previous page, this page has one list for the wide pane and one for the narrow pane.

-
Select a module and then click the up or down buttons to change its position in the list.
The order here is the order in which these modules are shown in Collaborator Workbench.
-
Click Next.
The next page summarizes your choices. You can return to the previous pages to make further alterations.
-
Click Finish to save your changes. Or click Back to go back to the previous pages.
See also
"Specifying Content Pane Security"
Specifying Content Pane Security
You can control access to the different Collaborator Workbench panes (My Tasks, My Worksheets, and Who's Online).
To specify access to Collaborator Workbench panes
-
Log into the Collaborator Workbench Administrator. See "Logging onto the Collaborator Workbench Administrator".
The Administration page appears.
-
Click Define Content Security.
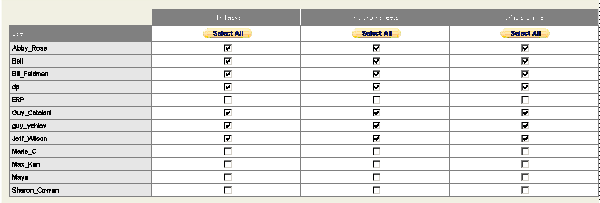
The system displays a table with one row for each user. Here you specify which panes to make available to each user.
-
Do one of the following:
-
Check the check box for a pane to grant user access to the user.
-
Clear the check box for a pane to deny access to the user.
-
-
Click Finish.
See also
"Configuring the Pane Configuration"
Replacing Default Demantra Graphics
The Web-based Demantra products contain default images that you can replace with your organization's own designs. To do so, just back up the default images and substitute your own image files, giving them the same filenames as listed here.
The graphic files are in the following directory:
Demantra_root/Collaborator/portal/images
You can replace any of the graphics files in this directory. If you replace the default graphics with other graphics that have the same width and height, those graphics will fit on the page without the need for any further editing. If your graphics files have different dimensions, you may need to edit the corresponding page to accommodate them.
Collaborator Workbench Splash Screen
The splash screen uses the graphic collaborator_splash.gif.
Collaborator Workbench Login Page
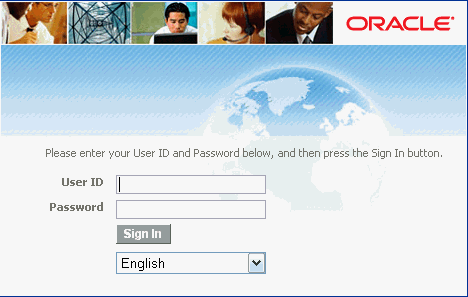
On the login page, the most commonly replaced images are the following:
-
customerLogo.gif
-
customerTxt.gif
-
customerPics.gif
-
collaboratorTitle.gif
-
collaboratorTxt.gif
Collaborator Workbench Main Page
On the main page, the most commonly replaced images are as follows:
-
customer_logo.jpg
-
collaborator_logo.gif

Customizing the Collaborator Workbench Login Page
The login page is Demantra_root/Collaborator/portal/loginpage.jsp
You can edit this page and you can redesign the layout and design as you wish.
Caution: A basic knowledge of HTML is required to perform this task.
However, the following code must be retained, because this provides the login functionality:
<TD>
<!-- The login area (username, password, language, login)--> <%@ include file="loginarea.jsp" %>
\</TD>
Configuring Links in Collaborator Workbench
The main Collaborator Workbench page provides a set of default links, some of which are configurable. These links are located on the second toolbar.
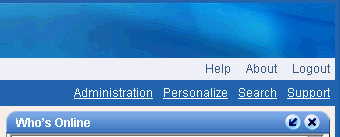
To configure these links, edit the file secondbar.jsp.
Caution: A basic knowledge of HTML is required to perform this task.
Links can be added, but the layout of the page must not be changed. Configurable links are marked by href = "#".
Also see "Collaborator Workbench".