Managing the Contract Life Cycle
This chapter covers the following topics:
- Overview of Managing the Contract Life Cycle
- Modifying Multiple Contracts at the Same Time (Mass Change)
- Handling Change Requests
- Entering Contract Changes
- Reviewing and Approving Changes
- Updating Contracts Online
- Creating Different Contract Versions for Your Customer
- Viewing Contract History
- Handling Returns and Granting Credit
- Changing Contract Status
Overview of Managing the Contract Life Cycle
This group of topics explains how you can manage the contract life cycle.
After the contract authoring process is complete, you must manage your contracts on an ongoing basis. You may need to change coverages, durations, versions, and other aspects your contracts.
You can streamline and control administrative processes, by leveraging functionality that manages updates and changes.
For information on contract extensions and renewals, see Approving Contracts.
Modifying Multiple Contracts at the Same Time (Mass Change)
You can change one attribute of multiple contracts with a single request using mass change functionality. Mass change is allowed for contracts that are in appropriate status, where the operation update online is permitted.
Note: Canceled contracts and Entered contracts that contain no lines do not appear in the Mass Change form. This form is designed for contract administrators to centrally manage contracts, which are generally in the Active status. Entered contracts, which may have lines and no sublines are essentially acted upon by assigned sales representatives who do not typically need to perform mass changes. Sales representatives are usually managing a limited number of contracts with specific requirements, rather than a large number of contracts that may require mass changes.
Mass Change supports changes to a particular instance selected in the update level. For example, if changes are to be made at the operating unit, it will update records pertaining to that operating unit.
The Mass change window allows you to enter the scope of the mass change request and selection criteria. It determines which contracts are to undergo a mass change. The update level is seeded, but may also be restricted by use of the OKS: Mass Change Security Level profile option. If the security of the profile option is turned on, the list may contain only the Contract and Contract Group levels; otherwise, the following is the list of update levels available:
-
Category
-
Contract Group
-
Operating Unit
-
Party
-
Contract
Mass change permits the following attributes to be changed. Making change on a contract has a subsequent cascading effect and therefore needs to be carefully considered before allowing such a change. Following attributes are permitted for mass change that can be selected from the Attribute's LOV in the Mass Change header:
-
Accounting Rule
-
Agreement
-
Business Process Price List
-
Contract End Date
-
Contract Group
-
Contract Line Ref
-
Contract Start Date
-
Contract Renewal Type
-
Coverage End Time
-
Coverage Start Time
-
Coverage Timezone
-
Coverage Type
-
Header Bill to Address
-
Header Ship to Address
-
Invoicing Rules
-
Known As
-
Party Billing Contact
-
Party Shipping Contact
-
Payment Term
-
PO Numbering for Billing
-
PO Required for Renewal
-
Preferred Engineer
-
Preferred Resource Group
-
Price List
-
Product Line Ref
-
Reaction Time
-
Resolution Time
-
Revenue Account
-
Salesperson
-
Summary Print
Note: if the billing schedule is defined with Equal Amount or Covered Level, you cannot use Mass Change to modify either the contract start date or the contract end date, as the billing schedule must be adjusted for each individual contract.
To modify multiple contracts at the same time:
-
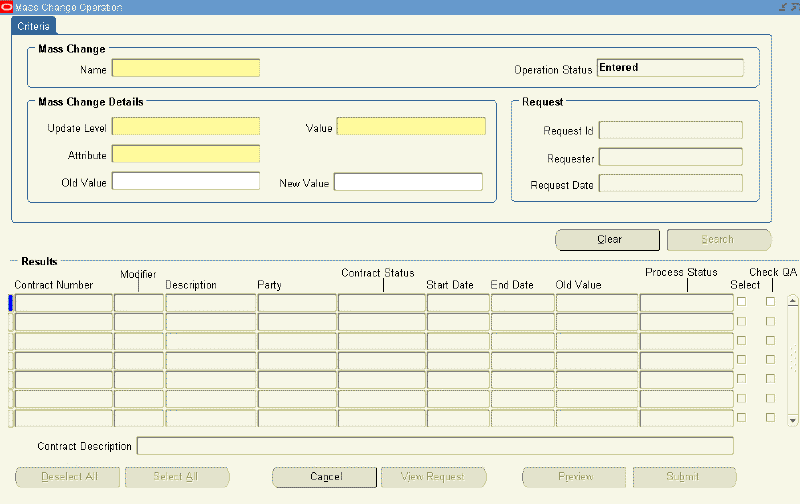
From the Navigator, navigate Contract Administration, and then select Mass Change.
The Mass Change Operation window appears.
-
Enter the name of mass change.
-
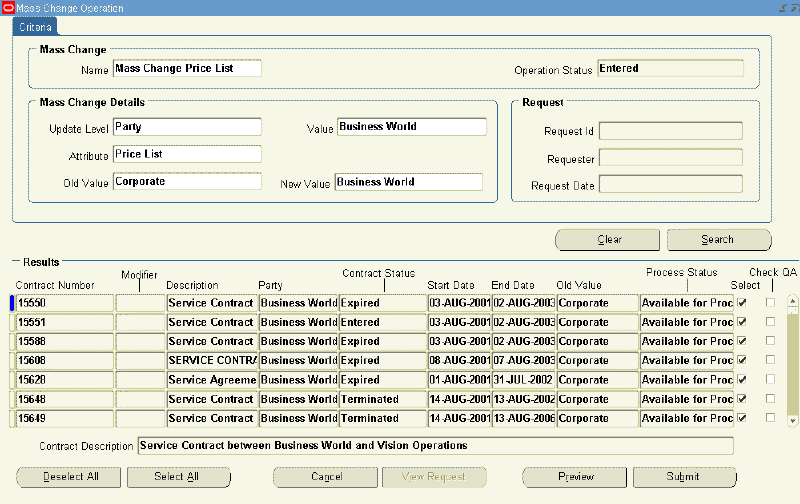
From Mass Change Details select the value Update Level from the LOV, such as Party.
-
Select Value from the LOV, such as Business World.
-
Select an appropriate attribute from the LOV, such as Price List
Attributes supported by mass change are listed in this list.
-
Select an old value, such as Corporate.
-
Select a new value, such as Business World.
-
Click Search or click Cancel and start over.
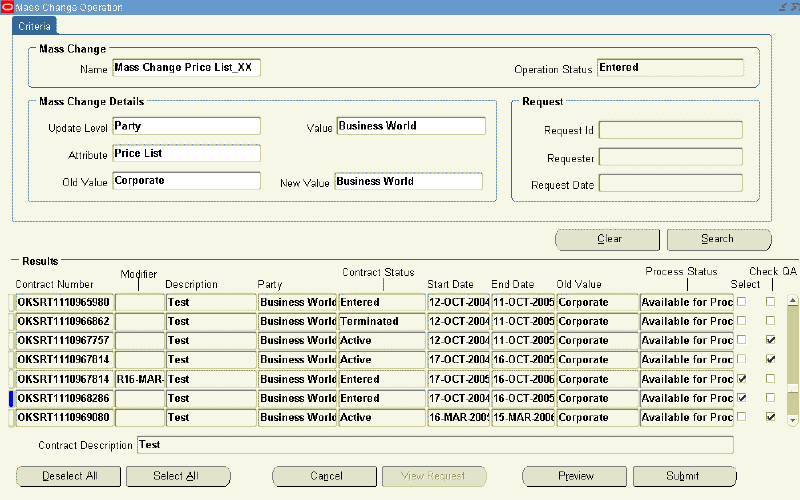
If you click the Search button, all the contracts that meet the criteria appear in the Result region. By default, all the records are selected.
-
To deselect a contract, check the Select check box.
Note: You can deselect all contracts by clicking Deselect All or you can select all contracts by clicking Select All.
-
To run the quality assurance (QA) check first, select the Check QA check box.
-
To preview the request without submitting it, click Preview.
The Mass Change Submission window appears.
Because the Mass Change is a powerful process, you may preview a report. This ensures that you do not unintentionally update any contracts. To do so, you can run a preview, review the report, then submit it when you are confident the changes are correct.
-
To submit the request, click Submit the Request.
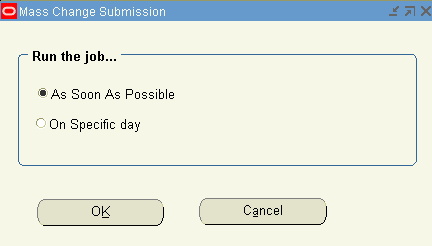
The Mass Change Submission window appears.
-
Select either As soon as possible or On Specific day.
-
Click OK.
A note appears, indicating that the Mass Change request was successfully submitted.
You are returned to the Mass Change window. The Operation Status field provides the status for the mass change.
The Request region is populated with details of the request.
Note: While submitting the mass change request, if one of the requests has an error it will display an error message. In this case, you can resubmit the request after making the changes to that request. This can be done until all the contracts in the mass change request are successfully processed.
-
-
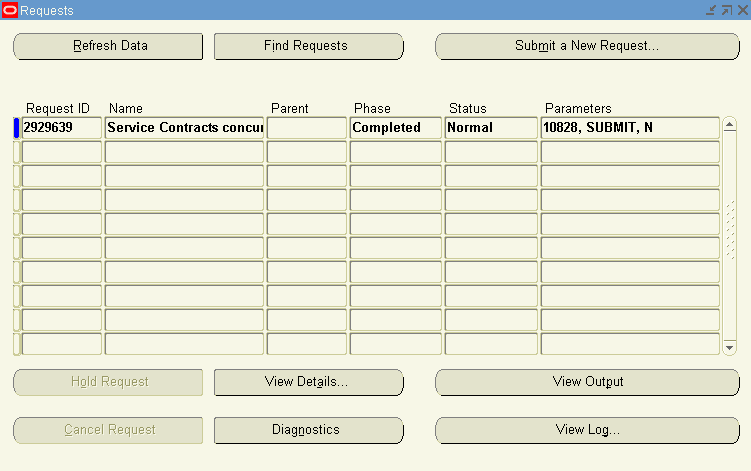
To view the details for the request, select View Request.
The Requests window appears.
-
After the request is completed, requery the Mass Change request window to view the updated operation status and request information in the Mass Change Operation window.
Handling Change Requests
Your administrator can set a contract to a status that does not allow changes to be made online through the authoring form, but does allow changes through a change request. This provides more control over tracking the changes made to a contract through its life cycle.
If the Active status does not allow online updates, then any changes to the contract would have to go through the change request process. After a change request has been approved, a notification is sent to the Contract Administrator. From the Inbox, you can open the contract for update. In this situation the Open for Update button is not visible in the contract itself.
After you complete the contract updates, you can run the contract through the QA Check and if everything passes, the contract status is set back to Active.
Entering Contract Changes
Confirm the status and operations setup allows changes for the category and status.
To enter contract changes:
-
From the Navigator, navigate to Contract Administration, and then select Launchpad.
-
Select the Contract Navigator tab.
-
Highlight the contract you want to change.
-
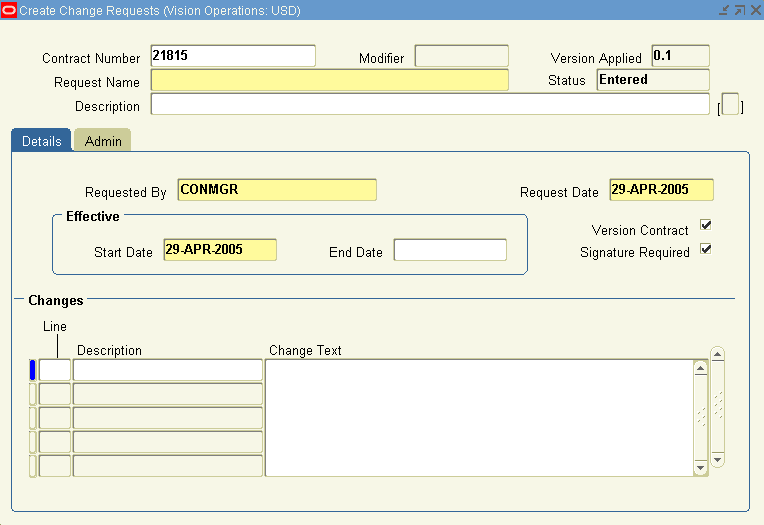
Right-click the contract and select the Create Change Request option.
The Create Change Requests window appears.
-
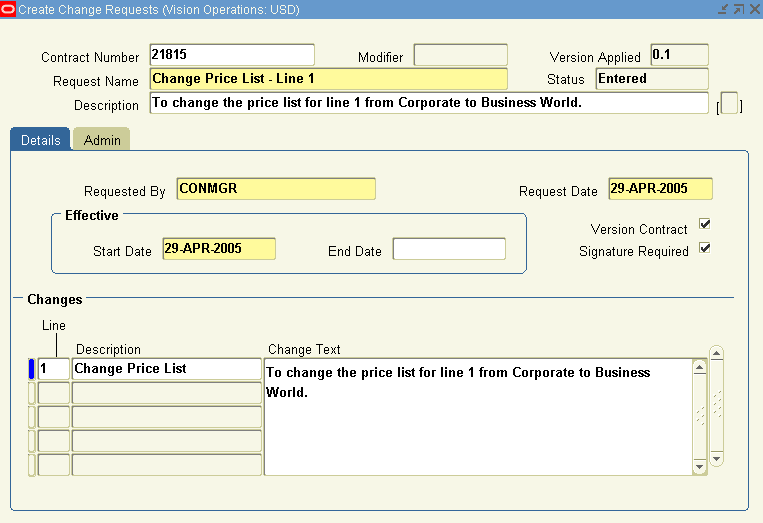
Enter the request name and a description.
-
Confirm the requester's name in the Request By field.
This person receives a workflow notification when changes are approved and can be applied to the contract.
-
Enter the request date.
-
Enter the effective dates.
-
To version the changed contract, select the Version check box.
-
To require signature, select the Signature Required check box.
-
Record the lines for which you are requesting a change and the exact nature of the change. For example, apply an extra 10% discount.
-
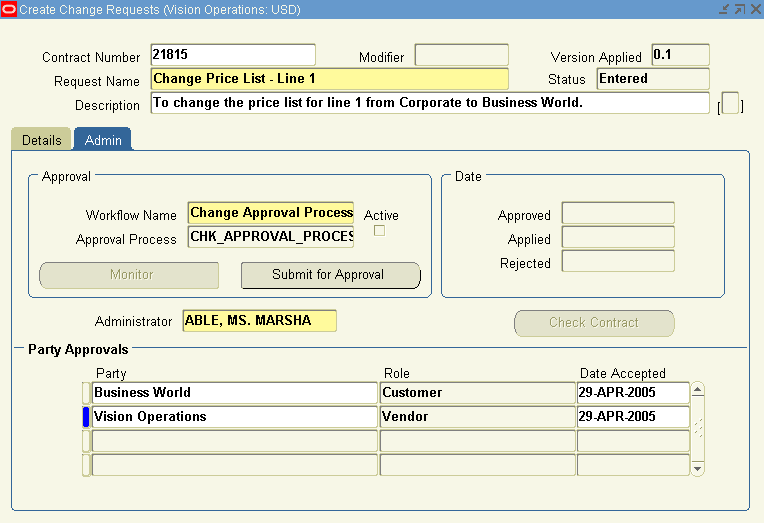
Select the Admin tab.
-
In the Workflow Name field, select the approval workflow.
-
Select an administrator.
-
Select party approvals (optional).
-
Save.
-
Click Submit for Approval.
A note message appears, indicating that the change request has been Submitted for approval
-
Click OK.
Reviewing and Approving Changes
The change request must first be approved before you can change the contract. After the change request has been approved, you can open the contract and apply the changes as described in the change request notification. After you start editing the contract, you automatically lock the contract for other users with an approved change request.
Prerequisite
Open the change request notification in your Inbox and confirm no other change requests are in process.
To review and approve changes:
-
From the Navigator, navigate to Contract Administration, and then select Launchpad.
-
From the Launchpad, click Find.
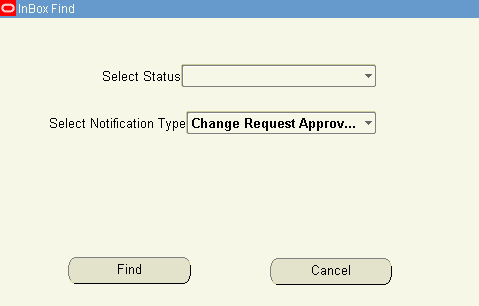
The Inbox Find window appears.
-
From Select Notification Type, select Change Request Approvals.
-
Click Find.
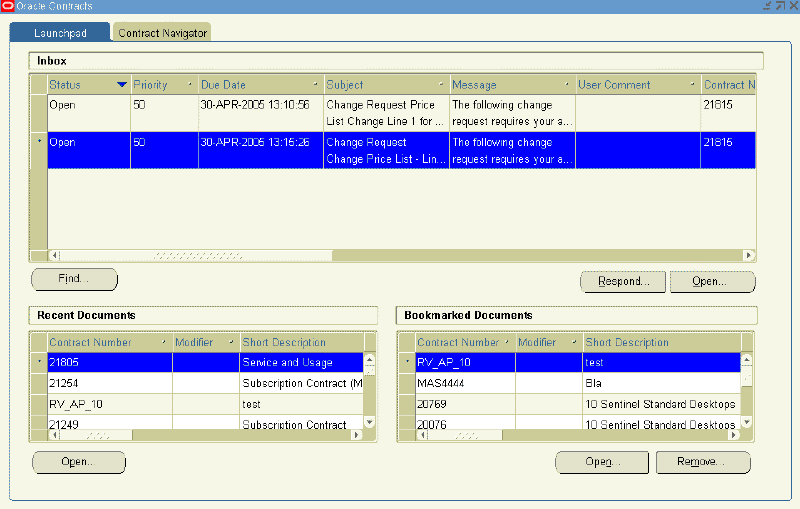
The contracts that have open change requests appear.
-
Highlight a contract from the Inbox and click Respond.
The Notification Details window appears.
-
Click Approve.
The worklist window shows the change request has been approved.
Close the worklist.
-
From the Launchpad Inbox select Find:
-
From the Select Notification Type list, select Change Requests Approved.
-
Click Find.
The approved change requests appear.
-
Highlight the change request and select Open.
The contract opens in status of QA Hold (or Open for Update).
After you make changes to the contract, you must submit the contract for a QA check.
-
-
From the Actions menu, select Check QA.
The Quality Assurance Results window appears. If the contract passes QA, select OK.
A new version of the contract will be created if that option was selected in the change request.
Note: To change a contract that has been submitted through the change request process to Active status, you can open the change request and click Check Contract on the Admin tab.
Updating Contracts Online
After the contract has gone through the approval process, you can update a contract through the Update Online operation, as long as the status and operations definition allows it.
Prerequisites
-
Set the OKC: Global Update Privileges profile option to Yes.
-
Grant the Update Online function to the user responsibility
-
Confirm other users do not have the change request lock on the contract.
To update contracts online:
-
From the Service Contracts Authoring window, select the Summary tab and select Open for Update .
The Contract Status should change from Active to QA Hold. This locks the contract.

-
Make changes to the contract.
-
Save.
-
From the Actions menu, select QA Check.
-
Review the QA results.
-
If the QA results are clean, click OK.
-
The Contract Status changes from QA Hold to Active.
Creating Different Contract Versions for Your Customer
The contract version consists of a major version and a minor version. The major and minor versions are separated by a period. When a contract is created, the version is set to 0.0. The minor version increases incrementally each time that the contract is changed. When you create a new version, the major version number of a contract is changed from its most recent value to the next increment. The minor version changes each time that the contract is changed, but the major version will not change again unless you create another contract version.
For example:
| Contract Changes | Version |
| Initial creation | 0.0 |
| First save with changes | 0.1 |
| Second save with changes | 0.2 |
| Create new version | 1.0 |
| First save after new version | 1.1 |
| Second save after new version | 1.2 |
To create different contract versions for your customer:
-
From the Service Contracts Authoring window, select the Tools menu and select Create New Version.
A caution window appears indicating that the application will create a new version.

-
Click OK.
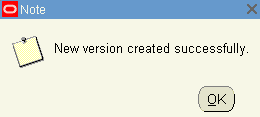
A note appears, indicating that a new version has been created successfully.
-
Click OK.
In the Version field, the digit that is in front of the period, or the major version number, increases by one. The minor version is reset to zero.
Viewing Contract History
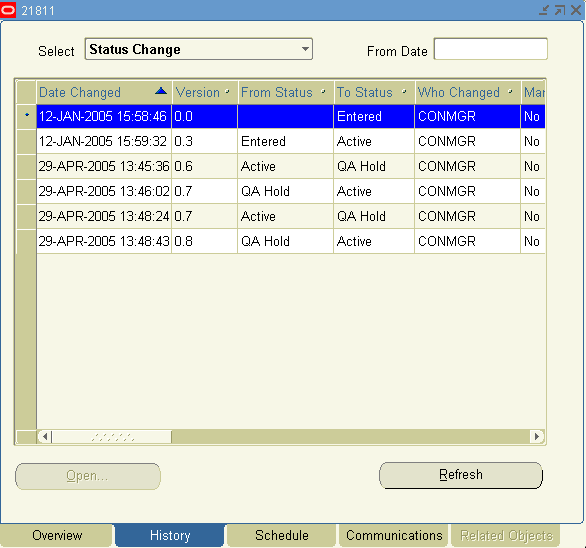
To view contract history:
-
In the Contract Navigator tab of the Oracle Contracts window, select a contract.
-
Double-click the contract.
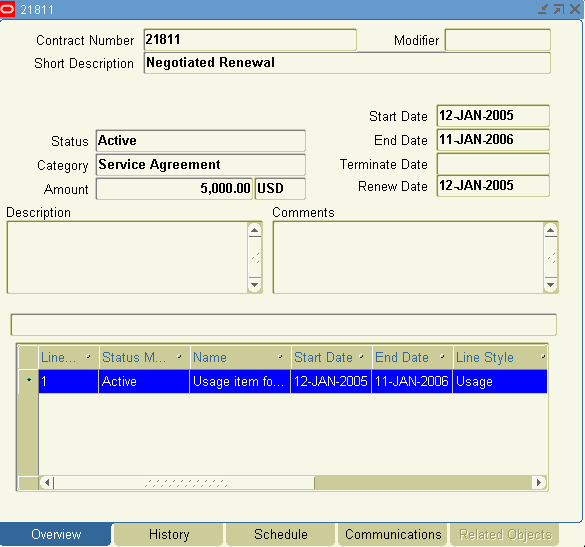
The Contract Execution window appears.
-
Select the History tab.
-
From the Select list choose an option:
-
Status Change
-
Contract Versions
-
Change Requests
-
Change Requests and Contract Versions
-
-
To open a contract version or change request, highlight the version and select Open.
Depending on what you select, the Service Contracts Authoring window or the Create Change Request window appears.
See also:
Handling Returns and Granting Credit
Credits are determined by the RMA line type in Oracle Order Management. When a product is returned from Oracle Order Management, Oracle Installed Base makes a call to Oracle Service Contracts with the parameter raise_credit, which determines if a full, a partial, or no credit is to be issued.
-
Full: Product line in Oracle Service Contracts is terminated as of the start date of the product line and a full credit is issued.
-
Calculated (Partial): Product line in Oracle Service Contracts is terminated as of the return date of the product. A partial prorated credit is issued based on the return date.
-
None: Product line in Oracle Service Contracts is terminated as of return date and no credit is issued.
If there is a null value and nothing is passed in the parameter raise_credit, then Oracle Service Contracts uses the credit option rule set in the Credit Amount field of the Global Contracts Defaults window. You can set the credit option to Full, Calculated, or None. For more information on the Global Contracts Defaults window, see Entering Contract Defaults.
If you define the credit option rule in Global Contracts Defaults, and your administrator sets the OKS: Raise Credit Memo for IB Instance Termination option to Yes, the application uses the values defined in the Global Contracts Defaults. If your administrator sets the profile option to No, the application does not generate credits.
Changing Contract Status
To change a contract status:
-
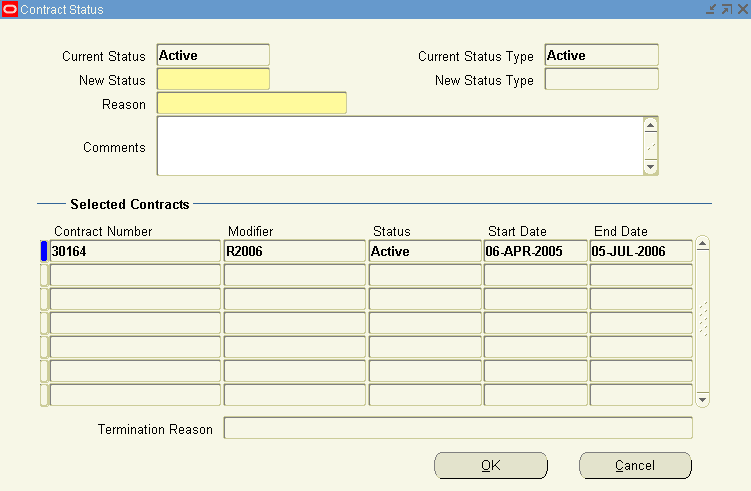
In the Contract Navigator, right-click a contract and select Change Status.
The Contract Status window appears.
-
Select the new status from the LOV.
Note: The New Status LOV is dependent on the Current Status. For example, the New Status LOV values for Terminated contract are different from that of an Entered or Active Contract.
-
Select a reason from the LOV.
If you need to add more reasons for the status change, your system administrator can add more options in the Lookup Codes.
-
Use the Comments field to enter any additional information.
-
Click OK.
-
A Status window appears indicating that the status change was successful.
-
Click OK.
Note: The Termination Reason field populates only for Terminated Contracts. This feature allows you to know the termination reason and segregate contracts with similar reasons under New Status.
-
In the Contract Navigator tab, right-click the contract and select Refresh.
The contract shows the new status.
Note: Certain status transitions are made based upon the start date or end date on a contract or on a contract line. There are two concurrent programs used to automatically change the status of a contract:
-
Contract Status Change by Range
-
Contract Status Change by Contract
These programs are used when the status transitions are not manual.
For example, a contract:
-
expires when an end date is reached.
-
becomes active from the signed status at the start date.
-