| Oracle® Argus Insight Cognos Installation Guide, Release 6.0 E18251-01 |
|
 Previous |
 Next |
This chapter provides information about the following:
This section is intended for the use of Cognos 8 users. If you are using Cognos Series 7.4 software, this section is not required.
Use this procedure to schedule the process that generates Cubes-on-the-fly.
In the Cognos 8 Server, go to <Argus Insight Directory>\ArgusInsight\Cognos\Cubes\PublishDemandCube folder.
In the DemandPublish.bat and DemandSource.bat files, set the following:
JAVA_Home to the Java_Home path on the Cognos 8 server.
JAR_Home to your <Argus Insight Directory>\ArgusInsight\Cognos\Cubes\PublishDemandCube\lib
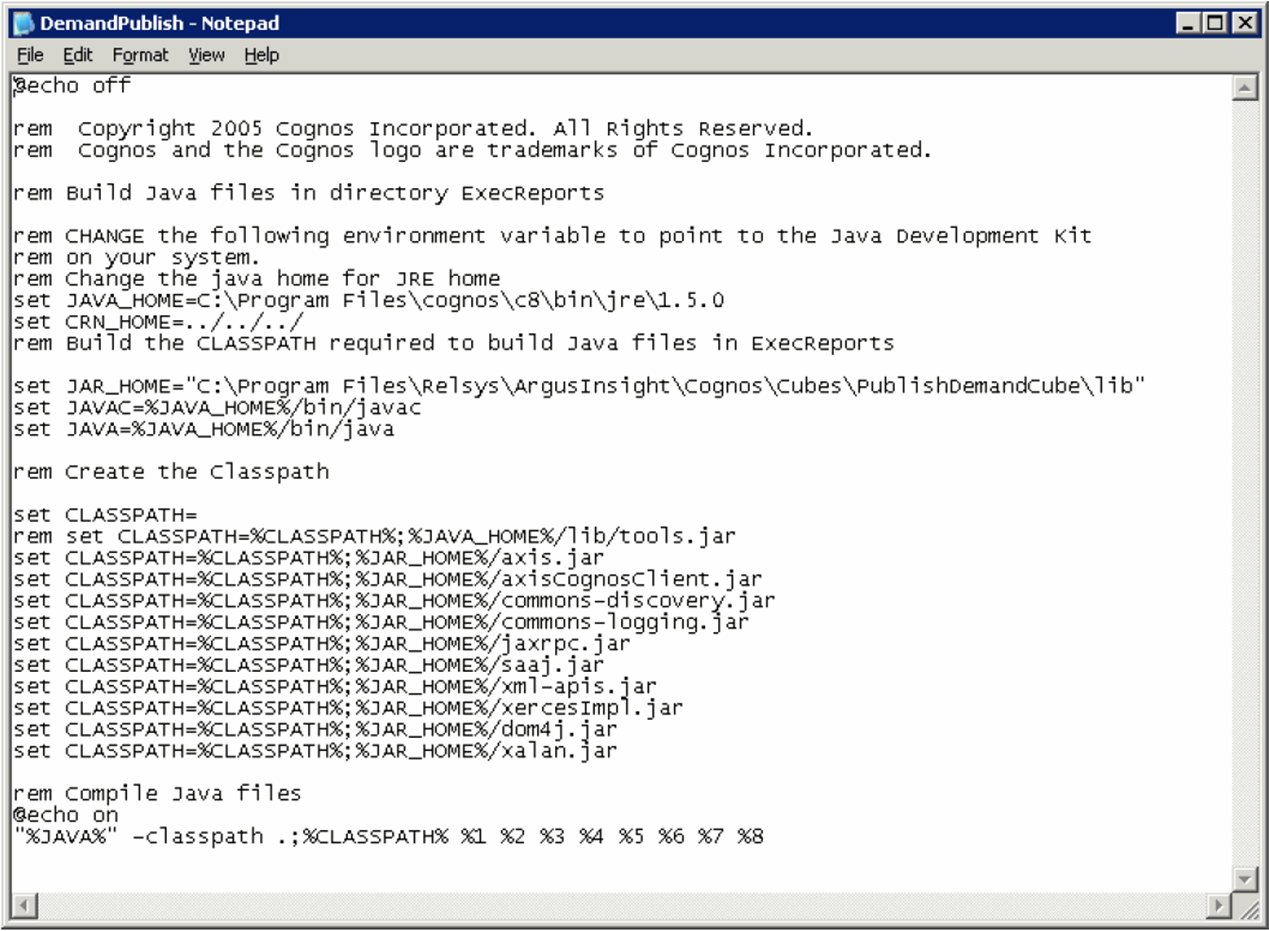
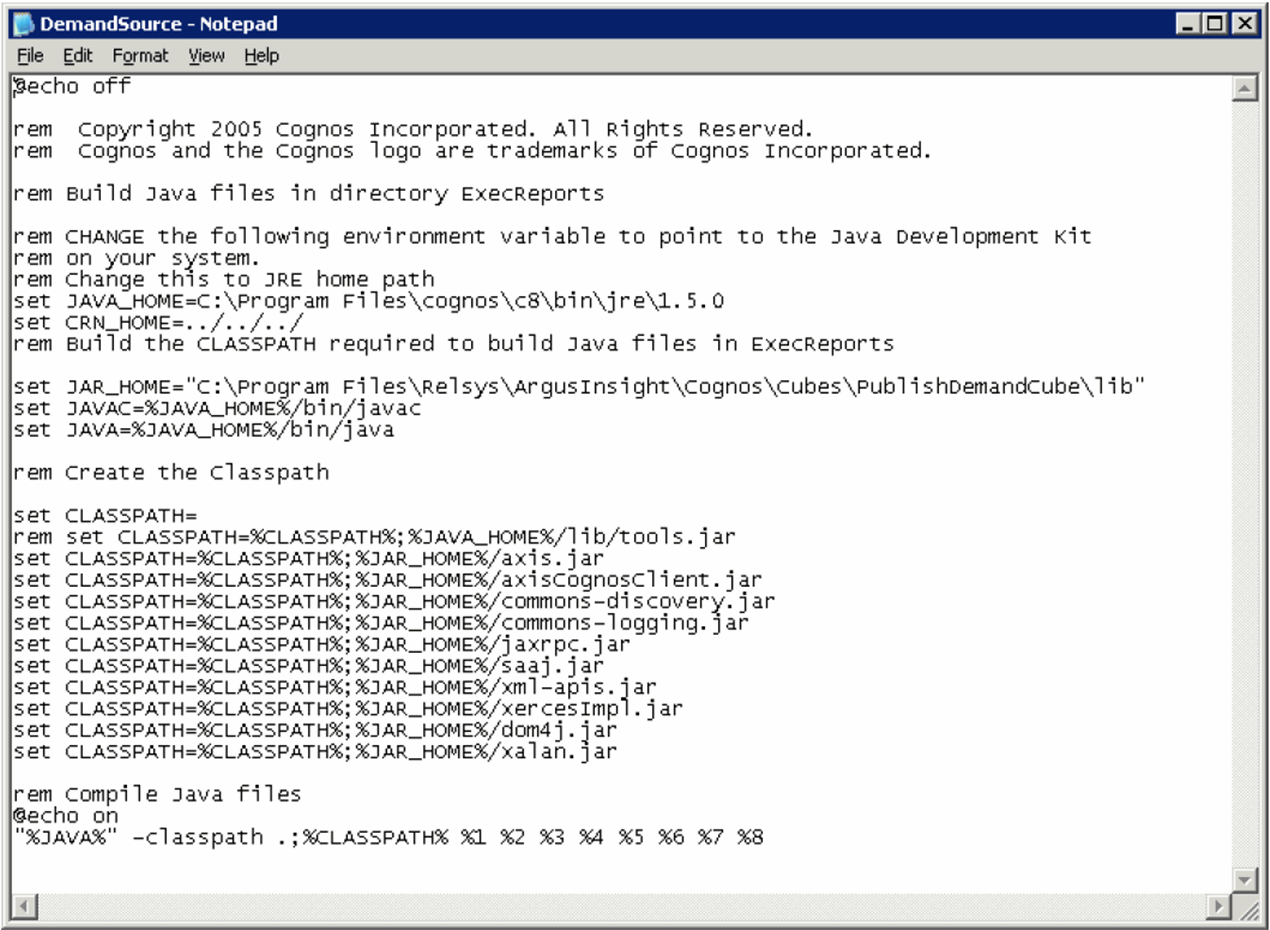
Save both files and exit.
Go to <Argus Insight Directory>\ArgusInsight\Cognos\Cubes\BatchGeneration-Cubes folder.
Open the GenerateCubes.cfg file.

Set the following parameters in the GenerateCubes.cfg file:
| Parameter | Description |
|---|---|
| ArgusInsightPath | This is the Argus Insight installation path; include the ArgusInsight folder in the string:
<Argus Insight Installation path>\ArgusInsight |
| CognosPath | This is the location of the Cognos 8 installation bin folder:
<Cognos 8 installation path>\c8\bin |
| ServerName | This is the name or IP address of the Cognos 8 server. If the Cognos 8 server is running on a port other than the default port, then the parameter values should be entered in this format: ServerName:PortNumber. For example, Cog8Server:9300 |
| CubeSaveDir | This is the path of the Argus Insight installation directory. This provides the path for saving the cube output files on their exact location. |
| CubeDataSourceDir | This is the path of the Argus Insight installation directory. This provides the path for the datasource files which are used for cube generation. |
|
Note: Although the paths may contains whitespaces, make sure there is no white space between the parameter name, the "=" sign, and the value. |
Save and close the configuration file.
Go to the <Cognos8 installation path>\c8\configuration folder and open the cogtr.xml file.

Modify this file to set the following parameters:
The following table describes the new parameters in this file:
| Parameter | Description |
|---|---|
| CubeSaveDirectory | This is the path of the Argus Insight installation directory. This provides the relative path for saving the cube output files on their exact location. |
| DataSourceDirectory | This is the path of the Argus Insight installation directory. This provides the relative path for the datasource files which are used for cube generation. |
| DataWorkDirectory | Any path on the Cognos 8 server, which will be used to store some temporary files during cube generation. |
| LogFileDirectory | Any path on the Cognos 8 server, where all the cube generation log files will be saved. |
| ModelSaveDirectory | This is the path of the Argus Insight installation directory. This provides the relative path for saving the cube model files during cube generation. |
| ModelWorkDirectory | Any path on the Cognos 8 server, which will be used to store some temporary files during cube generation. |
Go to the <Cognos8 installation path>\c8\cs7Gateways\bin folder and open the cs7g.ini file.

Add the following configuration item in the cs7g.ini file:
[Databases]
Power Reports=^User ID:^?Password:;LOCAL;OR;ORACLE@apr_app@PRMART/manager@COLSEQ=
where:
APR_APP is the DataMart Application Owner
PRMART is the Alias Name for the Argus Insight DataMart
Manager is the Password for the APR_APP user.
Save the file and exit.
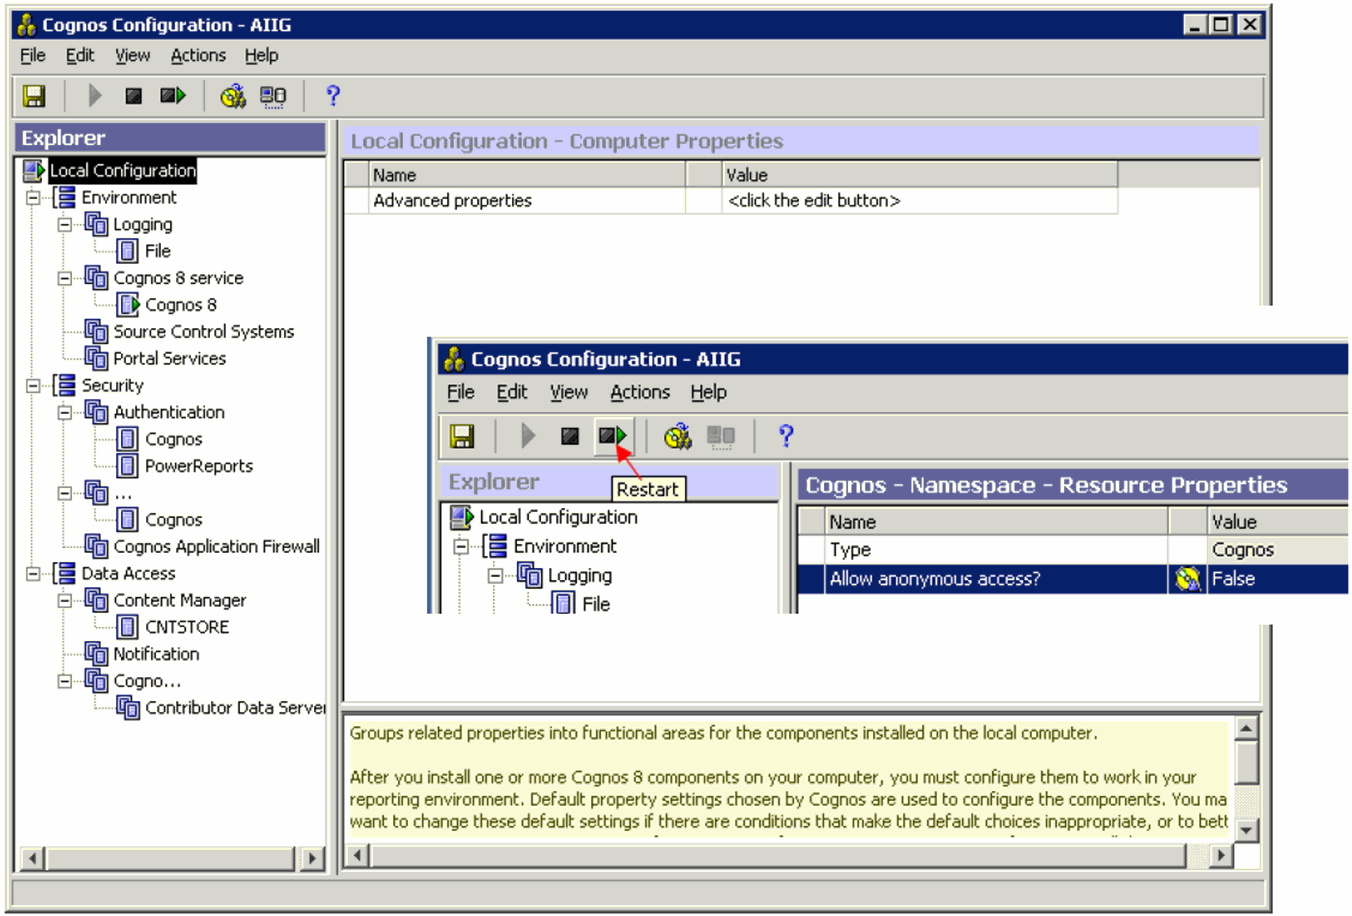
Go to Start > Programs > Cognos 8 > Cognos Configuration.
When the system opens the Cognos Configuration window appears, click Restart to restart the Cognos 8 service.
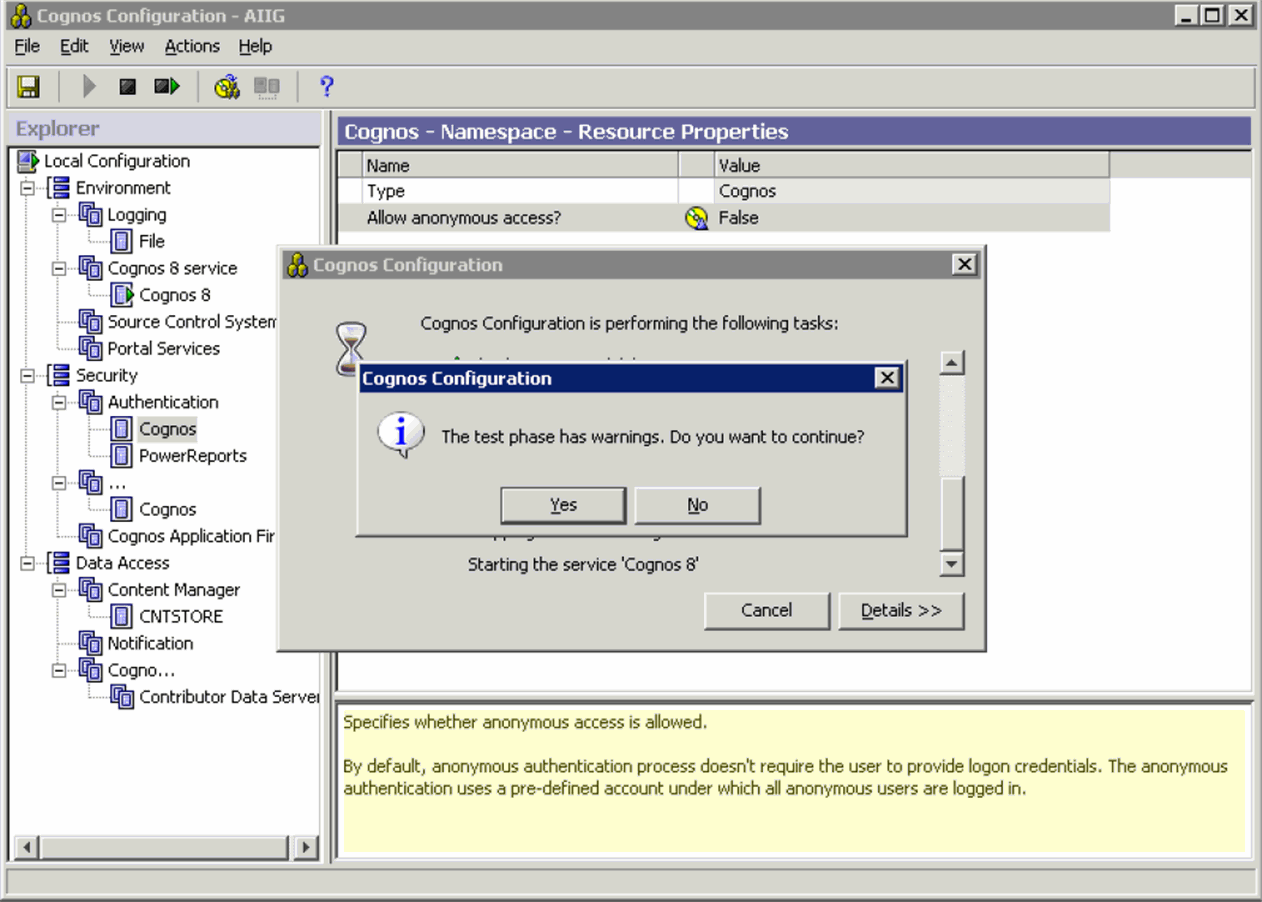
If any warnings exist during the Cognos service restart, the following screen may appear. Click Yes to ignore these warning if they appear to be the result of a mail server connection failure.
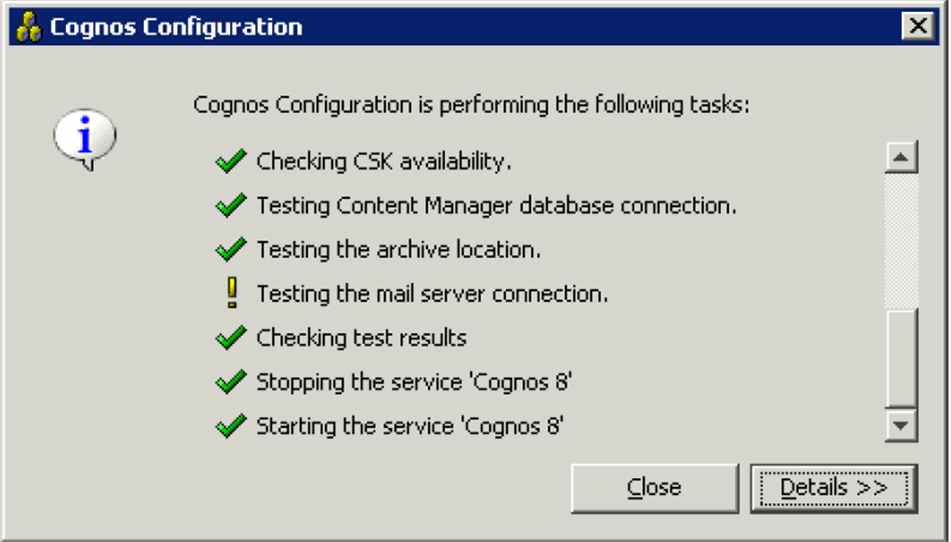
When the system opens the following dialog box, click Close to exit the Cognos configuration.
This section is for the user of Cognos Series 7.4 users. If you are using Cognos Series 8 software, this section is not required. Use the following procedure to configure the PowerPlay Enterprise Server. Follow the installation procedures in the order in which they appear.
Select Start> Program > Cognos Series 7 Version 4 > Tools > Configuration Manager.
When the system opens the following window, select File>Open Current Configuration.
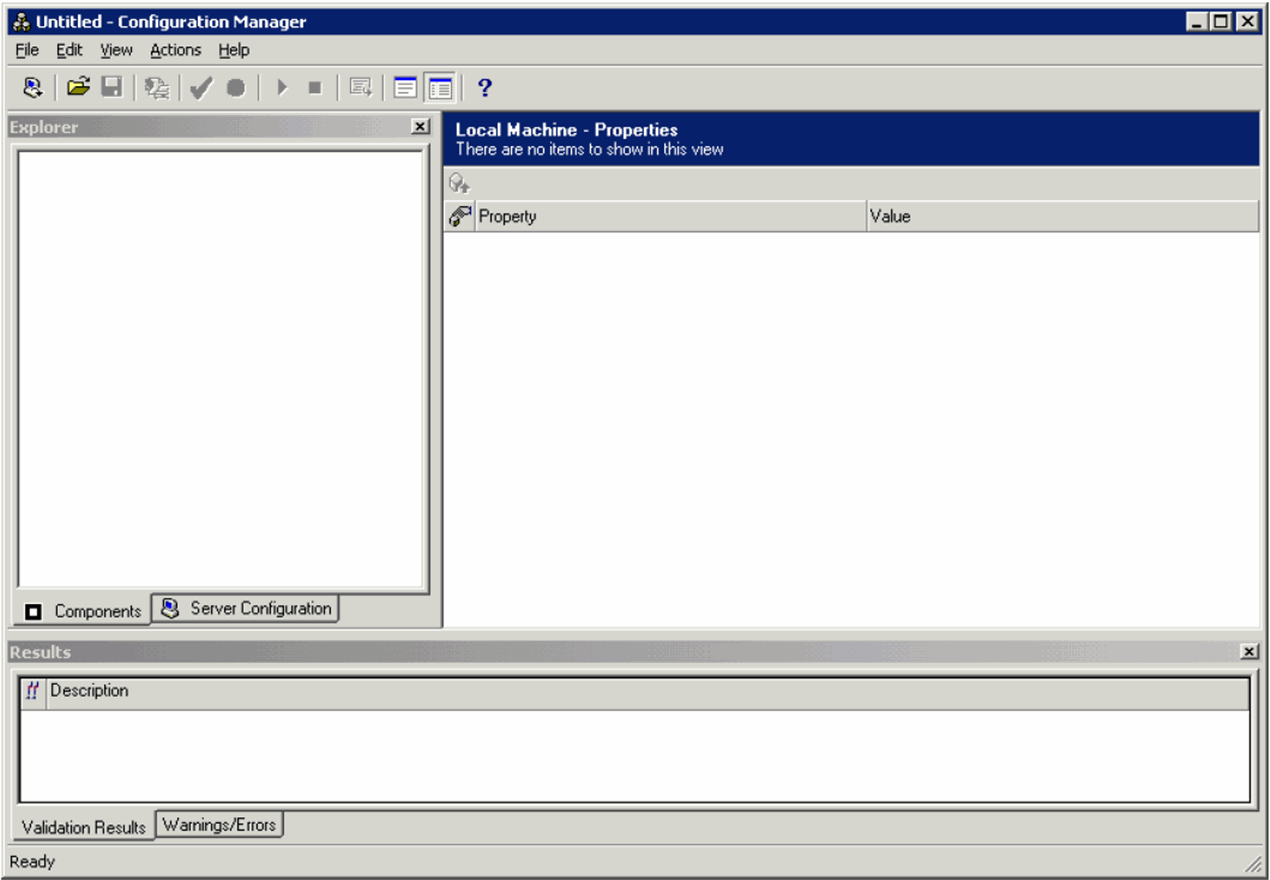
When the system opens the following window:
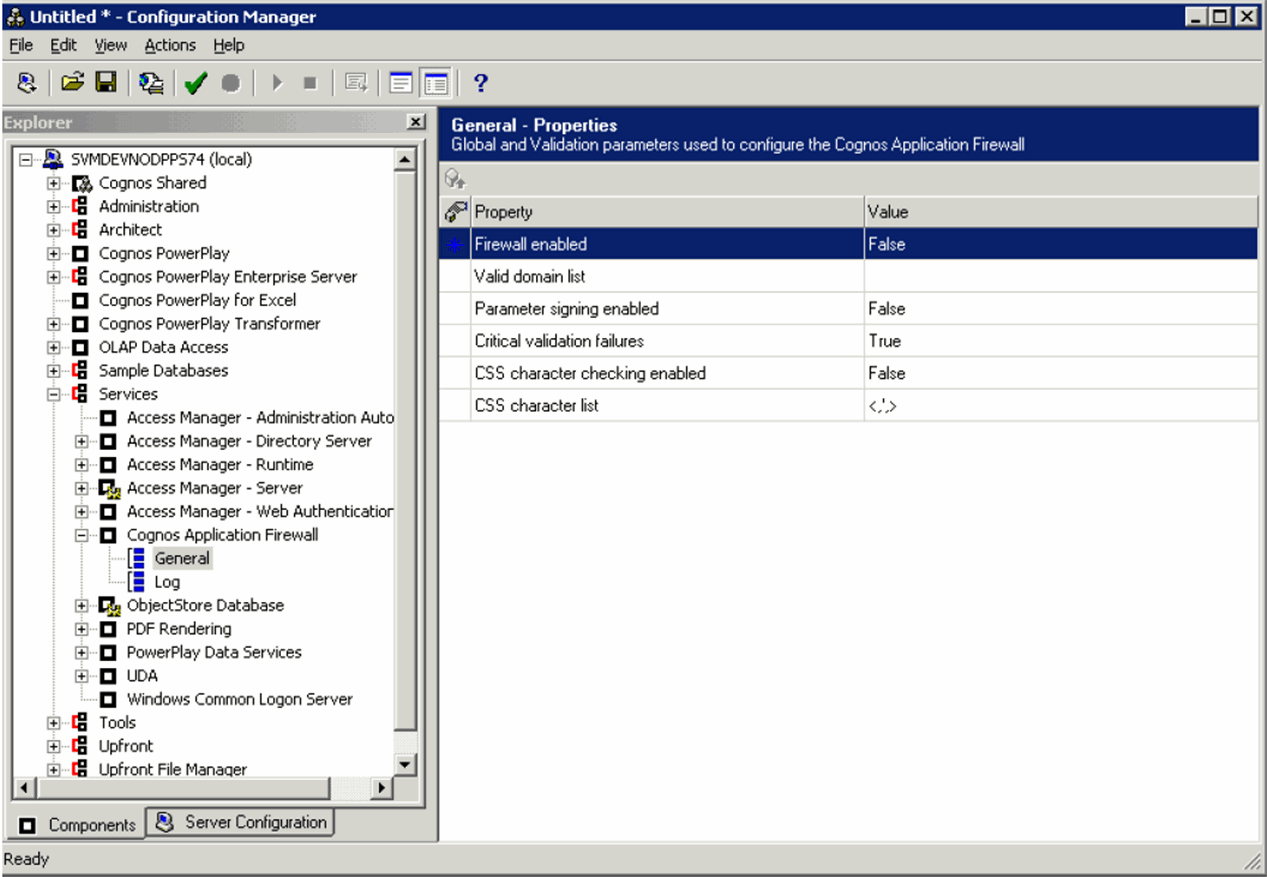
Select the Services > Cognos Application Firewall > General control tree item in the left pane.
In the right pane, verify that Firewall enabled is set to False
Open Configuration Manager and go to Services -> UDA->General:
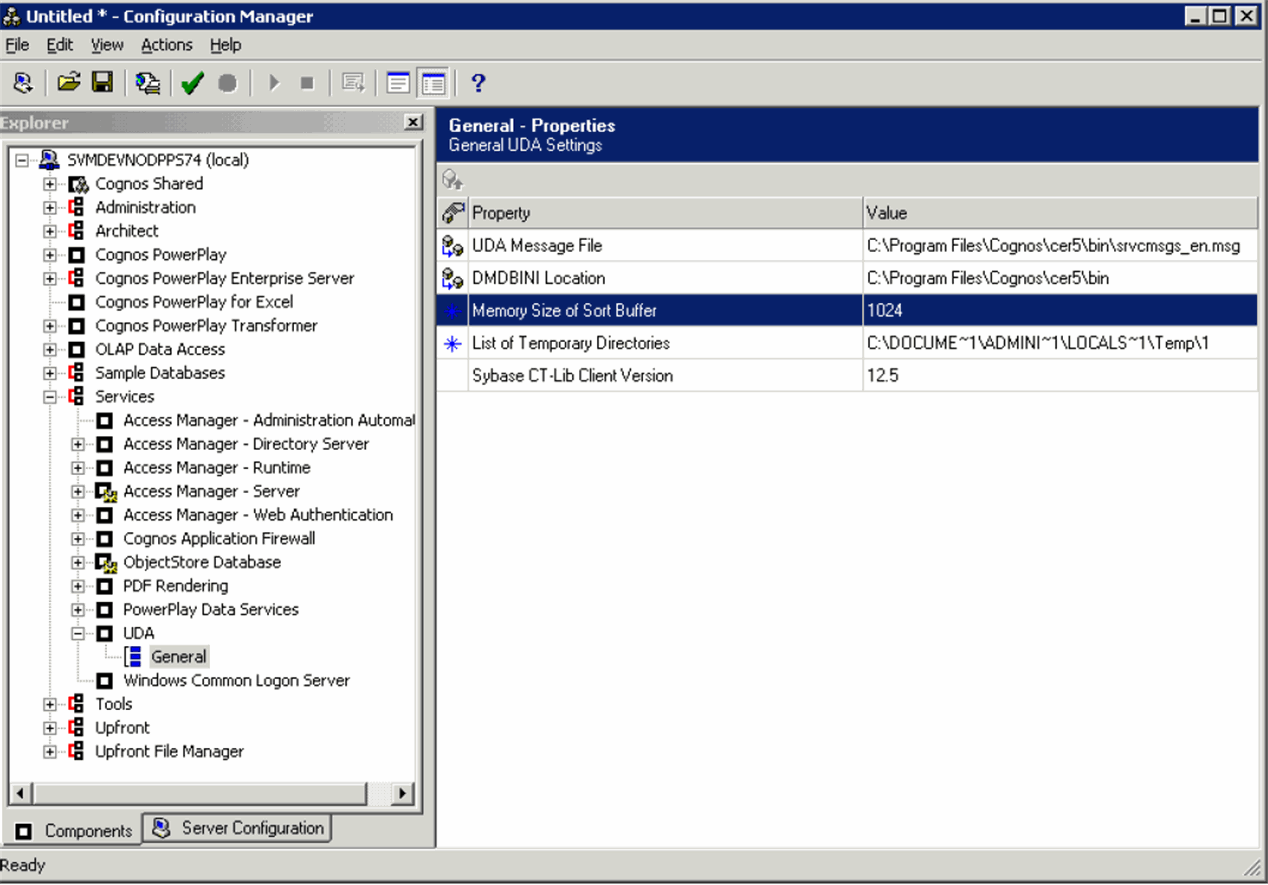
Set the window view to Advanced to view the properties.
Set Memory Size of Sort Buffer = 1024
Set the List of Temporary Directories to a system drive with approximately 20 GB of free space.
Select Services->PowerPlay Data Services->Cache.
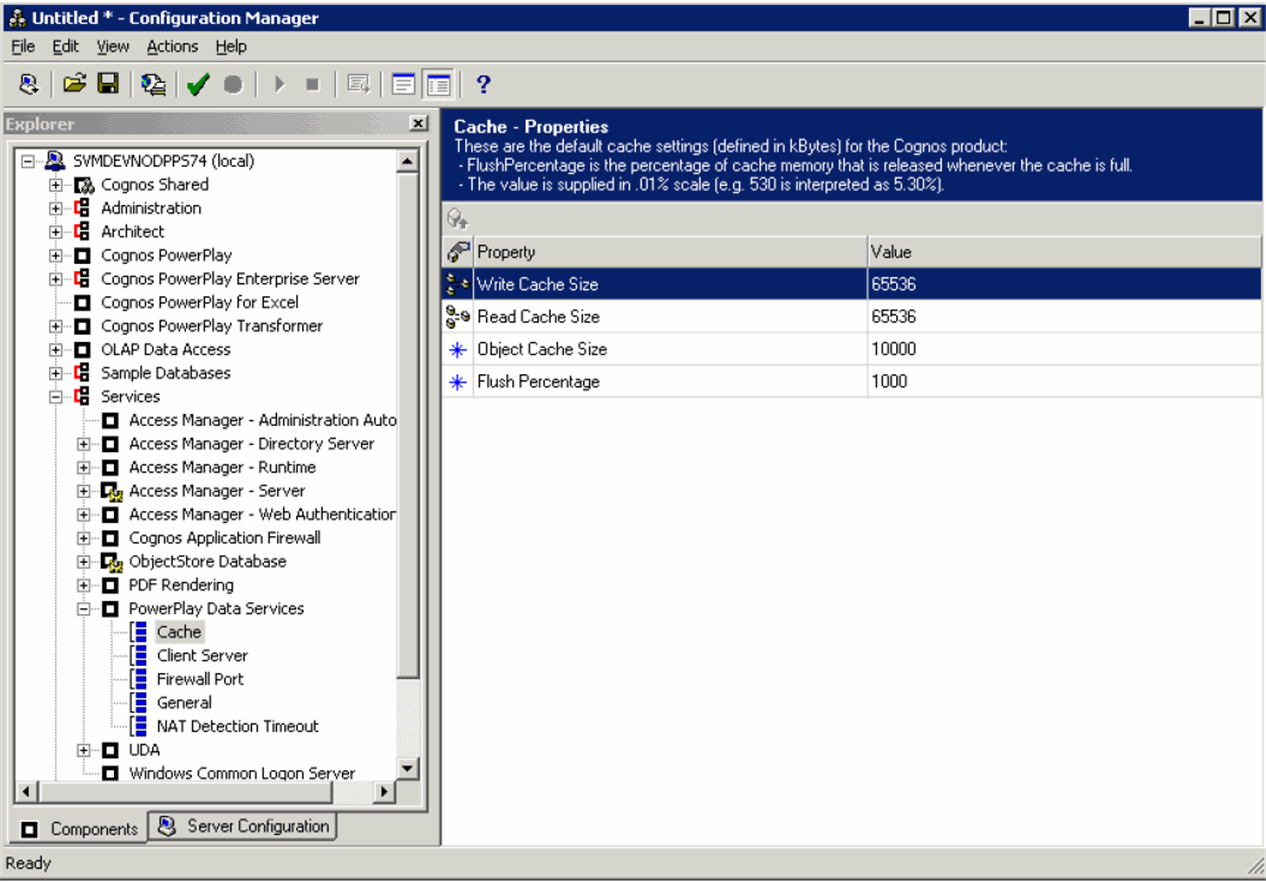
Set Write Cache Size = 65536.
Set Read Cache Size = 65536.
Set Object Cache Size = 10000.
Set Flush Percentage = 1000.
Select Cognos PowerPlay->General.
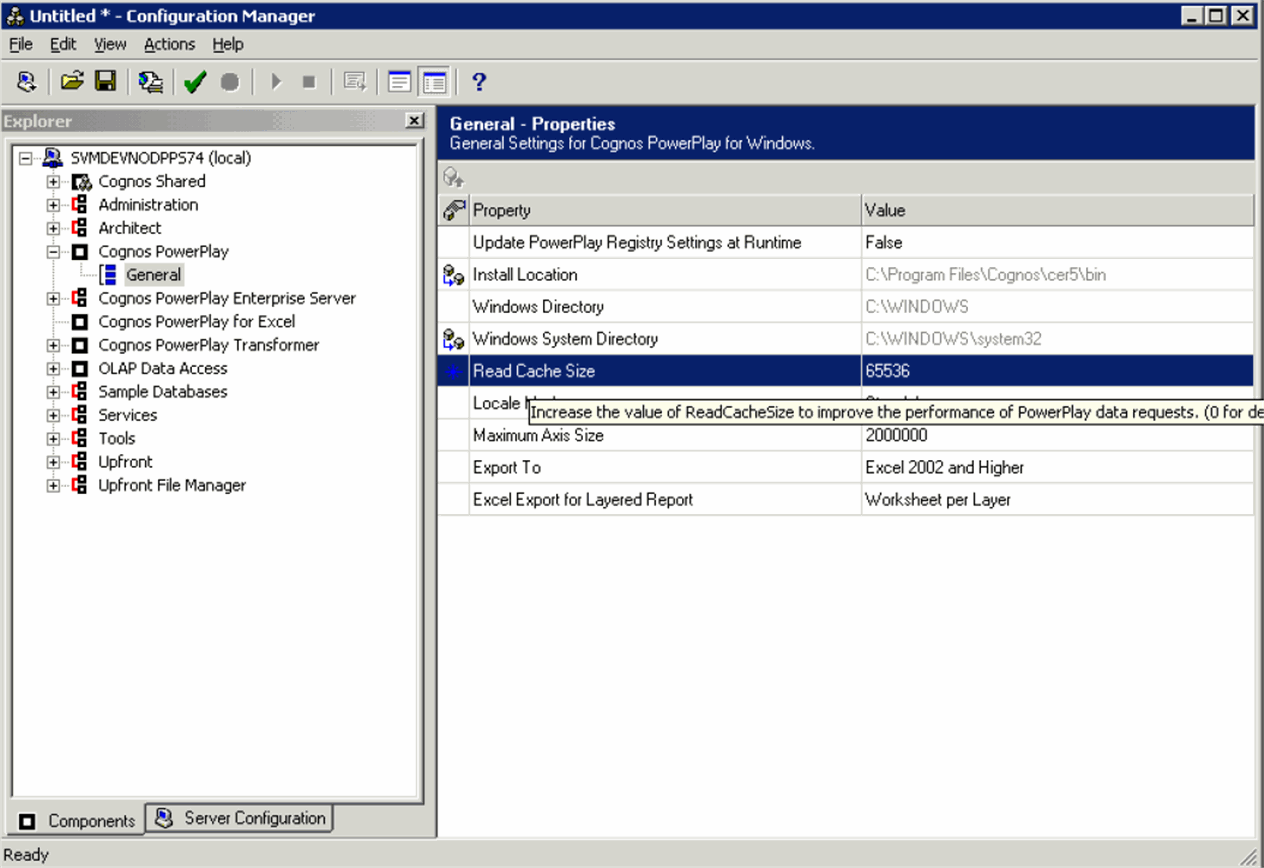
Set Read Cache Size to 65536
Add the Fetch Number of Rows value to the <PPES installation directory>\cer5\Bin\Cogdmor.ini file:
Fetch Number of Rows=100
Add the following text in Cognos.ini, located at <PPES installation directory>:
Power Reports=^User ID:^?Password:;LOCAL;OR;ORACLE@%s@PRMART/%s@COLSEQ=
Open <PPES installation directory>\cer5\Data\Bin\trnsfrmr.ini> file and set the MultiFileCubeThreshold key to the following value:
MultiFileCubeThreshold=10000000
|
Note: If the transfrmr.ini file is not present at the specified location, open the Transformer from Start>Programs>Cognos Series 7 Version 4> Tools. |
Set the path for Cubes.
Add or edit the values of following entries in trnsfrmr.ini located at following location:
<PPES installation Directory>\Cer5\Data\Bin\trnsfrmr.ini
DataSourceDirectory=<Argus Insight installation Directory>\ArgusInsight\
CubeSaveDirectory=<Argus Insight installation Directory>\ArgusInsight\
ModelSaveDirectory=<Argus Insight installation Directory>\ArgusInsight\
DataWorkDirectory= any Directory which exists on system. Eg.c:\Temp1
ModelWorkDirectory= any Directory which exists on system. Eg.c:\Temp1
LogFileDirectory=c:\temp\cubes\logs. This directory will contain all the logs for cube generation
Select the machine name from the left pane.
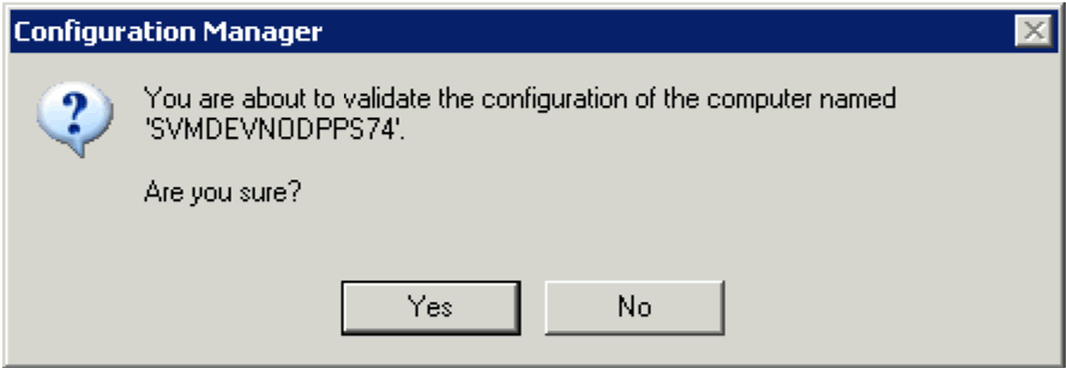
Select Actions > Validate Selection from the menu bar.
When the system opens the following dialog box, click Yes.
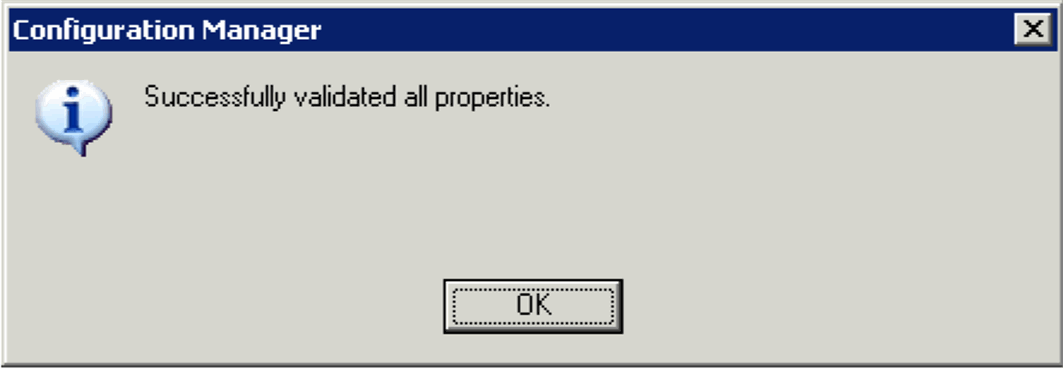
When the system opens the following dialog box, click OK.
Select Actions > Apply Selection.
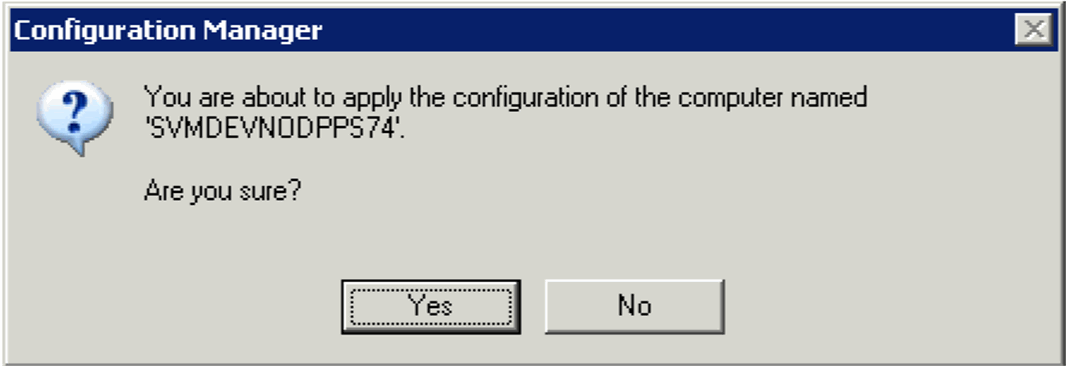
When the system opens the following dialog box, click Yes.
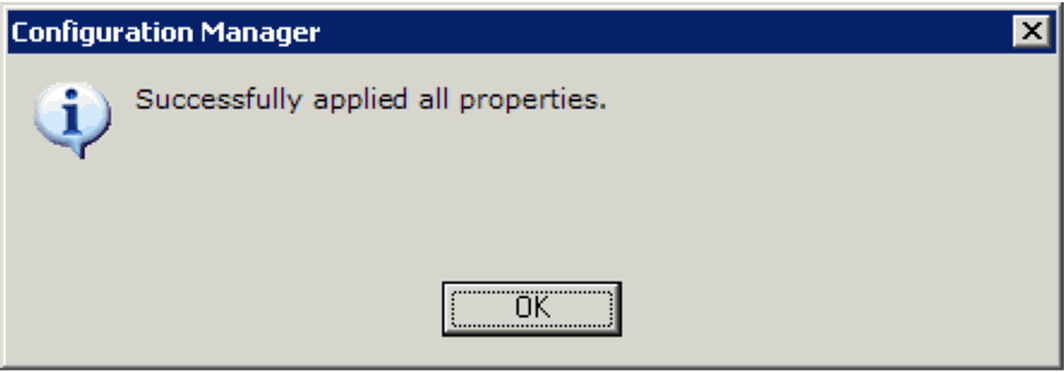
When the system opens the following dialog box, click OK.
Select File > Exit.
Use the following procedure to configure cubes.
Select Start > Program > Cognos Series 7 Version 4 > Tools > Access Manager Administration.
When the system opens the Access Manager- Administration window
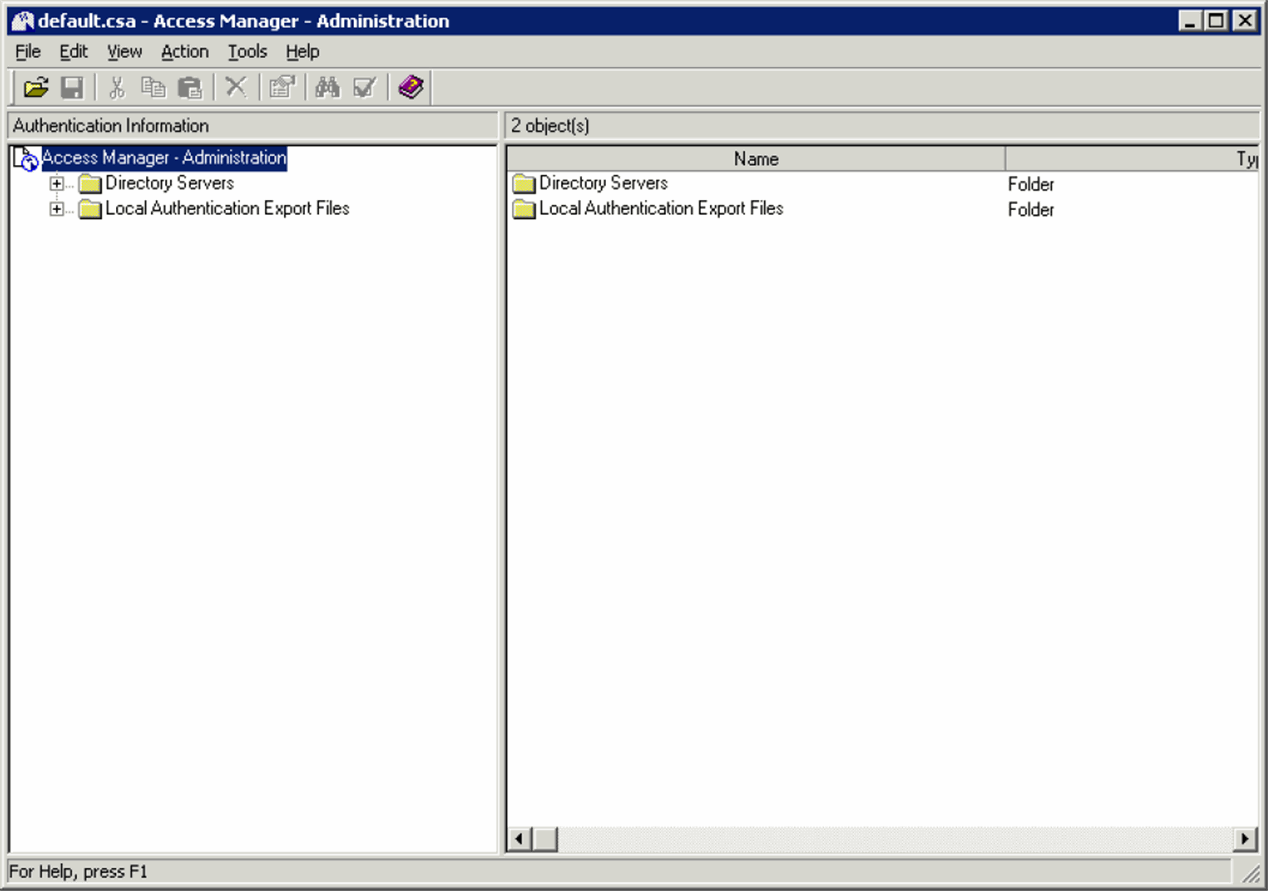
Expand the Directory Servers folder and click Server Name>Default.
Enter the User name and Password, if prompted to do so.
When the system opens the following window, right click Data Source> Add Database to add a new database.
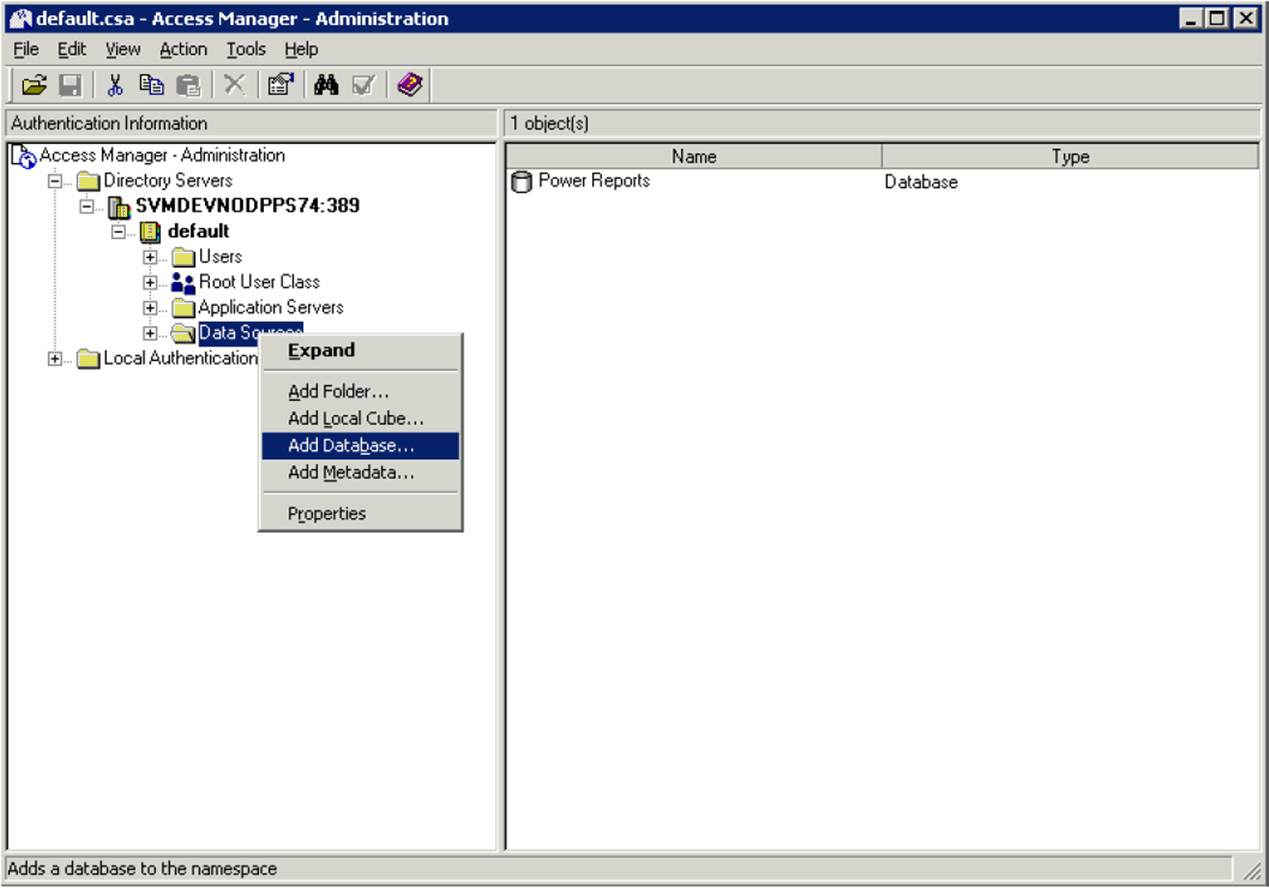
When the system opens the following dialog box:
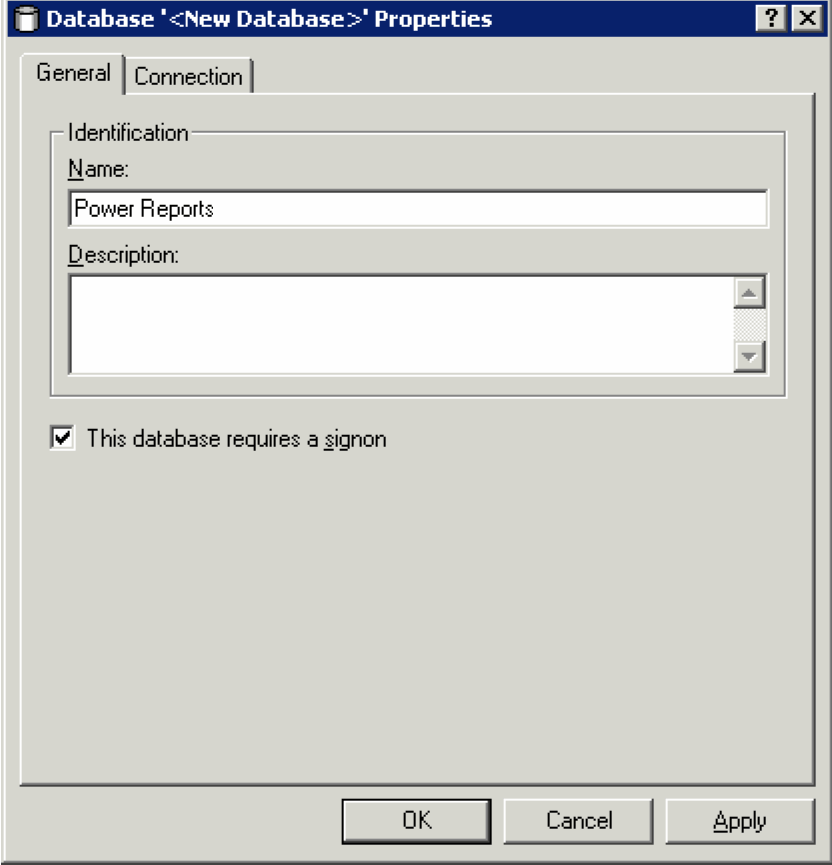
Type Power Reports in the Name field.
Click the Connection tab.
When the system opens the Connection tab:
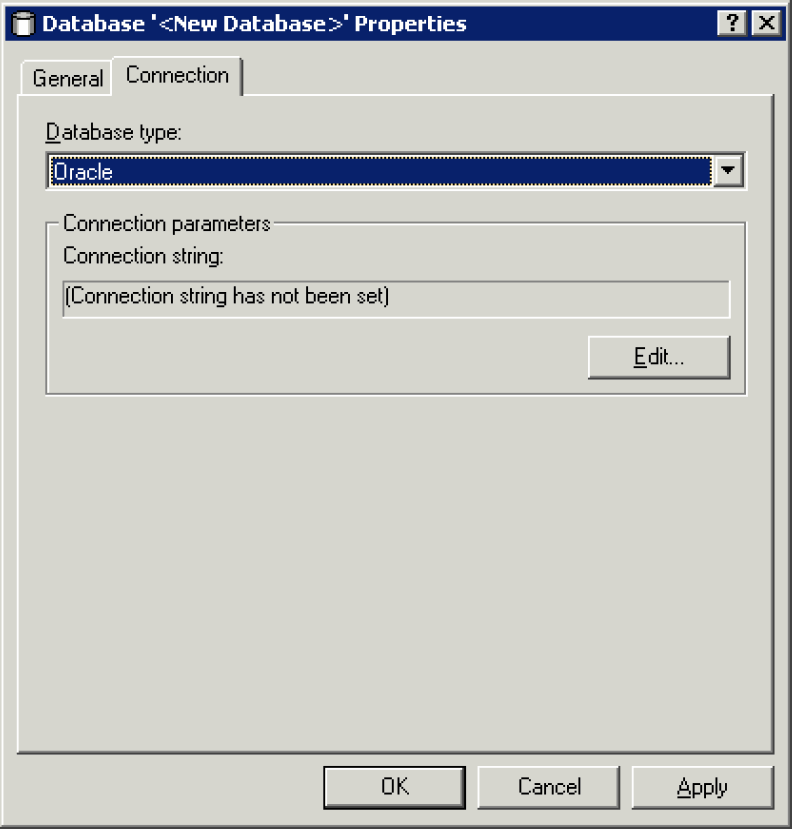
Select the database type as Oracle.
Click Edit
When the system opens the following dialog box:
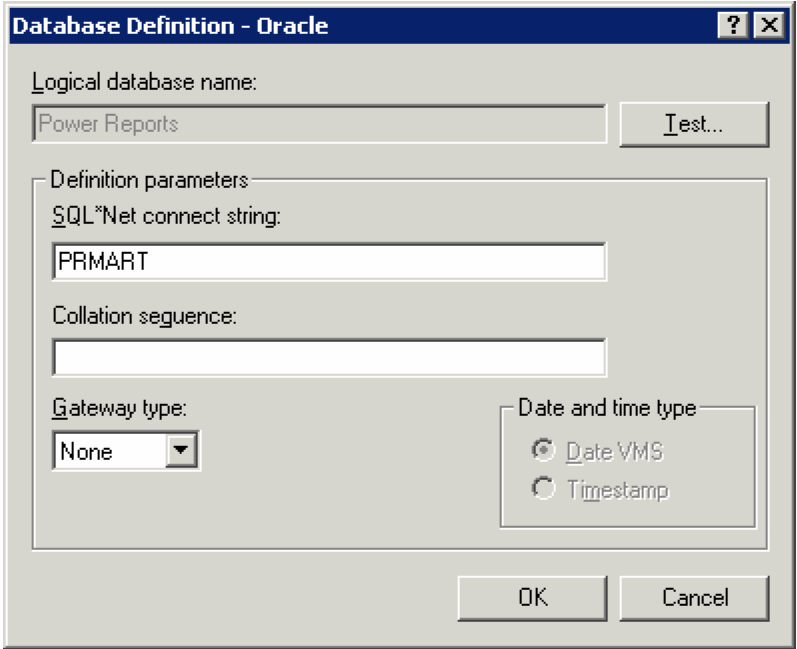
Type PRMART in the Enter SQL * Net Connect String field.
Click OK to exit the window.
Click OK to exit from the Database Properties window.
Go to Data Sources->Power Reports and right-click Signons.
Select Add Database Signon from the popup menu.
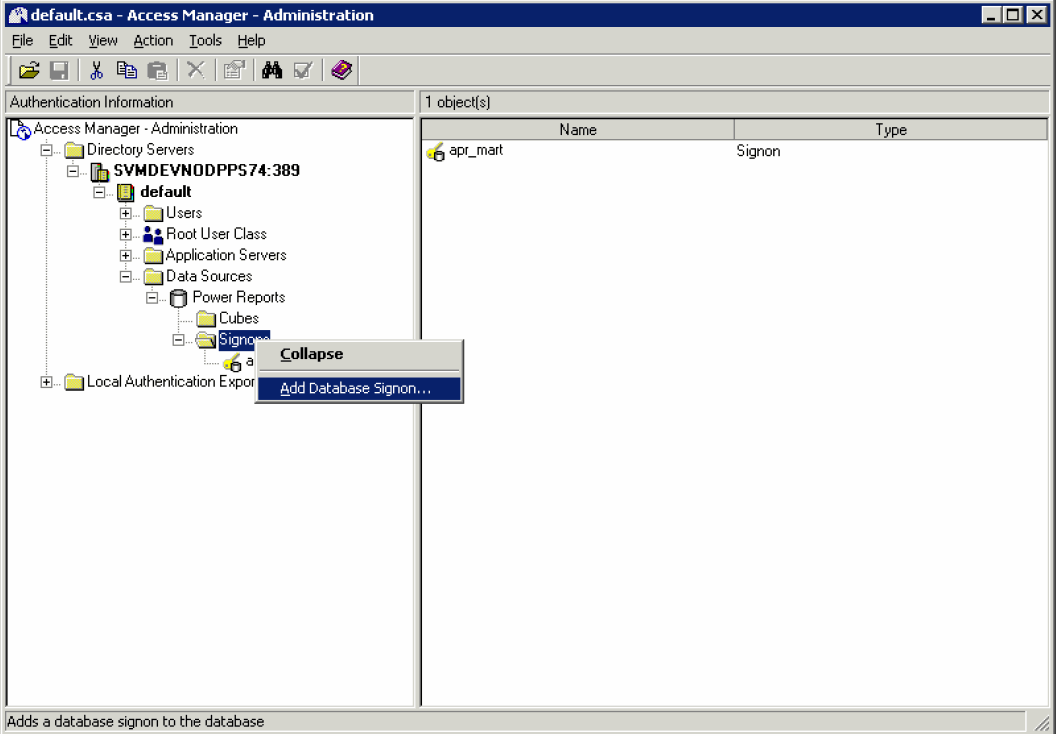
When the system opens the following dialog box:
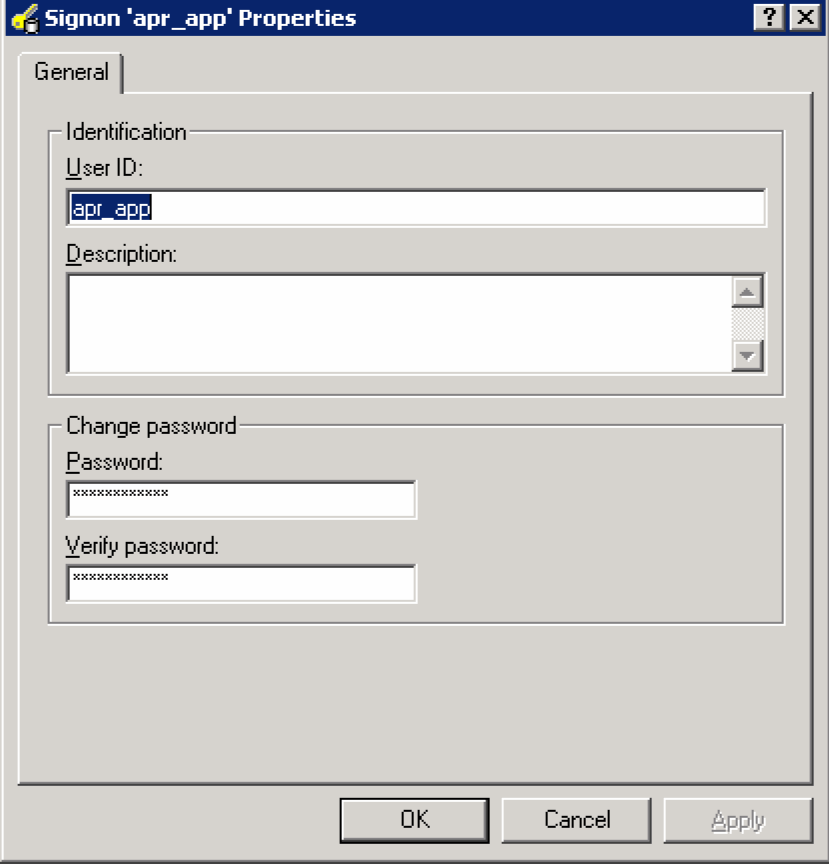
Type apr_app in the User ID field.
Type the apr_app password in the Password field.
Retype the password in the Verify Password field.
Click OK to save and exit.
Go to the Cubes Server Name> Default.
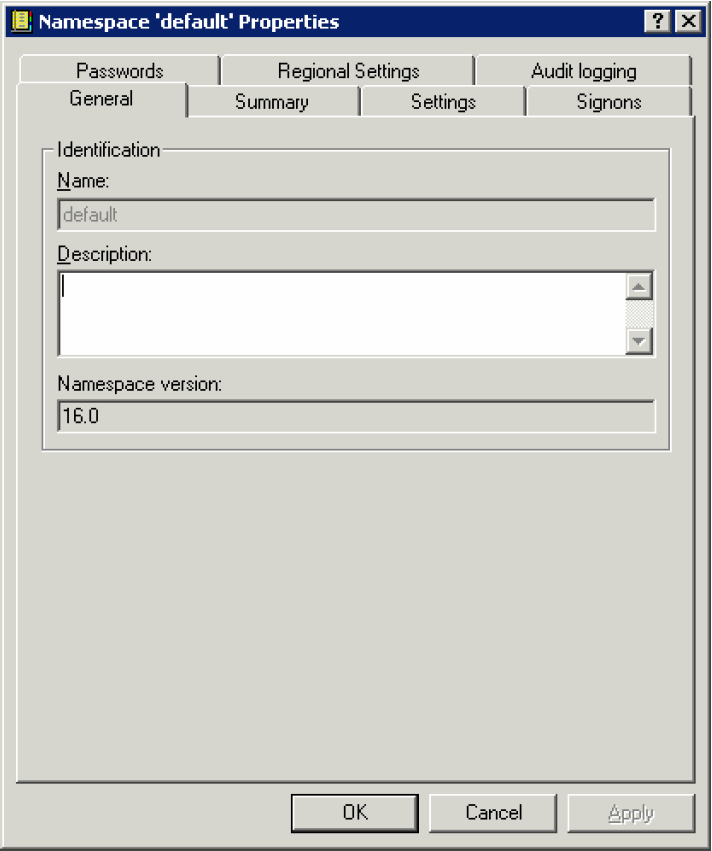
Right click on the default namespace and select Properties.
When the system opens the following dialog box, click the Signons tab.
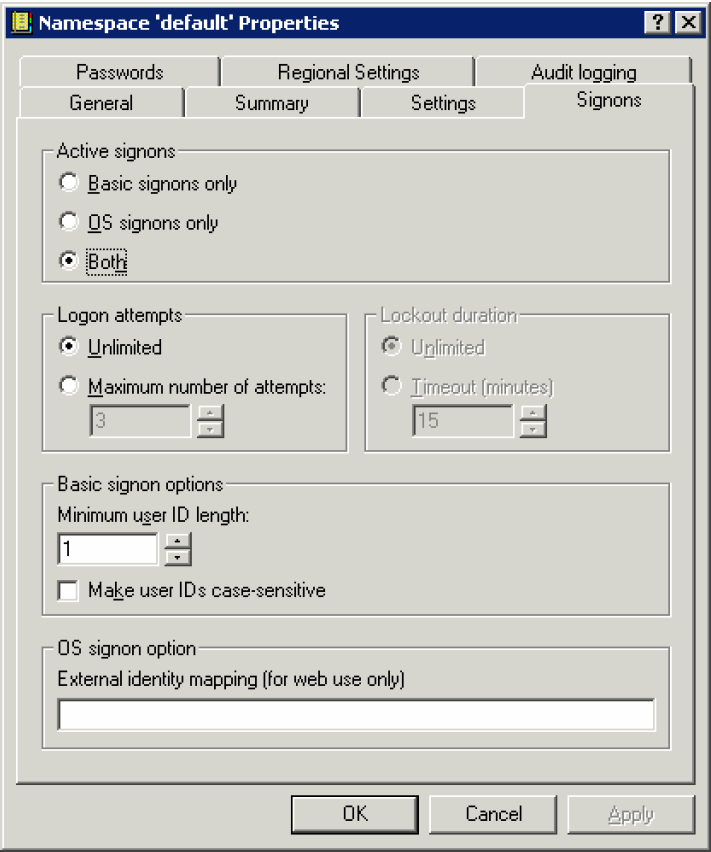
When the system opens the Signons tab, locate the Active Signons section and click the Both option button.
Click Settings to open the Settings tab.
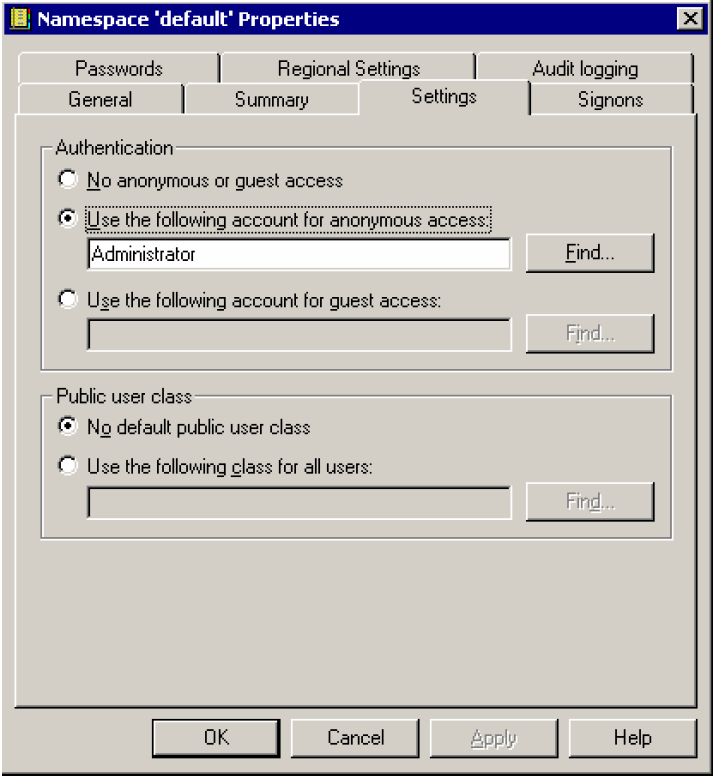
Click Use the following account for anonymous access option button and type Administrator in the associated text box.
Click OK
Go to Cubes Server Name-> Default->Users:
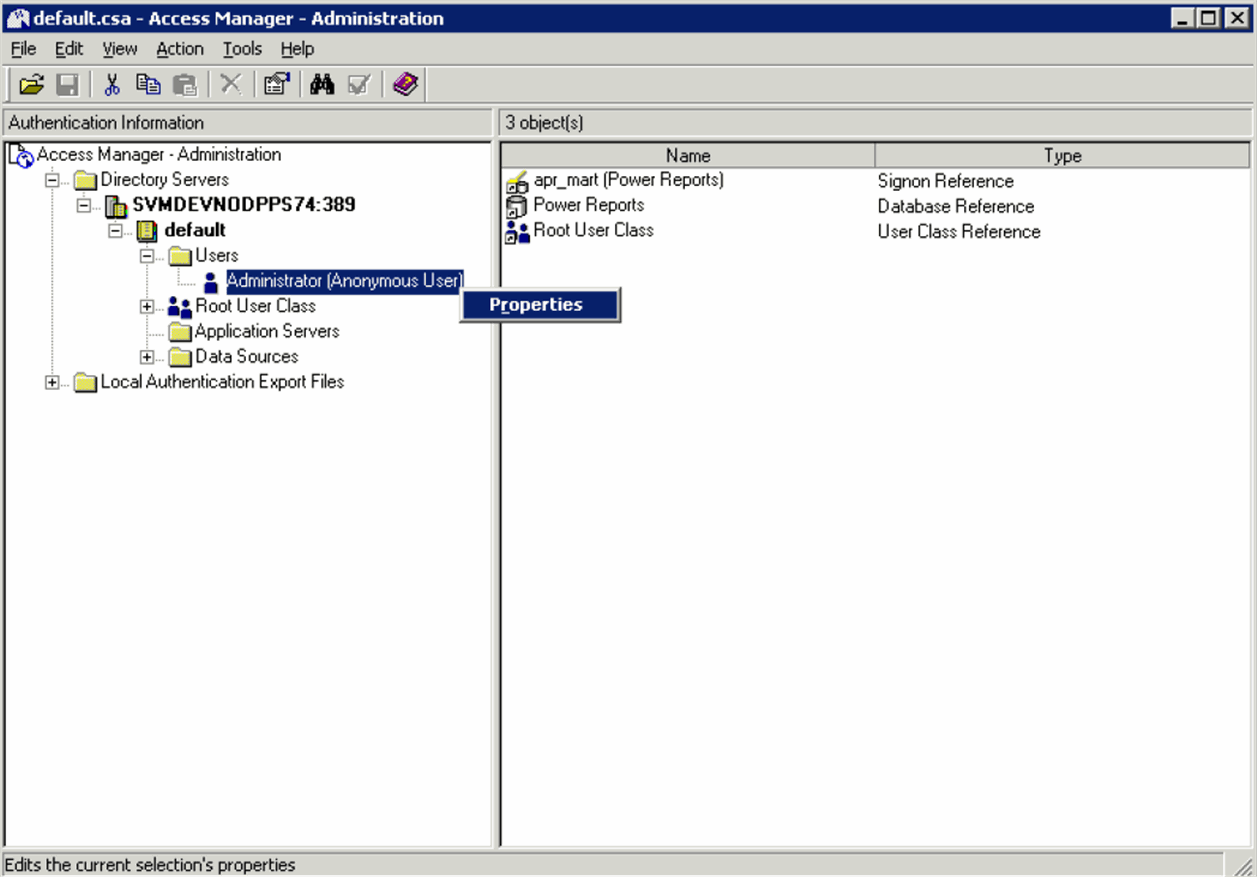
Right-click Administrator (Anonymous user).
Click Properties.
When the system opens the following dialog box:
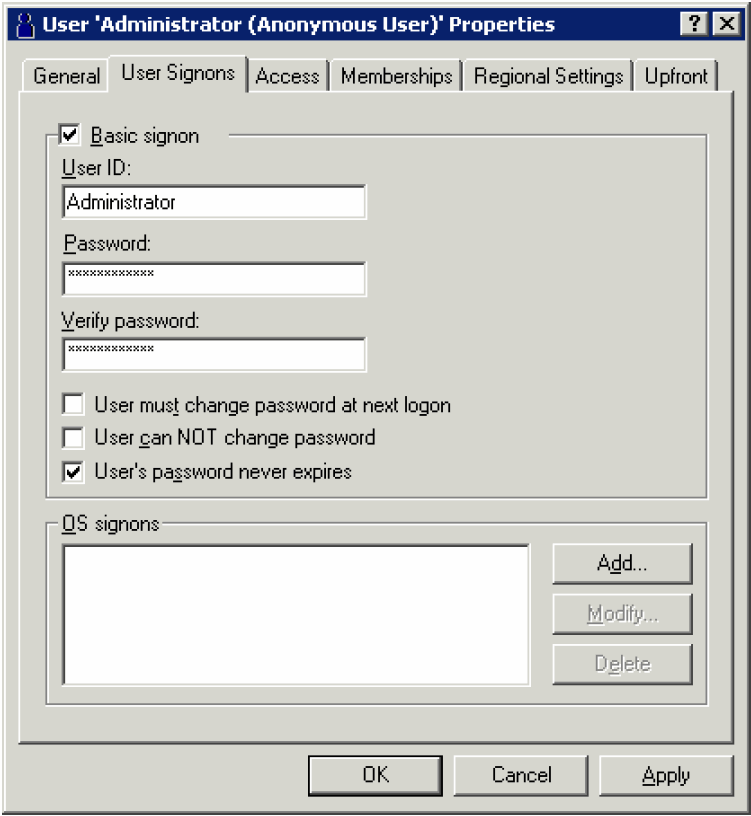
Click the User Signons tab.
On the User Signons tab, verify that the following field attributes are enabled, as shown in the following illustration.
Click Add.
When the system opens the following dialog box:
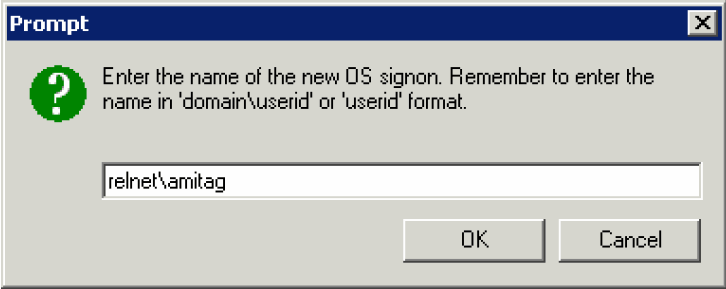
Type the domain user name in the text box.
Verify that the user is part of the Administrator group on the Cognos 8 server.
Click OK.
When the system opens the following dialog box:
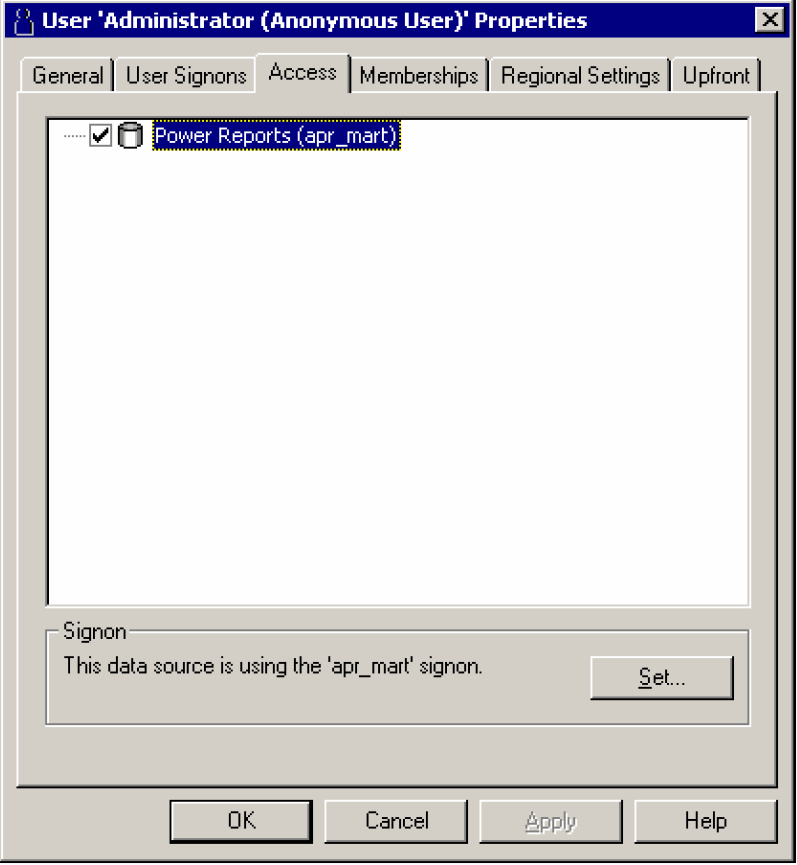
Click the Access tab
Click the Power Reports checkbox to select it.
Click Set . . . .
When the system opens the following dialog box:
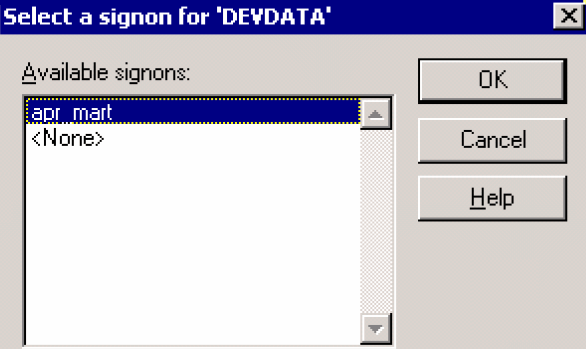
Select apr_mart.
Click OK to save and exit.
Click OK again to close the Administrator (Anonymous user) Properties dialog.
Keep the Access Manager window open and go to the Configuration Manager.
Restart the services from Configuration Manager.
Exit the Configuration Manager window and the Access Manager window.
This section is intended for use by Cognos Series 7.4 users. This section is not required if you are using Cognos Series 8 software.
Use the following procedure to configure IIS on the Cube Server.
On the Cube Server desktop, go to Start > Settings > Control Panel > Administrative Tools > Internet Services Manager:
Expand the control tree item corresponding to the Power Reports Web Server name.
Right-click Default Website>New>Virtual Directory. . . .
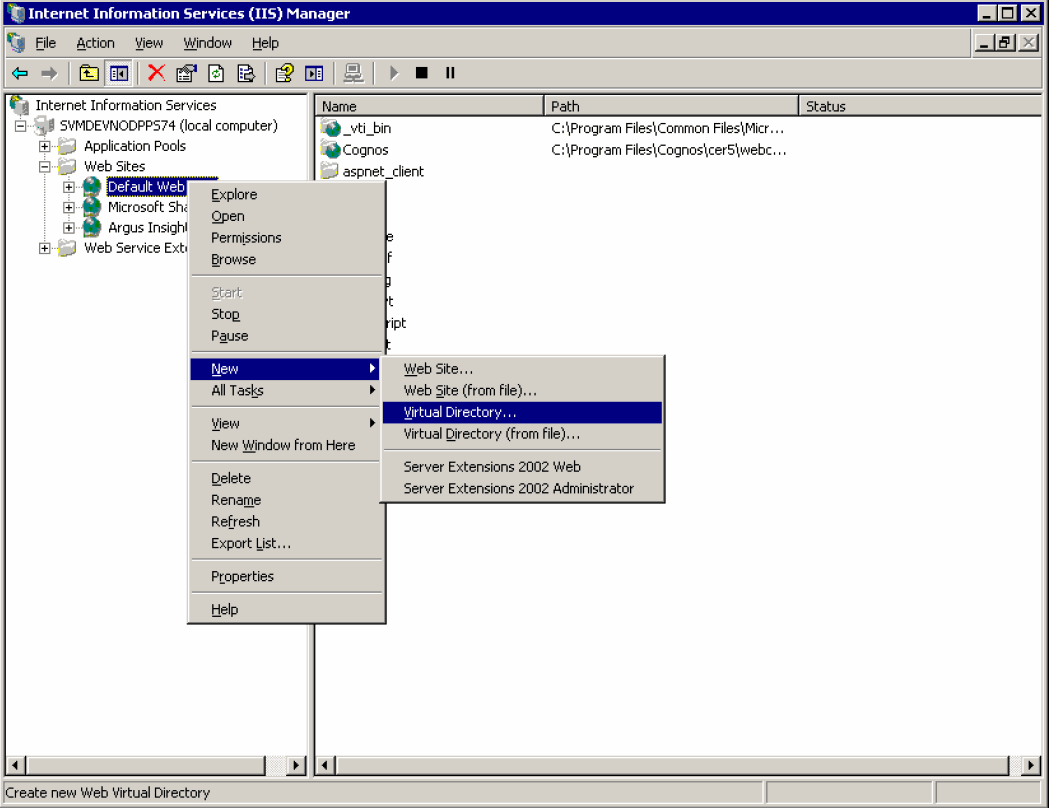
When the system opens the following dialog box, click Next>.
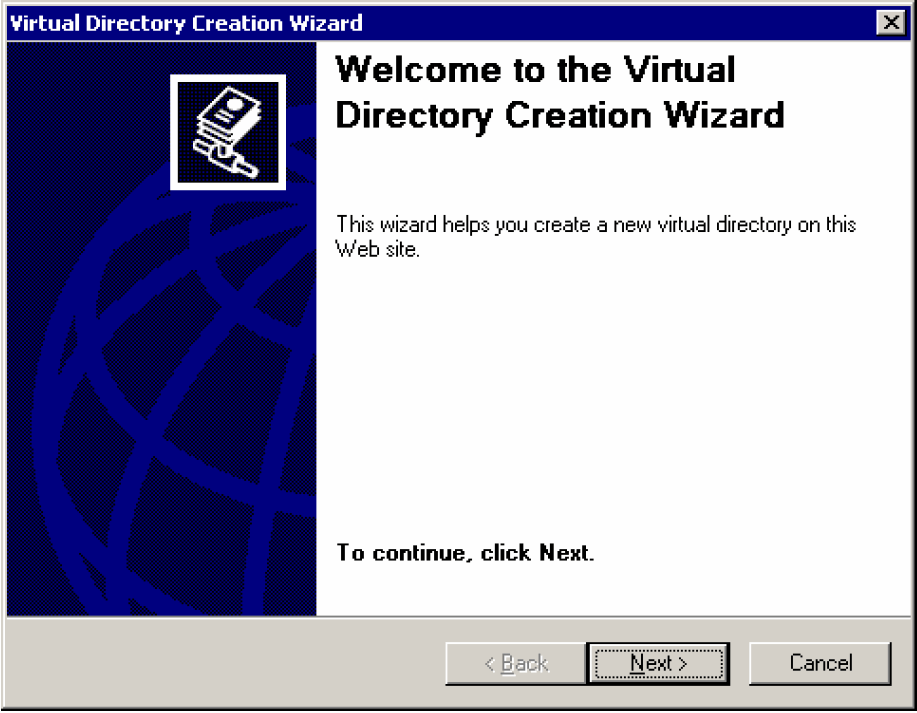
When the system opens the following dialog box:
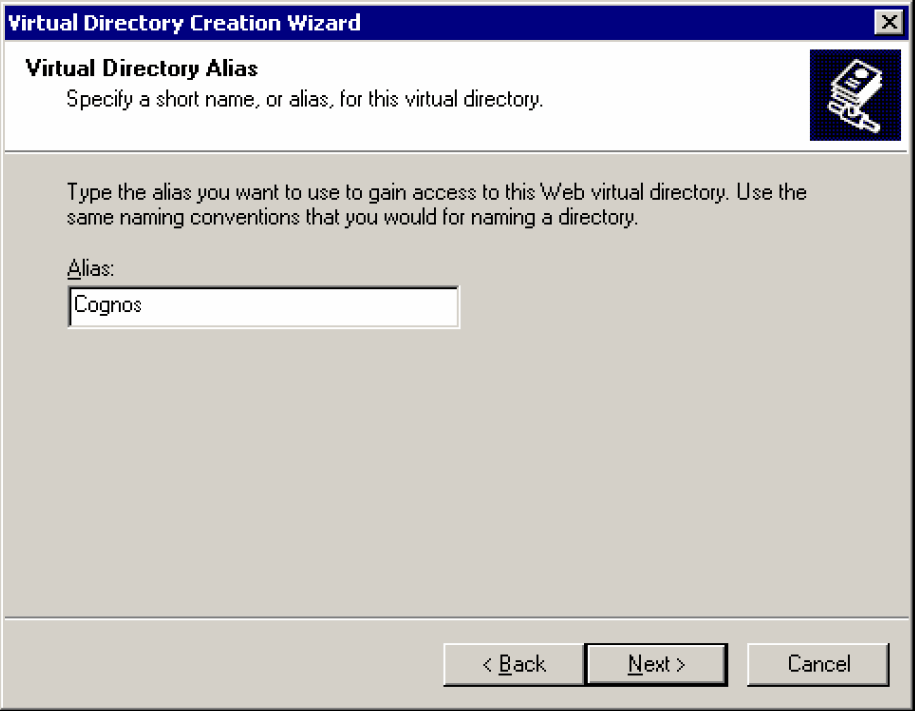
Type Cognos in the Alias field.
Click Next>.
When the system opens the following directory:
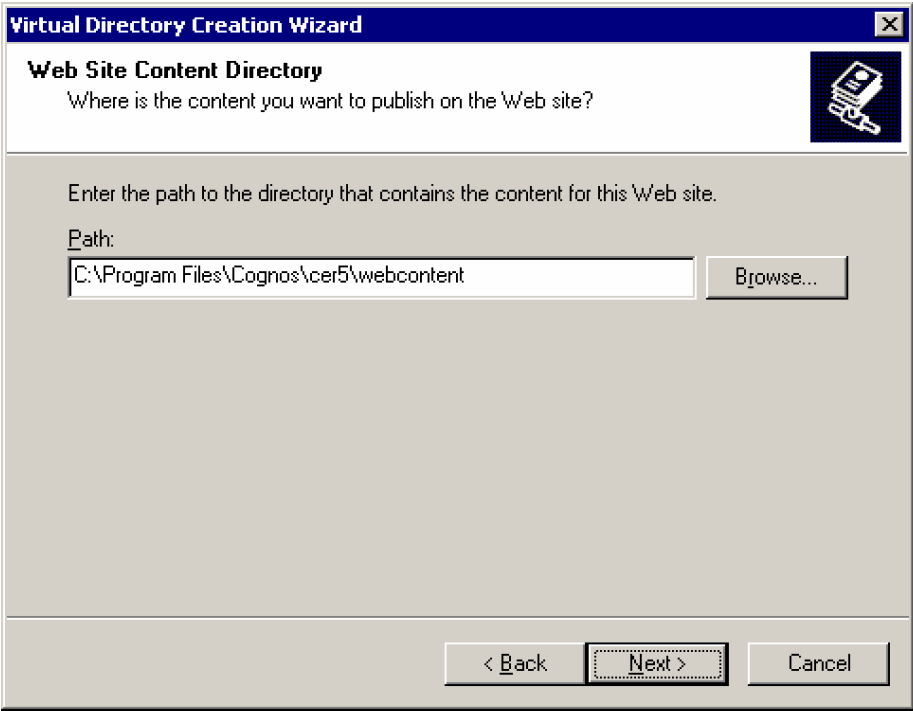
Click Browse.
Select the following location: <Cognos Installation Path on Cube Server>\cer5\webcontent. Click OK
Click Next>.
When the system opens the following dialog box:
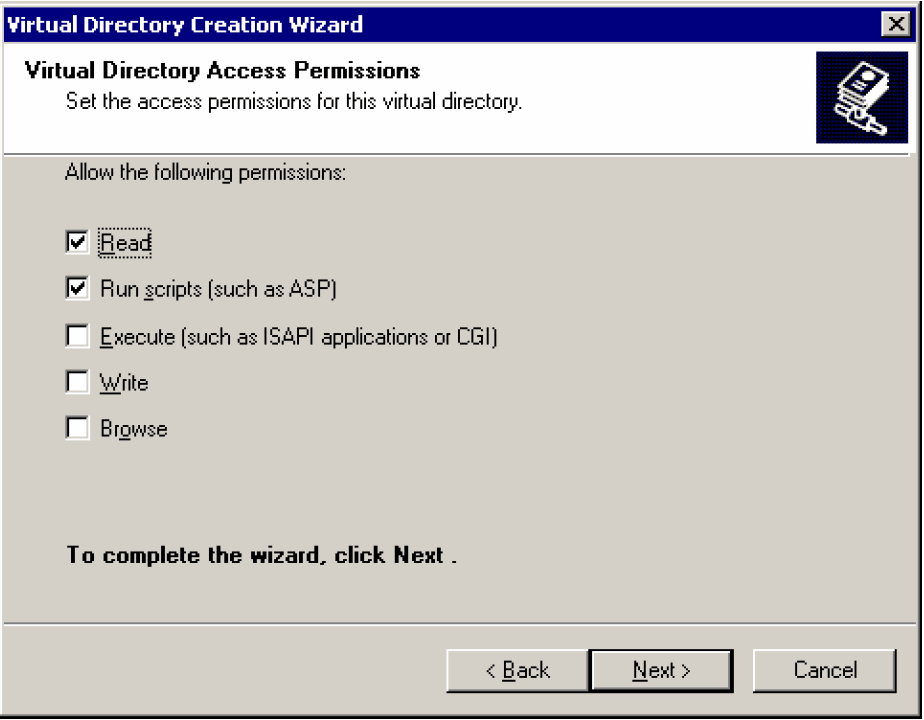
Click the Read Run scripts (such as ASP), Execute (such as ISAPI applications of CGI), and Browse checkboxes.
Click
Click Next>.
When the system opens the following dialog box, click Finish.
When the system opens the following window, expand the Default Web Site folder in the control tree.
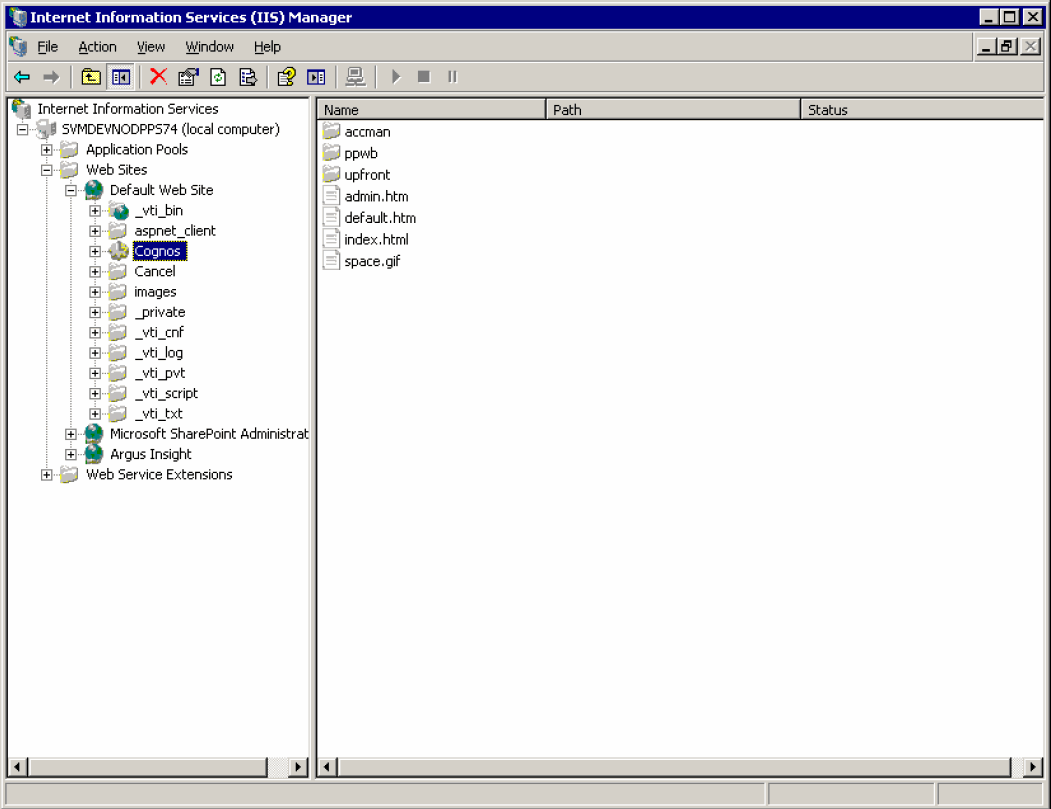
Right-click the Cognos>New>Virtual Directory . . .
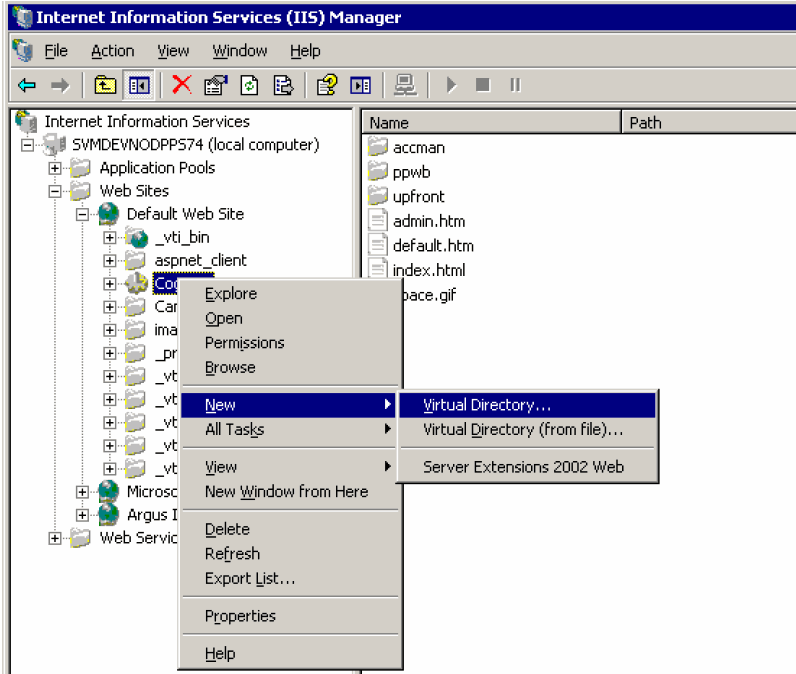
When the system starts the Virtual Directory Creation Wizard, click Next>.
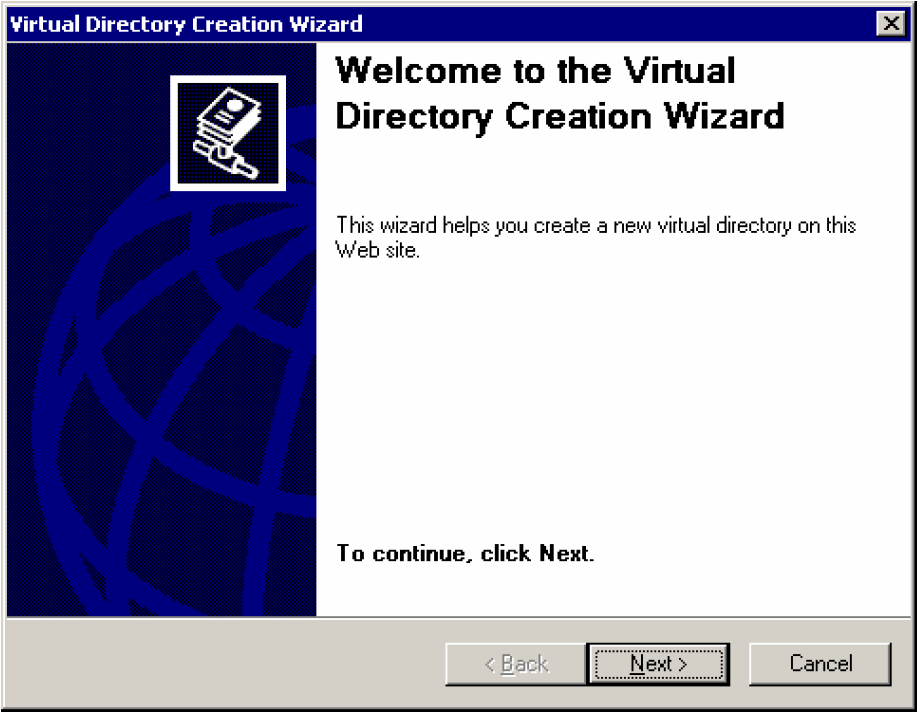
When the system opens the following dialog box:
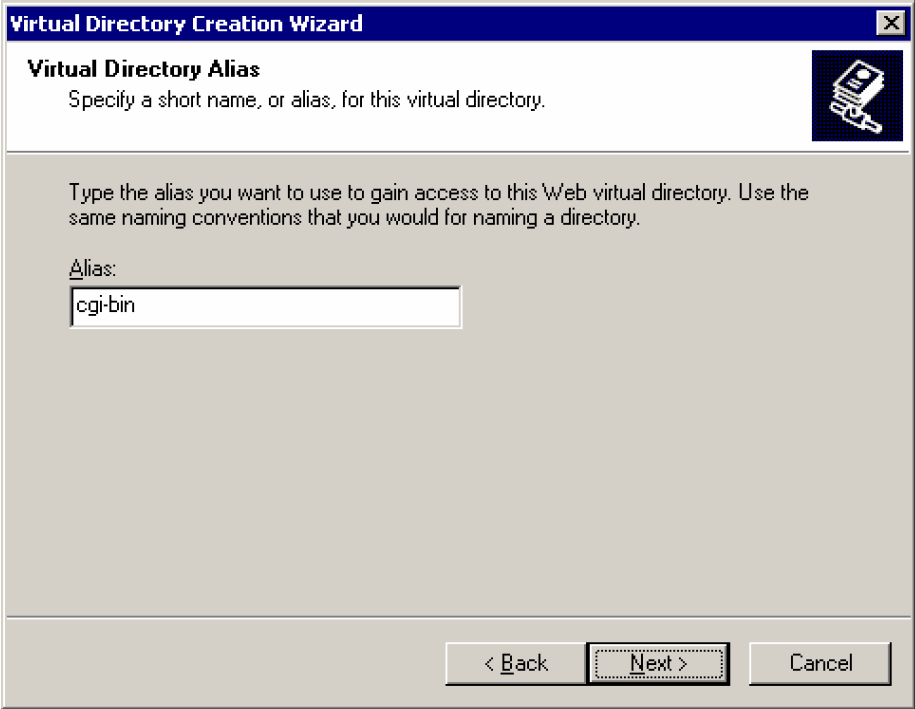
Type cgi-bin in the Alias field.
Click Next>.
When the system opens the following dialog box:
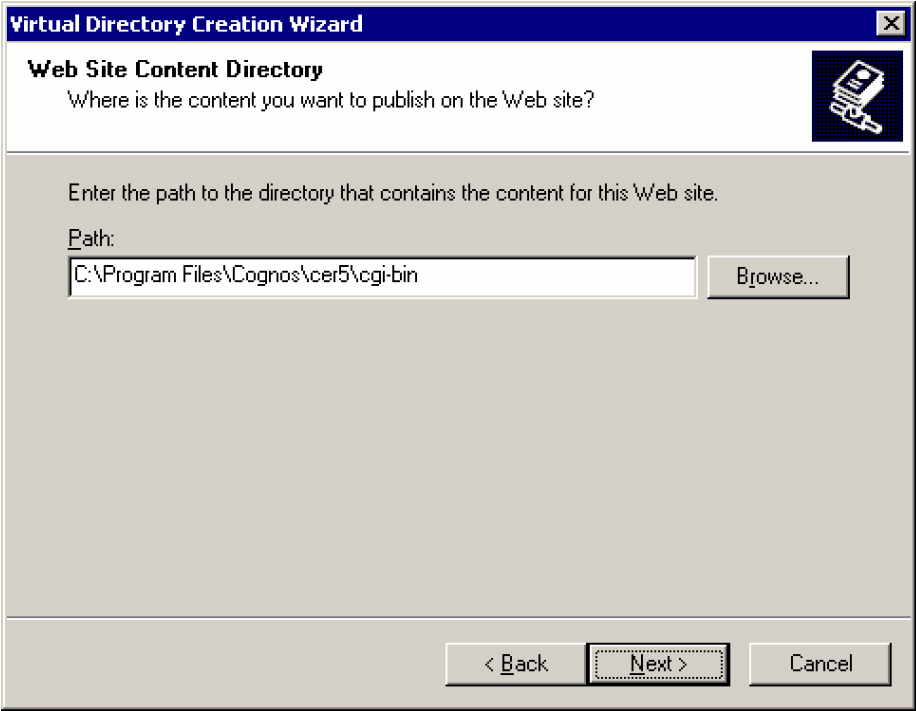
Click Browse.
Select <Cognos Installation Path on Cube Server>\cer5\cgi-bin from the window and click OK.
Click Next>.
When the system opens the following dialog box:
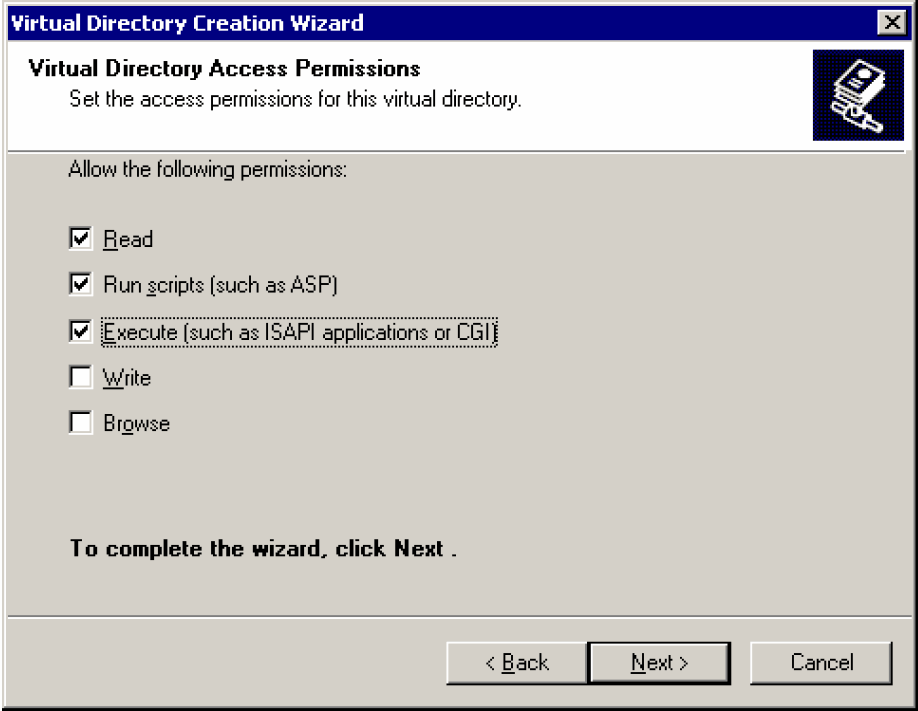
Check the following checkboxes:
Read
Run scripts (such as ASP)
Execute (such as ISAPI applications or CGI)
Browse
Click Next.
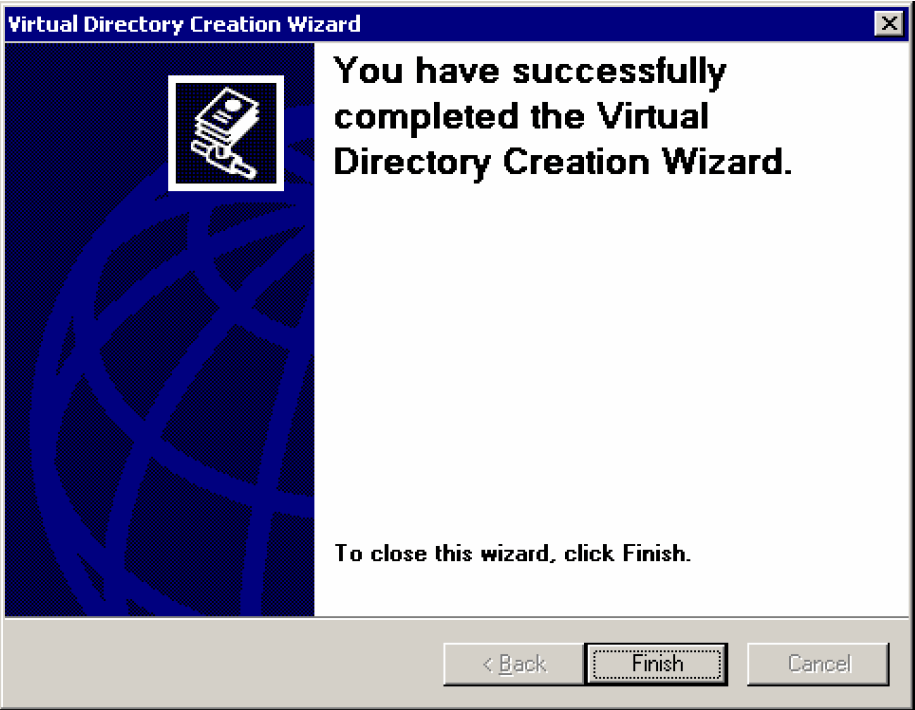
When the system opens the following dialog box, click Finish.
The system opens the WWW Configuration dialog box.
Close the Internet Information Services window.
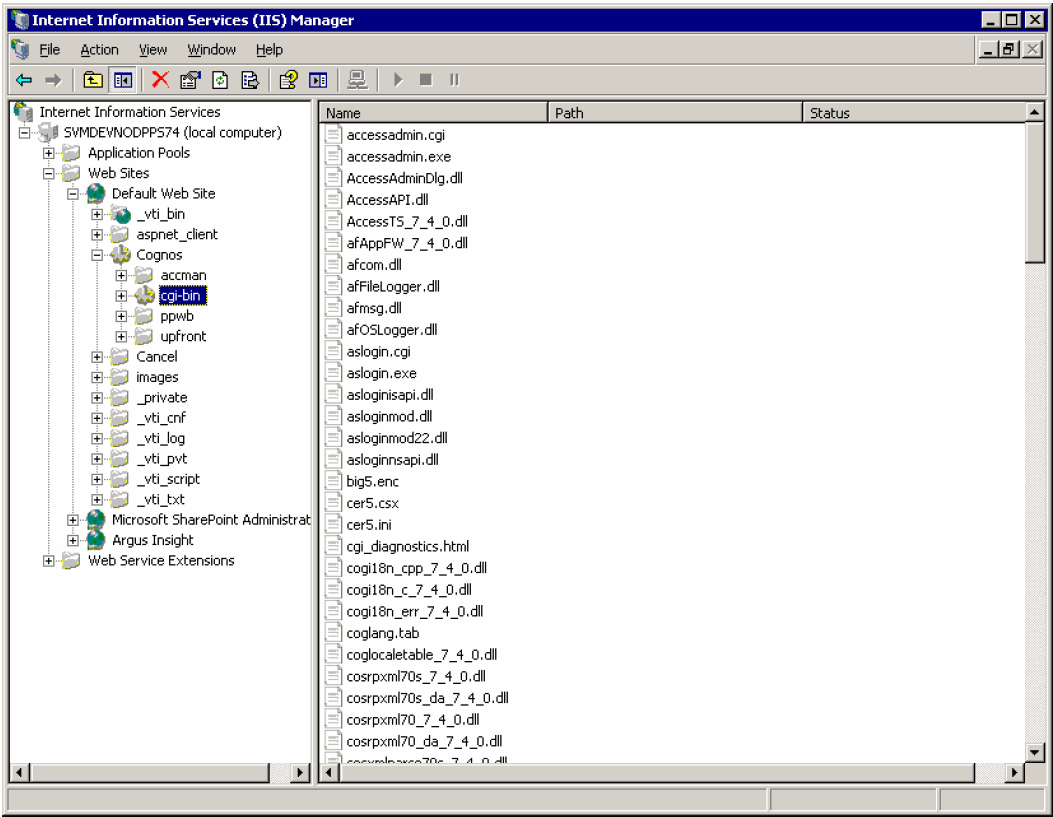
Use the following procedure to configure the Cognos Cubes for Cognos Series Version 7.4.
On the Cubes Server desktop, go to Start > Program Files > Cognos Series 7 Version 4> Cognos Server Administration.
Click the OLAP Cubes and Reports link.
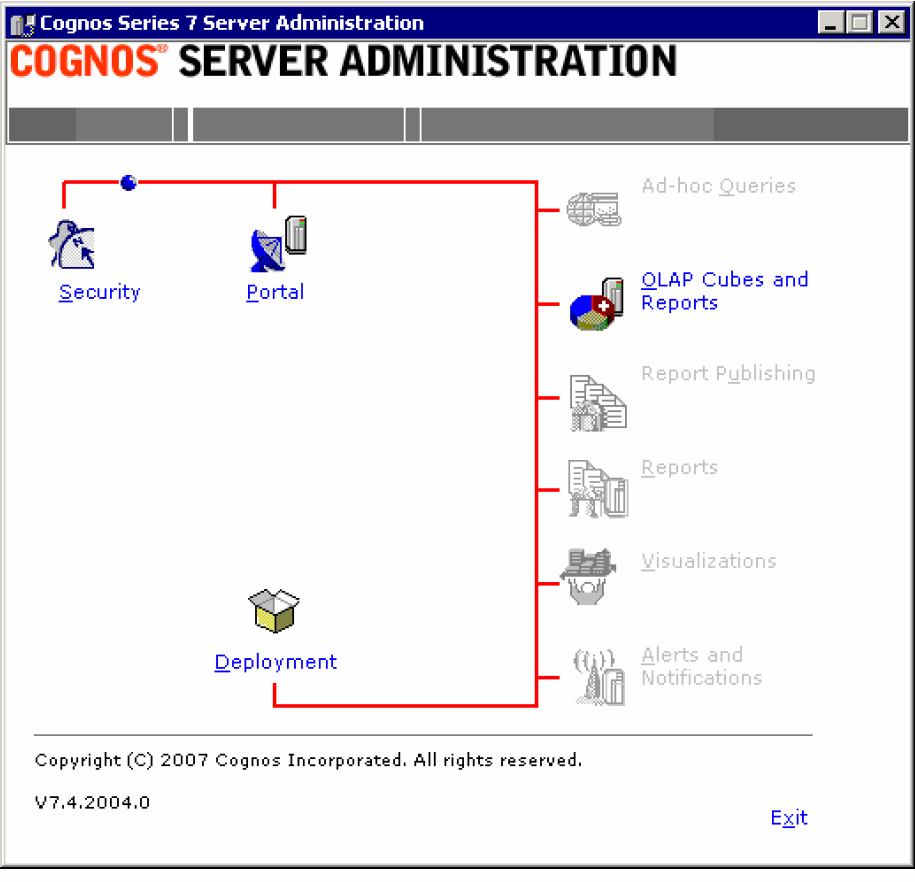
Select the Cube Server Name from the Server name list box. Click OK.
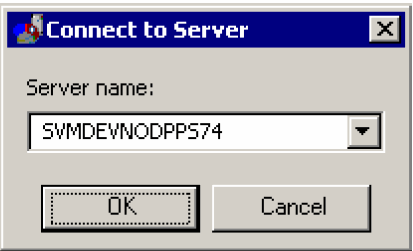
When the system opens the following dialog box, click Yes.
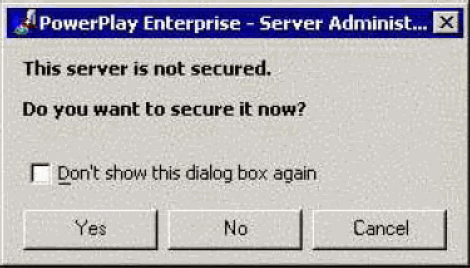
When the system opens the following dialog box:
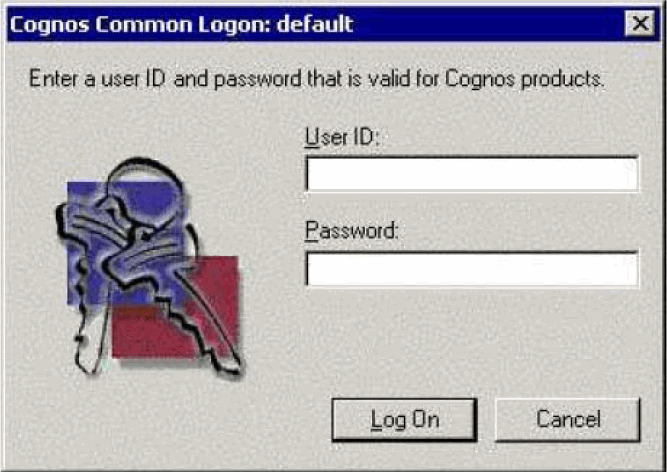
Type the Cognos User ID in the User ID field.
Type the password in the Password field.
Click Log On.
When the system opens the following dialog box, check all the checkboxes. Click OK.
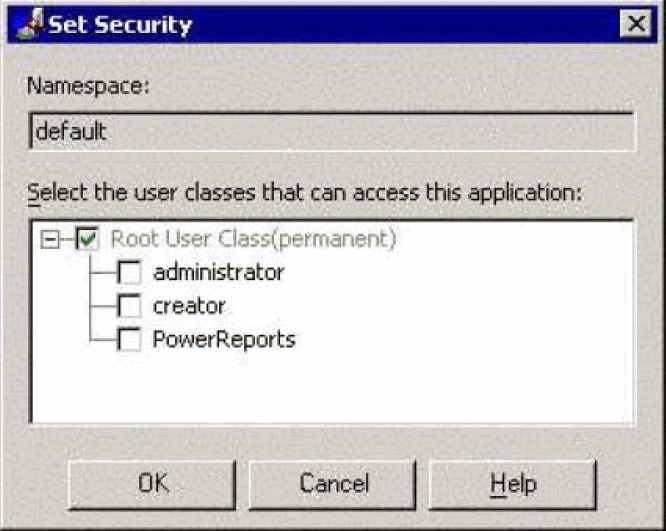
When the system opens the PowerPlay Enterprise Server Administration window:
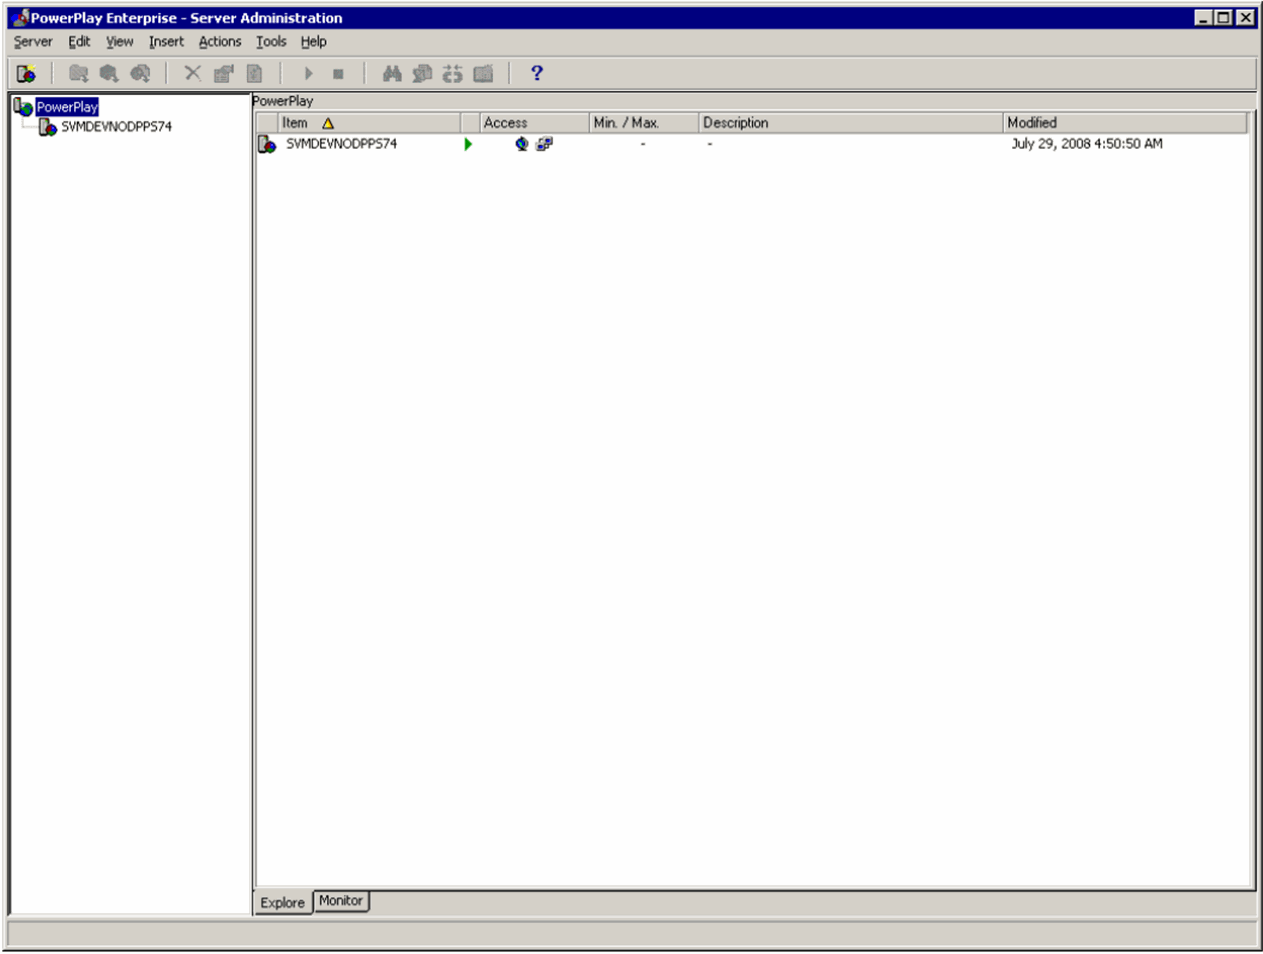
Right-click the Cube Server name in the left pane of the Server Administration window.
Select Properties from the popup menu.
When the system opens the Server Properties dialog box, click Settings.
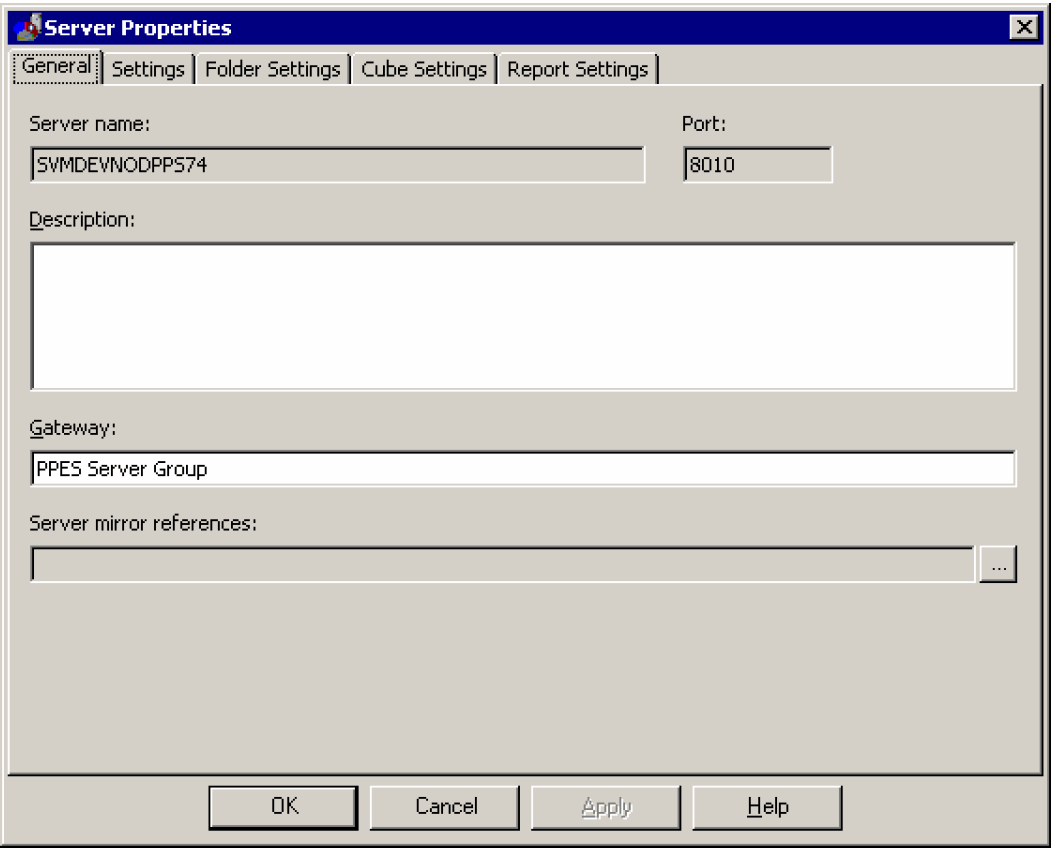
The system opens the Settings tab.
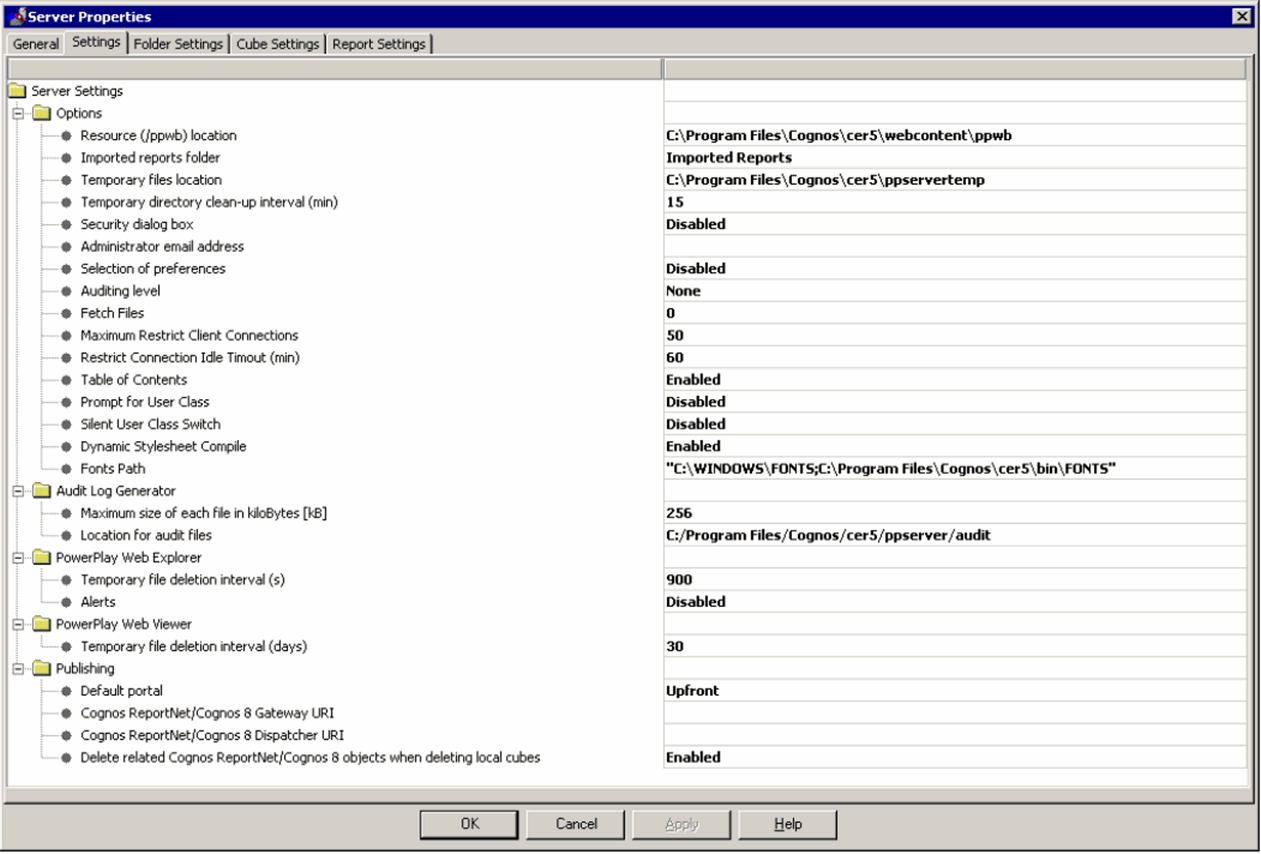
Set the values for the items on the Settings tab as shown in the following table. Click Apply.
| Setting Name | Value to Enter / Select |
|---|---|
| Options | |
| Resource (/ppwb) location | <Cognos Installation Path>\cer5\webcontent\ppwb |
| Imported Reports Folder | Imported Reports Folder |
| Temporary files location | <Cognos Installation Path>\cer5\ppservertemp |
| Temporary directory clean-up
Interval (min) |
15 |
| Security dialog box | Disabled |
| Administrator email address | Leave this field blank. |
| Selection of preferences | Disabled |
| Auditing level | Detail |
| Fetch files | 0 |
| Maximum Restrict Client
Connections |
50 |
| Restrict Connection Idle
Timeout (min) |
60 |
| Table of Contents | Enabled |
| Prompt for User Class | Enabled |
| Silent User Class Switch | Disabled |
| PowerPlay Web Explorer | |
| Temporary File Deletion Interval(s) | 900 |
| Alerts | Disabled |
| PowerPlay Web Viewer | |
| Temporary File Deletion Interval (days) | 30 |
| Publishing | |
| Default Portal | Upfront |
| Delete related Cognos ReportNet object when deleting local cubes | Enabled |
Select the Report Settings tab.
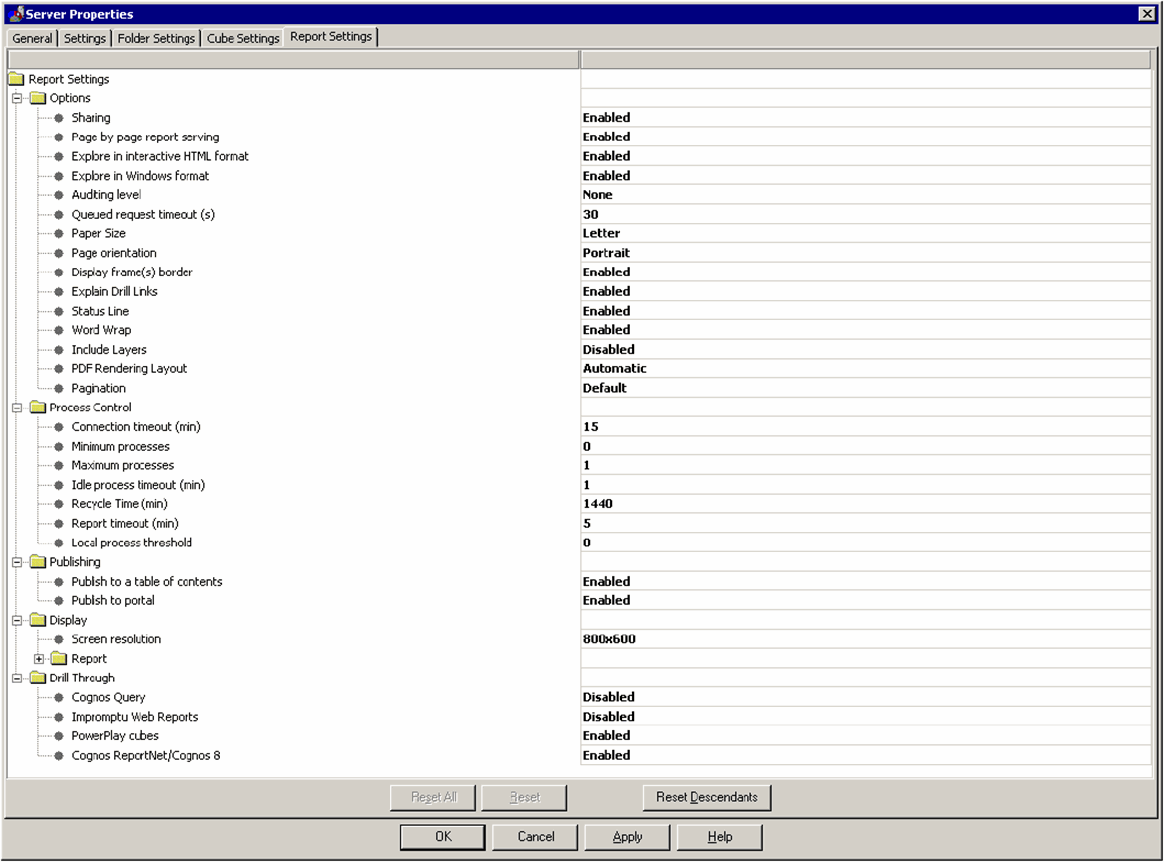
Set the values for the items in the Report Settings tab page as shown in the following table. Click Apply to apply the settings.
| Setting Name | Value to Enter / Select |
|---|---|
| Drill Through | |
| PowerPlay Cubes | Enabled |
| Cognos ReportNet/Cognos8 | Enabled |
Click OK.
Select the Cube Server name in the left pane of the Server Administration window.
From the menu bar, select Insert > Folder.
When the system opens the Folder Properties dialog box , click the General tab.
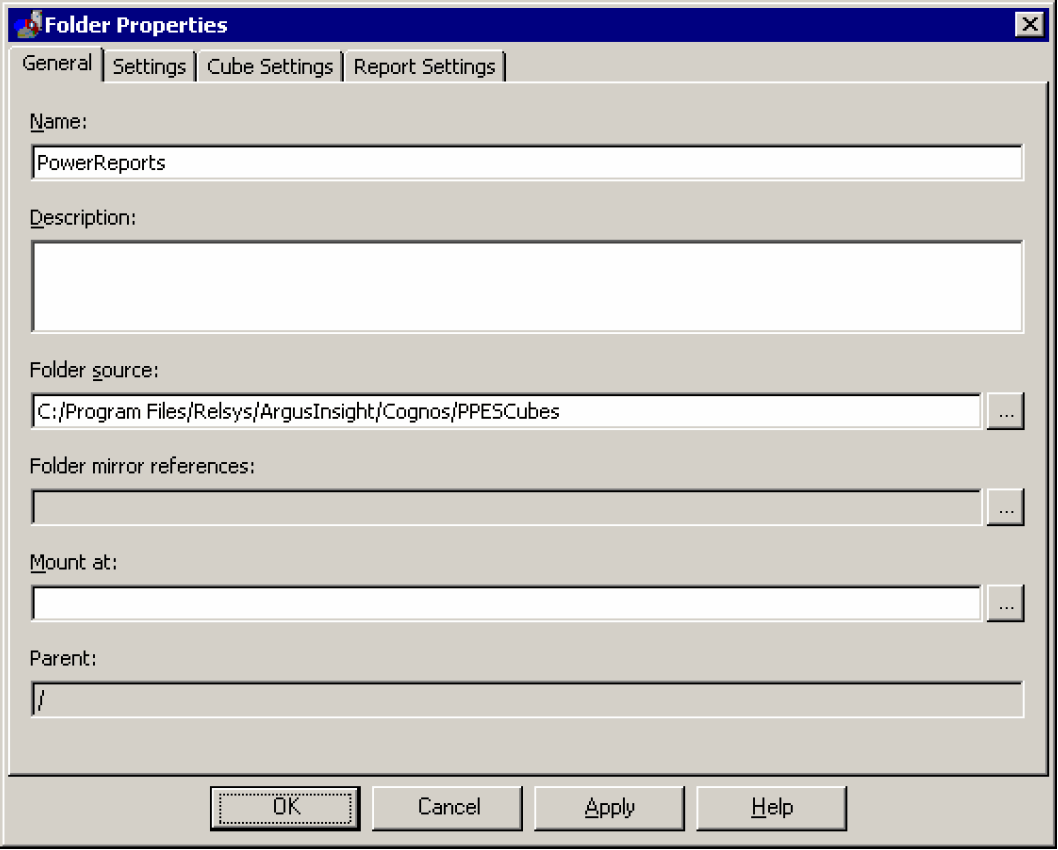
Enter PowerReports in the Name text box.
Specify the following path in the Folder source field:
<Argus Insight Installation Path>/Cognos/PPESCubes
Click the Cube Settings tab.
The system opens the Cube Settings tab.
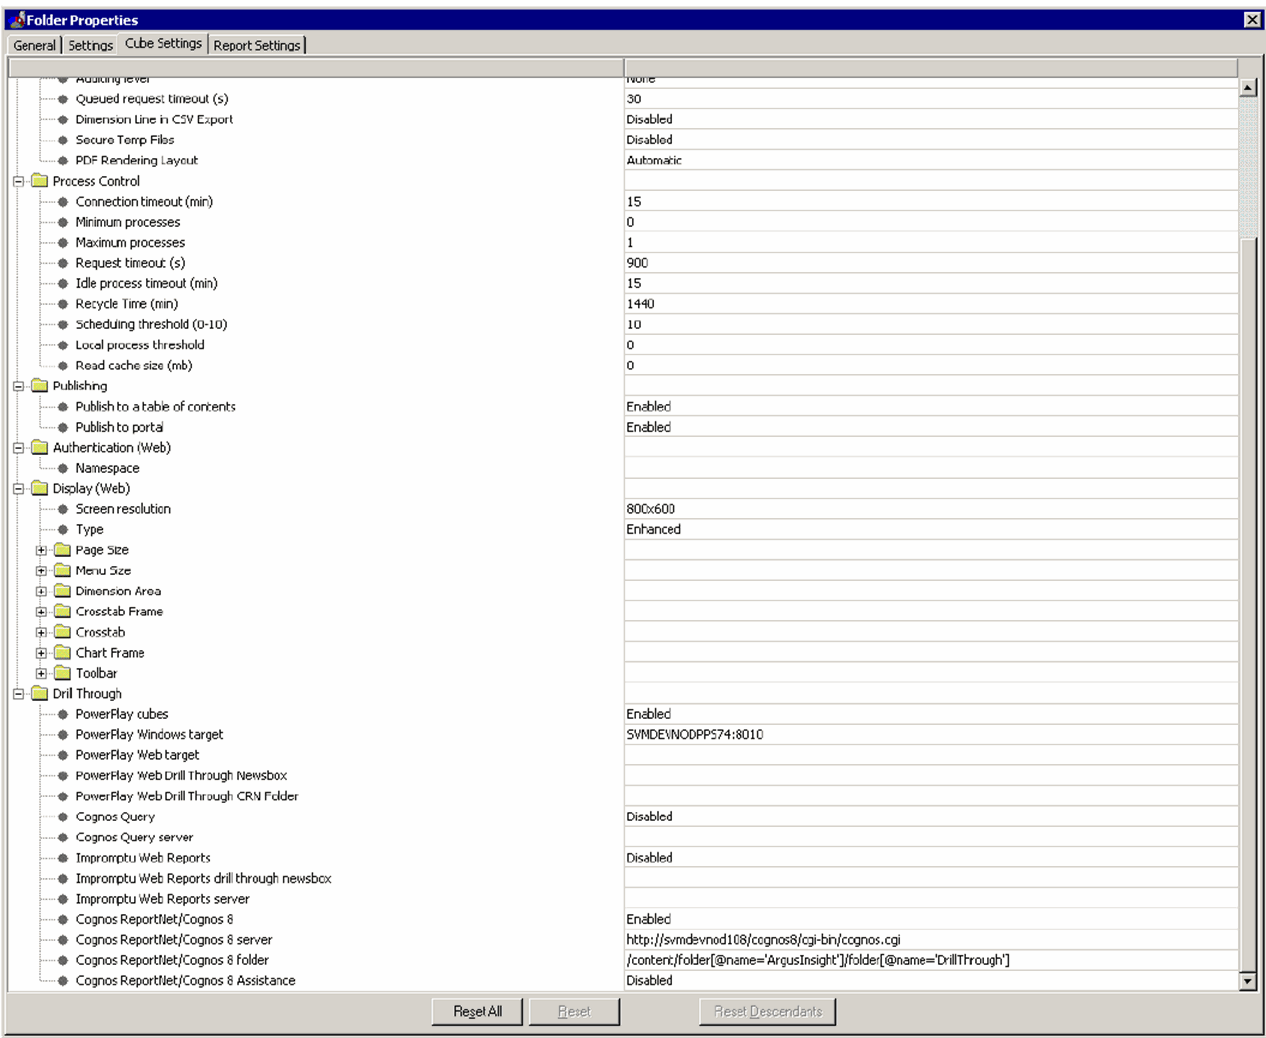
Set the values for the items in the Cube Settings tab, as specified in the following table. Click Apply.
| Setting Name | Value to Enter / Select |
|---|---|
| Drill Through | |
| Save as Power Cube | Enabled |
| PowerPlay Cubes | Enabled |
| PowerPlay Window Target | <Cube Server Name>:8010 |
| Cognos
ReportNet/Cognos8 Server |
http//<Cognos8 Server>/cognos8/cgi-bin/cognos.cgi |
| Cognos
ReportNet/Cognos8 |
Enabled |
| Cognos
ReportNet/Cognos8 Folder |
/content/folder[@name='ArgusInsight']/folder[@name='DrillThrough'] |
| Cognos Report Net Assistance | Disabled |
Select Server>Exit from the menu bar to close the Server Administration window.

Copy the ppwbcustom.js file from the following location: \\<Argus Insight Web Server>\<Argus Insight Installation Path>\ASP\include\js to the following location on the Cube Server: <Cognos Installation Path>\cer5\webcontent\ppwb
Go to <Argus Insight Directory>\ArgusInsight\Cognos\Cubes\BatchGeneration-Cubes folder.
Open the GenerateCubes.cfg file.
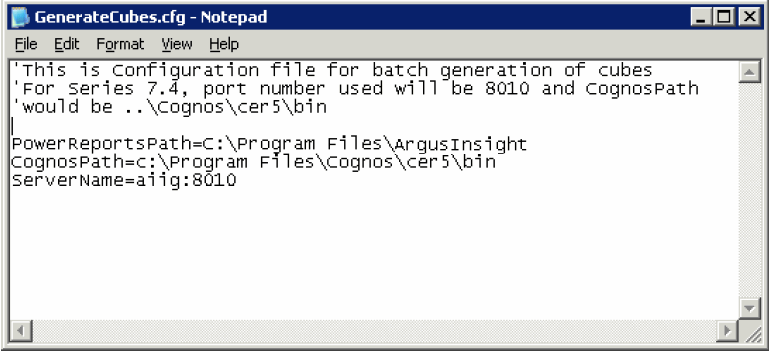
Set the following parameters in the GenerateCubes.cfg file:
| Parameter | Description |
|---|---|
| PowerReportsPath | This is the Argus Insight installation path; include the ArgusInsight folder in the string:
<Argus Insight Installation path>\ArgusInsight |
| CognosPath | This is the location of the Cognos 8 installation bin folder:
<Cognos Cubes installation path>\cer5\bin |
| ServerName | This is the name or IP address of the Cognos Cubes Server. Enter the parameter values in this format: ServerName:PortNumber. For example, CognosCubeServer:8010. |
|
Note: Although the paths may contains whitespaces, make sure there is no white space between the parameter name, the "=" sign, and the value. |
Save and close the configuration file.
Although the ETL process updates the datamart on a regular basis, you need to separately update each Cube after the incremental ETL process is completed. To do this, set up a batch process to update the Cubes installed as part of the Argus Insight application. The batch process performs the following tasks:
Updates Cube data
The system updates Cube data with the latest data from the datamart.
Copies the updated Cubes in the backup folder
The system copies the updated Cubes into a backup folder that contains subfolders for each Cube; the backup folder path is as follows:
<Argus Insight Installation path>\ArgusInsight\cognos\backup\PPESCubes
For example: C:\Program Files \Oracle\ArgusInsight\Cognos\backup\PPESCubes
Copies the updated Cubes in the published folder
The system copies the updated Cubes into the published folder at this location:
<Argus Insight Installation path>\ArgusInsight\cognos\PPESCubes
For example: C:\Program Files\Oracle\ArgusInsight\Cognos\PPESCubes
Schedule individual tasks to update each Cube. To improve the performance of the batch process, make sure that individual batch execution processes do not overlap with each other.
This section provides information for using Windows Task Manager to schedule batch generation. Use the following procedure to set up batch for each of the five Cubes.
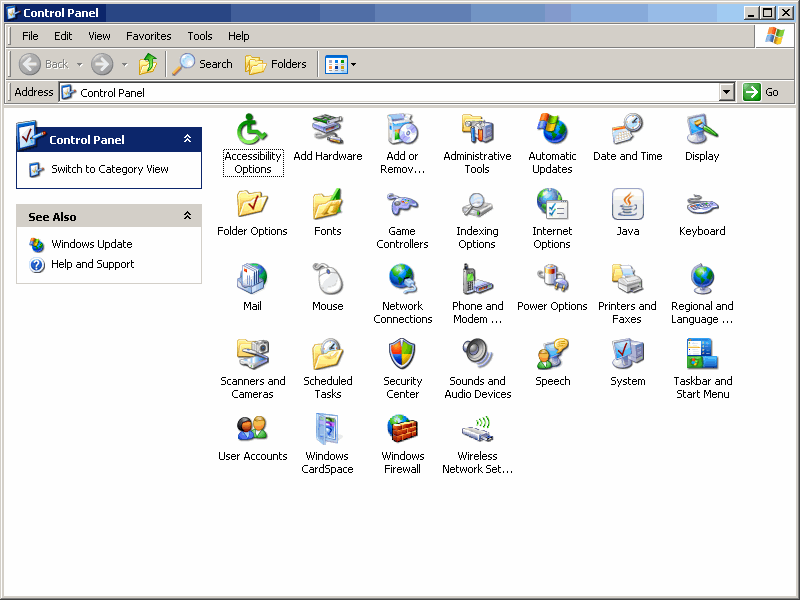
On the Cognos8/Cube Server, select Start > Settings > Control Panel.
When the system opens the Control Panel window, double-click Scheduled Tasks.
|
Note: The appearance of Scheduled Tasks in Microsoft Windows 2008 is differently from the Scheduled Tasks in Microsoft Windows 2003. |
When the system opens the Scheduled Tasks dialog box, double-click Add Scheduled Task.
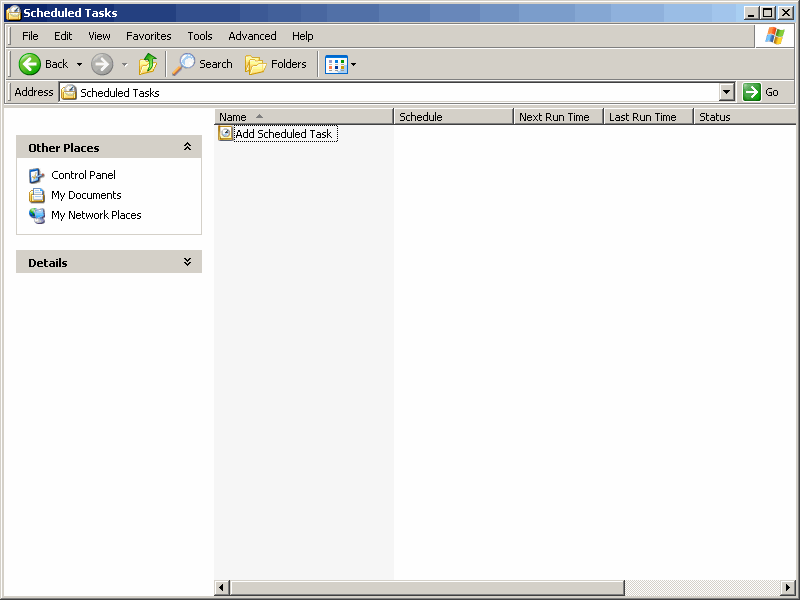
When the system opens the Scheduled Task Wizard dialog box, click Next>.
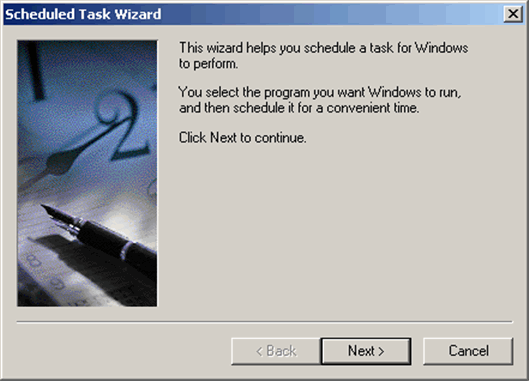
When the system opens the following dialog box, click Browse.
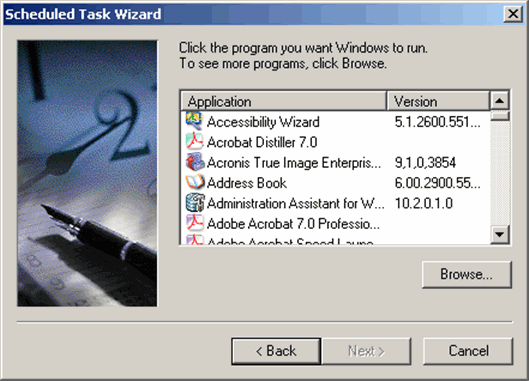
When the system opens the following window:
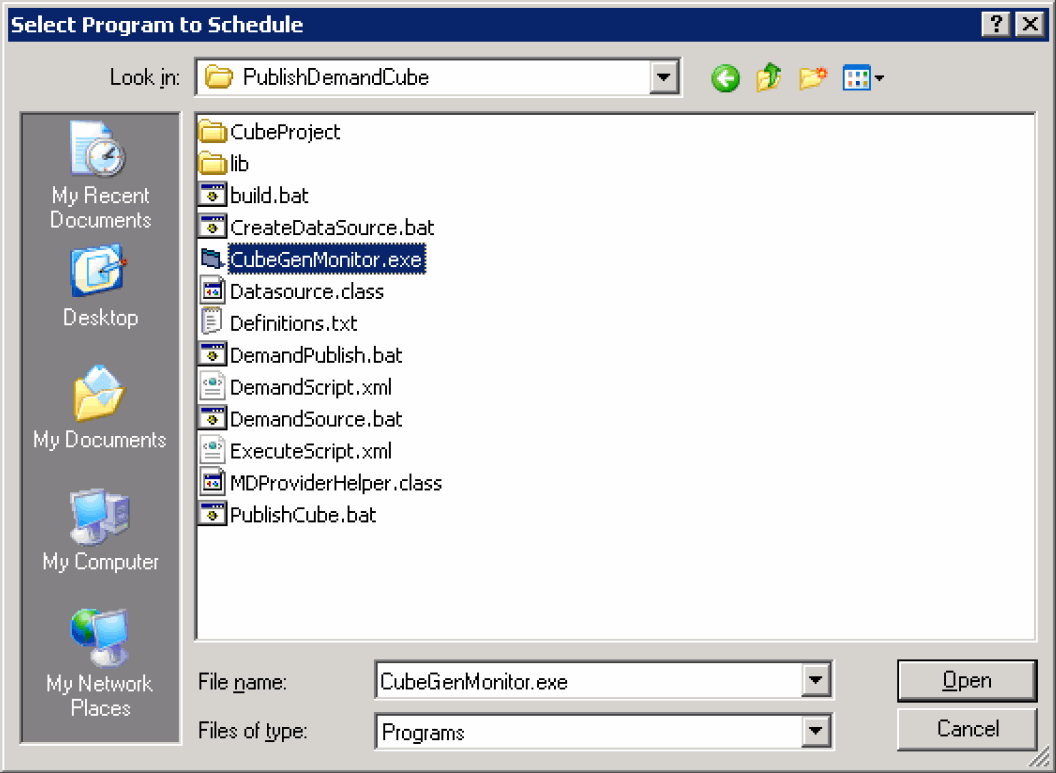
Navigate to the following location: <Argus Insight Installation Drive>\ProgramFiles\Oracle\ArgusInsight\Cognos\Cubes\PublishDemandCube
Select the CubeGenMonitor.exe file.
Click Open.
When the system opens the following dialog box:
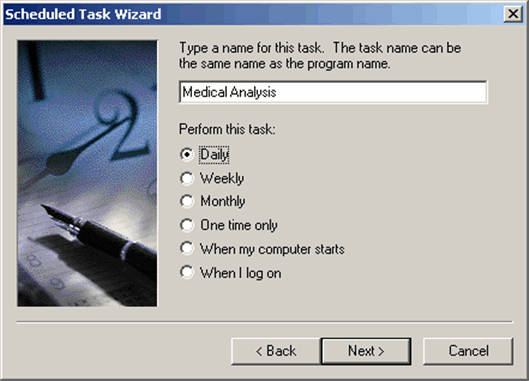
Type the Cube Name in the text box.
Locate Perform this task and select the frequency for refreshing the Cube.
Click Next.
|
Note: You can assign any name to the task, but we recommend that the name be similar to the name of the Cube you are scheduling. The following: |
| Cube Name | Cube ID |
|---|---|
| Medical Analysis | 7 |
| Clinical Trial Analysis | 8 |
| Overdose-Pregnancy-Interaction | 9 |
| Submission Statistics | 10 |
| Administration Statistics | 11 |
When the system opens the following dialog box, select the start time and day. Click Next>.
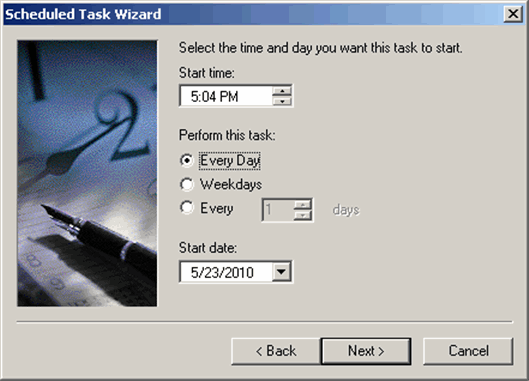
When the system opens the following dialog box:
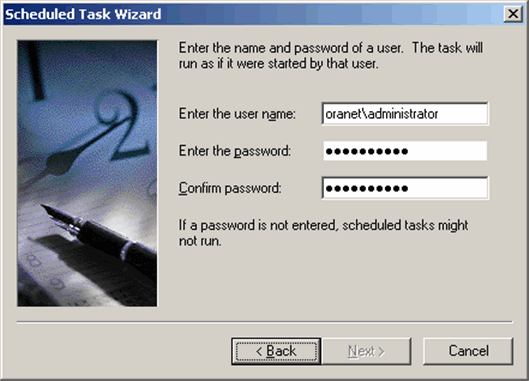
Type the name of the user authorized to run this task in the Enter the user name field.
Type the user password in the Enter the password field.
For verification, type the password in the Confirm password field.
Click Next>.
When the system opens the following dialog box check the Open advance properties for this task when I click Finish check box. Click Finish.
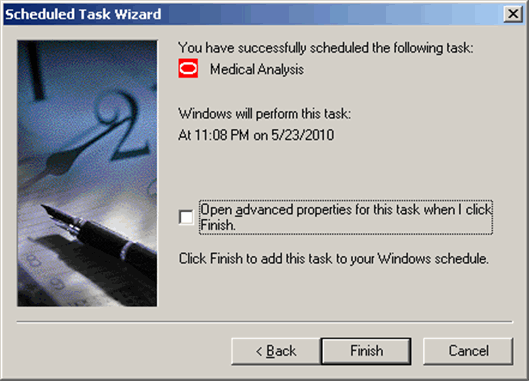
Double-click the Medical Analysis tab and open from the Scheduled Tasks. When the system opens the following dialog box, enter the run-time parameter for this task in the following format:
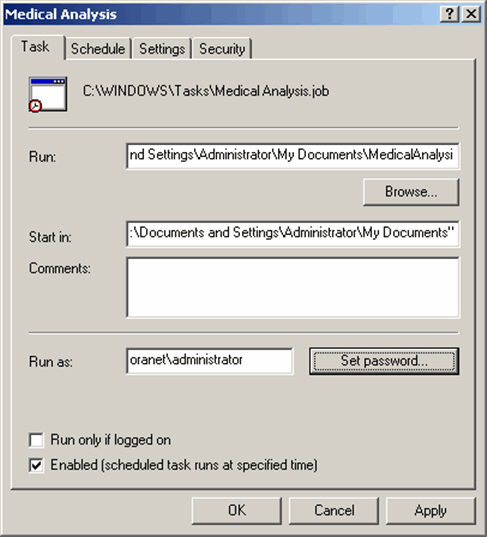
<Argus Insight installation path> \ArgusInsight\Cognos\Cubes\PublishDemandCube\CubeGenMonitor.exe <Cube ID> <
where:
CubeID identifies the Cube for which you are scheduling the batch generation.
The following table lists the Cube ID for each cube and provides examples of the run-time parameter to enter.
| Cube Name | CubeID | Example Run-Time Parameter |
|---|---|---|
| Medical Analysis | 7 | "C:\Program Files\Oracle\ArgusInsight\Cognos\Cubes\PublishDemandCube\CubeGenMonitor.exe" 7 |
| Clinical Trial Analysis | 8 | "C:\Program Files\Oracle\ArgusInsight\Cognos\Cubes\PublishDemandCube\CubeGenMonitor.exe" 8 |
| Overdose-Pregnancy-Interaction | 9 | "C:\Program Files\Oracle\ArgusInsight\Cognos\Cubes\PublishDemandCube\CubeGenMonitor.exe" 9 |
| Submission Statistics | 10 | "C:\Program Files\Oracle\ArgusInsight\Cognos\Cubes\PublishDemandCube\CubeGenMonitor.exe" 10 |
| Administration Statistics | 11 | "C:\Program Files\Oracle\ArgusInsight\Cognos\Cubes\PublishDemandCube\CubeGenMonitor.exe" 11 |
When the system opens the following dialog box:
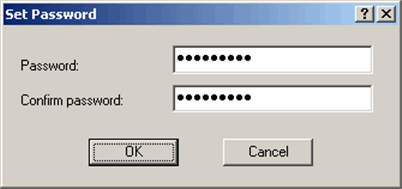
Type the password for the Cognos 8 Server admin user in the Password field.
For verification, type the password in the Confirm Password field.
Click OK.
When the system displays the following dialog:
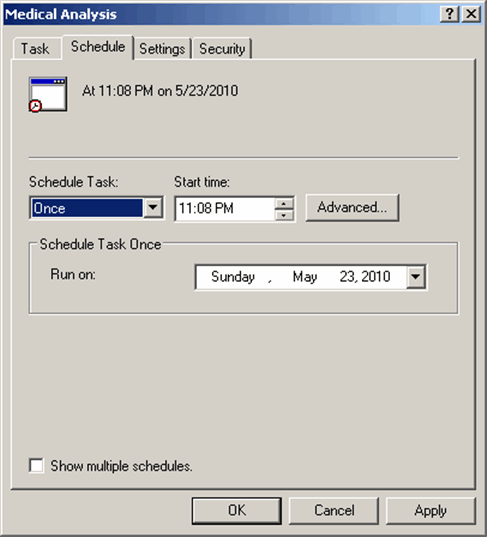
Click the Schedule tab.
Set the appropriate schedule options.
Click the Settings tab.
When the system opens the Settings tab, set the options as shown in the following illustration. Click OK.
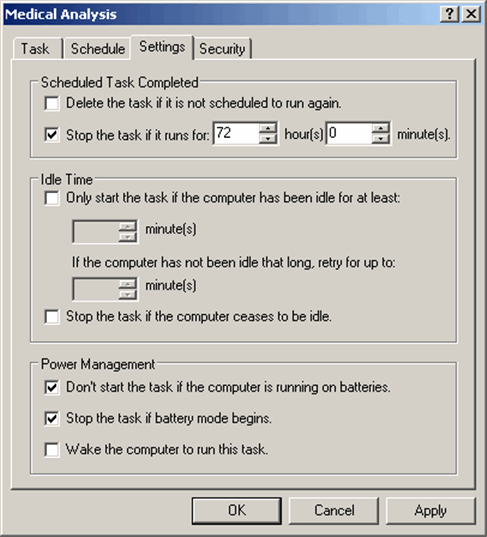
The system creates the new scheduled task CubeGenMoitor (or Cube Name you have specified).
Repeat Steps 1 through 15 to schedule batch generation for the remaining cubes.
Use the following procedure to set up batch generation for Demand Cubes.
Log on to the Cube Server as an Admin user.
On the Cube Server, select Start > Settings > Control Panel. Double-click Scheduled Tasks.

When the system opens the following dialog box, double-click Add Scheduled Task.

When the system opens the following dialog box, click Next>.

When the system opens the following dialog box, click Browse.

Navigate to the following location: <Argus Insight Installation Path>\ArgusInsight\Cognos\Cubes\PublishDemandCube.
Select the CubeGenMonitor.exe file. Click Open.

When the system opens the following dialog box, select Daily. Click Next.

When the system opens the following dialog box, set the start time, frequency, and start date for the process, as appropriate. Click Next>.

When the system opens the following dialog box:

Type the User ID in the Enter the user name field.
Type the user password in the Enter the password field.
For verification, type the password in the Confirm password field.
Click Next>.
When the system opens the following dialog box, click Open advanced properties for this task when I click Finsh checkbox. Click Finish.

Double-click the created task from the Scheduled Tasks. Select the Schedule tab. Click Advanced.

When the system opens the following dialog box:
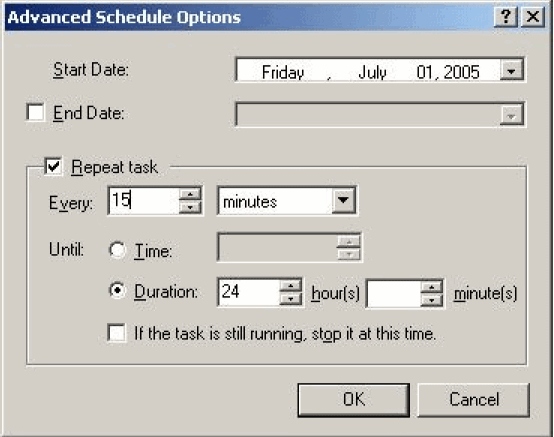
Check the Repeat Task checkbox.
Set how often the task will be executed.
Click the Duration option button and enter the duration as 24 hours.
Click OK.
Select the Settings tab. Do the following:

Verify that the Stop the task if it runs for checkbox is checked.
Enter the number of hours and minutes.
|
Note: This value can increase depending upon the size of the case series used to generate a cube. |
Click OK.
This topic has instructions on configuring the cubes.
Configure the Coggtr.xml file as shown below.

The following table describes the new parameters in this file:
| Parameter | Description |
|---|---|
| CubeSaveDirectory | This is the path on the Cognos 8 server for storing the output file generated as result of cube generation process. This is the path of the Argus Insight installation directory in a non-shared environment. It provides the relative path for saving the cube output files on their exact location. |
| DataSourceDirectory | This is the path of the Argus Insight installation directory in a non-shared environment. This provides the relative path for the datasource files which are used for cube generation. |
| DataWorkDirectory | Any path on the Cognos 8 server, which will be used to store some temporary files during cube generation. |
| LogFileDirectory | Any path on the Cognos 8 server, where all the cube generation log files will be saved. |
| ModelSaveDirectory | This is the path of the Argus Insight installation directory. This provides the relative path for saving the cube model files during cube generation. |
| ModelWorkDirectory | Any path on the Cognos 8 server, which will be used to store some temporary files during cube generation. |
Go to <Argus Insight Directory>\ArgusInsight\Cognos\Cubes\BatchGeneration-Cubes folder.
Open the GenerateCubes.cfg file.
Set the following parameters in the GenerateCubes.cfg file:

| Parameter | Description |
|---|---|
| ArgusInsightPath | This is the Argus Insight installation path; include the ArgusInsight folder in the string:
<Argus Insight Installation path>\ArgusInsight |
| CognosPath | This is the location of the Cognos 8 installation bin folder:
<Cognos 8 installation path>\c8\bin |
| ServerName | This is the name or IP address of the Cognos 8 server. If the Cognos 8 server is running on a port other than the default port, then the parameter values should be entered in this format: ServerName:PortNumber. For example, Cog8Server:9300 |
| CubeSaveDir | This value corresponds to CubeSaveDirectory attribute of Coggtr.xml file. This value will be same as value of CubeSaveDirectory in Coggtr.xml file i.e. <Argus Insight Installation path>\ArgusInsight |
| CubeDataSourceDir | This value corresponds to DataSourceDirectory attribute of Coggtr.xml file. This value will be same as value of DataSourceDirectory in Coggtr.xml file i.e. <Argus Insight Installation path>\ArgusInsight |
Restart the Cognos configuration services after applying the above settings.
Use the following procedure to configure Series 7.5 Cubes in an unshared environment,
Configure the trnsfrmr.ini file as shown below.

The following table describes the new parameters in this file:
| Parameter | Description |
|---|---|
| CubeSaveDirectory | This is the path on the cube server for storing the output file generated as result of cube generation process. This is the path of the Argus Insight installation directory in a non-shared environment. It provides the relative path for saving the cube output files on their exact location. |
| DataSourceDirectory | This is the path of the Argus Insight installation directory. This provides the relative path for the data source files which are used for cube generation. |
| DataWorkDirectory | Any path on the Cognos Cube server, which will be used to store some temporary files during cube generation. |
| LogFileDirectory | Any path on the Cognos Cube server, where all the cube generation log files will be saved. |
| ModelSaveDirectory | This is the path of the Argus Insight installation directory. This provides the relative path for saving the cube model files during cube generation. |
| ModelWorkDirectory | Any path on the Cognos Cube server, which will be used to store some temporary files during cube generation. |
Go to <Argus Insight Directory>\ArgusInsight\Cognos\Cubes\BatchGeneration-Cubes folder.
Open the GenerateCubes.cfg file.

Set the following parameters in the GenerateCubes.cfg file:
| Parameter | Description |
|---|---|
| ArgusInsightPath | This is the Argus Insight installation path; include the ArgusInsight folder in the string:
<Argus Insight Installation path>\ArgusInsight |
| CognosPath | This is the location of the PPES installation bin folder:
<PPES installation path>\cer5\bin |
| ServerName | This is the name of the Cognos Cube server. If the Cognos Cube server is running on a port other than the default port, then the parameter values should be entered in this format: ServerName:PortNumber. For example, CubeServer:8010 |
| CubeSaveDir | This value corresponds to CubeSaveDirectory attribute of trnsfrmr.ini file. This value will be same as value of CubeSaveDirectory in trnsfrmr.ini file i.e. <Argus Insight Installation path>\ArgusInsight |
| CubeDataSourceDir | This value corresponds to DataSourceDirectory attribute of trnsfrmr.ini file. This value will be same as value of DataSourceDirectory in trnsfrmr.ini file i.e. <Argus Insight Installation path>\ArgusInsight |
Restart the configuration manager service after applying the above settings.
Configure the Coggtr.xml file as shown below.

The following table describes the new parameters in this file:
| Parameter | Description |
|---|---|
| CubeSaveDirectory | This is the path on the cube server for storing the output file generated as result of cube generation process. |
| DataSourceDirectory | This provides the relative path for the datasource files which are used for cube generation. |
| DataWorkDirectory | Any path on the Cognos 8 server, which will be used to store some temporary files during cube generation. |
| LogFileDirectory | Any path on the Cognos 8 server, where all the cube generation log files will be saved. |
| ModelSaveDirectory | This provides the relative path for saving the cube model files during cube generation. |
| ModelWorkDirectory | Any path on the Cognos 8 server, which will be used to store some temporary files during cube generation. |
|
Note: The path for the DataSourceDirectory and the ModelSaveDirectory should always be same whether they are in a shared or unshared environment. |
Copy the COGNOS folder present under <Argus Insight Installation Directory>\ArgusInsight folder and paste the entire COGNOS folder on the path provided for DataSourceDirectory and ModelSaveDirectory attributes.
Make sure that path provided for CubeSaveDirectory exists on the server.
Go to <DataSourceDirectory>\Cognos\Cubes\BatchGeneration-Cubes folder.
Open the GenerateCubes.cfg file.

Set the following parameters in the GenerateCubes.cfg file:
| Parameter | Description |
|---|---|
| ArgusInsightPath | This is the Argus Insight installation path; include the ArgusInsight folder in the string:
<Argus Insight Installation path>\ArgusInsight |
| CognosPath | This is the location of the Cognos 8 installation bin folder:
<Cognos 8 installation path>\c8\bin |
| ServerName | This is the name or IP address of the Cognos 8 server. If the Cognos 8 server is running on a port other than the default port, then the parameter values should be entered in this format: ServerName:PortNumber. For example, Cog8Server:9300 |
| CubeSaveDir | This value corresponds to CubeSaveDirectory attribute of Coggtr.xml file. This value will be same as value of CubeSaveDirectory in Coggtr.xml file i.e. <Path of CubeSaveDirectory>. |
| CubeDataSourceDir | This value corresponds to DataSourceDirectory attribute of Coggtr.xml file. This value will be same as value of DataSourceDirectory in Coggtr.xml file i.e. <Path of DataSourceDirectory > |
Schedule the cubes for generation using files present in the <DataSourceDirectory>\Cognos\Cubes\BatchGeneration-Cubes folder. Demand cubes will be scheduled using CubeGenMonitor.exe file present under <DataSourceDirectory>\Cognos\Cubes\PublishDemandCube folder.
All other configurations remain same.
Restart the Cognos configuration services after applying the above settings.
Configure the trnsfrmr.ini file as shown below.

The following table describes the new parameters in this file:
| Parameter | Description |
|---|---|
| CubeSaveDirectory | This is the path on the cube server for storing the output file generated as result of cube generation process. |
| DataSourceDirectory | This provides the relative path for the datasource files which are used for cube generation. |
| DataWorkDirectory | Any path on the Cognos Cube server, which will be used to store some temporary files during cube generation. |
| LogFileDirectory | Any path on the Cognos Cube server, where all the cube generation log files will be saved. |
| ModelSaveDirectory | This provides the relative path for saving the cube model files during cube generation. |
| ModelWorkDirectory | Any path on the Cognos Cube server, which will be used to store some temporary files during cube generation. |
|
Note: The path for the DataSourceDirectory and the ModelSaveDirectory should always be same whether they are in a shared or unshared environment. |
Copy the COGNOS folder present in the <Argus Insight Installation Directory>\ArgusInsight folder and paste the entire COGNOS folder on the path provided for DataSourceDirectory and ModelSaveDirectory attributes.
Make sure that path provided for CubeSaveDirectory exists on the server.
Go to <DataSourceDirectory>\Cognos\Cubes\BatchGeneration-Cubes folder.
Open the GenerateCubes.cfg file.

Set the following parameters in the GenerateCubes.cfg file:
| Parameter | Description |
|---|---|
| ArgusInsightPath | This is the Argus Insight installation path; include the ArgusInsight folder in the string:
<Argus Insight Installation path>\ArgusInsight |
| CognosPath | This is the location of the Cognos 8 installation bin folder:
<PPES installation path>\cer5\bin |
| ServerName | This is the name of the Cognos Cube server. If the Cognos Cube server is running on a port other than the default port, then the parameter values should be entered in this format: ServerName:PortNumber. For example, CubeServer:8010 |
| CubeSaveDir | This value corresponds to CubeSaveDirectory attribute of trnsfrmr.ini file. This value will be same as value of CubeSaveDirectory in trnsfrmr.ini file i.e. <Path of CubeSaveDirectory>. |
| CubeDataSourceDir | This value corresponds to DataSourceDirectory attribute of trnsfrmr.ini file. This value will be same as value of DataSourceDirectory in trnsfrmr.ini file i.e. <Path of DataSourceDirectory >. This is the path where we have copied the entire COGNOS folder from Argus Insight installation directory. |
Schedule the cubes for generation using files present in the "<DataSourceDirectory>\Cognos\Cubes\BatchGeneration-Cubes" folder.
Demand cubes will be scheduled using "CubeGenMonitor.exe" file present under "<DataSourceDirectory>\Cognos\Cubes\PublishDemandCube" folder.
All other configurations remain same.
Restart the configuration manager service after applying the above settings.