Chapter 3 Installing SunScreen 3.1 Lite With Local Administration
This chapter explains how to install SunScreen 3.1 Lite in routing mode with local administration. In this configuration, the software is installed on a single machine and does not need to encrypt administration traffic. Use this installation method if you need SunScreen to function both as a router and a firewall and wish to administer on the firewall.
Topics covered include:
-
Installation of the software on a single machine
-
Setting of the PATH and installing SKIP upgrades
-
Managing your firewall
Before You Begin
Prior to installation, make sure the machine is performing properly as a router. Do not begin this procedure until you have read the information in "Installation Considerations."
The installation procedure requires that you reboot the machine when indicated. Do not perform any other tasks on the machine while installing the software, as a delay in rebooting the machine can affect installation and cause your system to hang.
To Install SunScreen
The installation wizard guides you through this procedure. You must be on the machine you are installing on in order to use the installation wizard and you must not telnet to the machine.
Note -
This chapter documents a default installation so you should accept all defaults as given. If you want a different choice, quit the installation wizard and restart it using the appropriate installation procedure; see the Table of Contents to locate the types of installations.
-
Insert the Solaris Easy Access CD-ROM into the CD-ROM drive.
A File Manager window appears listing the CD contents. Navigate down to the SunScreen directory.
-
Start the installation by double-clicking on the SunScreen installer icon.
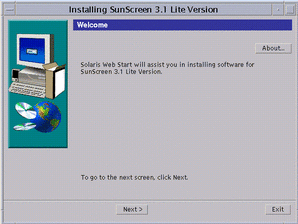
Type the root password for your system when prompted. The SunScreen installer's Welcome window appears (as shown in the following figure).
Figure 3-1 SunScreen Installation Welcome Window
-
Click Next to continue.
The Select SunScreen Components to Install window appears (as shown in the following figure).
Figure 3-2 Select SunScreen Components to Install Window
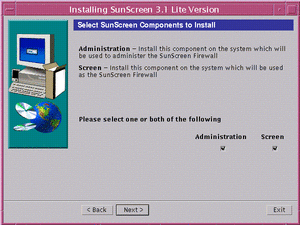
Since this is a local administration installation, you need both the administration and the Screen software.
-
Make sure both Administration and Screen boxes are checked, then click Next to continue.
The Checking System window appears (as shown in the following figure), while a check is verifying that all the required Solaris packages are on your machine.
Figure 3-3 Checking System Window
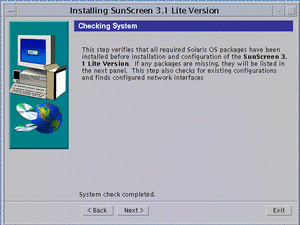
Note -If a list of missing required packages displays, exit the installation wizard now and install the required Solaris packages from your Solaris CD.
-
Click Next to continue.
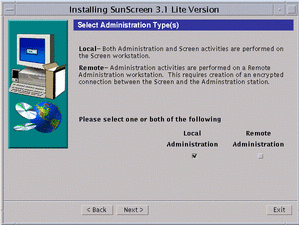
The Select Administration Type(s) window appears (as shown in the following figure) with Local Administration as the default entry .
Figure 3-4 Select Administration Type(s) Window
-
Click Next to continue.
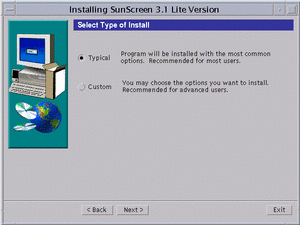
The Select Type of Install window appears (as shown in the following figure). You have two choices: Typical Install or Custom Install.
Figure 3-5 Select Type of Install Window
-
Select the type of install desired, and click Next.
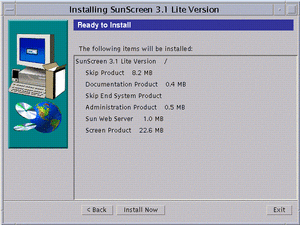
Next, the disk space on your machine is checked. An error message appears if you do not have enough disk space. If you have enough space, the Ready to Install window appears (as shown in the following figure).
Figure 3-6 Ready to Install Window
-
Click Install Now to continue.
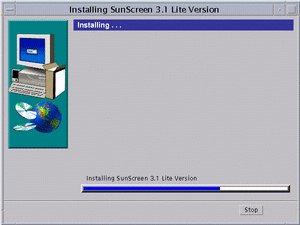
The Installing window appears with a status bar showing the progress of the installation (as shown in the following figure).
Figure 3-7 Installing Window
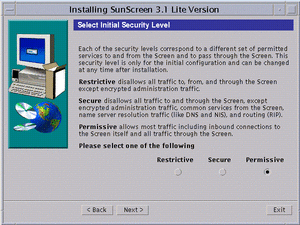
When it finishes, the Select Initial Security Level window appears (as shown in the following figure).
-
Select the appropriate level of security.
This window offers three levels of security with Permissive as your default initial security level. You can change this security level later as needed. See "Deciding on Your Initial Security Level" if you need more information.
Figure 3-8 Select Initial Security Level Window
-
Click Next to continue.
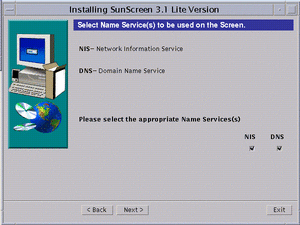
The Select Name Service(s) to be used on the Screen window appears (as shown in the following figure). The default entry specifies both NIS and DNS. You can deselect either one or if you do not want to use a name service, you can deselect both.
Figure 3-9 Select Name Service(s) to be used on the Screen Window
-
Click Next to continue.
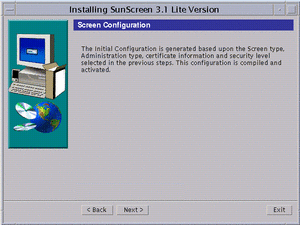
The Screen Configuration window appears with the message: Configuring Screen (as shown in the following figure). A message appears once the Screen successfully configures.
Figure 3-10 Screen Configuration Window
-
Click Next to continue.
The Reboot System window appears (as shown in the following figure).
Figure 3-11 Reboot System Window
-
Click System Reboot to finish the installation.
The installation wizard disappears.
Note -You must reboot the machine at this time in order to complete the installation process. If you wish to delay rebooting your machine, click Next instead of Reboot System. An Installation Summary window appears from which you can exit the installation.
Post Installation Tasks
After you install SunScreen 3.1 Lite, you should set the PATH and MANPATH so you can easily access the application and man pages.
Also, if you need to upgrade your SunScreen SKIP encryption keys, this is an appropriate time to do so.
To Set the PATH and MANPATH
-
Open a terminal window and become root, if not already.
-
Set the PATH and MANPATH by editing your shell initialization file (such as .profile or .login file).
PATH=/opt/SUNWicg/SunScreen/bin:$PATH export PATH MANPATH=$MANPATH:/opt/SUNWicg/SunScreen/man export MANPATH
To Install SKIP Upgrades
While you are not required to use encryption on a locally administered Screen, you may want to use encryption for VPN communication over public and private networks. If you want to use this feature, you may also want to upgrade the SKIP installation.
By default, SunScreen 3.1 Lite comes with the Global version of SKIP, which supports the RC2, RC4(x), and DES(x) cryptography modules and key lengths up to 1024 bits. If the security profile at your site requires additional cryptography packages and greater key lengths, you have to add these packages from the SunScreen SKIP 1.5.1 Domestic CD. For more information, see "Upgrading Cryptography Modules."
Managing Your Firewall
Use the administration GUI to manage your SunScreen firewall. See the SunScreen 3.1 Administration Guide for more information.
By default there is a pre-defined rule to allow encrypted administration traffic between the Screen and the Administration Station. This is the only default rule so no other communication (like ping or telnet) is allowed between the two systems until you specifically define a rule to allow that service.
To Launch the Administration GUI
To configure and manage your Screen, launch the administration GUI from a Java-enabled Web browser.
-
Open a Java-enabled Web browser and launch the administration GUI by typing the following URL:
http://localhost:3852
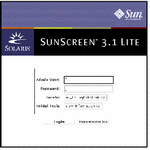
The administration GUI appears (as shown in the following figure).
Figure 3-12 Administration GUI Login Page
-
To log in, type the following and click Login:
User Name: admin
Password: admin
You next configure and manage your Screen with the administration GUI. See the SunScreen 3.1 Administration Guide for further instructions.
Note -One of your first administration tasks should be to change the default User Name and Password to something more secure so you can reduce the risk of compromising the administration traffic.
- © 2010, Oracle Corporation and/or its affiliates
